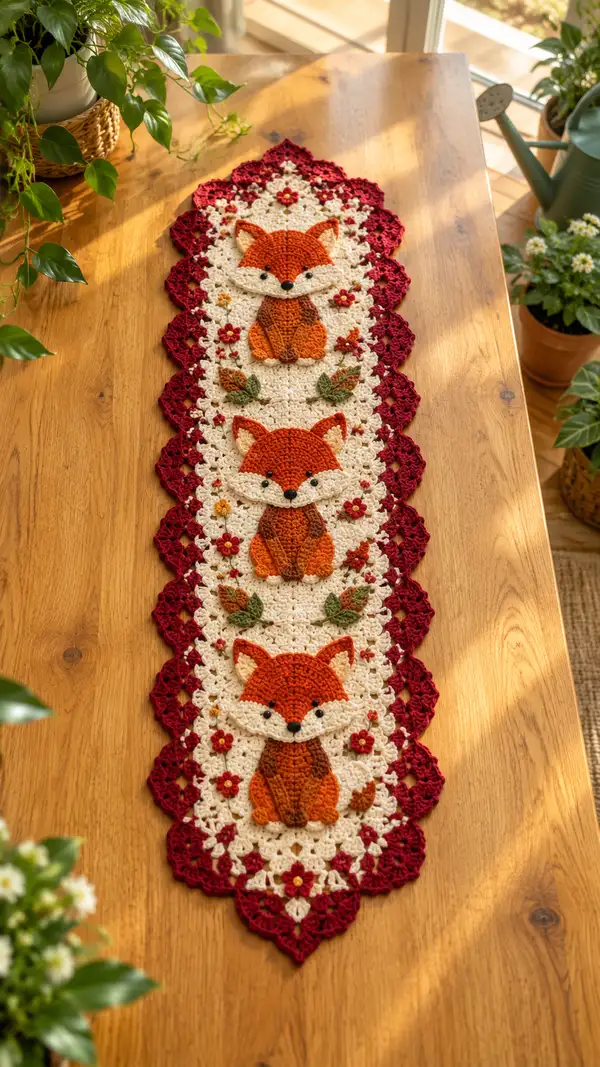
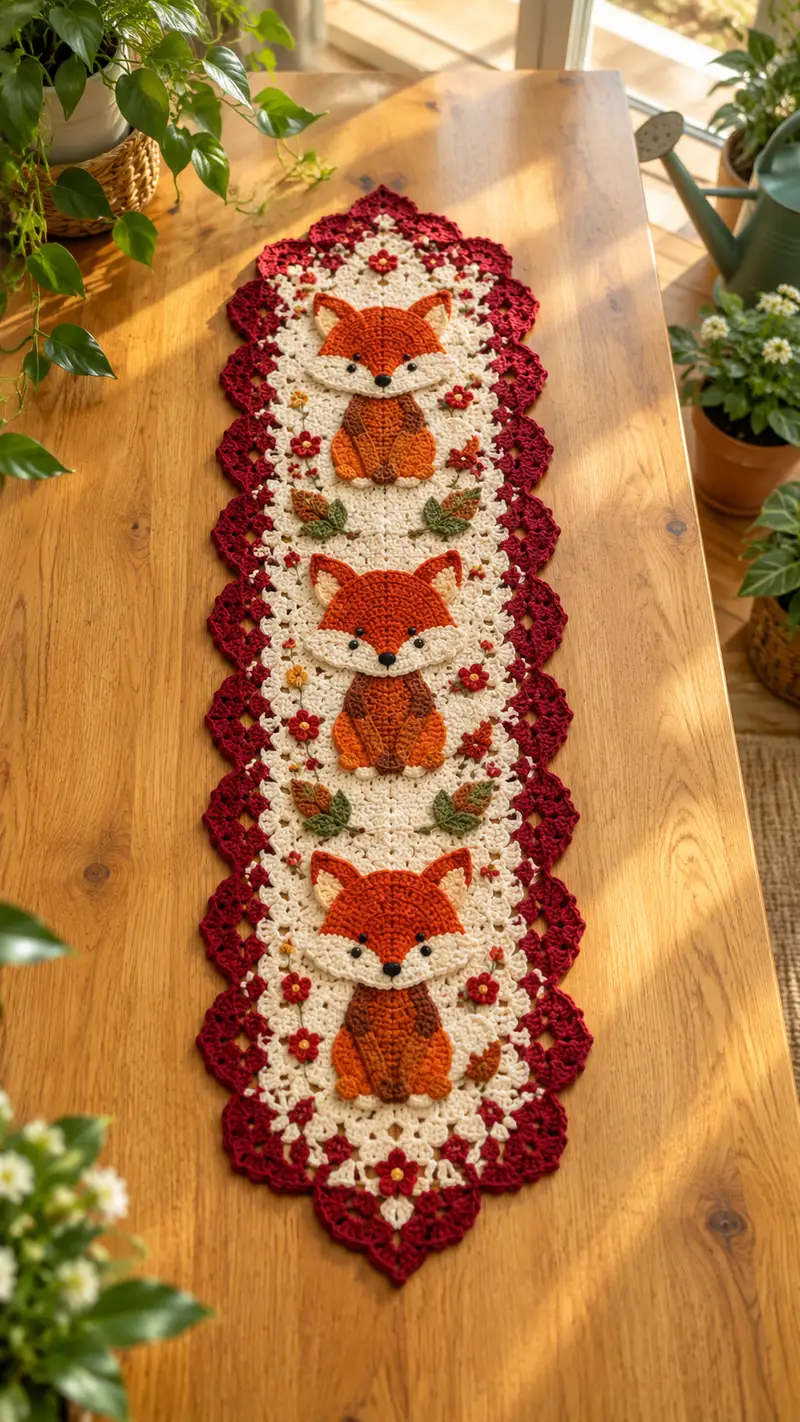
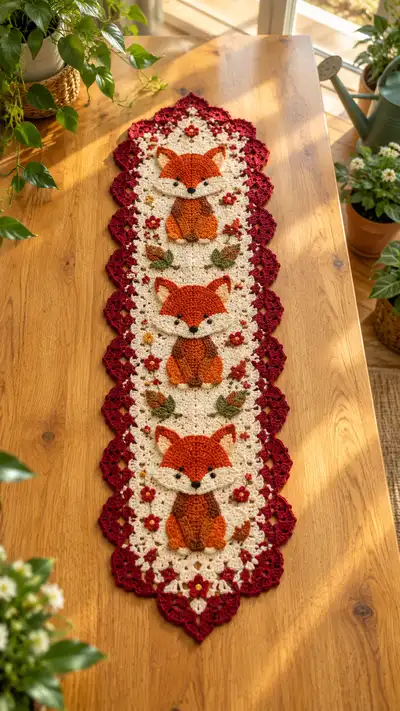
This charming table runner features three adorable fox appliques set on a delicate cream lace background with a rich burgundy scalloped border. Each fox is built as a layered applique with textured body, face, ears and tiny floral and leaf accents. The runner is perfect for autumn or rustic decor and looks beautiful displayed on a wooden table or sideboard. Detailed assembly and joining instructions are included so you can create a polished, professional finish.
Progress Tracker
0% Complete
— Notes & Overview :
Info :
This pattern is modular: you will make three identical motif panels (each panel contains one fox motif set onto a lace square-ish panel), join them together lengthwise, and finally add a scalloped burgundy border. All appliques (fox parts, flowers, leaves) are crocheted separately and sewn on. Work with worsted weight yarn and a 3.5mm hook for the background panels; use a 3.0mm hook for smaller, firmer appliques if desired.
Info :
All rounds for appliques are worked in continuous rounds unless specified as joined rounds; use a stitch marker at the first stitch of each round and move it up each round to help counting. For flat motifs, you may work joined rounds to create a neat seam — transition to FLO/BLO for texture as instructed.
— Fox Head (applique) :
Round 1 :
6 sc in magic ring (6)
Round 3 :
(1 sc, inc) x 6 (18)
Round 4 :
(2 sc, inc) x 6 (24)
Round 5 :
(3 sc, inc) x 6 (30)
Round 6 :
(4 sc, inc) x 6 (36)
Info :
Work these rounds in burnt orange. This creates a roughly circular head base; for a flatter semicircular head you will shape later with decreases and shaped rounds to form a forehead curve and jawline for the fox face.
Round 7 :
(5 sc, inc) x 6 (42)
Round 8 :
(6 sc, inc) x 6 (48)
Round 9 :
1 sc in each st (48)
Round 10 :
1 sc in each st (48)
Round 11 :
1 sc in each st (48)
Info :
At this stage the head is a full circle. We will create the forehead curve and bottom jaw by working shaped decreases on lower half to create a rounded point for the muzzle. If you prefer a flatter head, stop increases one round earlier.
Round 12 :
(6 sc, dec) x 6 (42)
Round 13 :
(5 sc, dec) x 6 (36)
Round 14 :
(4 sc, dec) x 6 (30)
Info :
Switch to shaping rounds that will flatten the lower center to attach the white muzzle overlay later. The counts above make a slightly tapered lower edge while keeping the top rounded. Fasten off leaving a long tail for sewing if desired.
Round 15 :
(3 sc, dec) x 6 (24)
Round 16 :
(2 sc, dec) x 6 (18)
Round 17 :
(1 sc, dec) x 6 (12)
Info :
Fasten off and leave a long tail for sewing. This small central decrease helps form the lower center notch where the muzzle will overlap. The head should be a rounded shape with a slight V at the bottom center for facial placement.
— Fox Face Muzzle (overlay) :
Round 1 :
6 sc in magic ring with cream/ivory (6)
Round 3 :
(1 sc, inc) x 6 (18)
Round 4 :
(2 sc, inc) x 6 (24)
Round 5 :
(3 sc, inc) x 6 (30)
Info :
The muzzle is slightly oval and will be stitched to the lower portion of the head. Work evenly and keep shape flat — do not stuff. You can shape edges with a few single crochet decreases in the lower rounds to form a softer pointed chin if desired.
Round 6 :
1 sc in each st (30)
Round 7 :
(3 sc, dec) x 6 (24)
Round 8 :
(2 sc, dec) x 6 (18)
Round 9 :
1 sc in each st (18)
Round 10 :
Fasten off leaving long tail for sewing (18)
Info :
Position muzzle centered over the lower V of the head applique, aligning the chin with the head's lower decreases. Sew with whip stitch around perimeter, hiding tail and weaving through top of head to secure.
— Fox Eyes and Nose (details) :
Info :
Use small black beads or French knots with yarn/embroidery thread for eyes. Place eyes approximately between head Rounds 9-10, spaced about 8-10 stitches apart depending on desired expression. For sewn-on beads, attach before sewing on the muzzle or stitch them through both head and muzzle layers for extra security.
Round 1 :
Embroider 2 small French knots or attach 6mm black beads for eyes; place eyes approx at horizontal centerline of the head about 8 sts apart
Round 2 :
Sew a small black nose centered on the muzzle lower edge with a triangular stitch or small finished bead
Info :
When using safety eyes, insert them from the back before sewing the muzzle and secure with washers. For child-safe items, prefer embroidered eyes only.
— Fox Ears (make 2) :
Round 1 :
6 sc in magic ring (6)
Round 3 :
(1 sc, inc) x 6 (18)
Round 4 :
1 sc in each st (18)
Round 5 :
1 sc in each st BLO (18)
Info :
Switch to cream/ivory for the inner ear detail on Round 6: join cream to center inner half and sc in position to create inner ear triangle. Working BLO on Round 5 creates a folded edge that helps shape the ear.
Round 6 :
Change to cream: 8 sc across center 2/3 of ear to form inner triangle, fasten off and weave in tails (8 inner sts)
Round 7 :
Return to orange and sc 1 round around ear perimeter to even edge if needed (18)
Round 8 :
Decrease slightly at base: (3 sc, dec) x 3 (15) - this helps create a tapered base for sewing
Round 9 :
Fasten off leaving long tail for sewing (15)
Info :
Position ears symmetrically on top of head, about 4-6 stitches in from each outer edge. Fold base slightly and stitch through head rounds to anchor; make sure inner cream triangle is visible when sewn.
— Fox Body (applique) :
Round 1 :
6 sc in magic ring with rust brown for central body base (6)
Round 3 :
(1 sc, inc) x 6 (18)
Round 4 :
(2 sc, inc) x 6 (24)
Round 5 :
(3 sc, inc) x 6 (30)
Round 6-7 :
1 sc in each st (30)
Info :
These rounds create a rounded top of the body that will sit under the head. Work in rust brown then switch to burnt orange for outer chest panel to create a layered look. Keep fabric flat and do not stuff the applique.
Round 8 :
Change to burnt orange: 1 sc in each st (30)
Round 9 :
(4 sc, inc) x 6 (36)
Round 10 :
1 sc in each st (36)
Round 11 :
(5 sc, inc) x 6 (42)
Round 12 :
1 sc in each st (42)
Info :
To create the folded chest panels, after Round 12 fold a small pleat on each side and stitch across two or three stitches to simulate the folded leg/hips of the fox. You can create surface slip-stitch ridges on Round 13 to simulate fur lines.
Round 13 :
Working in FLO: 1 sc in each st FLO to create ridge texture (42)
Round 14 :
(6 sc, dec) x 6 (36)
Round 15 :
(5 sc, dec) x 6 (30)
Round 16 :
(4 sc, dec) x 6 (24)
Round 17 :
(3 sc, dec) x 6 (18)
Round 18 :
Fasten off leaving long tail for sewing (18)
Info :
Body applique should tuck neatly under the head when assembled; use the long tail to stitch the head to the top of body with small even stitches. Add a few surface embroidery stitches in darker brown to give the body a shaded center stripe if desired.
— Front Paws (make 2) :
Round 1 :
6 sc in magic ring with burnt orange (6)
Round 3 :
(1 sc, inc) x 6 (18)
Round 4 :
1 sc in each st (18)
Round 5 :
Change to cream for paw tips: 6 sc across center top to create toe highlight, fasten off (6)
Round 6 :
Return to burnt orange: sc around edge if needed, fasten off leaving tail for sewing
Info :
Sew paws to lower front of body applique with the toe tips overlapping slightly. If you want slightly raised paws, insert a tiny bit of polyester stuffing inside before closing and sewing.
— Tail (optional small applique) :
Round 1 :
6 sc in magic ring with burnt orange (6)
Round 3 :
(2 sc, inc) x 4 (16)
Round 4 :
Work short rows: ch1, sc6 across next 6 sts; fasten off and shape tail as elongated teardrop
Info :
Many runners show no prominent tail; this is optional. If included, position tail behind the body slightly to one side and sew through several stitches to secure flatly to the background panel.
— Flower Motif (make many) :
Round 1 :
6 sc in magic ring with burgundy (6)
Round 2 :
ch1, *sc in next st, ch2* around to create picot-ready loops, join (6 loops)
Round 3 :
In each loop: (sl st, ch3, 2 dc, ch3, sl st) to form petals (6 petals)
Round 4 :
Join a little yellow: make a small center knot of 6 small sc forming a raised center, fasten off
Info :
Create a variety of flower sizes by working extra round of petals or reducing petal size; sew flowers on using matching thread and place centers slightly raised for dimension.
— Leaf Motif (make many) :
Round 1 :
ch8, in 2nd ch from hook: sc, hdc, dc, tr, dc, hdc, sc across; do not join; fasten off leaving a tail for stem (7 sts length)
Round 2 :
Optional: work a sc border around leaf edge to firm shape and add vein stitch down center with darker green thread
Info :
Sew leaves between fox motifs in pairs or clusters; slightly curve each leaf by anchoring inner edge more tightly than outer edge to create natural shaping.
— Background Lace Panel (one motif panel; repeat 3 times) :
Round 1 :
With cream yarn, ch4, join to form ring. Round 1: ch3 (counts as dc), work 11 dc into ring, join (12 dc)
Round 2 :
ch3, dc in same, *ch2, 2 dc in next dc* around to create 12 clusters with ch2 spaces, join (24 dc with 12 ch-2 spaces)
Round 3 :
In each ch-2: (2 dc, ch2, 2 dc) to form granny-style squares (12 shell spaces)
Round 4 :
Work round of chains and single crochets to create small gaps for decorative flowers: *sc between shells, ch3 across shell spaces* repeat; join
Round 5 :
Expand panel into an elongated oval by working rows of shells on opposing sides: on each long side add (2 dc, ch2, 2 dc) into side spaces to extend length; maintain shells at ends to keep oval tips
Round 6 :
Work two rounds of even shells around entire shape to make the cream field large enough to accept the fox applique and decorative motifs; counts will vary depending on extension, expect approx 48-72 stitches per round
Info :
Measure panel as you go: each completed motif panel should be approx 12-13cm wide and 32-36cm long (before border) using specified yarn and hook; adjust rounds to get desired size. Place the fox body centered vertically within the elongated panel when the cream field is large enough.
Round 7 :
Continue even shells for three more rounds to stabilize fabric (maintain pattern, approx 48-72 sts per round)
Round 8 :
Work a decorative round introducing small picot loops or ch-3 spaces where small flowers will be attached later; place these roughly in symmetric positions flanking the fox (maintain counts)
Round 9-12 :
1 sc in each st for 4 rounds to create a balanced field for applique attachment (constant stitch count)
Info :
At this point pin your appliques in position and check balance. The fox head should sit near the top third of the panel section reserved for the motif. Leave approx 6-8 shells of cream between motifs once panels are joined.
— Placement & Sewing of Appliques :
Round 1 :
Place body applique centered on panel, about 1.5-2 shell rows down from top of panel area for that motif
Round 2 :
Sew body down with long tail using small invisible stitches; anchor every 6-8 sts for secure hold
Round 3 :
Position head slightly overlapping top of body, stitch through head and body edge to prevent lifting; sew ears at top edge, sew paws at lower edge
Info :
Sew tiny flowers and leaves between motifs where indicated by the pattern photograph; use pins, check symmetry, and attach with small stitches. Hide ends inside shells where possible to keep the backside neat.
— Joining Three Panels (assemble runner) :
Round 1 :
Lay three completed panels lengthwise, matching shells and tip points; place right sides together for a neat join or face up and whip-stitch from the front depending on preferred look
Round 2 :
Sew panels together by aligning shell points and stitching through loops at the edge, using long cream tail and whip stitch; leave a join seam approx 2-3mm so it lies flat
Round 3 :
After joining, weave all seam tails through several stitches and block the joined seam with pins so it flattens before edging
Info :
Test the runner by laying it flat. If slight waves appear, you likely need additional blocking or minor adjustments to the seam tension. Undo and redo seams if necessary to preserve flatness.
— Scalloped Burgundy Border :
Round 1 :
Attach burgundy to one of the long-side shell points: ch1, sc evenly around entire runner edge to create a firm base (stitch count depends on runner circumference)
Round 2 :
In each shell point along the long sides: (ch2, 5 dc in same st, ch2, sl st in base) to form big scallop clusters; at pointed ends form a larger cluster with 7 dc for a pointed finish
Round 3 :
Work a second round of scallops between the first scallops: in the ch-2 spaces: (sl st, ch2, 5 dc, ch2, sl st) to deepen border and add lacy detail
Round 4 :
Work a finishing round of picots across scallop peaks if desired: *ch3, sl st in 3rd ch from hook* across the top of each scallop for a ruffled edge
Info :
Make sure scallops sit flat by pinning and blocking each scallop peak with a damp cloth or spray. Adjust stitch tension when working border to avoid puckering the cream field; use a slightly larger hook for scallops if fabric gathers.
— Final Assembly & Weaving :
Round 1 :
Sew flowers and leaves into their final positions using short hidden stitches, avoid bulky knots at the front
Round 2 :
Weave all tails on the wrong side; knot tails and bury them into the fabric by threading into a few stitches and trimming close
Round 3 :
Block entire runner flat: pin flat on blocking board keeping scallops and tip points taut; allow to dry fully
Info :
Light steam-blocking or wet-blocking will open up the lace and flatten joins. If using acrylic yarn, avoid high heat; pin and use a damp cloth for a gentler set.
Completing this fox trio table runner is such a rewarding project — each applique and decorative flower brings the composition to life. The warm oranges and deep burgundy frame the delicate cream lace beautifully. This runner makes a cozy autumn centerpiece or a thoughtful handmade gift. Enjoy the slow work of joining and blocking; the finished piece is full of texture and charm. 🧶🍂