Info :
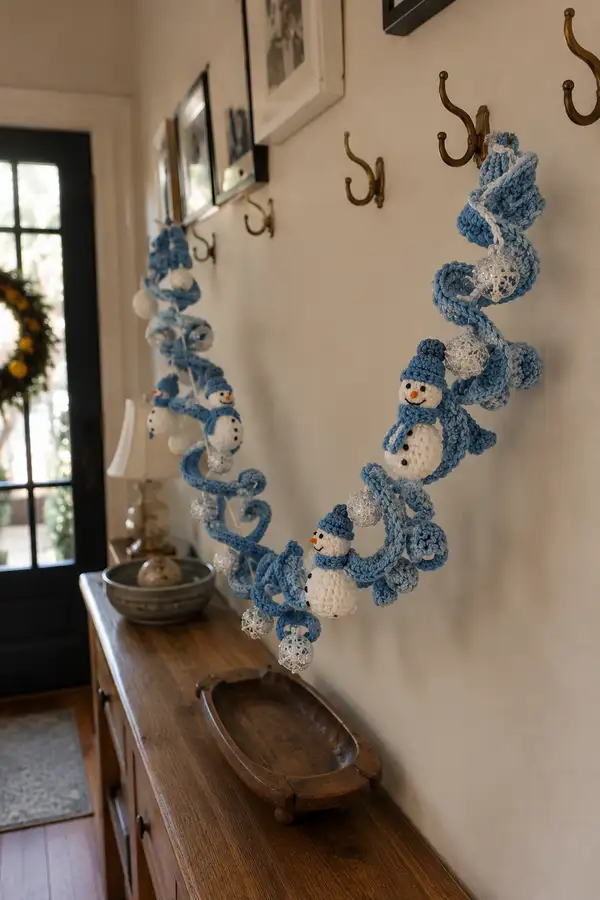
This pattern is divided into: Spiral Garland (long ruffled rope), Snowman units (head and body spheres), Hat, Scarf, Silver Baubles (crocheted metallic spheres), Pom-poms and Assembly. Work the spiral first in sections, make snowmen and baubles separately, and attach them as you assemble the whole garland. Keep stitch markers handy to mark start of rounds or long foundation chains.
— Head :
Round 3 :
(1 sc, inc) x 6 (18)
Round 4 :
(2 sc, inc) x 6 (24)
Round 5 :
(3 sc, inc) x 6 (30)
Round 6 :
(4 sc, inc) x 6 (36)
Info :
Place stitch marker at start of each round. If you are using safety eyes, plan placement between Rounds 9-11. Keep gauge consistent to make heads proportional to bodies.
Round 7 :
1 sc in each st (36)
Round 8 :
1 sc in each st (36)
Round 9 :
1 sc in each st (36)
Info :
Place safety eyes between Rounds 9 and 10, spaced 8-10 sts apart depending on desired cute expression. If using beads, sew them on after stuffing.
Round 10 :
1 sc in each st (36)
Round 11 :
(4 sc, dec) x 6 (30)
Round 12 :
(3 sc, dec) x 6 (24)
Info :
Begin stuffing head firmly now with small amounts of fiberfill, shaping gently. Add more stuffing as rounds progress to keep a smooth, rounded top.
Round 13 :
(2 sc, dec) x 6 (18)
Round 14 :
(1 sc, dec) x 6 (12)
Round 15 :
6 dec (6) - close to small opening
Info :
Fasten off leaving a long tail for sewing head onto body. Finish stuffing and close with needle through remaining 6 sts, pulling tight to close the hole. Weave tail into bottom of head for secure join.
— Body :
Round 3 :
(1 sc, inc) x 6 (18)
Round 4 :
(2 sc, inc) x 6 (24)
Round 5 :
(3 sc, inc) x 6 (30)
Round 6 :
(4 sc, inc) x 6 (36)
Info :
Body is larger than head. Continue increasing evenly to achieve proportion similar to the examples (body roughly 1.6x head diameter). Use the same yarn weight and hook as the head for visual consistency.
Round 7 :
(5 sc, inc) x 6 (42)
Round 8 :
(6 sc, inc) x 6 (48)
Round 9 :
1 sc in each st (48)
Round 10 :
1 sc in each st (48)
Round 11 :
1 sc in each st (48)
Info :
Begin stuffing body from the bottom after Round 11. Stuff firmly but not overly tight to allow attachment of head and to preserve softness.
Round 12 :
(6 sc, dec) x 6 (42)
Round 13 :
(5 sc, dec) x 6 (36)
Round 14 :
(4 sc, dec) x 6 (30)
Round 15 :
(3 sc, dec) x 6 (24)
Info :
Stop decreasing when hole is approximately the same diameter as head opening. Keep stuffing firm to give the snowman a nice round belly.
Round 16 :
(2 sc, dec) x 6 (18)
Round 17 :
(1 sc, dec) x 6 (12)
Round 18 :
6 dec (6) - leave long tail for sewing
Info :
Fasten off leaving a long tail for sewing head to body. If you prefer, instead of closing entirely, leave an opening to insert a hanging loop or wire before final closure.
— Hat (Make 1 per snowman) :
Round 1 :
Using blue yarn, 6 sc in mr (6)
Round 3 :
(1 sc, inc) x 6 (18)
Round 4 :
(2 sc, inc) x 6 (24)
Round 5 :
1 sc in each st (24)
Round 6 :
1 sc in each st (24)
Round 7 :
Fold brim up around base and work 1 sc in BLO around to form turned-up brim (24)
Round 8 :
Optional puff: ch 2, *3 dc in next st, sl st in next* rep around to create textured puff top; fasten off leaving tail to sew to head top (approx. 12 puffs)
Info :
To make a pom-pom on top: create a small pom from leftover yarn and sew securely to the hat top. Scale hat size by adding or removing increase rounds if needed to fit head circumference.
— Scarf (Make 1 per snowman) :
Foundation :
With blue yarn ch 18 (or length desired for tiny scarf).
Round 1 (Row 1) :
Row: 1 sc in second ch from hook and across (17 sc). Turn.
Round 2 (Row 2) :
Ch 1, 1 sc in each st across (17 sc). Fasten off leaving long tail for sewing. Fringe: cut 6-8 small strands, fold and knot to ends if desired.
Info :
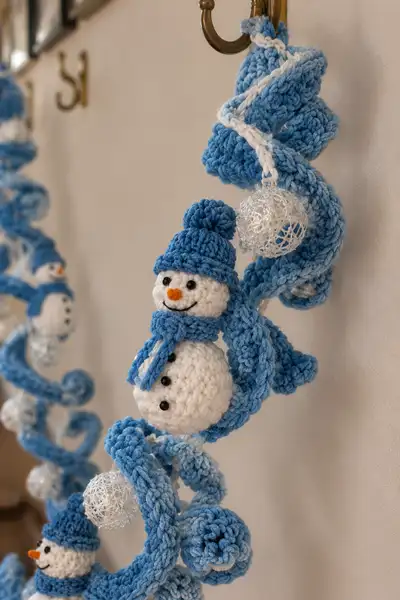
Wrap scarf around the neck seam between head and body and sew ends to the body so the knot sits centered or slightly off-center as pictured. Trim or add fringe for extra cuteness.
— Buttons, Nose & Face :
Buttons :
Sew three small black beads vertically to the front of the body sphere. Space evenly from center to lower belly for balanced appearance.
Nose :
Using orange yarn, embroider a small carrot nose or crochet a tiny cone: ch 3, sl st in 2nd ch and next ch, leave a short tail and stuff very lightly, sew to face between rounds 9-10.
Mouth :
Use black embroidery thread or yarn to stitch a simple smile under the nose by creating 3 small curved running stitches to create a smile line.
Info :
Position eyes first, then nose and smile. Embroidery allows for expressive features and keeps small parts safe for children if you prefer to avoid safety eyes.
— Optional Twig Arms (Make 2 per snowman) :
Option A - Crocheted Twig :
Ch 6, sc into 2nd ch from hook, sc across (5 sc). Turn, ch 1, sc across three rows. Create little forks by making (sc, ch 2, sc) at end and tighten. Fasten off leaving tail to sew into side of body at round 12-14. Reinforce with wire if desired.
Info :
You can also use small real twigs or craft wire wrapped with brown yarn for realism. If using wire, fold ends and conceal inside stuffing to avoid sharp edges.
— Silver Baubles (make as many as pictured; small metallic spheres) :
Overview :
Baubles are crocheted over a small styrofoam or craft sphere or worked as full crochet balls using metallic thread. Using metallic thread yields an airy, glittering ball that snuggles into the spiral ruffles.
Round 1 :
Using metallic thread and 3.5mm hook, 6 sc in mr (6)
Round 3 :
(1 sc, inc) x 6 (18)
Round 4 :
(2 sc, inc) x 6 (24)
Round 5 :
(3 sc, inc) x 6 (30)
Round 6 :
1 sc in each st (30)
Round 7 :
(3 sc, dec) x 6 (24)
Round 8 :
(2 sc, dec) x 6 (18)
Round 9 :
(1 sc, dec) x 6 (12)
Round 10 :
6 dec (6) - stuff lightly if making solid ball, fasten off and close
Info :
If crocheting over a craft sphere, stop increases sooner and work tighter to slip over the sphere; finish with a neat seam and secure with craft glue if necessary. Metallic thread can be doubled with a thin yarn for more body.
— Pom-poms (hat toppers) :
Make small pom-pom :
Wrap yarn around 2-3 fingers 40-60 times, tie center tightly with scrap yarn, cut loops, trim to round pom size. Sew on hat top securely.
Info :
Make pom-poms slightly smaller than hat diameter to keep them proportionate (approx 1.0-1.5 cm diameter for sample garland).
— Finishing & Repetition Notes :
Info :
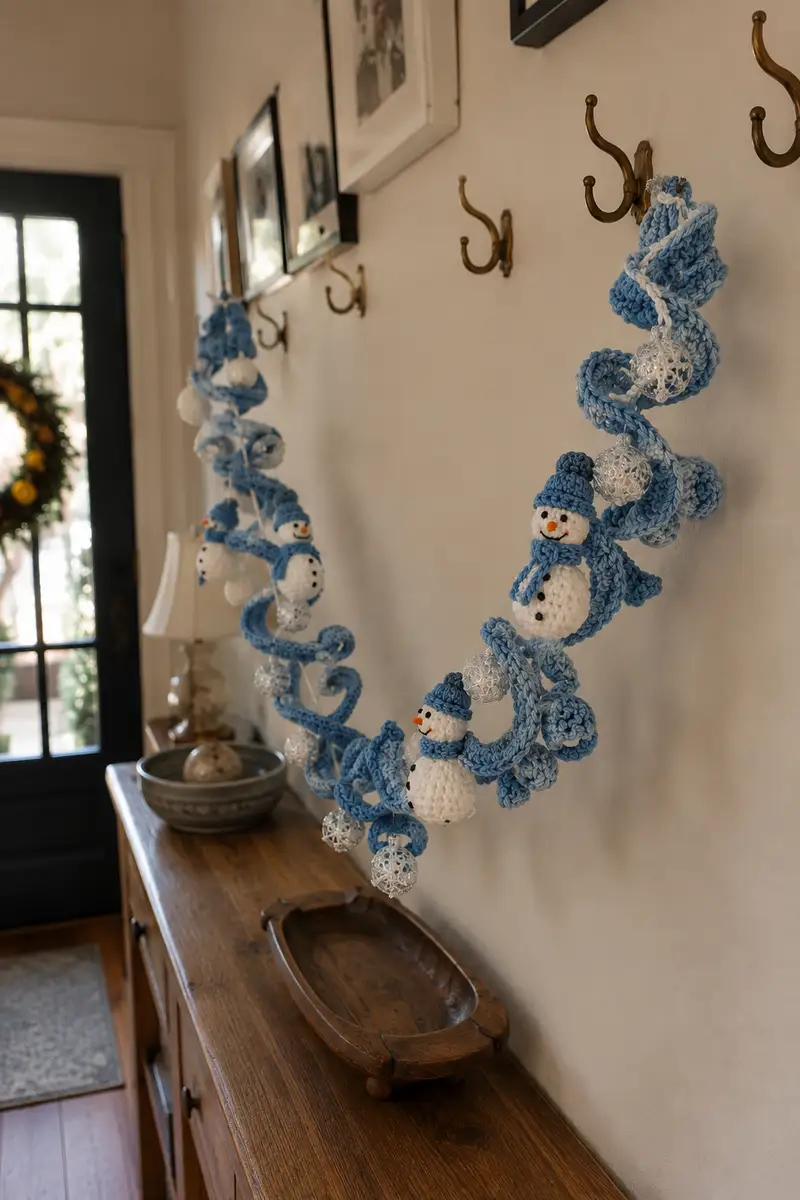
Make 6 snowman units (or desired number). Space them evenly along the spiral by pinning them into place and step back to judge spacing. Intermix silver baubles between the snowmen by tucking them into ruffle clusters or sewing them through the underside to secure. If you used an internal cord, sew the snowman neck seam over the cord and tie knots to lock position.
Final shaping :
Once all elements are attached, hang garland and gently shape spirals by twirling sections and adjusting ruffle direction with fingers. Steam lightly from a distance (if yarn is steam-safe) to relax and set shape if needed.
Info :
Weave or tuck all yarn tails into the underside of the spiral to keep the front neat. Add extra stitches to secure heavier baubles; use craft glue for non-crochet beads if necessary.
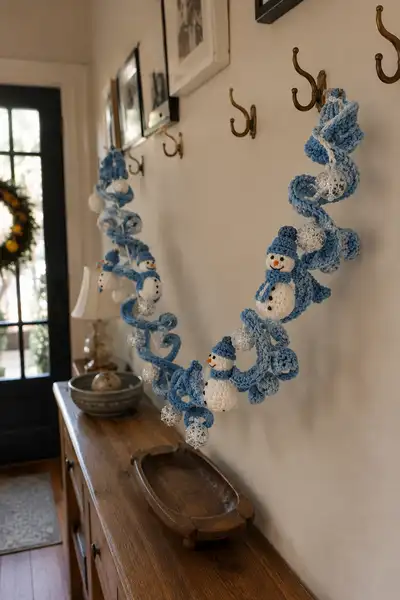
This Frosty Blue Spiral Garland brings season-long charm to your home — a delightful mix of ruffled texture and tiny snowman friends! Each crocheted snowman and silver bauble adds personality, while the spiral rope creates dynamic movement on hooks, mantels, or across doorways. I hope you enjoy stitching and shaping each whimsical section — the result is sure to sparkle in any entryway. 🎄❄️🧶