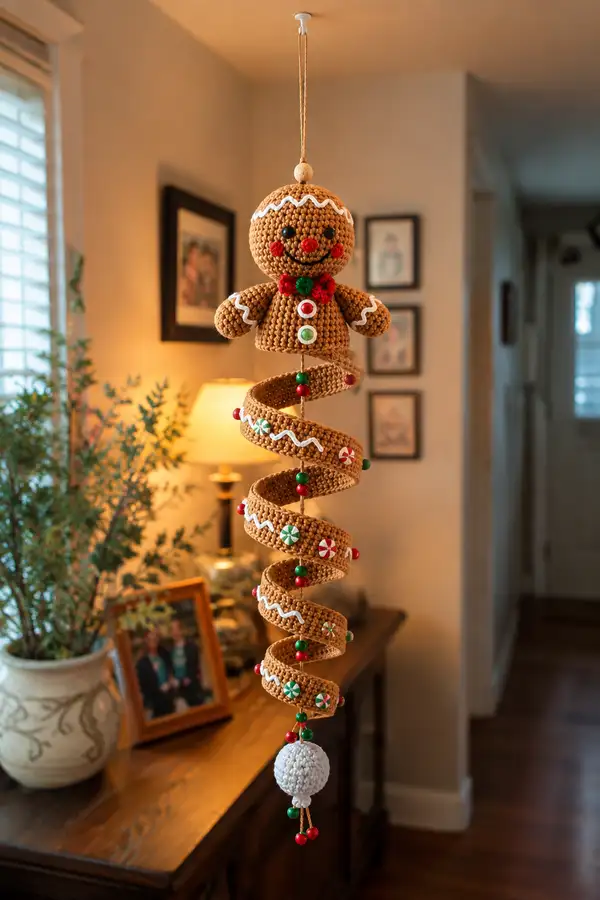
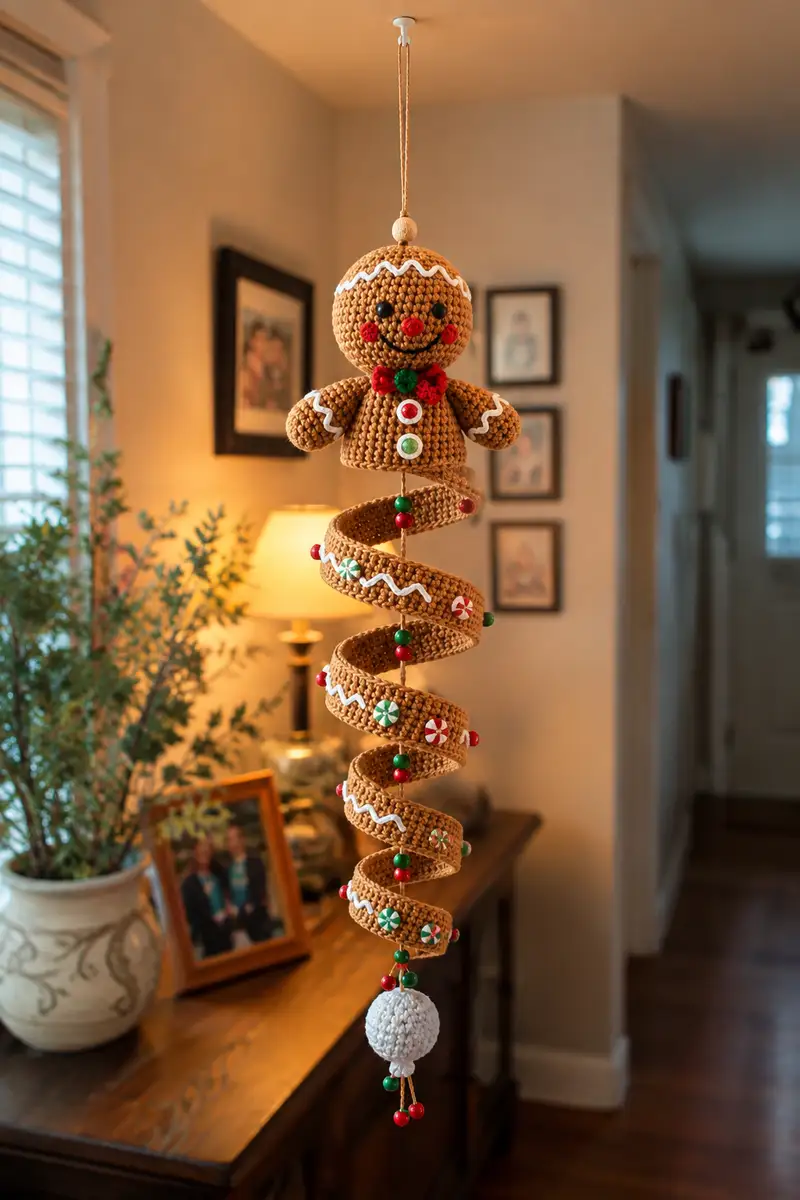
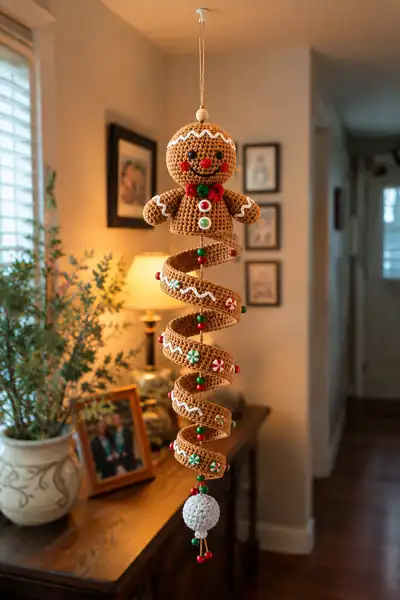
Create a charming hanging gingerbread spiral garland with a smiling gingerbread head, buttoned torso and a long coiled spiral decorated like candies. This pattern includes step-by-step round-by-round instructions, decorative candy appliques, a textured spiral coil and a weighted bottom ball — perfect for festive decor or a handmade gift.
Progress Tracker
0% Complete
— Head :
Round 1 :
6 sc in magic ring (6)
Round 3 :
(1 sc, 1 inc) x 6 (18)
Round 4 :
(2 sc, 1 inc) x 6 (24)
Round 5 :
(3 sc, 1 inc) x 6 (30)
Round 6 :
(4 sc, 1 inc) x 6 (36)
Round 7 :
(5 sc, 1 inc) x 6 (42)
Round 8 :
(6 sc, 1 inc) x 6 (48)
Info :
Use a tight tension for amigurumi. Place stitch marker at first stitch to mark rounds. This head will be fairly round and about 9-10 cm across when using worsted yarn with a 3.5mm hook.
Round 9 :
1 sc in each st (48)
Round 10 :
1 sc in each st (48)
Round 11 :
1 sc in each st (48)
Info :
Place safety eyes between rounds 13-14. Position them about 10-12 sts apart (measuring across the round) for a friendly expression. Mark eye placement with removable markers before inserting eyes.
Round 12 :
1 sc in each st (48)
Round 13 :
1 sc in each st (48)
Round 14 :
1 sc in each st (48)
Round 15 :
(6 sc, 1 dec) x 6 (42)
Round 16 :
(5 sc, 1 dec) x 6 (36)
Info :
Begin stuffing gently here. Add small amounts of fiberfill, push into the centre to maintain roundness. The head should be firm but still squeezable.
Round 17 :
(4 sc, 1 dec) x 6 (30)
Round 18 :
(3 sc, 1 dec) x 6 (24)
Round 19 :
(2 sc, 1 dec) x 6 (18)
Round 20 :
(1 sc, 1 dec) x 6 (12)
Info :
Fasten off leaving a long tail for sewing the head to the neck/torso. Finish closing the hole with a yarn needle. If you want the bottom of the head to be flat for attachment, stop decreasing one round earlier (12 sts) and use mattress stitch to join to the body opening.
— Head Icing and Face Detail :
Info :
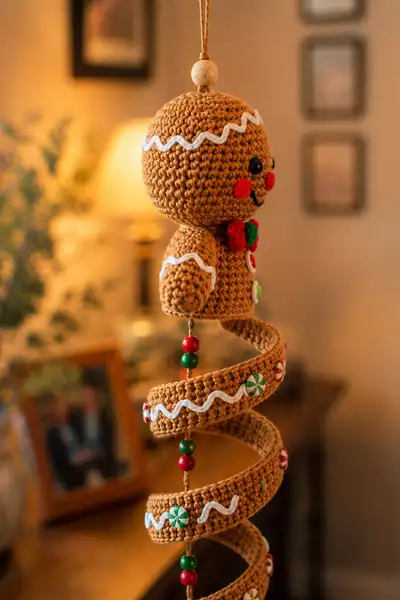
Using white yarn and a yarn needle or surface slip stitch, pipe a wavy icing line across round 6-7 of the head (visible on the photo). Work a wavy couching stitch around the head; if preferred, embroider a zigzag with buttonhole stitch for a raised look. Position the zigzag so it sits about 10 sts above the eyes.
Round 1 (Cheeks applique x2) :
Make 2: 6 sc in magic ring (6)
Round 3 :
1 sc in each st (12)
Info :
Fasten off leaving long tail for sewing. Attach cheeks slightly below and to the sides of the eyes; sew firmly and add a little stuffing to keep them slightly raised.
Info :
Embroider mouth using black yarn: use backstitch or small chain stitch forming a smiling curve starting between the cheeks under the eyes. Add a small vertical stitch at the center for a cute mouth detail.
— Body / Torso :
Round 1 :
6 sc in magic ring (6)
Round 3 :
(1 sc, 1 inc) x 6 (18)
Round 4 :
(2 sc, 1 inc) x 6 (24)
Round 5 :
(3 sc, 1 inc) x 6 (30)
Round 6 :
(4 sc, 1 inc) x 6 (36)
Round 7-9 :
1 sc in each st (36)
Info :
If you'd like a slightly flared torso, add one round of increases here: (5 sc, inc) x 6 to reach 42 sts. For the pictured model the torso is slightly narrower than the head so keep at 36 sts to align with neck join.
Round 10 :
1 sc in each st BLO (36)
Round 11 :
1 sc in each st (36)
Round 12 :
1 sc in each st (36)
Info :
Work white icing trim on round 11: using surface slip stitch or pipe embroidery with white yarn, create a wavy line that follows the round. This trim is decorative and worked after finishing the body rounds.
Round 13 :
(4 sc, 1 dec) x 6 (30)
Round 14 :
(3 sc, 1 dec) x 6 (24)
Round 15 :
(2 sc, 1 dec) x 6 (18)
Info :
Begin stuffing the torso firmly but not overpacked; you will need the top neck opening to be flexible for sewing the head. Stuff to just under the neck opening, leaving a small cavity for sewing.
Round 16 :
(1 sc, 1 dec) x 6 (12)
Info :
Fasten off leaving a long tail for sewing. Align the 6-st opening to the base of the head (if the head was closed to 6 sts). Use a mattress stitch or whip stitch to sew head to torso, adding extra stuffing as needed through the opening before fully closing.
— Arms (Make 2) :
Round 1 :
6 sc in magic ring (6)
Round 3 :
(1 sc, 1 inc) x 6 (18)
Round 4 :
1 sc in each st (18)
Info :
The hand is slightly oval and short. Add a few stitches of stuffing now to form a round palm. Keep stuffing firm for stability.
Round 5 :
1 sc in each st (18)
Round 6 :
(4 sc, 1 dec) x 3 (15)
Round 7 :
1 sc in each st (15)
Round 8 :
1 sc in each st (15)
Info :
Work white icing trim on outer arm edge: using surface slip stitch or white yarn, pipe a small wavy trim across the side of the arm at round 7-8. This is sewn on later or embroidered in place.
Round 9 :
(3 sc, 1 dec, 1 sc) x 3 (12)
Round 10 :
1 sc in each st (12)
Round 11 :
(2 sc, 1 dec) x 4 (8)
Round 12 :
1 sc in each st (8)
Round 13 :
(1 sc, 1 dec) x 4 (4)
Round 14 :
Fasten off leaving long tail for sewing
Info :
Sew arms to the sides of the torso approximately between rounds 9-12 of the body for the natural placement shown in the image. See assembly for exact positioning. Use small, even stitches and hide tails inside the body.
— Spiral Coil (Spiral Strip) :
Info :
The spiral coil is a long, wide strip worked in rounds that is then shaped around a central cord. We will make a long narrow tube flattened on one side to form the spiral with firm structure. Using worsted yarn and a 3.5mm hook, chain a foundation of 8 sts to start the tube circumference; the finished tube will be worked in joined rounds to create approximately 6-7 cm tall coils when wrapped.
Round 1 :
Ch 8, join with sl st to form ring, ch 1, 8 sc in ring (8)
Round 2 :
2 sc in each st around (16)
Round 3 :
1 sc in each st (16)
Round 4 :
1 sc in each st BLO (16)
Round 5 :
1 sc in each st (16)
Info :
We will expand the tube to create the spiral width. The pictured spiral has a wide flat ribbon-like appearance. To flatten one side, work every even round in BLO to produce a slight ridge on the top edge.
Round 6 :
(1 sc, inc) x 8 (24)
Round 7 :
1 sc in each st (24)
Round 8 :
1 sc in each st BLO (24)
Round 9 :
(3 sc, 1 inc) x 6 (30)
Round 10 :
1 sc in each st (30)
Round 11 :
1 sc in each st BLO (30)
Round 12 :
(4 sc, 1 inc) x 6 (36)
Round 13 :
1 sc in each st (36)
Round 14 :
1 sc in each st BLO (36)
Round 15 :
(5 sc, 1 inc) x 6 (42)
Round 16 :
1 sc in each st (42)
Round 17 :
1 sc in each st BLO (42)
Info :
Continue working these increase cycles until the tube reaches approximately 36-40 cm in length (measured along the central stitch line) or until you have made 12 increase cycles (this will create a wide spiral of approx 7-8 coils). The pictured spiral consists of 7 coils; each coil here uses about 4-6 rounds of height to form. You can also change coil count by adjusting length.
Round 18 :
(6 sc, 1 inc) x 6 (48)
Round 19 :
1 sc in each st (48)
Round 20 :
1 sc in each st BLO (48)
Round 21 :
(7 sc, 1 inc) x 6 (54)
Round 22 :
1 sc in each st (54)
Round 23 :
1 sc in each st BLO (54)
Round 24 :
(8 sc, 1 inc) x 6 (60)
Round 25 :
1 sc in each st (60)
Round 26 :
1 sc in each st BLO (60)
Info :
After round 26 the tube is approximately the width used in the example photo. Work straight rounds (1 sc each) until the overall length of the strip is sufficient to make the number of coils you want; for the sample make about 120-140 rounds total across the spiral (this pattern will describe continuing rounds, but you can adjust for shorter/longer hangings). Use a row counter to track total rounds because each round is narrow.
Round 27-60 :
1 sc in each st (60)
Info :
Try the strip around a central cord as you go to test coil shape. When joined to cord and beads the strip will form spaced coils. You may also add a pipe cleaner or thin floral wire inside a central cord for extra stiffness.
Round 61-90 :
1 sc in each st (60)
Info :
If you want a spiral with the same width as pictured (approx 7 coils), you will likely stop the strip at around 90-100 rounds total of the constant-width section when joining. For a longer spiral, continue with additional rounds of 60 sts. Keep the last 4 rounds slightly tighter by working BLO on the final round to create a crisp edge for decorating.
Round 91 :
1 sc in each st BLO (60)
Info :
Fasten off leaving a very long tail for sewing to the central cord. Prepare a strong cotton cord approximately the full length you want the spiral to hang. Thread beads as shown in photos – alternating red and green beads are used between coil sections to separate and give spacing for the coils to sit apart.
— Spiral Decoration: Candy Appliques (Make 12 or as needed) :
Round 1 :
6 sc in magic ring (6)
Round 3 :
1 sc in each st (12)
Info :
Switch color to white or green to make pinwheel candy looks. Embroider alternating segments with surface embroidery (use 6 spokes to create a peppermint look). Fasten off leaving long tail and sew to outside edge of spiral every 6-8 rounds as pictured. Use roughly 10-12 candies spaced along the spiral.
— Bow / Collar (Bowtie) :
Round 1 :
6 sc in magic ring (6)
Round 3-4 :
1 sc in each st (12)
Info :
Flatten into a bow by folding in half and sewing center tightly. Use a small button or contrasting center circle (make 6 sc in magic ring, sl st to close) to fasten in the center. Attach just below the head at front of torso.
— Buttons (Decorative, Make 3) :
Round 1 :
6 sc in magic ring (6)
Round 3 :
1 sc in each st (12)
Info :
Sew these down the center of the torso spaced about 4-5 rounds apart. Add small contrasting center with French knot or a tiny bead for extra detail.
— Bottom Weighted Ball :
Round 1 :
6 sc in magic ring (6)
Round 3 :
(1 sc, 1 inc) x 6 (18)
Round 4 :
(2 sc, 1 inc) x 6 (24)
Round 5 :
(3 sc, 1 inc) x 6 (30)
Round 6 :
(4 sc, 1 inc) x 6 (36)
Round 7-10 :
1 sc in each st (36)
Info :
Insert a small bag of sand or a metal washer wrapped in plastic into the ball for weight if you want the spiral to hang straight. Add weight at the very end before final closing round.
Round 11 :
(4 sc, 1 dec) x 6 (30)
Round 12 :
(3 sc, 1 dec) x 6 (24)
Round 13 :
(2 sc, 1 dec) x 6 (18)
Round 14 :
(1 sc, 1 dec) x 6 (12)
Info :
Fasten off leaving long tail. Close opening and tuck in weight. Attach small tassel or three bead dangles to the bottom as shown, using short lengths of yarn threaded with small round beads and knotted.
— Optional Extra: Small Spacer Beads and Cord Threading :
Info :
Use a strong cord through the center of the spiral. Thread beads in between coil segments to act as spacers and to force the spiral into loops. Tie knots in the cord where needed to secure each coil. Use approximately 8-12 spacer beads depending on spiral length.
— Final Finishing Touches :
Info :
Embroider any mouth or icing details now. Use a small yarn tail to couch white icing lines across spiral outer edge with small zigzag lines spaced around each visible coil. Sew candy appliques and beads to the outside, spacing them evenly and reinforcing with several stitches so they will not fall off during handling.
Info :
Attach wooden bead to the top of the head with the hanging cord for a finished look. Use a secure overhand knot and a dab of glue if desired. Trim and weave in all tails securely inside the body or spiral to hide ends.
This gingerbread spiral garland turns out both playful and elegant — a perfect handmade accent for your holiday home! Each stitch builds into a cheerful gingerbread face, a tiny bow, and a whimsical spiral sprinkled with candies. Hang it in a doorway or near a tree and enjoy the way it spins in the breeze. 🧶🎄 Your finished garland will be a festive keepsake for years to come — happy stitching and enjoy the cozy process! ✨