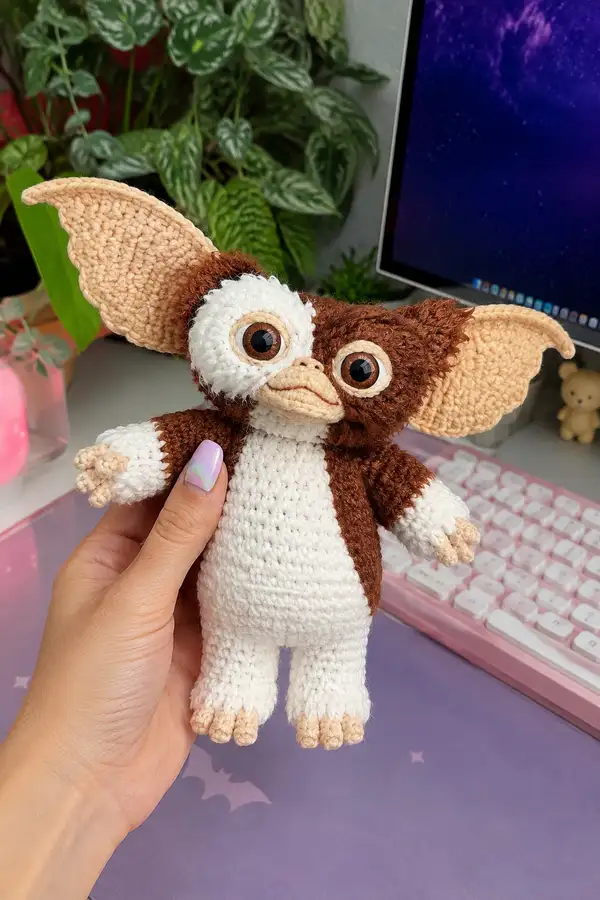
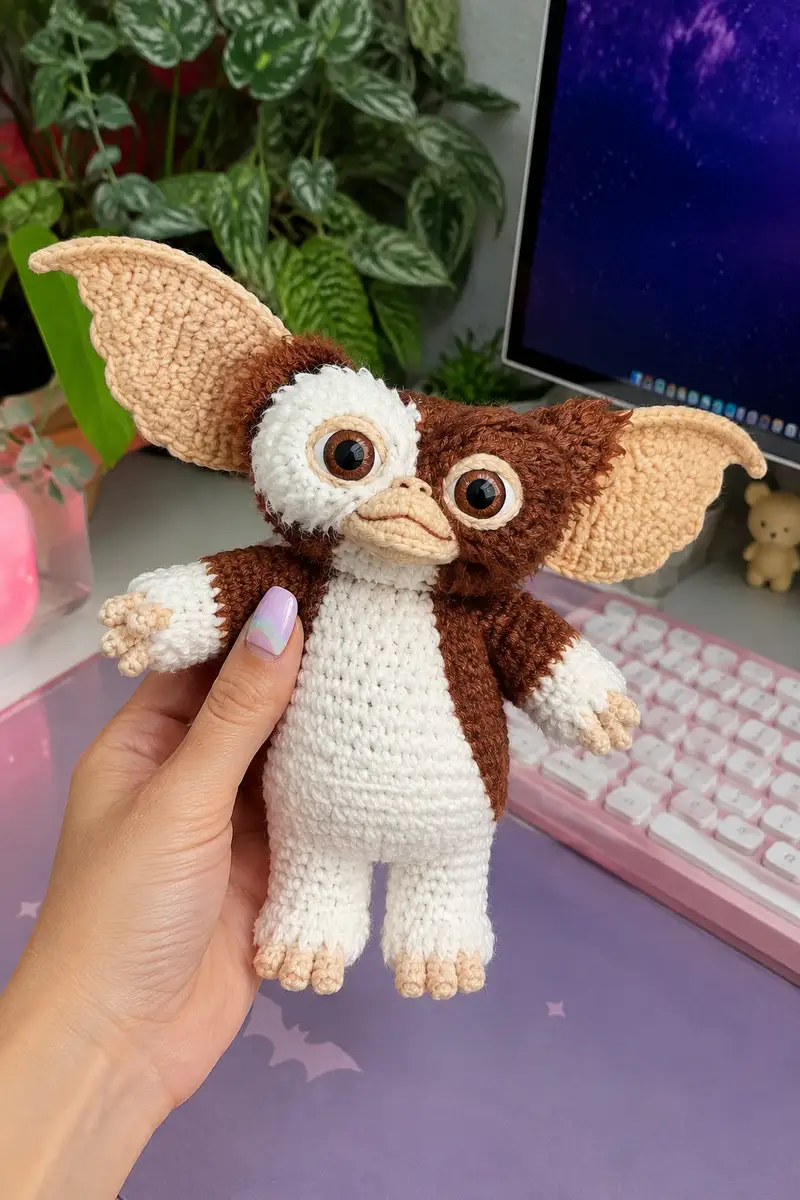
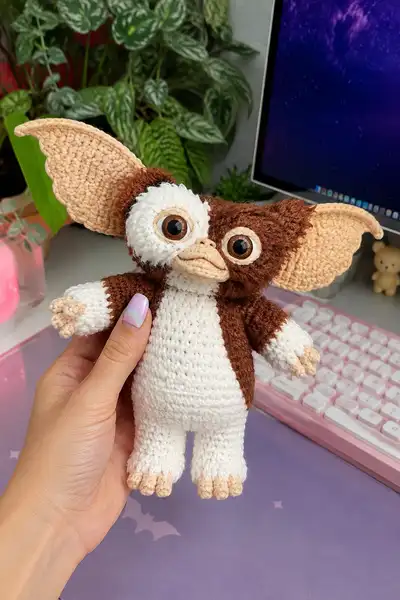
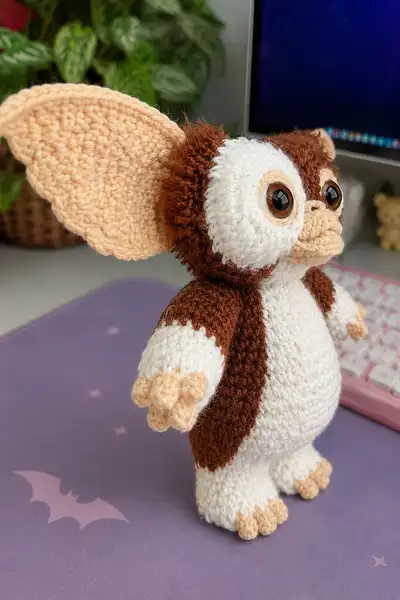
A squishy, highly detailed Gizmo-inspired amigurumi with oversized ears, expressive eyes, and soft fur texture. This pattern uses color changes, eyelash yarn accents, and layered facial pieces to recreate the beloved Mogwai look. Finished piece stands approximately 8-10 inches tall and is perfect for gifting or display. Written for crocheters with some amigurumi experience who enjoy assembly and character details.
Progress Tracker
0% Complete
— Head (outer base, brown with fur accent) :
Round 1 :
6 sc in magic ring (6)
Round 3 :
(1 sc, inc) x 6 (18)
Round 4 :
(2 sc, inc) x 6 (24)
Round 5 :
(3 sc, inc) x 6 (30)
Round 6 :
(4 sc, inc) x 6 (36)
Round 7 :
(5 sc, inc) x 6 (42)
Round 8 :
(6 sc, inc) x 6 (48)
Info :
Start with chocolate brown yarn. If using eyelash fur yarn for the fuzzy head, hold it together with the brown yarn every 2-3 rounds from Round 6 onward to build subtle fur texture. Using eyelash alone will hide your stitches; hold it with the base yarn for control.
Round 9-12 :
1 sc in each st (48)
Info :
Maintain even tension; begin checking symmetry for ear placement. Place temporary stitch markers where you plan to attach ears (approx 10-12 stitches apart across top sides).
Round 13-16 :
1 sc in each st (48)
Info :
Place safety eyes between rounds 13 and 14 if embedding eyes directly into this head piece. Note the final pattern uses separate white eye discs sewn on top; if you prefer, attach eyes now through the base so they are secured to head structure. Aim for 6-8 stitches between centers depending on expression.
Round 17 :
(6 sc, dec) x 6 (42)
Info :
Begin transitioning to the top of the muzzle area. If you plan to add eyelash yarn for the fur halo, add it now and work two rounds holding both yarns to give a consistent fur line across the head.
Round 18 :
(5 sc, dec) x 6 (36)
Round 19 :
(4 sc, dec) x 6 (30)
Info :
Start stuffing the head lightly now, adding more as you shape around the eye area and muzzle. Use small amounts to avoid over-stuffing which can distort facial placement.
Round 20 :
(3 sc, dec) x 6 (24)
Round 21 :
(2 sc, dec) x 6 (18)
Round 22 :
(1 sc, dec) x 6 (12)
Info :
Fasten off leaving a long tail for sewing the head to the body. Finish stuffing and close with a needle. This base head is designed to be covered partially by separate face discs (white) and a mule-like muzzle piece that will be sewn on top for detail.
— Face Eye Patch (Make 2 - white circles that sit around eyes) :
Round 1 :
6 sc in magic ring (6)
Round 3 :
(1 sc, inc) x 6 (18)
Round 4 :
(2 sc, inc) x 6 (24)
Round 5 :
(3 sc, inc) x 6 (30)
Round 6 :
(4 sc, inc) x 6 (36)
Info :
The eye patch is intentionally slightly domed to sit around the eye. Block lightly or stuff with a small tuft of fiberfill to give a rounded surround. Place finished eye patch on the head to determine exact placement before sewing.
Round 7 :
1 sc in each st (36)
Round 8 :
1 sc in each st (36) - fasten off leaving long tail for sewing
Info :
Sew the white eye patches onto the brown head base so the inner edges just meet where the muzzle will be attached. The top of the white patch should reach round 12-14 of the head for correct eye height.
— Eye Rings (Make 2 - inner peach rings for dramatic eyes) :
Round 1 :
6 sc in magic ring (6)
Round 3 :
(1 sc, inc) x 6 (18)
Info :
These are thin rings that sit between the white patch and the safety eyes to give a rim. Fasten off leaving long tail to whipstitch around each safety eye. Sew to the white patch so the safety eye holes align perfectly in the center.
— Muzzle / Beak (Peach - layered piece) :
Round 1 :
6 sc in magic ring (6)
Round 3 :
(1 sc, inc) x 6 (18)
Round 4 :
(2 sc, inc) x 6 (24)
Round 5 :
1 sc in each st (24)
Round 6 :
BLO 1 sc in each st (24)
Info :
Working BLO on Round 6 creates a ledge for the top lip. After Round 6, fold and sculpt the piece to form the horizontal lip. You will create two layered rows to simulate the top/bottom beak shape.
Round 7 :
(3 sc, dec) x 6 (18) - shape front ridge
Round 8 :
(2 sc, dec) x 6 (12)
Round 9 :
6 dec (6) - fasten off leaving long tail for sewing and shaping
Info :
Mold and stitch the muzzle to form a slightly protruding beak. Add a small row of slip stitches or embroidery to indicate the mouth line under the beak. Attach muzzle to head so it sits centered below the eyes; sew through head base and behind eye patches for a secure hold.
— Body (White front with brown back) :
Round 1 :
6 sc in magic ring (6)
Round 3 :
(1 sc, inc) x 6 (18)
Round 4 :
(2 sc, inc) x 6 (24)
Round 5 :
(3 sc, inc) x 6 (30)
Round 6 :
(4 sc, inc) x 6 (36)
Round 7 :
(5 sc, inc) x 6 (42)
Round 8 :
(6 sc, inc) x 6 (48)
Round 9-12 :
1 sc in each st (48)
Info :
Start in white yarn. After Round 12, change to brown for the back panels, carrying the white yarn inside or fastening off depending on preferred clean color separation. In this pattern, we will work front and back as one piece and change colors at specific rounds to create the white tummy and brown back.
Round 13 :
Change to brown yarn now for the back stitches only: work 1 sc in each st for 1 full round in brown (48)
Round 14 :
Change to white yarn and work 1 sc in each st (48)
Round 15-18 :
1 sc in each st (48)
Info :
For crisp color blocks, carry the unused yarn inside the stitches and catch it every 3-4 stitches, or fasten off and rejoin at color changes to avoid visible floats on the outside.
Round 19 :
(6 sc, dec) x 6 (42)
Round 20 :
(5 sc, dec) x 6 (36)
Round 21 :
(4 sc, dec) x 6 (30)
Info :
Begin stuffing the body moderately at Round 21. The body should be firm enough to support the head but not overstuffed or rock-hard. Add stuffing gradually as you continue decreases.
Round 22 :
(3 sc, dec) x 6 (24)
Round 23 :
(2 sc, dec) x 6 (18)
Round 24 :
(1 sc, dec) x 6 (12)
Info :
Stop stuffing here; leave a longer opening to attach the head and legs. When closing, sew the head into place first, then finish closing the bottom after leg attachment for stability.
Round 25 :
6 dec (6) - fasten off leaving long tail for assembly
— Arms (Make 2 - white lower with brown shoulder, peach fingers) :
Round 1 :
6 sc in magic ring (6)
Round 3 :
(1 sc, inc) x 6 (18)
Round 4 :
1 sc in each st (18)
Round 5 :
Change to white yarn now and 1 sc in each st (18)
Round 6-9 :
1 sc in each st (18)
Info :
Stuff the hand portion firmly but keep the arm tube slightly loose for attaching to the body. The peach fingers will be small popcorn/cluster stitches attached to the front of the hand.
Round 10 :
Change to peach yarn for fingers: 1 sc in each st (18)
Round 11 :
(2 sc, dec) x 4 + 2 sc (14) - shape toward wrist
Round 12 :
1 sc in each st (14)
Round 13 :
Change to brown yarn for shoulder section: 1 sc in each st (14)
Round 14-17 :
1 sc in each st (14)
Round 18 :
(1 sc, inc) x 4 + 2 sc (18) - expand shoulder slightly
Round 19 :
1 sc in each st (18) - fasten off leaving long tail for attachment
Info :
Make three little finger clusters on the palm edge using small 3-sc bobbles or picot clusters: ch2, 3 sc in same st, sl st to next stitch, repeat to make three toes/fingers. Sew them to the hand for an organic look.
— Fingers (Make 6 small clusters - 3 per hand) :
Round 1 :
With peach yarn: ch2, 3 sc in same st, sl st to base (creates 1 finger cluster). Fasten off leaving tail for sewing. Repeat to make 6 clusters.
Info :
Sew clusters onto the front of each hand aligned on the palm edge. Use a couple of secure stitches through the base of each cluster to prevent them from dangling when the toy is handled.
— Legs (Make 2 - white legs with peach toes and brown back trim) :
Round 1 :
6 sc in magic ring (6)
Round 3 :
(1 sc, inc) x 6 (18)
Round 4 :
(2 sc, inc) x 6 (24)
Round 5 :
1 sc in each st (24)
Round 6 :
Change to peach yarn for toes: 1 sc in each st (24)
Round 7 :
Make toe clusters: in front 6 sts create three clusters - form 3x (ch2, 3 sc in same st) across front 6 stitches. Then 1 sc in remaining 18 sts (24)
Round 8 :
Change to white yarn. 1 sc in each st (24)
Round 9-14 :
1 sc in each st (24)
Info :
Stuff the foot firmly, using a tool to push stuffing into the toe clusters so the toes keep shape. Leave the leg tube slightly under-stuffed until attached to the body for a smooth join.
Round 15 :
(6 sc, inc) x 3 (27) - slight shaping for calf
Round 16-20 :
1 sc in each st (27)
Round 21 :
(4 sc, dec) x 4 + 3 sc (24)
Round 22 :
1 sc in each st (24)
Round 23 :
(2 sc, dec) x 6 (18)
Round 24 :
1 sc in each st (18) - fasten off leaving long tail for sewing
Info :
Sew legs to the bottom of the body aligning centers to the front seams. For correct posture, place legs about 6-8 stitches apart across the base and test standing balance before final tightening.
— Ears (Make 2 - large, peach inner ear panels) :
Round 1 :
6 sc in magic ring (6)
Round 3 :
(1 sc, inc) x 6 (18)
Round 4 :
(2 sc, inc) x 6 (24)
Round 5 :
(3 sc, inc) x 6 (30)
Round 6 :
(4 sc, inc) x 6 (36)
Round 7 :
(5 sc, inc) x 6 (42)
Round 8 :
1 sc in each st (42)
Round 9 :
BLO 1 sc in each st (42)
Info :
Shape the ear by working the back round in BLO to create a ridge that mimics the ear fold. After finishing the inner panel, make an outer ear backing in brown to give structure and a rim for sewing to the head.
Round 10 :
Fasten off inner ear leaving long tail. Make an outer ear in brown with same counts R1-R8 and sew inner panel atop outer for a two-layer ear with neat edge.
Info :
When sewing ears to head, position at the marked ear points from the head Info section. Curve the ear slightly forward and tack at three points before final sewing so it retains the natural Gizmo tilt.
— Outer Ear Backing (Make 2 - brown) :
Round 1 :
6 sc in magic ring (6)
Round 3 :
(1 sc, inc) x 6 (18)
Round 4 :
(2 sc, inc) x 6 (24)
Round 5 :
(3 sc, inc) x 6 (30)
Round 6 :
(4 sc, inc) x 6 (36)
Round 7 :
1 sc in each st (36) - fasten off leaving long tail for sewing
Info :
Assemble ear by centering the peach inner panel on the brown backing and sewing around the rim. Add 3 evenly spaced tacking stitches to the head to create the slight upright curve seen on the finished toy.
— Fur Halo Accent (brown eyelash - optional decorative rounds) :
Info :
To create the fluffy halo around the face and upper back, work 2-4 rows holding eyelash yarn together with the brown base yarn around head R6-R14 of the head or when sewing face pieces on. Stitch through both head base and halo rounds while sewing face discs to hide ends.
— Assembly & Finishing Touches :
Info :
Before final sewing, position the head on the body and ensure legs are centered so the toy stands balanced. Pin every piece first then remove and stitch securely. Use mattress stitch or whip stitch for attachment seams and weave in ends neatly.
Info :
Attach safety eyes into the eye rings then sew the combined eye units to the white eye patches. If using plastic safety eyes, secure with washers and apply a tiny smear of fabric glue for durability if the toy will be handled by children.
Info :
Add small embroidered nostrils with black thread on the muzzle and a tiny stitched smile under the beak. Use short stitches to keep expression subtle and sweet.
Info :
Brush eyelash/fur yarn gently with a soft toothbrush to fluff the fur halo if using eyelash yarn. Trim any long strands to blend with the head for a tidy finish.
Info :
Final blocking: lightly steam or shape ears and flatten foot base so the finished toy stands. Re-check all seams and add additional stitches if necessary for stability.
This delightful Gizmo-inspired amigurumi brings movie nostalgia to life with big eyes, floppy ears and a fuzzy halo of fur! Each carefully constructed round and sewn detail creates a lovable, tactile friend you'll be proud to make. Whether you gift it or keep it on display, this project is a joy from the first stitch to the final assembly. 🧶💖 Share your finished pal and celebrate the little victories of handmade crafting! 🎨