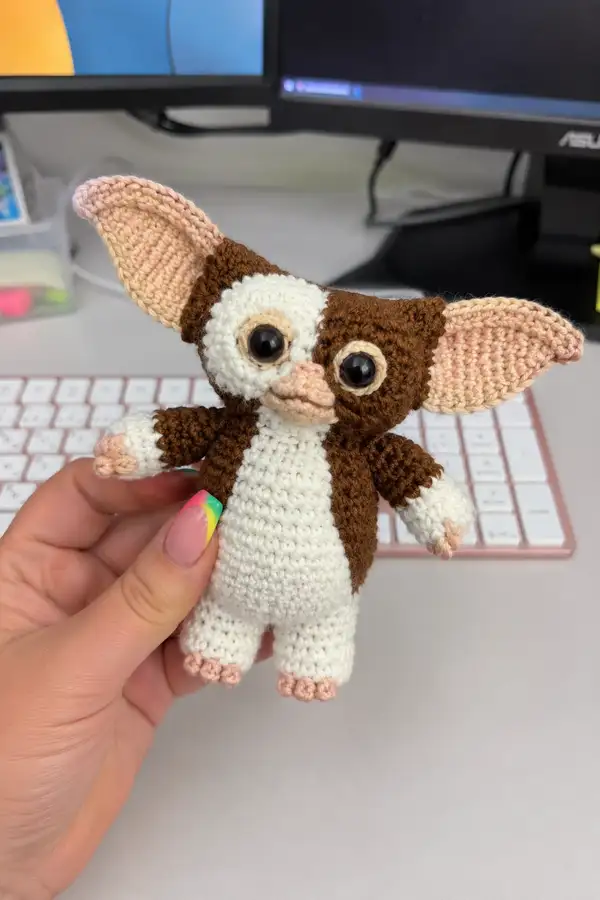
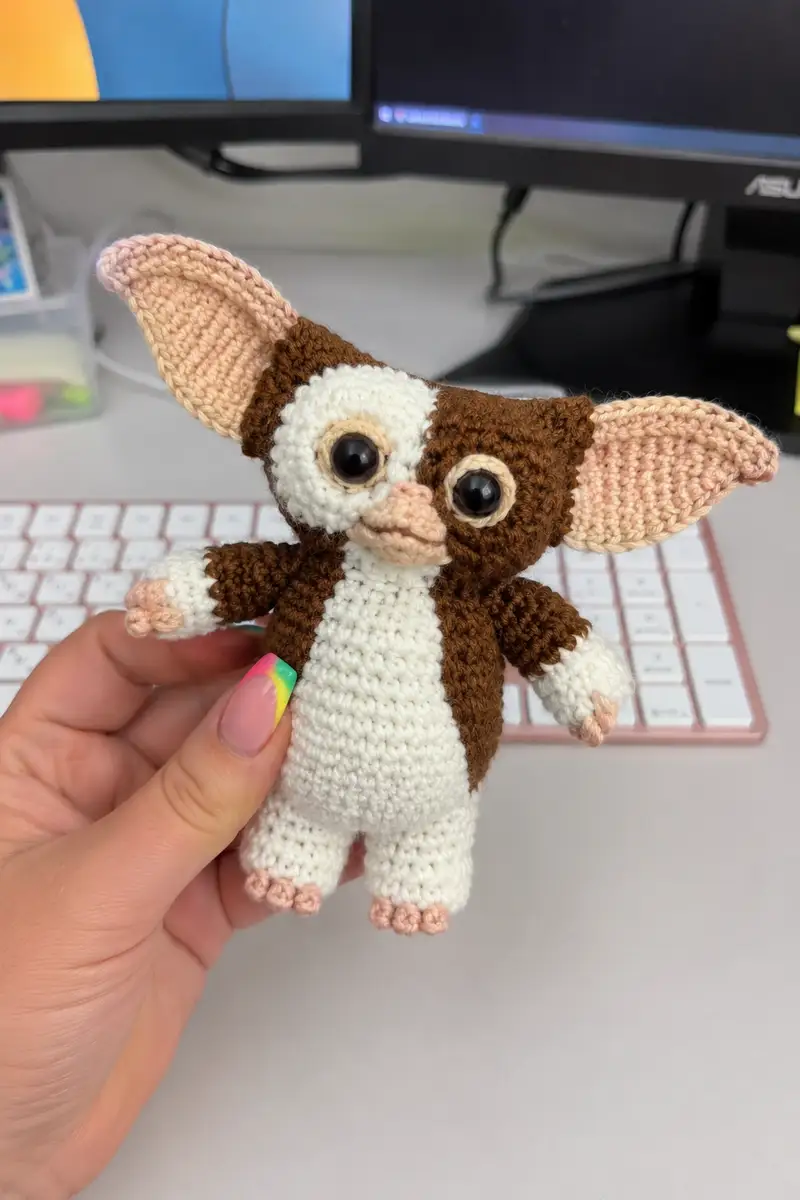
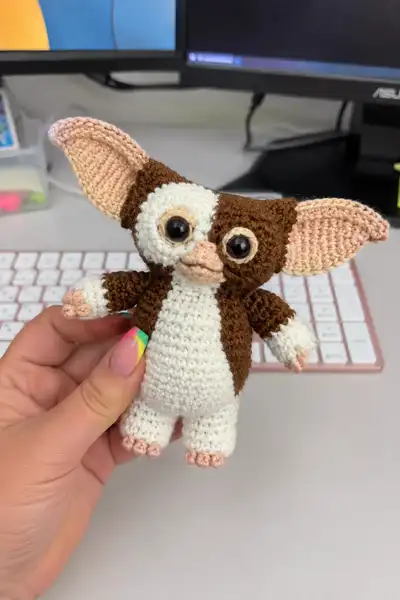
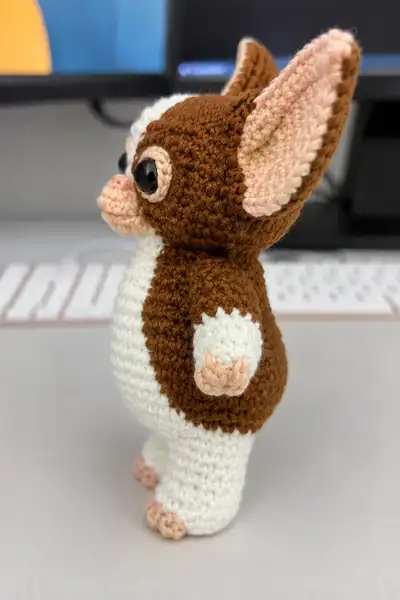
Create a lovable Gizmo-inspired amigurumi with large expressive eyes, oversized inner-pink ears, and a contrasting brown-and-white coat. This pattern guides you step-by-step through head shaping, split-color body construction, tiny three-toed hands and feet, and the little snub muzzle that gives this character so much personality. Worked in worsted weight yarn with clear color-change tips and assembly notes for a neat finish. A charming handmade friend perfect for gifting or keeping.
Progress Tracker
0% Complete
— Head :
Round 1 :
6 sc in magic ring (6)
Round 3 :
(1 sc, inc) x 6 (18)
Round 4 :
(2 sc, inc) x 6 (24)
Round 5 :
(3 sc, inc) x 6 (30)
Round 6 :
(4 sc, inc) x 6 (36)
Round 7 :
(5 sc, inc) x 6 (42)
Round 8 :
(6 sc, inc) x 6 (48)
Round 9-16 :
1 sc in each st (48)
Info :
Place safety eyes between rounds 12-13 for a large-eyed expression; position centers about 6-8 stitches apart depending on desired look. For this Gizmo-style face, aim for 6-7 sts apart between eye centers for a cute wide-eyed look. If using 10mm eyes push eye posts through between rounds 12 and 13 and secure washers.
Round 17 :
(6 sc, dec) x 6 (42)
Round 18 :
(5 sc, dec) x 6 (36)
Info :
Begin gentle stuffing now; fill the forehead area to keep the shape rounded. Use small amounts of fiberfill so you can continue to shape as you decrease.
Round 19 :
(4 sc, dec) x 6 (30)
Round 20 :
(3 sc, dec) x 6 (24)
Round 21-24 :
1 sc in each st (24) - work 4 rounds (24)
Info :
These rounds form a short neck tube that will be sewn into the body opening. Keep these rounds uniform and slightly firmer than the head to give the neck a defined join. Stuff head firmly but avoid overstuffing the neck tube so it remains flexible for sewing.
Round 25 :
(3 sc, dec) x 6 (18)
Round 26 :
(2 sc, dec) x 6 (12)
Info :
Fasten off leaving a long tail for sewing if you prefer to sew the head closed after attaching to the body; otherwise leave tail for final closure. Make sure the head is fully stuffed and face features are firmly secured before final rounds.
— Face Patch & Eye Rims :
Round 1 :
Using white yarn: mr, 6 sc in mr (6)
Round 3 :
(1 sc, inc) x 6 (18)
Round 4 :
(2 sc, inc) x 6 (24)
Round 5 :
1 sc in each st (24)
Info :
This oval face patch is sewn over the front of the head; center it so the eyes will sit roughly on the upper half of the patch. Leave a tail for sewing and use mattress stitch to neatly attach around the oval edge. Stretch the patch slightly when sewing to create a subtle dome under the eyes.
Round 6 (Eye rim) :
Using light peach: mr, 6 sc in mr (6). Fasten off leaving tail (6)
Round 7 (Eye rim outer) :
Join in next round and sc around previous eye rim into 6 sts to make a raised ring: (1 sc in each st, 2 sc in each of the 6 base sts) very gently expand to form a 12-st ring (12)
Info :
Create two identical eye rims. Sew rims around the safety eyes on the face patch before final attachment to ensure they sit flush and even. Leave tails long for weaving in through head after attachment.
— Muzzle / Nose :
Round 1 :
Using light peach: mr, 6 sc in mr (6)
Round 3 :
(1 sc, inc) x 6 (18)
Round 4 :
1 sc in each st (18)
Round 5 :
(2 sc, dec) x 4, 2 sc (14)
Round 6 :
1 sc in each st (14)
Round 7 :
(1 sc, dec) x 4, 2 sc (10)
Round 8 :
1 sc in each st (10)
Round 9 :
Stuff lightly and shape nose ridge with your thumb; flatten base slightly for sewing (10)
Round 10 :
Fasten off leaving long tail for sewing to face (10)
Info :
Sew muzzle centered between the eyes slightly below eye level; pull a few gathering stitches under the nose to create a small cleft mouth if desired. Use a yarn needle and matching yarn tail to stitch the base evenly and invisibly into the head.
— Ears (Make 2) :
Round 1 :
Work ear inner (light peach): ch 2, 6 sc in second ch from hook (6) - We will work this ear flat in rounds shaping a leaf-like ear.
Round 2 :
2 inc, 4 sc across back of chain to create oval increase shape (10)
Round 3 :
(2 sc, inc) x 2, 4 sc (12)
Round 4 :
(3 sc, inc) x 2, 4 sc (14)
Info :
Work these initial rounds in a flat spiral to create an oval inner ear cup. You can optionally place a stitch marker at the midpoint to help shape the fold later when attaching to the outer ear.
Round 5 :
1 sc in each st (14)
Round 6 :
1 sc in each st BLO (14) - this creates a subtle ridge for the ear fold
Info :
Fasten off inner ear and set aside. The inner ear will be sewn to a larger outer ear in brown to create the two-color recessed look seen in the reference toy. Keep inner ear slightly smaller than outer cup.
Outer Ear Round 1 :
Using brown: mr, 6 sc in mr (6)
Outer Ear Round 2 :
6 inc (12)
Outer Ear Round 3 :
(1 sc, inc) x 6 (18)
Outer Ear Round 4 :
(2 sc, inc) x 6 (24)
Outer Ear Round 5 :
(3 sc, inc) x 6 (30)
Outer Ear Round 6 :
1 sc in each st (30)
Outer Ear Round 7 :
1 sc in each st BLO (30) - creates a crisp edge for attaching inner ear
Round 8 :
Fasten off leaving long tail; sew inner ear to outer with mattress stitch, easing inner cup into center and collecting a small fold at the base so the ear tips forward slightly
Info :
Pin ears to head to find ideal forward tilt before permanently sewing. Gizmo-style ears sit wide and slightly forward; space them about 7-9 stitches from each side of the head center depending on preference. If you want poseable ears, leave a small channel and insert a short wire before closing the base.
— Body (Main Brown Shell) :
Round 1 :
6 sc in magic ring (6)
Round 3 :
(1 sc, inc) x 6 (18)
Round 4 :
(2 sc, inc) x 6 (24)
Round 5 :
(3 sc, inc) x 6 (30)
Round 6 :
(4 sc, inc) x 6 (36)
Round 7-18 :
1 sc in each st (36)
Info :
This brown shell forms the coat around the back and sides. We will add a separate white belly panel later and sew it to the front edge of these rounds. Keep the front gap free of brown or change color when sewing belly on to match the pictured split-color effect.
Round 19 :
(3 sc, dec) x 6 (30)
Round 20 :
(2 sc, dec) x 6 (24)
Round 21-22 :
1 sc in each st (24)
Info :
Stop here and leave the last round open for sewing legs and attaching head. The body top is the insertion point for the head neck tube. You will sew the head's neck rounds (the 24-st tube) into this opening for a neat join; pin before sewing to make sure the head sits centered.
— Belly Panel (Make 1, White) :
Round 1 :
mr, 6 sc in mr (6)
Round 3 :
(1 sc, inc) x 6 (18)
Round 4 :
(2 sc, inc) x 6 (24)
Round 5 :
(3 sc, inc) x 6 (30)
Round 6 :
1 sc in each st (30)
Info :
Fasten off leaving a long tail. The belly is oval; when sewing to the body line up the narrow end at the neck and the wider end towards the bottom so it matches the front curve. Stretch slightly as you sew to create a domed tummy similar to the reference photo.
— Right Arm (Make 2) :
Round 1 (Palm/toes color) :
mr, 6 sc in mr (6)
Round 3 :
(1 sc, inc) x 6 (18)
Round 4 :
1 sc in each st (18) - shape palm width
Info :
Create small toe clusters at the palm end by making tiny 3-loop clusters later; for now keep palm round and switch color for wrist cuff.
Round 5 (Change to white) :
Change to white yarn in last stitch, 1 sc in each st (18)
Round 6-9 :
1 sc in each st (18) - work wrist/forearm in white for 4 rounds (18)
Info :
Stuff the palm lightly but firmly. The arms are small so work with tiny stuffing tufts to avoid lumps. Leave the top end open for sewing to the body later.
Round 10 (Change to brown)
Switch to brown yarn in last stitch; 1 sc in each st (18)
Round 11-16 :
1 sc in each st (18) - work this length to reach shoulder height (18)
Round 17 :
(2 sc, dec) x 4 + 2 sc to shape shoulder (14)
Round 18 :
1 sc in each st (14) - fasten off leaving long tail for sewing (14)
Info :
Repeat for second arm. Pin arms to body sides so that the wrists align with the front seam of the brown coat. Sew through both arm stitches and body stitches using a ladder stitch for an invisible seam. If you want arms slightly forward-facing, sew at a slight angle with the top of the arm pulled forward one row.
— Fingertips (Make 6 total, 3 per hand) :
Round 1 :
Using light peach: ch 2, 3 sc in second ch from hook, sl st to first of the three sc to form a small cluster (3)
Round 2 :
Fasten off leaving tail for sewing. Sew three clustered tips to the palm edge spaced evenly to form tiny three-toed fingertips.
Info :
Sew each cluster to the final palm round so the toes face outward slightly. Use a small dab of glue inside each cluster if you want extra durability for a toy that will be handled often.
— Left Arm :
Make left arm :
Work as for Right Arm and attach symmetrically (follow same rounds above for consistency)
— Right Leg (Make 2) :
Round 1 (toe cluster color) :
mr, 6 sc in mr (6)
Round 3 :
(1 sc, inc) x 6 (18)
Round 4 :
1 sc in each st (18)
Round 5 :
Change to light peach: 1 sc in each st (18) - begin toe color round
Round 6 :
Make 3 small toe clusters around the front half of the foot: (sc3tog cluster, 3 sc, sc3tog cluster) spaced across front, adjusting so final count returns to 18; arrange clusters and then continue (18)
Info :
Pinch the toe clusters slightly and sew additional gathering stitches under each to give defined little toes. Stuff toes lightly to keep them round.
Round 7 (change to white) :
Switch to white yarn in last stitch; 1 sc in each st (18)
Round 8-20 :
1 sc in each st (18) - work leg tube to desired length (13 rounds) (18)
Round 21 :
(2 sc, inc) x 4 + 2 sc (22) - widen slightly at top if desired to fit body base
Round 22 :
1 sc in each st (22). Fasten off leaving long tail for sewing (22)
Info :
Leg top circumference can be slightly larger to make sewing to the body easier. When attaching two legs to the bottom of the body they should sit side-by-side with a few stitches between them. Stuff legs firmly from toes upward and ensure the bottom of feet is flat enough to stand if you prefer a standing pose.
— Left Leg :
Make left leg :
Work as for Right Leg and attach mirrored
— Assembly Preparation :
Info :
Before sewing pieces, arrange the body, belly panel, legs and arms on a flat surface. Pin the belly panel to the front of the body rounds (align the narrow end at the neck). Place legs at the bottom edge spaced evenly and note which body stitches they will be sewn to. Use a tapestry needle and the long tails left on pieces to sew securely in place.
— Attaching Legs & Closing Body :
Step 1 :
Place one leg at the bottom edge of the body and pin so the front of the foot faces forward. Start sewing using whip or mattress stitch; stitch all the way around connecting leg top rounds to body bottom rounds. Repeat for second leg ensuring both legs sit evenly apart (use 4-6 stitches gap depending on spacing)
Step 2 :
After both legs are attached, close any remaining gap between leg joins by sewing through both body and leg base loops until seam is neat. Add extra stitches through the body bottom to make the join firm.
Info :
If your body open circumference was 24 and each leg top is 22, distribute the stitches evenly: sew leg tops to 12-13 body stitches each and use the remaining 0-2 stitches to create a neat seam between legs. Adjust slightly as needed for even placement.
— Attaching Head, Ears & Arms :
Step 1 :
Place the head neck tube into the body opening (the head neck rounds of 24 should align with the body opening rounds of 24). Pin the head centered; check from front and side for tilt.
Step 2 :
Sew the neck evenly around with reinforcing passes; use the long tail from the head or separate yarn for a stronger join. Weave through front loops of neck tube and corresponding body last round for an invisible seam.
Step 3 :
Pin ears to top sides of head, approximately 6-8 stitches from the top center on each side and tilted slightly forward. Sew ear bases securely through the bottom few rounds only to keep the ears free to fold slightly.
Step 4 :
Pin arms to sides: place the top of the arm (14-st opening) at body side rounds so the wrist sits just below the head line. Sew through both arm and body stitches, reinforcing the seam with a second pass if desired.
Info :
When stitching the head and limbs, use small stitches and pull gently to avoid puckering. For symmetry always check from multiple angles and adjust before tying off final tails.
— Final Details & Finishing Touches :
Step 1 :
Sew the white belly panel to the front brown shell using a mattress stitch; start at the neck and work toward the bottom, making small even stitches to avoid gaps. Slightly stretch the belly panel while sewing to create a plump tummy look.
Step 2 :
Sew muzzle to face centered between eyes; tack the base down securely and add a couple of small embroidery stitches to suggest a little mouth line under the muzzle if desired.
Step 3 :
Sew eye rims around safety eyes if not already done. Weave tails into the head to secure and trim close. Ensure eye washers are firmly locked from inside before trimming excess posts.
Step 4 :
Sew three small toenail clusters to each foot front edge using light peach yarn. Secure with a knot inside the foot and weave in end to hide it.
Step 5 :
Weave in all remaining tails neatly inside the body and give the toy a final fluff of stuffing if needed by pushing a small amount in through small openings and sewing shut.
Info :
Optional: Add a tiny embroidered eyebrow or blush to cheeks. Use alcohol-free makeup or pastel chalk for blush and fix with a textile medium if desired. Double-check all safety eyes and seams for stability before gifting to small children.
This Gizmo-inspired amigurumi combines classic amigurumi shaping with playful details — oversized inner-pink ears, big expressive eyes, and tiny three-toed hands and feet. Each section is designed to sew together smoothly for a clean, polished finish. Enjoy putting on the finishing touches and personalizing the face to bring your little companion to life! 🧶😊✨