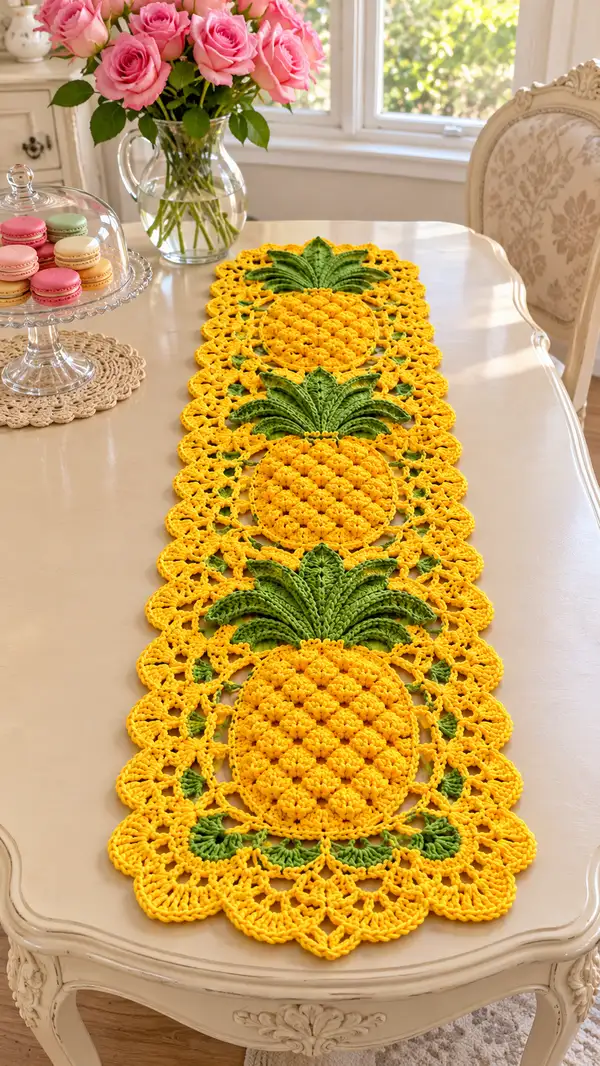
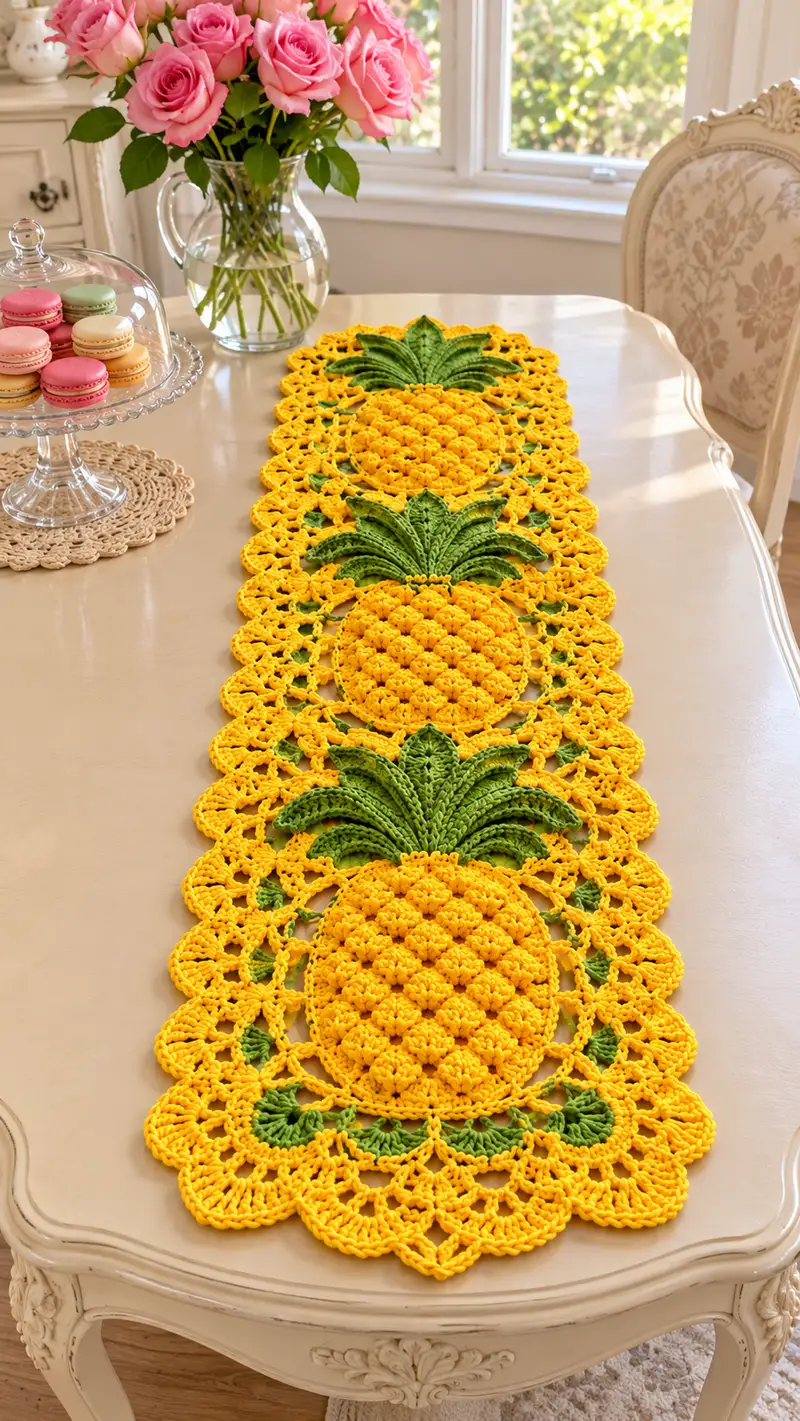
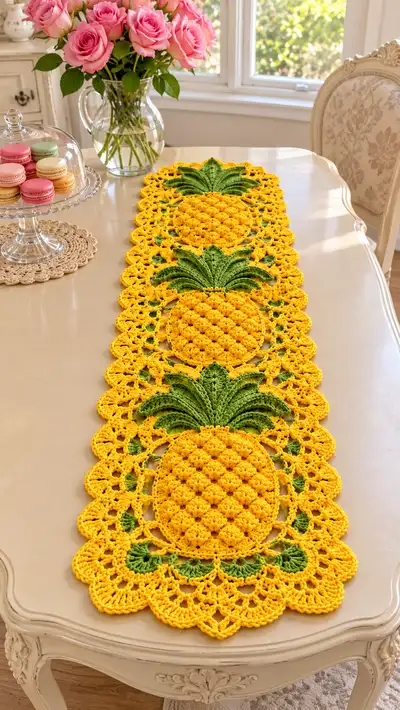
Create a bright, decorative table runner made of three pineapple motifs joined by a lacy scalloped border. This project uses textured puff clusters to recreate pineapple eyes, raised layered leaves in contrasting green, and an openwork lace join for a vintage-inspired, modern tabletop accent. The runner pictured measures long enough for a dining table center and is perfect for sunny kitchens, summer tablescapes, or a cheerful welcome display.
Progress Tracker
0% Complete
— Notes & Gauge :
Info :
Gauge is not critical but for reference: one pineapple round (finished pineapple body after Round 20 of the center) measures approximately 12-13 cm (5 in) across when worked with worsted cotton yarn and a 3.5mm hook. Adjust hook if your fabric is looser or tighter. The runner pictured uses 3 pineapple motifs joined end-to-end with a scalloped border.
Info :
Use a 3.5mm hook for the majority of the pattern. Use 3.0mm for tight texture rounds if you prefer crisper puff stitches. Keep tension uniform. Block motifs before joining to ensure flat edges.
— Pineapple Motif: Center Circle & Textured 'Eyes' (Make 3) :
Round 1 :
6 sc in magic ring (6)
Round 3 :
(1 sc, inc) x 6 (18)
Round 4 :
(2 sc, inc) x 6 (24)
Round 5 :
(3 sc, inc) x 6 (30)
Round 6 :
(4 sc, inc) x 6 (36)
Round 7 :
(5 sc, inc) x 6 (42)
Round 8 :
(6 sc, inc) x 6 (48)
Info :
Rounds 1-8 form a flat, even base. Keep your tension steady and check flatness: the circle should lie flat without ruffling. Adjust by adding or skipping an increase round if needed for your yarn/hook combination.
Round 9-12 :
1 sc in each st around (48)
Info :
Work these even rounds to create height for the pineapple body. Place a removable stitch marker at the first stitch to mark round start. We will create puff texture starting next.
Round 13 :
(1 sc, ch 2, skip 2, 3 dc cluster in next st, ch 1) x 12 (48 sts counted as 48 worked positions)
Info :
This round establishes spaces for puff clusters to be anchored into on the following rounds. The written stitch count shows worked positions around the circle; cluster placement will create raised texture in later rounds.
Round 14 :
Into each 3 dc cluster from previous round: puff stitch (yarn over, insert hook, pull up loop) repeat 5 times total on the same stitch, yarn over and pull through all loops, ch 1 to secure, sc in the next sc between clusters (12 puff clusters, 12 sc = 24)
Info :
How to make a puff for this pattern: yarn over, insert hook in target st, yarn over, pull up a loop (repeat this yarn over/insert/pull up loop 4 more times total), you will have 11 loops on the hook; yarn over and pull through all loops, ch 1 to close the puff and secure it. Each puff counts as a single stitch for counts from this round onward.
Round 15 :
(sc in next sc, puff in next cluster) x 12 (24)
Info :
Round 15 reduces stitch count because each puff cluster replaces multiple earlier stitches. Work tightly so the puffs pack closely forming the pineapple diamond pattern.
Round 16 :
(puff, sc) x 12 (24)
Round 17 :
1 sc in each st (24)
Round 18 :
(1 sc, inc) x 12 (36)
Info :
Increase round after building texture gently expands the motif to a wider pineapple silhouette while keeping the puff texture centered. Stitch count math: 12 repeats adding 12 stitches to 24 = 36.
Round 19 :
1 sc in each st (36)
Round 20 :
(2 sc, inc) x 12 (48)
Info :
Now the textured pineapple round should approximate the central pineapple body. Check that puffs appear staggered to form diamond 'eyes' across the fruit. If necessary, make an extra even round to flatten before proceeding to join the leaves.
Round 21 :
1 sc in each st (48)
Round 22 :
(3 sc, inc) x 12 (60)
Info :
Round 22 expands beyond the puff-textured area to provide a stable base for leaf attachment. The number of repeats equals 12 to maintain symmetry around the motif and match the lace joining spacing later.
Round 23 :
1 sc in each st (60)
Round 24 :
(4 sc, inc) x 12 (72)
Round 25 :
1 sc in each st (72)
Info :
Fasten off the yellow main body and weave ends short if you will immediately attach leaves. If you prefer, change to green yarn and start the leaf foundation round from the motif edge. Block motif flat before adding leaves if possible.
— Pineapple Leaves: Layered Raised Leaves (Make 3 sets per motif) :
Info :
Leaves are worked in green and are constructed as a set of layered leaf units that are sewn or crocheted onto the top edge of the pineapple body. Each motif in the photo uses 7-9 leaf segments in a fan; we will make 7 leaf units per motif for a balanced look. Work leaves from base to tip, creating a ridge by working in BLO on subsequent foundation rounds.
Leaf Unit - Round 1 :
Join green with sl st to the top center point of the pineapple body (any of the mid-round scs along Round 21), ch 1, sc in same st, ch 2, sc in next 6 sts along top edge (total 8 sc along base) (8)
Leaf Unit - Round 2 :
Turn work slightly toward outside, ch 1, 1 sc in same st, hdc in next, dc in next 2, tr in next 2, dc in next, hdc in next, sc in last (total stitches across leaf without counting base = 8)
Info :
Work Row 2 with slightly taller stitches toward the center of the leaf to create a tapering arc. Maintain same number of worked stitches so joins remain even when attaching multiple leaves.
Leaf Unit - Round 3 :
Ch 1, turn to work back along edge, sc in each st across (8) working through both loops to flatten and secure the leaf shape
Leaf Unit - Round 4 :
Work 1 sc in base st to attach, ch 1, 1 sc in next base st, then work 1 sc in back loops only (BLO) across the leaf edge for 8 sts total to create a raised central ridge effect (8 BLO)
Info :
After Round 4 you will have a leaf with a subtle ridge. Repeat the Leaf Unit with slight alternation in placement to form a layered fan of 7 leaves: place the first leaf at center, then work three leaves on each side symmetrically. Use stitch markers to map positions evenly across the top edge of the pineapple.
Leaf Unit - Round 5 :
For a second smaller layer on top of the first: join green to inner base point behind the first row, ch 1, sc in same, (hdc, dc, hdc) across central stitches to create a short inner leaf (5 sts) and sc to finish. Fasten off, weave tails. Repeat to make 7 units per motif.
Info :
Sew or slip-stitch the leaf bases into the Round 22/23 edge of the pineapple motif. The leaves should overlap slightly and be staggered so that when the set of 7 is complete, the fan looks full. For a raised look, use 3.0mm hook when making the BLO ridges so they sit higher.
— Inner Decorative Accent Rows Around Motif (Yellow & Green) :
Round 1 (after leaves attached) :
With yellow, join at any base point along outer edge (Round 25), ch 3 (counts as dc), dc in same st, *ch 2, sk 1, 2 dc in next st* rep around to create an openwork ring. Work 36 two-dc clusters evenly spaced (72 dc positions including ch-3 starts)
Info :
This ring begins the lacy join and adds visual continuity between motifs. Maintain even spacing — count clusters and adjust spacing slightly to finish evenly around the motif.
Round 2 :
Join green into the top of every 3rd ch-2 space, ch 1, sc in space, ch 2, sc in next ch-2 space, *sc in next ch-2 space* around. Intended result: alternating bright green accents in the lace with 12 visible green V-shapes per motif.
Info :
These small green inserts echo the leaf color and anchor the joining lace that will connect motifs. If you prefer fewer green accents, work every 4th space instead of every 3rd.
— Lace Connector and Scalloped Border (Join motifs and border) :
Info :
The lace connector works around each motif and includes join-as-you-go options so you can attach motifs end-to-end as you work the border rounds. You can also finish each motif completely and sew them together, but join-as-you-go will produce cleaner continuous lace.
Round 1 :
With yellow, at an openwork ring space, join with sl st, ch 4 (counts as tr + ch1), *in next ch-2 space work (tr, ch1, tr), ch 2, sk next 2 dc-cluster, repeat around forming pairs of tr separated by ch spaces until you reach the joining edge where another motif will connect. Work total of 24 'tr pairs' around (work evenly spaced)
Info :
As you approach the area where motifs will be joined (top and bottom of runner), plan join points every motif length so motifs connect symmetrically: for a 3-motif runner, you will join at the short ends of motifs with a set of chain arches that match the opposite motif.
Round 2 :
Ch 1, sc in same st, *ch 3, sc in next ch-1 space between tr pairs, ch 3, sc in next arch top* rep to create large chain arches around motif base (24 arches)
Info :
These large arches form the scaffolding for the scalloped border; keep arches consistent by counting stitches and adjusting the number of chains to keep scallops symmetrical.
Round 3 :
Into each large ch-3 arch work: (2 dc, ch 2, 2 dc) shell, sc in next sc. Repeat for each arch (24 shells, sc between shells) (shells count = 24)
Round 4 :
Ch 1, sc in each dc and sc across to even out shells, working 3 sc across each shell peak to create a firm ridge (approx 72 sc total — adjust to match actual stitch positions)
Info :
Round 4 evens out the scallops and creates a foundation for the decorative scalloped edging. If your stitch count seems off, recount shells and adjust sc groups across shells so your total equals 3 sc per shell plus sc between shells.
Round 5 :
Start scalloped edge: *(skip 1 sc, 5 dc in next sc, sk 1 sc, sl st in next sc)* repeat around to create tight scallops. Work scallops evenly; you should have approximately 24 scallops around each motif (adjust to actual shells count)
Info :
The tight scallops are decorative and help the runner sit flat. When joining motifs end-to-end, match scallop positions between two adjacent motifs and join with sl sts across matching scallop tops or with a decorative single-crochet bridge (instructions below).
Round 6 :
Fasten off yellow if not joining now. We will perform join-as-you-go instructions on next motif's scallop round for a seamless edge. If finishing motif separately, weave in ends and block flat to measurements before sewing motifs together.
Info :
Join-As-You-Go method: When you reach the final scallop round on the next motif at the position opposite the first motif, instead of closing the scallop with sl st to join, insert hook through the matching scallop top of the adjacent motif and sl st to join, then complete the scallop on the active motif. Repeat for all matching scallops to connect motifs.
— Detailed Join-As-You-Go Scallop Attachment :
Step 1 :
Work the entire motif 1 including scallop round up to the final ch-3 arch if joining later. Block motif 1 flat and place facedown where motif 2 will meet.
Step 2 :
Work motif 2 until you reach the scallop round. When you get to a scallop that will match motif 1, ch 1, *work 2 dc, ch 1, insert hook in top of matching scallop on motif 1 and sl st to join, finish 3 dc to complete the 5-dc scallop on motif 2, sl st to next sc* continue around joining each matching scallop.
Info :
Take care to pick the exact top stitch of the scallop to get an even seam. Use pins to match scallops before you join. Join only those scallops that correspond to each other along the short edge; leave outer scallops unjoined.
— Extended Runner Side Lace Rows (After motifs joined) :
Round 1 :
With yellow, join at any scallop valley along the long edge of connected motifs, ch 1, sc around edge working 1 sc in each ch space and shell peak to tidy up the join. Work around entire assembled runner with a base even sc row to prepare for decorative edging (approx stitch count will vary with number of motifs; expect 280-360 sc around full runner)
Info :
The long-edge sc round evens the edges so the next rounds of decorative lace have even spacing. Count shells across one motif and multiply by number of motifs to estimate total stitches; adjust to maintain symmetry.
Round 2 :
*(ch 4, sk 2, sl st) in each sc around* — place chain arches evenly along the long edges to form an airy lacy side. Repeat corners with extra chains for smooth corners (approx same number as scallops)
Round 3 :
Into each ch-4 arch work: (sc, hdc, 3 dc, hdc, sc) to form a small pineapple-like shell along the runner edge. Repeat around long edges; for corners work an extended 7-dc shell to curve neatly.
Round 4 :
Ch 1, sc in each st across shells, working 3 sc across each central 3-dc section to create a strong ridge (adjust total sc to match number of shells)
Info :
These side shells echo the motif scallops and strengthen the runner's long edges. Keep the corner shells slightly larger to help the runner lie flat across a rectangular table.
Round 5 :
Final scalloped edge: *(skip 1 sc, 7 dc in next sc, skip 1 sc, sl st in next sc)* repeat around long edges and short sides to create a balanced large scallop edge. Fasten off and weave all ends securely.
Info :
Once all motifs are joined and the final scalloped edge is complete, block the entire runner carefully to smooth scallops and set shape. Use pins in each scallop to hold form while damp blocking. When dry, the runner will keep its shape and display crisp lacework.
— Optional Embellishments & Tips :
Info :
Add small green embroidered stitches into the centers of puff clusters if you want additional contrast. For a slightly aged look, work the final edge with a lighter golden tone. If you want a non-slip underside, apply small dots of fabric-safe non-slip glue along the underside or sew a lightweight backing fabric.
Info :
To make a longer runner simply add more pineapple motifs in the same sequence; to create a shorter table centerpiece use only one or two motifs and adjust the border accordingly.
This Golden Pineapple Welcome table runner is a joyful addition to any home — bright, textured, and full of handcrafted charm. With puff-cluster pineapple bodies and layered green leaves, each motif becomes a small work of art that ties together into an elegant, lacy runner. Blocking and careful joining make the final piece lie flat and beautiful on a dining table or sideboard. Enjoy the process, and know this cheerful runner will bring smiles every time you lay it out! 🧶🌞