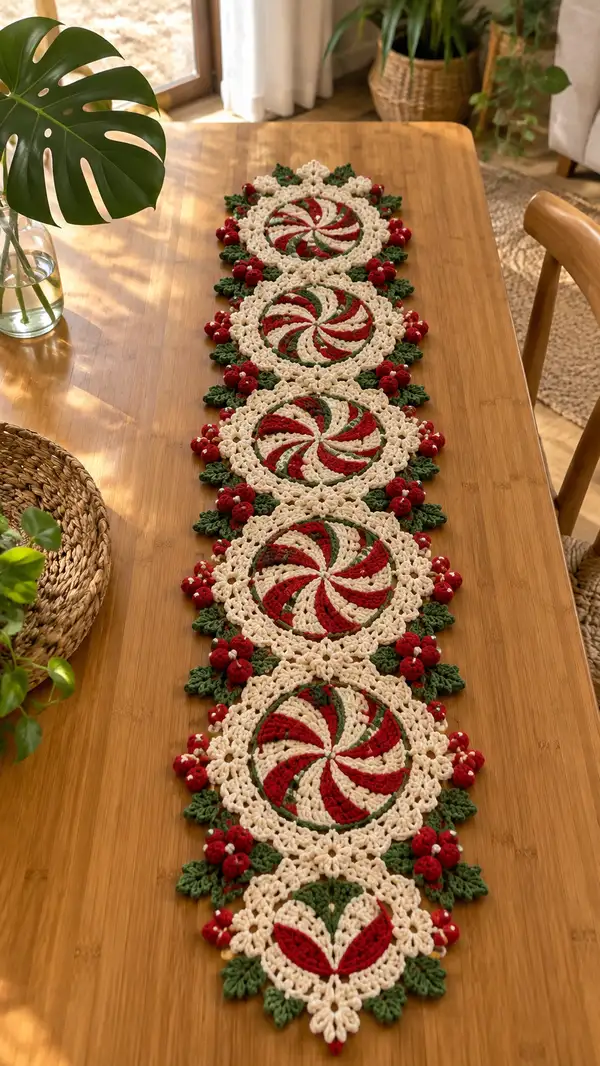
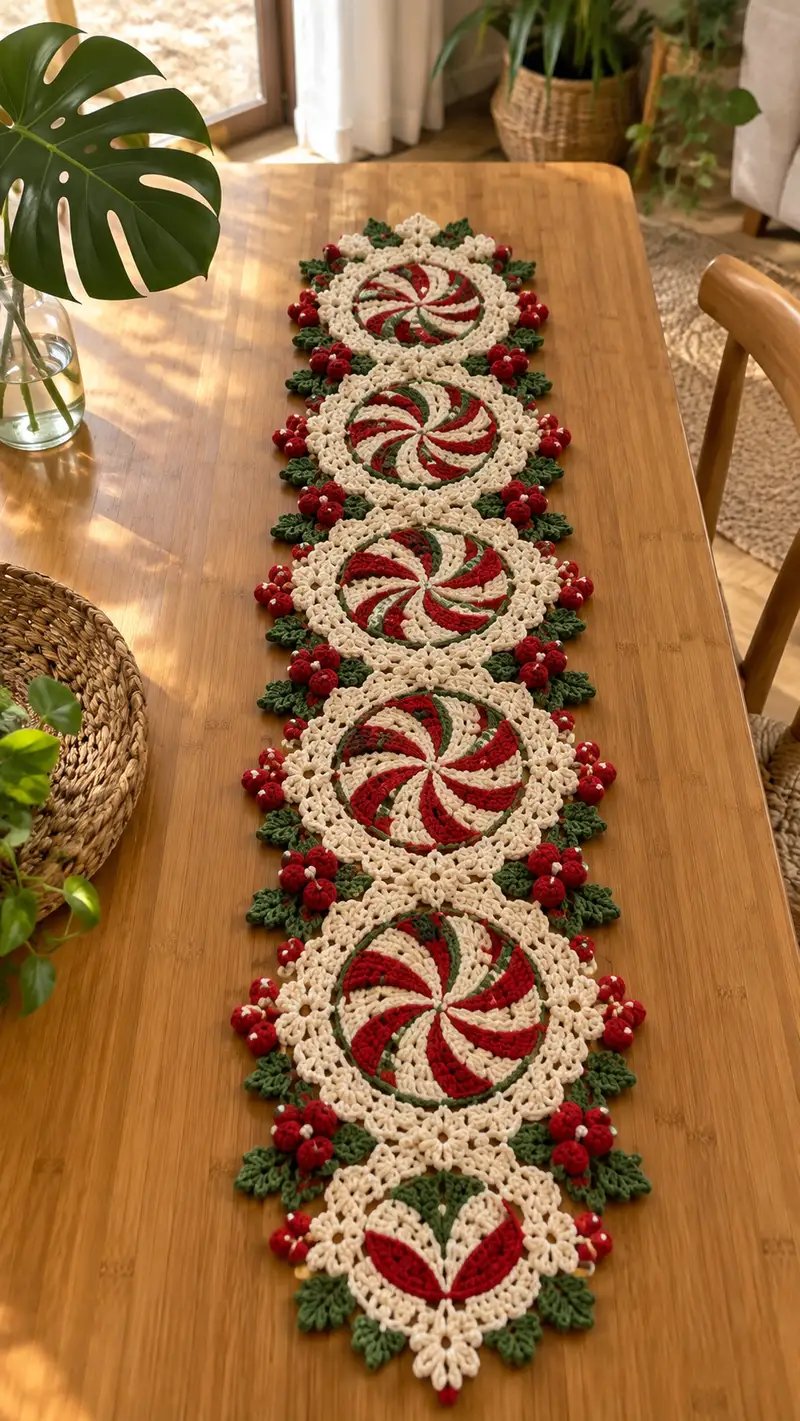
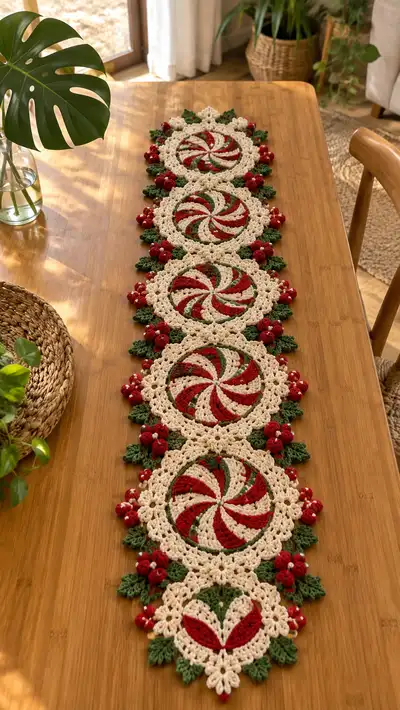
Bring festive charm to your table with this Cream and Red Peppermint Swirl Table Runner. The runner features linked circular peppermint-motif doilies accented with deep green leaves and clustered red berry bobbles. Soft cream lace edges frame the swirling red-and-green pinwheel centers for a handmade holiday statement piece that lays flat and photographs beautifully.
Progress Tracker
0% Complete
— Notes & Gauge :
Info :
This pattern creates circular motifs that are joined to form a long table runner. Gauge for one finished motif measures approximately 7.5-8 inches (19-20 cm) across after blocking when using worsted weight cotton and a 4.0mm hook. If your motifs are larger or smaller, adjust hook size accordingly. All rounds are worked in continuous rounds unless otherwise stated; use a stitch marker to mark the first stitch of each round and move it up as you work.
Info :
Color notes: The main background/edging color is called 'Cream'. Accent colors are 'Red' for peppermint wedges and berries, and 'Green' for thin accent lines and leaves. Carry yarn inside the motif where indicated or fasten off and rejoin to avoid long floats. The pattern includes many Info sections with tips for color changes and assembly—read those carefully.
— Swirl Center (Make one for each motif) :
Round 1 :
6 sc in magic ring (6)
Round 3 :
(1 sc, 1 inc) x 6 (18)
Round 4 :
(2 sc, 1 inc) x 6 (24)
Round 5 :
(3 sc, 1 inc) x 6 (30)
Round 6 :
(4 sc, 1 inc) x 6 (36)
Round 7 :
(5 sc, 1 inc) x 6 (42)
Round 8 :
(6 sc, 1 inc) x 6 (48)
Info :
We are creating a base circle of 48 sts to divide evenly into 8 swivel wedges (48 = 8 x 6). This facilitates making 8 spiral wedges for the peppermint look. Place 8 evenly spaced markers at every 6th stitch (optional) to mark wedge boundaries.
Round 9 :
1 sc in each st (48)
Round 10 :
1 sc in each st (48)
Info :
Begin colorwork for the swirl on Round 11. Each wedge is 6 stitches wide at this circle; the swirl is built by working front-post and crossed stitches that create a slanted wedge. Use Red and Cream and a tiny amount of Green for the thin accent. Carry unused color behind work where possible, or fasten off between color changes if you prefer neater back.
Round 11 :
Change to Red. *In first 6 sts (wedge 1) work: (hdc, dc, dc) all worked into successive sts to create a slightly taller wedge curve; sl st into next st to finish wedge. Repeat from * around across 8 wedges using the same color placement so the initial wedge segments are Red (48)
Round 12 :
Change to Cream. Work 1 sc in each st around (48). This evens the row and prepares for wedge shaping.
Round 13 :
Color sequence begins: For 8 wedges, work as follows repeating around: Into wedge 1 (first 6 sts): join Red, work (fpdc around next post or worked as 3 crossed dc cluster to slant wedge), slip to next wedge boundary. Into wedge 2: switch to Cream and repeat cluster shaping to create alternating colors. Continue alternating Red and Cream for each wedge so you have 4 red wedges and 4 cream wedges evenly spaced; the last wedge of each color should include a single Green accent stitch at the outermost stitch of the wedge to create the thin green line at the edge (48)
Info :
Detailed stitch mapping for Round 13: Because each wedge is built across 6 base sts, you will replace the 6 sc with a curved cluster that covers six effective stitches. Use a combination of dc clusters and crossed dc (dc around next st then dc into previous st) to create the twist. If you prefer, you can create the twist by working (hdc, dc, tr) into the 6 sts with the tallest stitch located toward the outer edge for a spiral effect.
Round 14 :
1 sc in each st around to tidy the row and lock color changes (48)
Round 15 :
Change to alternate color and in each wedge work a longer cluster to enhance the swirl: *(in wedge: 2 dc, tr, 2 dc) across the 6-st wedge, sl st to join between wedges* repeat around (48)
Round 16 :
1 sc in each st around (48)
Info :
Color Detail :
Where the thin green accent is needed, use a stranded technique: when you reach the outer stitch of a given red or cream wedge, work a single sc or hdc in Green to create a subtle green stripe that curves between wedges. Do this consistently on the same outer-most stitch of each wedge for visual rhythm.
Round 17 :
Work 1 sc in each st BLO (48). Working in BLO here creates a subtle ridge that helps define the edge of the swirl before the decorative ring.
Round 18 :
Switch to Cream. *Ch3 (counts as dc), sk 1, dc in next, ch2, sk1, dc in next 3 sts to create small arch, sl st into next st* Repeat this arching pattern around to begin the inner lace ring (48)
Round 19 :
In each ch-2 arch: (sc, ch3, sc) to form small picoted loops; between arches 1 sc in the base stitch. This creates a decorative ring just outside the swirl (48 loops / 48 sts)
Info :
Stuffing Note: This item is a flat doily; no stuffing is required except for berries. Keep center work flat and maintain even tension. If you see curling, block motif flat after finishing all rounds for that motif.
— Outer Lace Frame (Rounds 20-32) :
Round 20 :
Change to Cream. *In each sc base around: (ch5, sk next st, sl st into next st) creating loopy chains for later shell attachment* Repeat around (48 chain loops)
Round 21 :
Into each ch-5 loop: work (sc, hdc, 5 dc, hdc, sc) shell. This turns each chain loop into a fuller shell. At the end of round you will have 48 shells (48 shells)
Info :
Spacing: Because we've created 48 shells, the shells are small and lace-like. If your yarn is thicker, reduce the number of shells by working Round 20 with ch4 loops instead to avoid crowding.
Round 22 :
1 sc in each stitch and 1 sc in each shell space between shells to tidy. (Approximately 96 sc across this round depending how you placed stitches)
Round 23 :
Work (ch4, sl st into 3rd dc of next shell) around to form connecting arches between shells. This gives the motif a lacy scallop for the outer ring.
Round 24 :
In each ch-4 arch: (sc, ch2, picot, ch2, sc) to make a small pointed floral loop. This contributes to the floral look between motifs (48 small points)
Info :
Edge Stability: If you prefer a more stable edge, substitute ch-4 with ch-3 and reduce picot size to keep the ring firmer. Blocking after finishing will set the lace flat.
Round 25 :
Change to Cream. *Work into each shell point: (sc, ch3, sc) to accent each scallop* Repeat around (48)
Round 26 :
1 sc in each st around to tidy and prepare for leaf and berry attachment (approx 96 sc)
Info :
Count check: At this stage you should have a full circular motif with a decorative cream lace border. Exact stitch numbers may be slightly higher than base 48 due to shell stitch expansion; ensure your shell count equals the number of chain loops originally created so joins line up when matching motifs for the runner.
— Decorative Leaf Units (Make 8 leaves per motif) :
Info :
Each motif in the runner features a group of leaves between the lace scallops. We will make 8 leaves per motif positioned evenly around the circle (one leaf at every other scallop). Leaves are worked flat and sewn on or crocheted on in the join-as-you-go round described later.
Leaf Round 1 :
Using Green: ch6, 1 sc in 2nd ch from hook, hdc in next, dc in next, tr in next, sl st into last ch - turn to work along opposite side of chain: 1 sc into same chain base, hdc into next, dc into next (total creates a slender boat shape, about 10 sts)
Leaf Round 2 :
Turn, into each stitch along leaf edge work: (sc, hdc, 3 dc) at the point (to create a plump tip), then retrace back with hdc and sc to base. Fasten off leaving long tail for sewing. (approx 14-16 sts)
Info :
Add surface veins: Using a tapestry needle and Green, embroider one center vein and 1-2 side veins per leaf with a backstitch or surface slip stitch for definition. Press lightly when blocking to flatten slightly and shape for attachment.
Leaf Round 4 :
Repeat for all leaves (8 per motif). Make pairs of leaves to create fuller clusters between motifs if desired.
— Berry Bobbles (Make multiple clusters between motifs) :
Berry Round 1 :
Using Red: 6 sc in magic ring (6)
Berry Round 2 :
6 inc (12)
Berry Round 3 :
*(1 sc, 1 inc) x 6 (18)
Info :
Stop here for a small raised bobble: stuff a tiny pinch of fiberfill into the berry, then close tightly in next two rounds to form a round berry. For a firmer berry, continue to Round 4; for a small tight berry stop at Round 3 and flatten slightly when sewing on.
Berry Round 4 :
(1 sc, 1 dec) x 6 (12) - stuff firmly
Berry Round 5 :
6 dec (6) - Fasten off leaving long tail for sewing. Weave tail through last 6 sts and pull closed. Tie off and hide tail inside berry.
Info :
Group berries into clusters of three: sew three berries together at their bases with a short length of yarn so they form a triangular cluster like holly berries. Optionally sew a tiny bead or a cream French knot on top of each berry for a highlight, as pictured.
— Joining Motifs and Join-as-you-go Border :
Info :
This runner is assembled motif by motif using a join-as-you-go (JAYG) method during the outermost decorative round. Each motif will be attached to the preceding motif at 6 evenly spaced points around the edge where leaf/berry clusters are located. Layout the motifs in a straight line and pin them where you want the joins before performing the join rounds.
JAYG Round 1 :
With Cream and starting at any scallop on motif A, join to motif B by working: when you reach the scallop that matches a scallop on the adjacent motif, slip stitch through the corresponding stitch on the edge of motif B, then continue with your scallop sequence on motif A. Repeat at every designated join point (6 joins per side per motif). This secures motifs together while adding a small decorative connector loop between them.
JAYG Round 2 :
After initial slip-stitch joins, work 1 sc in each st around motifs and through the slip stitches used to join to tidy the seam. Add small picot (ch3, sl st in 3rd ch) at each join to form a bead-like connector for extra visual continuity (approx 96 sc across the joined pair).
Info :
Placement guide: For a neat runner, align motifs so the leaf clusters sit between motifs and berries rest centered in the repeat. Pin motifs before joining to keep spacing equal. If your motifs are slightly off-size, adjust the number of joining slip stitches between points to even the spacing.
JAYG Round 3 :
Work an outer seam: *(sc in next 3 sts, ch2, sl st into the corresponding stitch on adjacent motif, ch2, sc in next 3 sts)* repeat around to strengthen the join and create a decorative ladder between motifs (these ladder spaces are where leaf clusters will be sewn or crocheted on).
Info :
Reinforcement: After joining all motifs across the runner, go back with a single crochet edge around the entire runner (working through edge stitches and join loops) to even the tension and lock the structure together. This also hides any visible floats from join-as-you-go slip stitches.
— Attaching Leaves and Berry Clusters :
Info :
Sew leaf pairs and berry clusters into the ladder spaces created by JAYG Round 3. Position three small berries grouped together near the base of a leaf pair (as pictured). Secure using whipstitch or hidden mattress stitch and weave ends into the runner edge. Use small stitches and pin pieces before sewing to ensure correct placement.
Attachment Step 1 :
Pair two leaves on each side of a join: place one leaf pointing outward and one slightly angled toward the runner. Sew with the spare tail to the motif through the base of the leaf and then anchor the vein stitches inside the runner for stability.
Attachment Step 2 :
Sew berry clusters at the base of the paired leaves. Hold the cluster so berries sit slightly raised and stitch through the base of each berry into the motif edge, anchoring securely with several stitches. Hide the tail inside one berry for neatness.
Info :
For a vintage look, slightly flatten leaf tips when blocking and steam lightly. Be careful with acrylic yarn and high heat; cotton tolerates a stronger steam for crisping.
— Final Scalloped Edge & Finish (Rounds 33-40) :
Round 33 :
With Cream: sc evenly around entire runner edge, working through join points and scallops from motifs (approx 6 sc per scallop area, adjust to fit tension)
Round 34 :
*Ch4, sl st into 2nd ch from hook to make tiny picot, ch2, sl st into previous sc to form small loop* repeat across the seam to create a finishing beaded scallop
Round 35 :
1 sc in each small loop to firm up the edge and prepare for final ornamentation (approx 150-180 sc depending on runner length)
Round 36 :
Work optional decorative points at each end of the runner: at each terminal scallop work (picot cluster: ch3, sl st, ch3, sl st) three times to form the triangular tip as pictured. This is worked into the very last scallop at both ends and will mimic the end motif's triangular flourish.
Round 37 :
Trim tails and weave in ends using a yarn needle. Use small, even stitches to hide yarn ends inside the lace. For any visible joins, add a tiny decorative bead or French knot in cream at evenly spaced intervals as shown in the photograph.
Info :
Blocking: Wet-block the entire runner (or steam-block) into the desired shape on a flat surface using rust-proof pins. Pin each scallop and leaf to a smooth, even position and allow to dry completely. Blocking sets the lace, evens tension and helps the runner lie flat on the table.
Round 38 :
Optional starburst reinforcement: With a small crochet hook and matching cream thread, tack down the center of each motif to the adjoining motif with 3 discreet embroidery stitches to avoid future shifting. Knot and hide ends inside lace.
Info :
Final inspection: Lay runner flat and inspect for loose ends, uneven joins or floppy scallops; add a few extra surface stitches where needed to tidy the edge. If using beads on berries, ensure they are securely stitched and not a choking hazard if runner will be used around children.
This Cream and Red Peppermint Swirl Table Runner is a festive heirloom that combines delicate lace and playful peppermint swirls to brighten your holiday table. Each motif is portable and meditative to make—perfect for cozy crafting weekends. Pin, block and assemble the motifs for a polished, gift-ready finish. I hope you enjoy every stitch and the warm glow this runner brings to your home! 🎄🧶