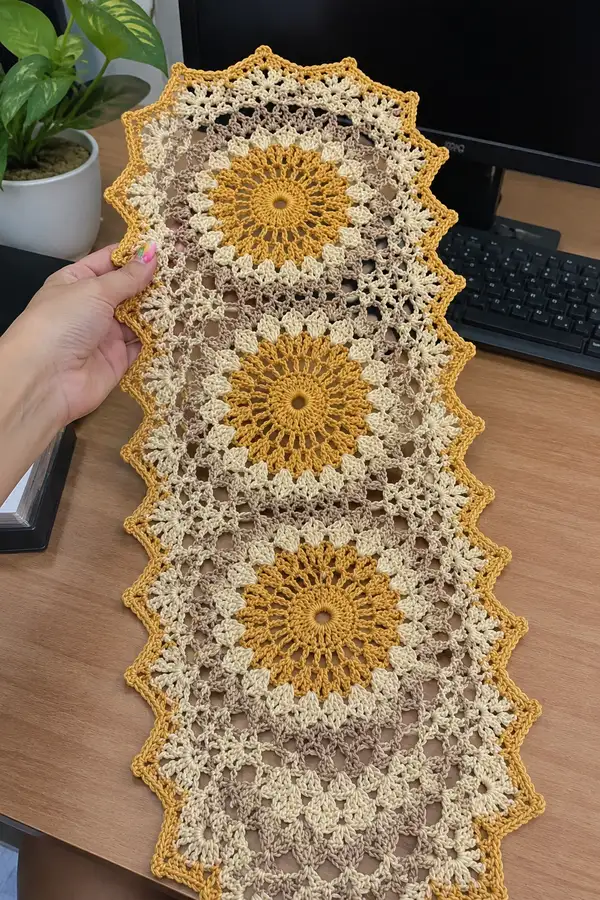
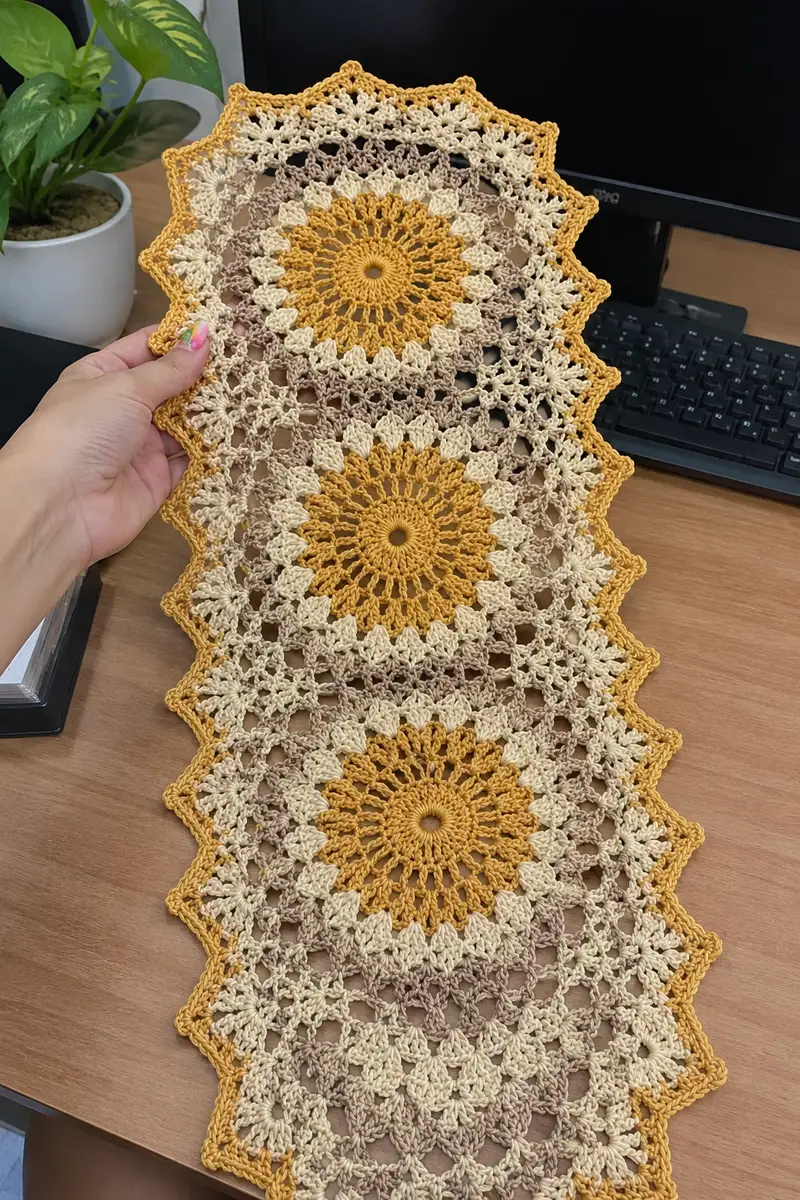
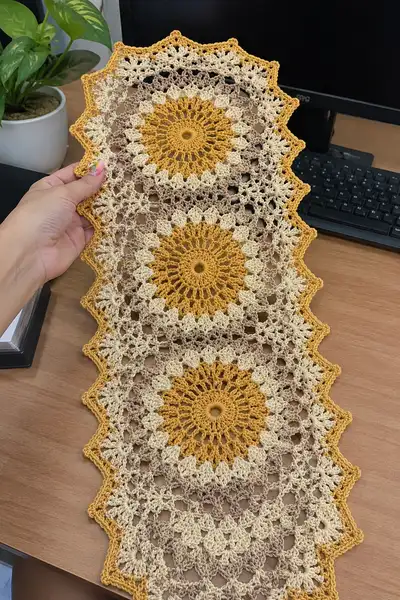
Create a warm, vintage-inspired Golden Sunburst Mandala Table Runner made from three joined sunflower-style crochet mandalas. Rich mustard centers radiate into soft cream and taupe lace rounds, finished with a scalloped golden edging. This runner sits beautifully on a desk or dresser and highlights openwork lace, cluster stitches and a pointed star border.
Progress Tracker
0% Complete
— Materials & Gauge :
Info :
Gauge: one completed mandala motif (center to outer petal point) measures approximately 21-23 cm across when worked in specified yarn and 3.5mm hook. Blocking can change final size slightly. Work a small test motif if uncertain and adjust hook size to match drape and stitch definition.
— Overview :
Info :
This runner is made from three identical sunflower-style mandalas joined with two lace connector panels and finished with a star-point scalloped border. Each mandala is worked in rounds using mustard for center rounds then switching to cream and taupe for lace rounds. After making three mandalas you will join them using a join-as-you-go lace panel, then work a continuous edging around the entire runner. Work tightly for a neat lace look but keep a flexible fabric that lays well.
— Mandala (Make 3) :
Round 1 :
Make a magic ring. Ch3 (counts as dc), 11 dc into ring. Join with sl st to top of ch3. (12 dc)
Round 2 :
Ch3 (counts as dc), 1 dc in same st, 2 dc in each st around. Join with sl st to top of ch3. (24 dc)
Round 3 :
Ch3, 1 dc in next st, *2 dc in next st; repeat from * around. Join. (36 dc)
Round 4 :
Ch3, 1 dc in next 2 sts, *2 dc in next st; repeat from * around. Join. (48 dc)
Round 5 :
Ch3, 1 dc in next 3 sts, *2 dc in next st; repeat from * around. Join. (60 dc)
Info :
These initial increase rounds create a dense, even circular disk for the solid sun center. Check that rounds lie flat; if they ruffle, adjust tension or use a slightly larger/smaller hook.
Round 6 :
Ch3, 1 dc in next 4 sts, *2 dc in next st; repeat from * around. Join. (72 dc)
Round 7 :
Ch1, sc in same st, *ch3, sk 2 sts, sc in next st; repeat from * around to create evenly spaced ch-3 loops for petal anchors. Join with sl st to first sc. (24 ch-3 loops)
Info :
Change to mustard yellow for Rounds 1-6 for a strong center if not already in mustard. Work Round 7 in mustard as well to keep petal foundation cohesive.
Round 8 :
Join cream in any ch-3 loop of previous round with sl st, ch3 (counts as dc), 11 dc into same ch-3 loop, sl st to next ch-3 loop, *ch3, 12 dc in next ch-3 loop, sl st to next ch-3 loop; repeat from * around. (12 dc clusters x 24 loops = note each cluster sits in a ch-3 loop; overall decorative petal look)
Round 9 :
Ch1, sc in same st, *ch3, sk until center of cluster, sc between clusters (working into ch-1 space created by previous sl st anchors); repeat around. Join. (24 ch-3 spaces)
Round 10 :
Ch3 (counts dc), 2 dc in same sp, *ch2, 3 dc in next ch-3 sp; repeat from * around to form raised spokes and small arches. Join. (24 x 3-dc groups)
Info :
At this point the mandala begins to take a sunburst shape. Keep tension even; gently flatten after this round to set the spoke pattern before continuing with openwork lace rounds.
Round 11 :
Change to taupe. Ch3, 1 dc in next st, *ch2, sk 1 dc, 1 dc in each of next 2 sts; repeat around to create alternating chain-spaces and short dc bands. Join. (72 sts diminished into 24 groups with ch2 between)
Round 12 :
Ch1, sc in same st, *(ch5, sc into top of next 3-dc group), repeat around creating large open loops; join. (24 ch-5 loops)
Round 13 :
Join cream in ch-5 loop, ch3, 7 dc in same ch-5 loop (8 dc clusters), sl st to next ch-5 loop, *ch1, 8 dc in next ch-5 loop; repeat. Join. (8-dc clusters x 24)
Round 14 :
Ch2 (counts hdc), hdc in next 3 dc, *ch3, skip cluster join, hdc in next 4 dc; repeat around to form airy mesh. Join. (hdc groups reflecting the underlying clusters)
Info :
Use a stitch marker to mark the beginning of each round in this openwork area because ch-spaces make it easy to lose count. This is a good place to switch between cream and taupe for a tonal lace effect.
Round 15 :
Ch3, dc in each hdc across until you reach a ch-3 space, *(ch2, sk next ch-3, dc in each hdc across next group); repeat around. Join. (This forms elongated mesh windows. Overall stitch count still corresponds to the number of mesh groups: 24)
Round 16 :
Change to cream. Ch1, sc into top of first dc, *ch4, sk 3 dc, sc into next dc center to create chain loops that will become a secondary shell row; repeat. Join. (24 ch-4 loops)
Round 17 :
Join taupe in each ch-4 loop: ch3, 4 dc in loop (5 dc cl), sl st to next loop, *ch1, 5 dc in next loop; repeat. Join. (5-dc clusters x 24)
Round 18 :
Ch2, hdc in next 2 dc, *ch3, sk to next cluster, hdc in next 3 dc; repeat. Join. (hdc groups matching cluster widths)
Info :
At the end of Round 18 you have formed a broader lace ring that will visually and physically join to the next outer mesh. Check that your work lays flat; if slight cupping occurs, block the motif before continuing. Blocking now will help final joining and edging.
Round 19 :
Ch3, dc in next 4 sts, *ch2, sk 1 st, dc in next 5 sts; repeat around to create a band of dc groups separated by ch-2 spaces. Join. (24 groups of 5-dc)
Round 20 :
Ch1, sc in same st, *(ch5, sc into center of next 5-dc group), repeat around to create deep chain petals; join. (24 ch-5 petals)
Round 21 :
Change to mustard for a sunny outer accent. Join with sl st into ch-5 petal, ch3, 11 dc into same petal (12-dc petal clusters), sl st to next petal center, *ch1, 12 dc in next petal; repeat around. Join. (12-dc petal clusters x 24)
Round 22 :
Ch1, sc in same st, *ch3, sc between petal clusters to open lace between petals; repeat. Join. (24 ch-3 spaces)
Round 23 :
Ch3, (2 dc, ch2, 3 dc) into the ch-3 space to form a shell and picot anchor; sl st to next ch-3 space, *(3 dc, ch2, 3 dc) in next ch-3 space; repeat around. Join. (24 shells)
Info :
If you want deeper sun points, increase shells to (4 dc, ch2, 4 dc) in this round but adjust subsequent rounds accordingly. The pattern uses 3-dc shells for a balanced lace look.
Round 24 :
Ch1, sc into center of each shell, *ch4, sc at shell center; repeat to create airy points; join. (24 ch-4 loops)
Round 25 :
Join taupe into each ch-4 loop: ch3, 7 dc in loop, sl st to next loop; *ch1, 7 dc in next loop; repeat. Join. (7-dc clusters x 24)
Round 26 :
Ch2, hdc across groups as follows: hdc in next 3 dc, *ch3, hdc in next 4 dc; repeat around. Join. (hdc groups matching clusters)
Round 27 :
Ch1, sc in top of first hdc, *(ch3, sc between cluster groups) repeat around; join. (24 spaces)
Round 28 :
Change to mustard. Ch1, sc in same st, *(5 dc cluster worked across the ch-3 space: join 5 dc into space), sl st to next sc; repeat to create small pointed star anchors; join. (24 small star clusters)
Round 29 :
Ch3, dc in each dc across until star cluster, *(ch2, 3 dc in cluster top), continue around smoothing the transition; join. (count corresponds to number of small clusters and the dc bands: 72 approx)
Round 30 :
Ch1, sc around entire round placing 3 sc into the top of each star cluster point and 1 sc in other dc groups to create a firm foundation for the final scalloped edge. Join. (approx 96 sc - the stitch count depends on how many points but is calculated to put 3 sc in each point)
Info :
Fasten off and weave in ends leaving a tail of about 25 cm for seaming if you plan to seam by hand. Block each mandala flat and pin points into crisp star shapes before moving to joining instructions. Blocking will open lace and even the motif size so joining rows match accurately.
— Lace Connector Panels / Join-As-You-Go (Make 2) :
Info :
The runner connects three mandalas vertically using two rectangular lace connector panels worked in situ between mandalas. You can either join completed mandalas by sewing or use JAYGO (join-as-you-go) in the panel rounds described below. Each connector consists of multiple mesh rows that align to the mandala mesh openings.
Connector Round 1 :
With cream yarn, ch 32 (or chain length matching distance between mandala edges after blocking); turn, sc in 2nd ch from hook and in each ch to end. (31 sc)
Connector Round 2 :
Ch3, dc in next 2 sc, *ch3, sk 2 sc, dc in next 3 sc; repeat across to create mesh foundation; end with dc in last 2 sc; turn. (mesh repeats approx 6-7 depending on ch count)
Info :
Place the connector so its top row will align with a corresponding ch-space on the mandala edge. If working JAYGO, when you reach the column that meets the mandala, join with sl st into the mandala ch-space and continue working across. This allows one continuous join without later sewing.
Connector Round 3-6 :
Repeat mesh pattern: ch3, dc groups separated by ch3 spaces across; turn. Keep 4 rounds to build a tall enough lace panel so the motifs sit with an elegant openwork between them. (Maintain consistent repeats each row)
Connector Round 7 :
Ch1, sc across entire row inserting sc into ch-3 spaces and dcs to create solid edging for later joining to the second mandala; fasten off and weave ends. (Even sc edge)
Info :
When joining two mandalas, align and pin both mandalas and the connector panels. Using the long tails left from motifs or whip stitch with matching yarn, sew along the sc edges so the three panels form a continuous runner. If you prefer seamless JAYGO, follow the JAYGO instructions during the last lace round of each mandala and the connector rounds to sl st directly into the adjacent mandala's ch-space.
— Alternative Join-As-You-Go Method (Detailed) :
Info :
Place 1st mandala on flat surface. Prepare the connector chain length and begin mesh row as described. For the row that meets the top of the 2nd mandala, when you reach the point of attachment, insert hook into the matching ch-space of the second pre-blocked mandala and sl st to join, ch1 and continue the mesh row on the connector piece. Proceed to finish connector row and continue next rounds. Repeat on the other side for the second connector between mandala 2 and 3.
— Continuous Star-Point Edging (All-Around) :
Info :
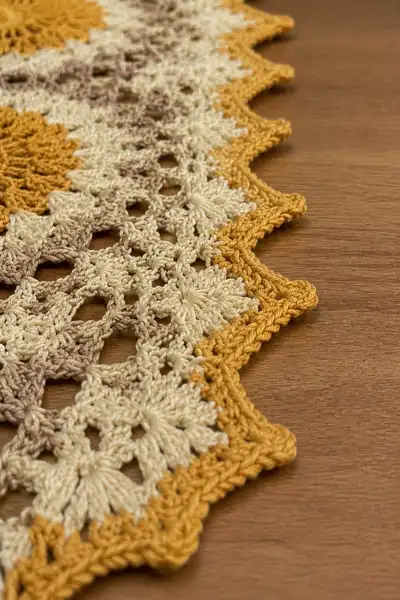
Once mandalas are joined and connector panels are in place, work a continuous edging around the outside perimeter. The edging is worked in mustard and creates the pointed star scallops visible in the photos. Work a full round of single crochet around the outer edge to create a stable base for the star points.
Edge Round 1 :
With mustard, join anywhere on the outer round; ch1, work 1 sc in each st and into chain spaces around entire runner perimeter. When you hit the junctions (corners where mandalas meet connector), place 2 sc into the seam to maintain an even edge. Join. (stitch count will equal total outer stitches; approximately 360-420 sc depending on motif size and seam choices)
Edge Round 2 :
Ch3, *skip 2 sc, (3 dc, ch2, 3 dc) in next sc (this forms a star point shell), skip 2 sc, sc in next sc; repeat around. Join. (one shell per mandala point and per connector corner; number of shells depends on outer points - aim for equal spacing so shells line up with mandala outer petals)
Edge Round 3 :
Ch1, sc into the shell top, *ch3, sc at base between shells to create small loops; repeat. Join. (sc anchors and ch-3 loops for final points)
Edge Round 4 :
For each ch-3 loop: join with sl st, ch3, 4 dc into loop, picot (ch3, sl st into top of last dc) if desired for a decorative point, sl st into next sc. Repeat around to work a defined point at each star location. Join and fasten off. (Final points equal number of shells from Round 2)
Info :
If you prefer a subtler scallop, work (5 dc shells) instead of (3 dc-ch2-3 dc). For a more pronounced point, work (4 dc-ch2-4 dc). Adjust stitch counts and ensure Edge Round 1 sc count accommodates your chosen shell spacing.
— Detailed Point Formation (optional deeper star tips) :
Edge Round 5 :
Ch1, sc into first shell top, *ch5, sc into shell top to create extended loop; repeat around for extended picot loops. Join. (creates deeper pockets to form longer star tips)
Edge Round 6 :
Join mustard into ch-5 loop: ch3, 9 dc into loop, sl st to base, *ch1, repeat around. Join and fasten off. This produces a deeper, more prominent star detail and is optional depending on how pointy you want the runner edge to be.
Info :
After edging, perform a final blocking session. Pin each star point to dimension and steam or wet-block carefully per yarn manufacturer's instructions. Blocking is crucial to obtain the crisp points and flat lace visible in the images.
— Finishing Touches & Weaving Ends :
Info :
Weave in all tails on the wrong side using a yarn needle and hiding ends under worked bars so they do not show on the surface. Trim ends flush. If any points feel loose after blocking, reinforce with a few close whip stitches at the shell bases on the wrong side.
Care Instructions :
Wash gently by hand in warm water with mild soap and reshape while damp. Lay flat to dry. Avoid machine washing or drying to preserve fibers and blocking shape.
Final Notes :
This pattern is intentionally modular: make more mandalas to scale up to a larger runner, or decrease motif counts for a shorter table piece. Colors can be changed at the start of any round; carry color inside if you plan to hide floats or fasten off at each change for a cleaner reverse side.
Your Golden Sunburst Mandala Table Runner is more than a practical accent — it's a handmade statement piece that warms any space. The layered sunflower centers and delicate lace panels combine to create a balanced vintage-modern look. Blocking and careful joining turn three round motifs into a long, elegant runner that will catch compliments and coffee rings alike. 🧶✨ Display it proudly or gift it to someone who loves thoughtful handmade decor. Happy stitching! 🌻