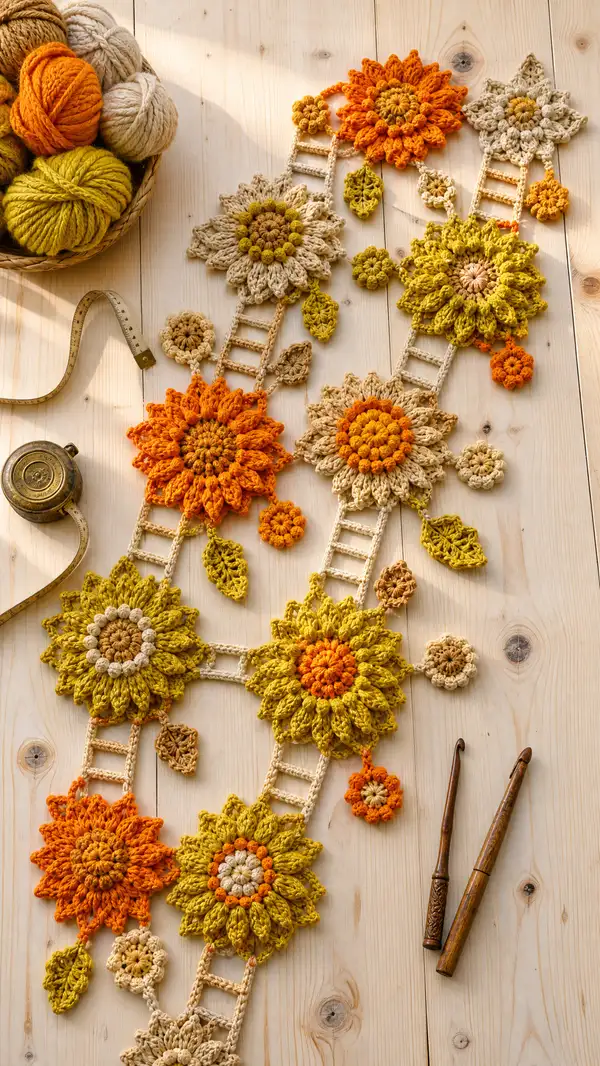
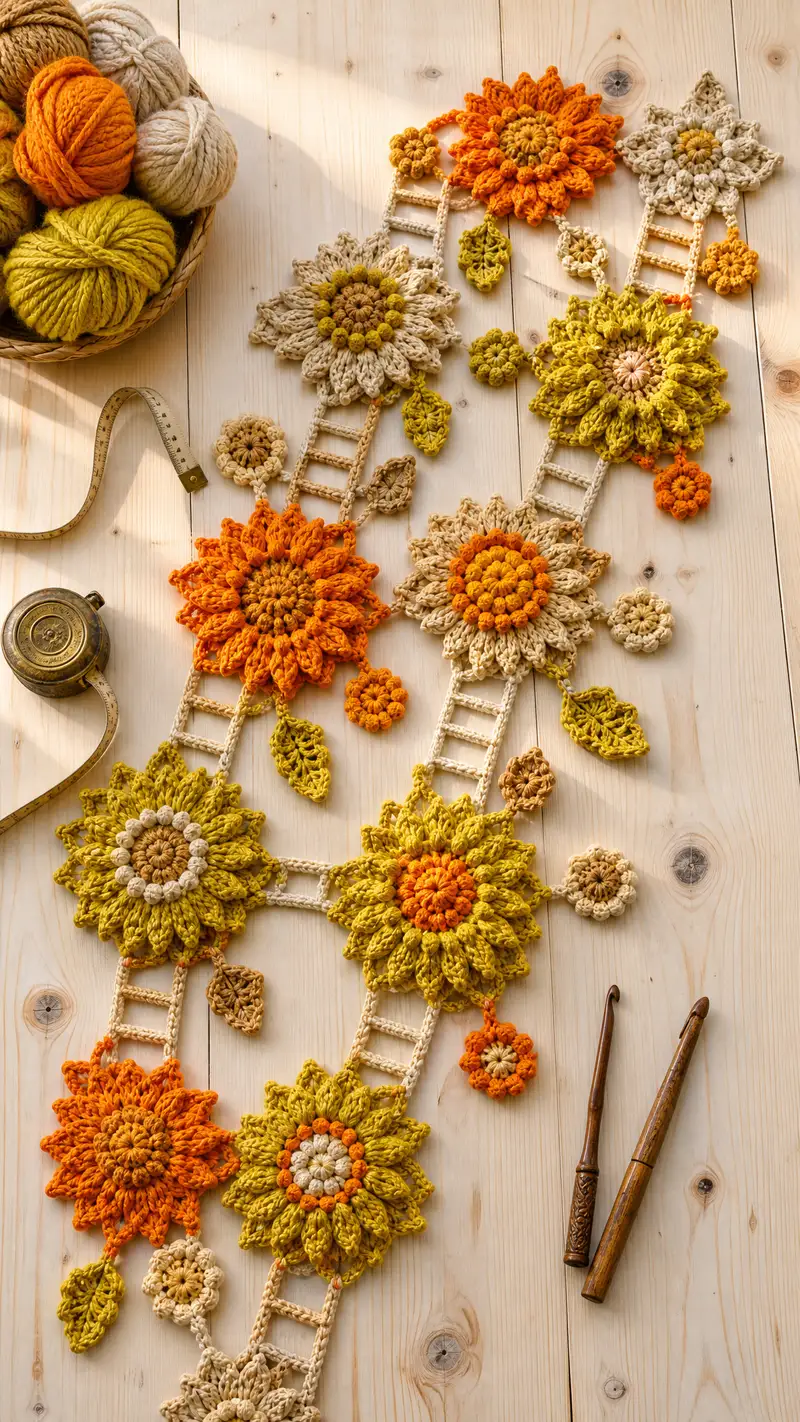
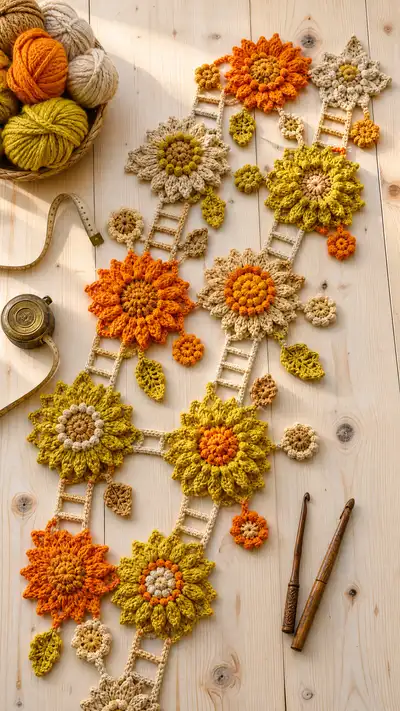
Bring warm sunflower fields to your table with this Golden Sunflower Garland Table Runner pattern. The design features layered sunflower motifs, tiny cluster blooms, and leafy connectors in rich autumn tones of gold, mustard, orange and oatmeal. Each motif is crocheted individually and joined with decorative ladder connectors to create a flowing, organic runner. The pattern includes step-by-step motif instructions, joining guidance, and finishing tips to create a beautiful seasonal centerpiece.
Progress Tracker
0% Complete
— Project Overview :
Info :
This runner is modular: you will make multiple Large Sunflower Motifs, several Small Rosette Motifs, Leaves and Ladder Connectors. Motifs are worked flat in rounds and joined using chain ladders and slip-stitch joining. Follow gauge suggestions, keep tension consistent, and block motifs before assembly. The pattern below details one Large Sunflower Motif, one Small Rosette Motif, one Leaf, Ladder Connector and Join/Edging instructions. Make the quantities shown or customize layout.
— Stitch & Technique Info :
Info :
Puff stitch: yarn over, insert hook, yarn over, pull up a loop (repeat 2-3 times to accumulate 3-4 loops), yo and pull through all loops on hook, ch1 to close puff. Popcorn: work 5 dc in same st, remove hook, insert into first dc, pull through loop to form popcorn; ch1 to secure. Use US terms. Maintain consistent tension for flat motifs.
— Large Sunflower Motif (Make 6-8) :
Round 1 :
6 sc in magic ring (6)
Round 3 :
(1 sc, 1 inc) x 6 (18)
Round 4 :
(2 sc, 1 inc) x 6 (24)
Round 5 :
(3 sc, 1 inc) x 6 (30)
Round 6 :
(4 sc, 1 inc) x 6 (36)
Round 7 :
(5 sc, 1 inc) x 6 (42)
Round 8 :
(6 sc, 1 inc) x 6 (48)
Info :
Work these foundation rounds tightly to give a solid center. Keep stitch marker in first stitch of each round to track rounds. If your center sits cupped, block lightly; it should lie flat before adding decorative texture.
Round 9 :
1 sc in each st around (48)
Round 10 :
(1 sc, 1 puff in next st) x 24 (48)
Info :
Make a medium puff: yo, insert hook, pull up loop, repeat 2 more times for 3 loops total then yo and pull through all loops, ch1 to secure. Each puff 'consumes' a single stitch as an anchor, so this pattern keeps count at 48.
Round 11 :
1 sc in each st around (48)
Info :
Change to your petal color now (Golden Yellow or Orange). We will create petal base loops by grouping the 48 stitches into 12 petal anchors. Each petal will be anchored across 4 stitches so plan spacing carefully with stitch markers if helpful.
Round 12 :
(3 sc in next 3 sts, ch4, sl st in next st) x 12 — work evenly to form 12 ch4 loops around (48 sts used for anchors)
Info :
Each group uses four stitches (3 sc + sl st) so 12 groups use 48 stitches total. The ch4 loops will form the base for the large sculpted petals; keep loops consistent size by holding same tension on chains.
Round 13 :
Work petals into ch4 loops: *(sc, hdc, 3 dc, hdc, sc) in ch4 loop; sl st in next sl st anchor* x 12 (no change in base count)
Info :
Petal profile: sc and hdc smooth the base, 3 dc create the full petal height. Work petals loosely to maintain a gentle curve; petals should stand up slightly from the center.
Round 14 :
1 sc in each anchor stitch and around petals base (48)
Round 15 :
(1 sc, 1 puff in next stitch) x 24 (48)
Info :
This second puff round (worked between petals) builds a ring of small bobbles to mimic the seed/inner petal row. Keep puff height consistent; ch1 after each puff. Check that petals remain evenly spaced.
Round 16 :
1 sc in each st around (48)
Round 17 :
Join additional petal layer: *(ch5, sl st into tip of previous petal (top of 3 dc), sl st into next anchor) x 12 — creates ch5 loops for second petal layer
Round 18 :
Work second-layer petal into each ch5 loop: *(sc, hdc, 5 dc, hdc, sc) in ch5 loop* x 12 (petals attached to existing motif)
Info :
Second-layer petals are slightly taller (5 dc) to produce a full, layered flower. Make sure each petal is worked into its ch5 loop — do not pull too tight at the base, allow the petal to fan out.
Round 19 :
1 sc in each anchor/space around second layer (48)
Round 20 :
(1 sc, 1 tr cluster over next 2 sts) x 12 (48)
Info :
Tr cluster detail: Work a 3-tr cluster decreasing into one top (yo, insert, pull up loop, yo pull through 2 loops) for each of three times then yarn over and pull through remaining loops to form cluster. This gives texture at petal bases.
Round 21 :
1 sc in each stitch around (48)
Round 22 :
Edge the petals with slip-stitch picots: *(sl st, picot (ch3, sl st into base), sl st) across top of each petal cluster* x 12 (work evenly)
Info :
Picots soften the petal tips and add a delicate lace look. If picots make edges too pointy, work a small sc instead (sc in ch3 loop).
Round 23 :
Working around base: 1 sc in each stitch to tidy edges and anchor decorative loops (48)
Round 24 :
Optional: Add an outer small lace round: *(ch4, sl st into next anchor) x 12 to create decorative loops for joining later*
Info :
If you plan to join motifs with ladder connectors, leave the loops or work a small chain tab now at predictable intervals (every 4th petal) so connectors can be attached consistently.
Round 25 :
Weave a tidy finish: 1 sc in each st around to stabilize outer loops (48)
Round 26 :
Optional accent ring: change to Mustard yarn. *(1 sc, ch2, sk 1) x 24 to create subtle ring pattern* (48 anchor points)
Info :
Accent ring gives a halo effect in a contrasting tone. Carry color across the back if you want to avoid too many ends; otherwise fasten off and weave in tails now.
Round 27 :
Change back to main petal color. 1 sc in each st around (48)
Round 28 :
Finish outer petals with (sc, hdc, 3 dc, hdc, sc) worked into picot loops from round 22 or into ch4 loops made earlier to form outer-most decorative petals (12 petals)
Round 29 :
1 sc in each stitch around the very outer edge to tidy and even shape (count varies visually but maintain anchors = 48)
Round 30 :
Optional: Add tiny cluster accents between petals: *(ch2, pop (5 dc popcorn) into space, sc) x 12* — these are decorative and optional
Round 31 :
1 sc in each st around for stabilization (48)
Round 32 :
Fasten off leaving long tail for sewing if motif will be joined or for weaving if used singly
Info :
Block each motif flat while slightly stretching petals outward so the motif abstains a uniform shape. Weave in ends neatly into the back using a yarn needle. Make the number of large motifs desired for your runner (6–8 shown in the photo).
— Small Round Rosette Motif (Make 8-12) :
Round 1 :
6 sc in magic ring (6)
Round 3 :
(1 sc, inc) x 6 (18)
Info :
This small rosette acts as a filler bloom between larger flowers. Keep rounds tight to produce a compact, puffed look.
Round 4 :
(2 sc, inc) x 6 (24)
Round 5 :
1 sc in each st around (24)
Round 6 :
(1 sc, 1 puff in next st) x 12 (24)
Round 7 :
1 sc in each st around (24)
Round 8 :
Optional petal round: *(ch3, sl st into next st) x 12 to form 12 small loops
Round 9 :
Work small picot petals into loops: *(sc, 3 dc, sc) in each ch3 loop* x 12
Round 10 :
1 sc around to tidy (24)
Round 11 :
Fasten off, weave in ends. Block as needed to match motif size.
Info :
Make many small rosettes to fill gaps between large sunflowers. They add dimension and color contrast when placed on the runner.
— Leaf Motif (Make 12-16) :
Round 1 :
Ch 6, starting in 2nd ch from hook: 1 sc, hdc, 2 dc, hdc, sc — turn to work back along opposite side: sl st into same base, sc, hdc, dc into base to create a small leaf shape. Fasten off (worked flat)
Info :
This short leaf is crocheted in a small chain boat and then mirrored back for an even leaf. For a more sculpted leaf, use front post stitches on the lower rounds or add a midrib with surface slip-stitch embroidery later.
Alternate Leaf (Textured) :
Ch 8. Row 1: in 2nd ch from hook sc, hdc in next, dc in next 2, hdc, sc. Row 2: ch1, turn and work along opposite chain edge: sc, hdc, dc in corresponding sts to form symmetrical leaf. Fasten off and shape with blocking.
Info :
Use Olive Green or a muted Mustard for leaves. Make several small and a few medium leaves to scatter along the runner for realism.
— Ladder Connector (Make multiple to join motifs) :
Info :
Ladder connectors create a vintage ladder look between motifs. They are chains of evenly spaced bars made by working sc posts and chain ladders. Make many in oatmeal/natural color to match the sample.
Round 1 :
Ch 30 (or desired length for a connector approximately 9–10 cm); sc in 2nd ch from hook and in next 2 ch (3 sc)
Round 2 :
Turn, ch1, sc in same 3 sts, ch6, skip 6 ch, sc in next 3 sts across — this creates the first ladder bar and spaces for rungs
Round 3 :
Turn, ch1, sc in first 3 sts, *(ch3, sl st into ch-sp across from previous row to make a rung, sc in next 3 sc) repeat across until end*
Info :
To create evenly spaced ladder rungs, count ch-spaces carefully and work sl st rungs across each ch-space. If your connector needs to be shorter or longer, adjust starting chain length. Keep edges tidy with sc rows at ends to provide stable sewing edges.
Round 4 :
Work an edging of 1 sc around both long edges of the ladder connector to stabilize for joining. Fasten off and weave ends.
— Joining Motifs & Layout :
Info :
Plan your runner layout on a flat surface. The sample photograph arranges alternating large sunflowers connected by ladders, with small rosettes and leaves arranged between and hanging from petal tips. Pin motifs in place before joining.
Join Step 1 :
Position ladder connector between two motifs where you left an outer loop or anchor. Using the long tail of the motif or a contrasting joining yarn, sew ladder ends to motif loops with a whip stitch through several anchor loops for a secure join. Repeat for all connectors.
Info :
If you prefer, crochet a short chain tab on the motif edge to slip-stitch the ladder directly into place to avoid sewing. For a neater join, use mattress stitch with the yarn tail and hide ends inside motif back.
Join Step 2 :
Sew small rosettes and leaves onto motifs and connectors with small invisible stitches. Place rosettes to fill gaps and leaves to hang naturally from petal tips.
Info :
For symmetry, note the motif round numbers where you fastened off or left loops—these are the best anchor points for connectors so that joins sit flat and neat.
— Border & Finishing Touches :
Round 1 :
Once all motifs are joined, work a neat border along the entire runner edge: 1 sc evenly around all exposed edges (work into anchor loops and connectors) to unify look
Round 2 :
Optional crochet lace edging: *(sc, ch3, sc) into every 3rd sc across to form a scallop pattern — repeat along whole edge*
Info :
Blocking now will set the shape of the entire runner. Lay runner on a blocking board or padded surface, pin outer-most petal tips outward to match photo spacing, and spray lightly with water or steam. Allow to dry fully before unpinning.
Final Step :
Weave in all ends on the back side, trim any excess yarn and check joins for security. Add a tiny dab of fabric glue to very small knots if desired for extra security (undoable if you want to launder later, so use sparingly).
Info :
Gently hand wash runner if needed in cool water and lay flat to dry. Cotton yarn will soften but retain shape well when blocked after washing.
— Quantities & Repeats Suggested :
Info :
Suggested motif counts for runner similar to photo: 6–8 Large Sunflower Motifs, 8–12 Small Rosettes, 12–16 Leaves, and 10–14 Ladder Connectors of varying lengths. You can increase or decrease motifs to fit your table—make extra small rosettes to fill gaps.
Info :
While the pattern above offers in-depth rounds for one large motif and the small/leaf/connector elements, repeat the sections the number of times needed to build the runner length you desire. Always pin and layout motifs before permanently sewing them together to achieve balanced spacing and flow.
This Golden Sunflower Garland Table Runner is a labor of love that brightens any table with layered texture and warm colors. Each carefully crafted sunflower, rosette and leaf comes together to create a lively, handcrafted centerpiece that's perfect for seasonal decor or special occasions. Block, assemble and enjoy the rich dimensional details—every petal and puff was made with cozy attention. 🧶🌻 Your finished runner will be a cherished handmade accent that invites compliments and smiles. ✨