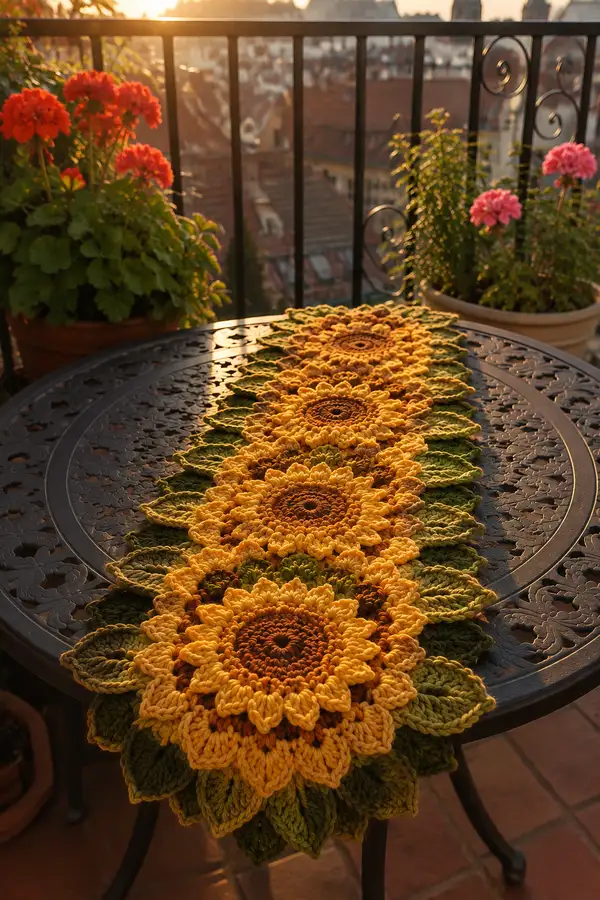
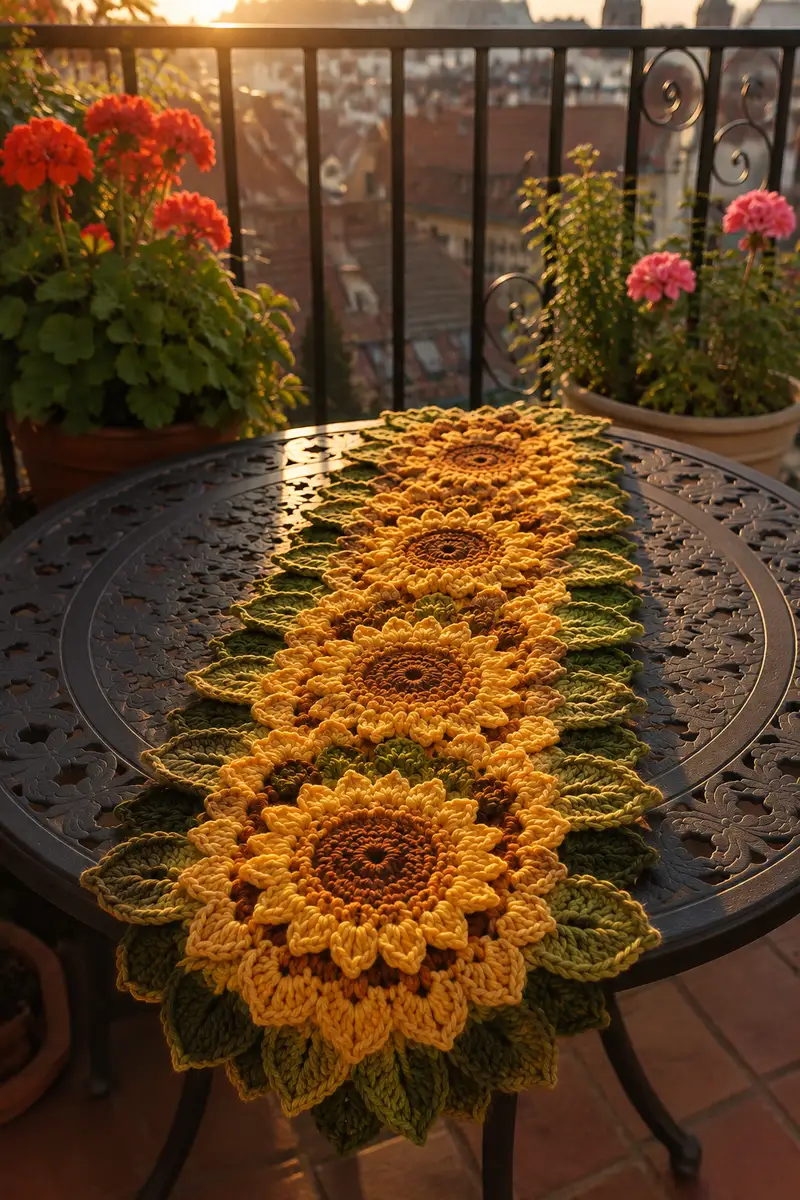
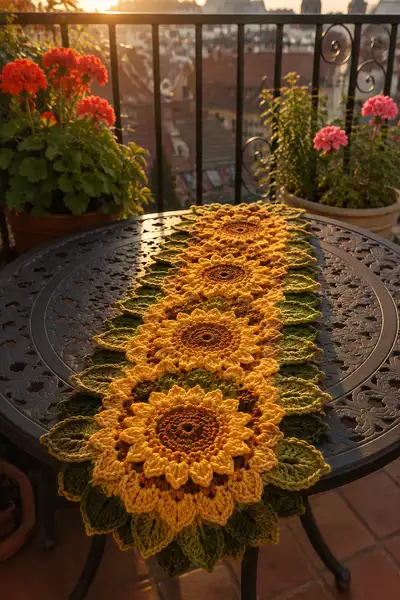
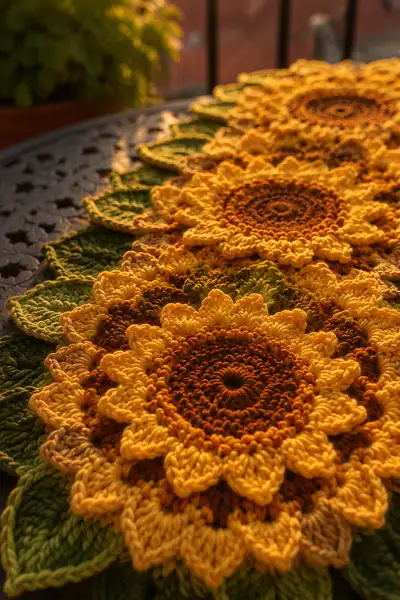
A warm, garden-inspired table runner made from connected sunflower medallions and layered leaves. This pattern guides you through crocheting textured sunflower centers, layered petals and elongated leaves for a richly dimensional runner. Five linked sunflowers form a stunning centerpiece for your table, finished with a neat border and optional blocking for crisp petals. Perfect for bringing autumnal color and handmade charm to your home.
Progress Tracker
0% Complete
— Overview & Gauge :
Info :
Gauge is not critical for this decorative runner, but each sunflower medallion should measure approximately 20-22 cm (8-8.5 inches) in diameter when worked with worsted weight yarn and a 4.0mm hook. Tension and yarn choice will change final size; swatch one motif to confirm size. This pattern makes five medallions linked into a runner approximately 110-120 cm long (43-47 inches). Adjust the number of motifs to change runner length.
— Sunflower Medallion (Make 5) :
Round 1 :
Using deep brown, 6 sc in magic ring (6)
Round 3 :
(1 sc, 1 inc) x 6 (18)
Round 4 :
(2 sc, 1 inc) x 6 (24)
Round 5 :
(3 sc, 1 inc) x 6 (30)
Round 6 :
(4 sc, 1 inc) x 6 (36)
Info :
These first rounds form the sunflower center. Keep stitches tight to avoid gaps showing the table surface through the brown center. If your ring is loose, use a smaller hook (3.5mm) for rounds 1-6 only.
Round 7 :
1 sc in each st (36)
Round 8 :
1 sc in each st (36)
Round 9 :
(4 sc, 1 inc) x 6 (42)
Round 10 :
1 sc in each st (42)
Info :
Round 9 increases the center out to a larger disc that will support the petal foundation. Place marker at start of each round; centers are round and must remain flat.
Round 11 :
Change to golden amber color now. 1 sc in each st (42)
Round 12 :
1 sc in each st (42)
Round 13 :
(5 sc, 1 inc) x 6 (48)
Round 14 :
1 sc in each st (48)
Info :
Switching to golden amber at round 11 gives a soft transition between center and petals. We will create a small decorative ridge at rounds 15-18 that becomes the base for puff petals.
Round 15 :
1 hdc in next 2 sts, *2 hdc in next st, 1 hdc in next 2 sts; rep from * around (56)
Round 16 :
1 sc in each st (56)
Round 17 :
1 sc in each st BLO (56)
Round 18 :
1 sc in each st (56)
Info :
Working round 17 in BLO creates a slight ridge that sits under the base of the petals, giving them lift and separation. Use a stitch marker to ensure petals align evenly around the circle; we will make 12 petals so base repeats should divide to 12 sections (56/12 is not whole, so petals will be anchored on groups of 4 and 5—see petal placement below).
Round 19 :
Change to brighter yellow. Chain 1, *sc in next 3 sts, ch 2, skip 1 st; rep from * around to create small gaps for petal bases (approx 14 gaps). Adjust by spacing to obtain 12 evenly spaced base points. Work 56 sc distributed to create 12 petal anchors (keep counts even).
Info :
If 56 does not divide perfectly to 12, distribute extra single crochets evenly (for example: use a repeat of 4,4,4,5 pattern across sections) so that petals sit symmetrically. Use pins to preview petal placement before working puff petals.
Round 20 :
Prepare to work petal clusters from the base anchors. At each anchor (skipped ch-2 gap or designated anchor st) work the following petal stitch cluster to create tall textured petals: (ch 2, 5-tr puff cluster: yarn over twice for dtr-style puff - insert hook, yo and pull up loop, repeat 4 more times in same st for 5 loops, yo and pull through all loops, ch 2, sl st into same anchor st to close petal). Move to next anchor and rep. Make 12 petals total.
Round 21 :
Fasten off petal base color and join a lighter yellow to the back loop area just behind each petal. Working behind petals in the row beneath: *sc 3 behind petal, 2 sc between petals; rep around to secure petals and tidy base (approx 72 sc)
Info :
This round secures the petals and smooths the base; if preferred, work sc around each petal base individually to emphasize separation. Ensure petals stand upright by pulling gently on the ch-2 tails and weaving them under the base before fastening off.
Round 22 :
Change to very light yellow for petal highlight. Working in front of petals, join in top of one petal and do: *(ch 1, sc in top of petal, ch 1, puff 3 cluster across top of same petal to create a scalloped top) repeat for each petal (12 scallops). Fasten off and weave ends.
Round 23 :
Join golden amber to next round at base between petals. Work 1 sc between each petal and 2 sc in petal stitch tops to add full edging (approx 90 sc). This evens the outer circumference and prepares for a layered petal round.
Round 24 :
1 sc in each st (90)
Info :
At this stage your sunflower should have a defined center and a single layer of raised petals with a flatter round behind them. We will add a second layer of longer petals that sit between and slightly behind the first layer to create fullness.
Round 25 :
To prepare petal anchors for the outer layer, work the following: *sc 5, skip 2; rep around. Count should give approximately 30 anchor points. We will select every third anchor to make 10 larger outer petals to complement 12 inner petals. Adjust spacing visually so outer petals sit evenly.
Round 26 :
Change to mid-gold. At each designated anchor, work a tall petal: (ch 2, 1 dtr, 1 tr, 3 dc in same anchor, 1 tr, 1 dtr, ch 2, sl st into anchor) creating elongated petals. Make 10 outer petals total, spacing them evenly between inner petals. Fasten off each petal base color when complete.
Round 27 :
Working in the round behind outer petals, join darker amber and sc around the base to stabilize (approx 120 sc). Use sc in gaps and 2 sc where petals meet to keep the circumference even.
Round 28 :
1 sc in each st (120)
Info :
Use pins to hold outer petals down and shape them gently outward. If you prefer a denser runner, add an extra hidden round of sc here to broaden the medallion edge.
Round 29 :
Change to light yellow and work a decorative picot edging: *sc 3, picot (ch 3, sl st into first ch), sc 3; rep around to create a gentle scalloped edge outlining petals (approx 120 sc total plus picots)
Round 30 :
Weave in all ends around the medallion back neatly and block this motif flat so petals gently curve outwards. Repeat to make five identical sunflower medallions.
Info :
Each medallion uses a combination of cluster and post stitches to create depth. If you find the outer petals too floppy, steam-block them lightly over a rounded surface or starch lightly. Keep the back tidy because the back will be visible between leaves when joined.
— Leaf Unit (Make 10-12 sets per medallion, adjust as pictured) :
Round 1 :
Using dark olive green, ch 8, sc in 2nd ch from hook, hdc in next, dc in next 2, tr in next 2, dc in next, hdc in next, sl st to first sc to close turn and form a pointed leaf (modification: begin with mr and work symmetrical rounds for a fuller leaf if desired)
Round 2 :
Working around both sides of chain base: sc 3 along first side, hdc 2, dc 3 at tip, hdc 2, sc 3 down other side (approx 16 sts). Sl st to join at base.
Info :
This leaf is worked flat as an oval and later attached around the medallion perimeter to form the leafy border. Leaves should be slightly cupped; don't over-block them flat. Make a pair of leaves in contrasting moss green for each position to create the layered look.
Round 3 :
Change to lighter moss green along center: work 1 sc along base, then (*fpdc around next dc to create vein effect, sc in next) across leaf, ending with 1 sc and fasten off. Total approx 18 sts including fpdc ribs.
Round 4 :
Join darker green at base: reverse sc into base stitch to create a small stem tail for sewing (3 sc). Fasten off and leave long tail for joining. Make 12–14 leaves per medallion depending on spacing—typically one leaf between each outer petal plus a few tucked between petals.
Info :
Alternate leaf colors (olive/moss) and sizes for a natural layered effect. When working the fpdc veins, keep the posts neat to give leaves visible texture from above. Block leaves lightly while damp and pin them in a curved shape for realistic appearance.
— Small Accent Leaves & Fillers (Make many) :
Round 1 :
Make small filler leaves: mr, ch 5, (sc, hdc, dc, hdc, sc) in chain, sl st to mr, fasten off. Make 18–24 accent leaves to tuck between petals and between medallions later.
Info :
These small leaves add visual fullness where medallions meet. Use a lighter green to break up heavy dark green and create a layered, lifelike runner.
— Joining Medallions into Runner :
Info :
Lay out five sunflower medallions in a row on a flat surface, right sides up, spacing them so the outer petal edges just touch. Arrange leaves so they tuck between adjacent medallions producing continuous leafy border. Pin motifs and leaves together before sewing.
Round 1 :
Choose one medallion as center and place a second medallion next to it overlapping outer petals slightly; from the back, use whip stitch to sew through the base round (round 27 area) of both medallions for 8–12 visible connection stitches. Repeat sewing to ensure sturdiness. Use matching thread color for invisible join.
Round 2 :
Sew leaves between medallions: position larger leaves to overlap the join and whip stitch their base tails through both medallion backs. Use 2–3 small stitches to anchor each leaf. Add filler leaves to cover any gaps and to make a continuous foliage border.
Info :
Work from the center outward—join medallions sequentially so tension between joins is even and the runner lies flat. If a seam pulls too tight, unpick and re-position pins before re-stitching. Ensure joins are consistent on both front and back for a neat finish.
Round 3 :
Once the five medallions are securely joined, tack additional accent leaves along the outer edges where needed to make the shape gently scalloped rather than strictly circular.
Info :
At this stage the runner will look like a chain of sunflowers with leaves peeking out. Step back frequently to check symmetry along the central axis and adjust leaf placement until you are satisfied with the flow.
— Outer Border & Edge Rounds :
Round 1 :
With moss green, join at an outermost leaf edge and work 1 sc evenly around the entire runner, working around petal tips and leaf edges to create a consistent border (work extra sc where gaps appear). Total stitch count will vary with your number of leaves—aim for even spacing (approx 350–420 sc).
Round 2 :
1 sc in each st (same count as previous). Use BLO on this round to create a subtle ridge if you want the runner edge to have a rolled border.
Info :
If your stitch count is large and unwieldy, divide the runner into sections and count stitches per section to maintain evenness. It's fine to adjust counts to prevent bunching—scatter increases where needed.
Round 3 :
Work a decorative edging in single crochet and picot: *sc 4, picot (ch 3, sl st into first ch), sc 4; rep around. If your runner has many scallops, reduce picots spacing to sc 2 between picots for a denser edge. Fasten off and weave ends.
Round 4 :
For a stronger rim, work reverse single crochet (crab stitch) around the very outside by working sl st from left to right into previous sc stitches; this gives a rope-like finished edge and stabilizes petals.
Info :
Reverse single crochet can be worked with a slightly smaller hook (3.5mm) to tighten the edge. Take care when working around the tips of tall petals—hold them gently in place with your free hand to keep the edge even.
— Optional Backing & Stabilizing :
Info :
If the runner will be used under heavy objects or in frequent-use areas, consider sewing a lightweight cotton backing or interfacing to the underside to help maintain shape. Cut backing in the same scalloped shape and whip stitch around the edge, hiding stitches in the reverse single crochet row.
Round 1 :
When adding backing, baste the backing fabric to the runner with 1/4" seam allowance, then remove basting and finish with a narrow whipstitch close to the outer edge. This secures the runner while preserving the textured top.
Info :
Backings also protect delicate yarn from dining wear. Use machine-washable cotton backing if you anticipate laundering the runner.
— Finishing & Blocking :
Info :
Wet-block the entire runner by pinning it to a blocking board in its final shape and size. Gently stretch petals outward so they curve naturally. Allow to dry completely—this sets the petals and leaf shape. If you used a colorfast yarn, steam-blocking is also an option to add crispness to petal edges.
Round 1 :
After blocking, trim any exposed ends and weave in tails on the back using a yarn needle. If you added backing, check that the stitches are secure and conceal knots within back stitches.
Info :
Final pressing: use a cool iron under a cloth to flatten any small waviness in petals, being careful not to crush three-dimensional texture. Add light starch for a more rigid decorative runner.
— Alternate Sizes & Customizing :
Info :
To make a longer or shorter runner, change the number of sunflower medallions or alter individual motif diameter by adding or removing increase rounds in the center prior to petal construction. For a placemat set, make single medallions and add a narrow border.
Round 1 :
To reduce motif size, omit rounds 9-11 of the center and work petals on fewer base anchors. To enlarge, add one more increase round (e.g., round 13 to 54 stitches) and increase petal counts proportionally.
Info :
Color variations: use variegated yarn for petals to get tonal depth like the photo, and alternate leaf shades to mimic natural variation. Use a sport or DK yarn with a 3.5mm hook for a slightly smaller, more delicate runner.
This Golden Sunflower Medallion Table Runner brings the warmth of late-summer gardens into your home with layered petals and lush leaves. Each medallion is a joy to make, and joining them becomes a soothing rhythm as the runner grows. The detailed instructions help you shape lifelike petals and sturdy joins for a lasting heirloom piece. 🧶🌻 Display it proudly on your table and enjoy the sunshine it brings indoors. Happy stitching! ✨