About This Granny Square Pocket Bottle Holder Pattern
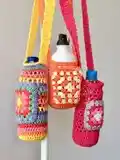
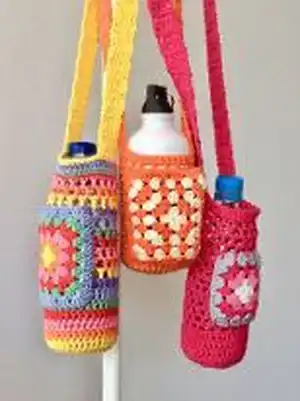
This pattern creates a crocheted bottle holder with a long strap and an optional phone pocket made as either a solid-colour panel or a granny square pocket. The body uses a solid base that transitions into a stretchy netting section to hold bottles securely while allowing some flexibility. The pattern is quick to make and easy to personalise with stripes, colours, and pocket styles.
Includes complete instructions for the bottom, netting body, strap methods, granny square pocket and plain pocket. Suitable for upper-beginner crocheters who know basic stitches.
Why You'll Love This Granny Square Pocket Bottle Holder Pattern
I absolutely love this pattern because it combines practicality and style – it creates a truly useful accessory you can use every day. I enjoyed designing the simple netting section that stretches just enough to hold different bottle sizes while still looking neat. I love that you can personalise it with bright stripes or a vintage granny square pocket for a pop of colour. Making several for friends as festival gifts is one of my favourite ways to share handmade joy.
Switch Things Up
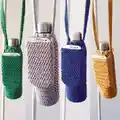
I love experimenting with colour—try making the netting in a neutral main colour and add bright contrasting stripes or a multicolour granny square pocket for instant visual interest.
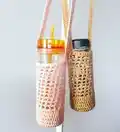
You can change the size by using different yarn weights and hook sizes; a bulkier yarn and larger hook will give a chunky, cosy holder while a finer yarn makes a sleek mini version.
If you want a non-stretch strap, use Method 2 and crochet the handle horizontally, or add a fabric or ribbon reinforcement under the strap to prevent stretching over time.
For a more secure phone pocket, add a metal snap or a small button and loop on the pocket top so the phone cannot fall out when moving about.
I sometimes line the pocket with lightweight fabric for extra structure and to stop sharp phone edges from stretching the crochet stitches.
Swap the granny square pocket for a small zippered pouch if you prefer secure storage for cards and keys instead of a phone pocket.
Make mini versions as keychain bottle holders using thinner yarn and a small carabiner clip to attach to bags or belt loops.
Add decorative edging or scallops around the pocket or top of the holder for a feminine touch, or keep it simple and modern with crisp single-colour finishing rows.
Try using recycled cotton or t-shirt yarn for an eco-friendly, sturdy holder that works well for heavier bottles and everyday use.
I often stitch a small label or embroidered initial on the pocket to personalise gifts—it's an easy way to make each holder feel special.
Common Mistakes & How to Fix Them
✗ Not checking gauge before starting can result in a holder that is too loose or too tight; always make the small base and measure it on your bottle to ensure a snug fit and adjust hook size if necessary.
✗ Skipping the magic loop tightening can leave a loose hole at the bottom; pull the magic loop securely and weave in the tail to close the base neatly.
✗ Adding too many increases in early rounds will make the body too wide and loose; follow the increase counts exactly and check the diameter on your bottle after rounds 4-6.
✗ Making the strap without measuring stretch will result in an uncomfortable length; measure across your body and allow for stretching, or use Method 2 (horizontal handle) to reduce stretch and sew on firmly.
✗ Sewing the pocket on without pinning can make it crooked; place the pocket between the straps, pin or hold it straight, then sew around three sides for an even finish.
✗ Forgetting to leave a long tail for sewing the pocket and strap makes finishing difficult; always leave a long tail when you complete a pocket or strap to sew neatly onto the body.