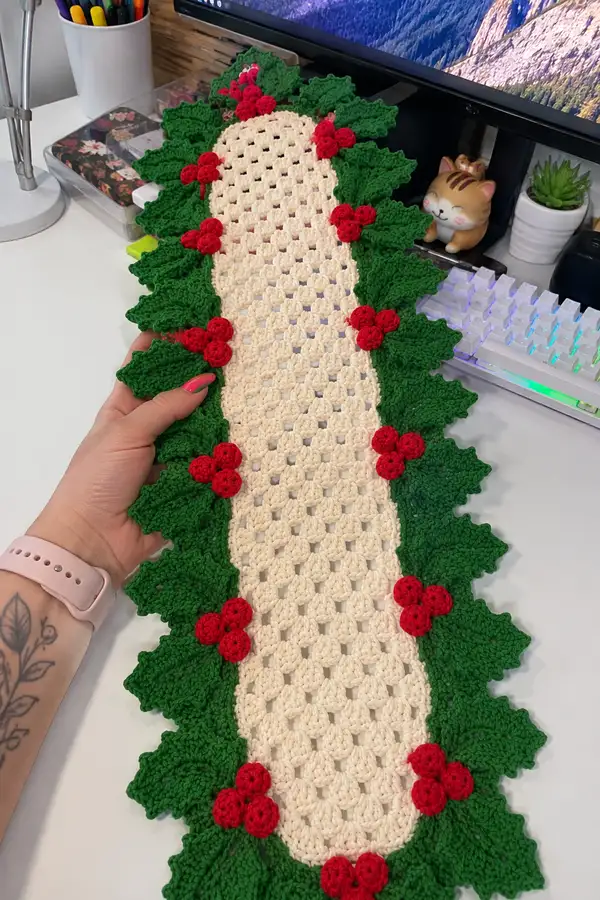
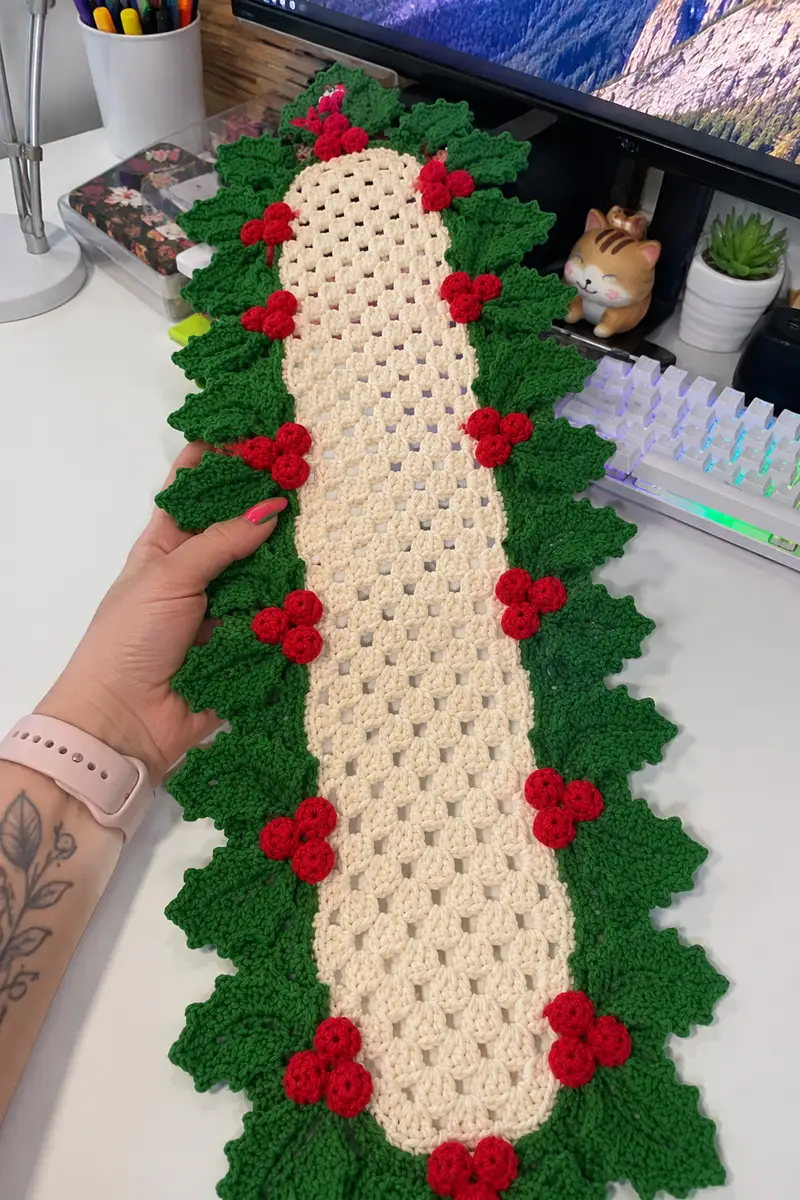
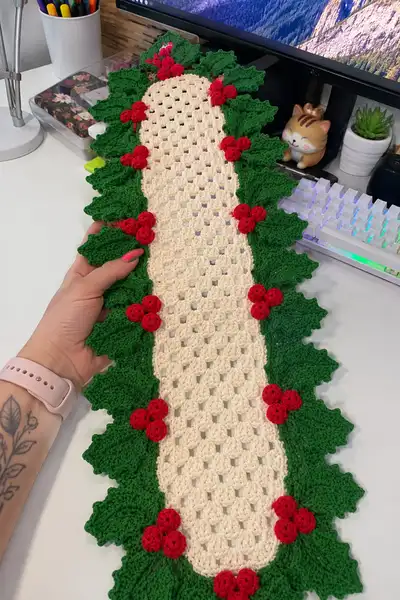
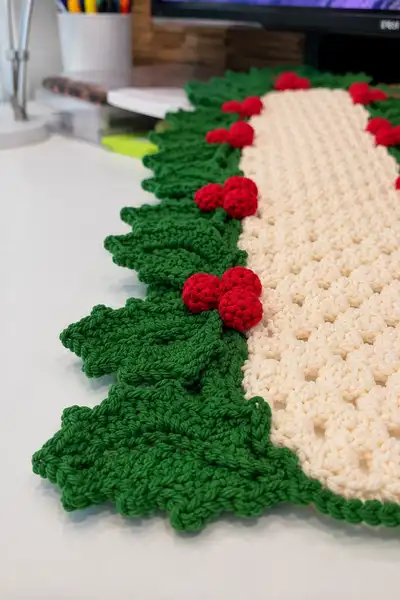
A festive, hand-crocheted table runner featuring a cream granny-mesh center framed by sculpted holly leaves and clustered red berries. This runner blends classic granny stitch texture with bold holiday edging to create an elegant seasonal accent. Works up flat and is customizable in length — perfect for centerpieces, mantels, or side tables.
Progress Tracker
0% Complete
— Materials & Gauge :
Info :
Suggested gauge: 16 stitches and 12 rows of the mesh pattern = 4in (10cm) using worsted weight yarn and 4.0mm hook. Gauge is not critical for a decorative runner, but matching gauge helps ensure leaf scale matches the center panel. Measurements shown assume above gauge.
— Central Mesh Panel (work flat as a long strip) :
Round 1 :
Foundation: Ch 39 (this foundation determines width – increase or decrease by multiples of 3 to change runner width). Leave a 6in tail if you want to add a folded hem later (39)
Round 2 :
Row 1: Dc in 4th ch from hook (counts as first dc), *ch1, skip next ch, dc in next ch; rep from * across to last 2 chains, ch1, dc in last ch. Turn. This establishes a series of dc separated by ch-1 spaces. Treat each dc + ch-1 as one mesh unit. Approx equivalent stitch count: 13 x 3-dc clusters across (mesh repeat)
Round 3 :
Row 2: Ch3 (counts as dc), *dc into ch-1 sp from previous row, ch1, dc into same ch-1 sp (this makes clusters centered in each previous ch-1), rep across to end, dc into top of turning ch. Turn. Maintain 13 cluster positions across (pattern width remains stable)
Info :
To maintain a tidy oval start and end, work the first and last cluster into the turning chains so the edge remains smooth. Place a stitch marker in the first cluster of row 3 to track the beginning of each row if desired.
Round 4-36 :
Row 3-35: Rep Row 3 for length. Work an even number of rows (I worked 34 rows for a medium-length runner). Each row = 13 cluster positions; maintain same sequence: ch3, (dc, ch1, dc) into each ch-1 space across. After Row 36 you will have approximately 36 rows creating the long cream center panel. Adjust to desired length by adding or removing repeats in multiples of 1 row. (mesh width remains: 13 cluster positions)
Info :
Make the central panel as long as you want: each additional row adds roughly 0.25in–0.35in depending on tension. I recommend making a sample of 10 rows, measuring, and calculating required rows for your desired runner length.
Round 37 :
Last mesh row: Work Row 3 one final time, finishing with a tight turning and fasten off leaving a long tail for joining. Block center panel flat to remove curling before attaching leaves. (mesh width remains stable)
Info :
Blocking tip: Pin the mesh to a flat surface, stretching very slightly to square the mesh but not to distort the overall shape. Damp-block or steam lightly keeping steam at distance to avoid melting any synthetic fibers.
— Border Foundation & Edge Row (attach green border to mesh) :
Round 1 :
Join green yarn at one short end corner: With RS facing, join with sl st in the turning ch at end of last mesh row. Ch1, work 1 sc in same stitch, then work 1 sc evenly into each dc and each ch-1 space along the long side of the mesh. Work 1 sc into side of each row (approx 36 side stitches), then 1 sc in each stitch across the opposite short end, then repeat along the second long side, ending with a sl st to join. Approx total sc around = 2 x 13 clusters across + 2 x 36 side sc = approx 100 sc (count will vary slightly with mesh length)
Info :
This row creates a foundation for leaves and evens the raw edge of the mesh. Place markers roughly every 6-8 sc to mark potential leaf attachment points — you will use these markers to decide where leaves align and how many you’ll make.
Round 2 :
Work 1 sc in each sc around for one complete even round. When working across the long sides, work 1 sc into the side of each mesh row to create a firm edge for sewing on leaves later. Sl st to join and fasten off leaving long tail if you prefer to sew leaves on later by whip stitch. (even round)
Info :
If you prefer leaves joined as you go, do not fasten off — use the tail or the working yarn to begin the first leaf now at your first marked attachment point. Otherwise fasten off and work leaves separately and sew them on later.
— Holly Leaf Pattern (Make 16–20 leaves depending on runner length) :
Info :
Make as many leaves as required to fill both sides of the runner. For a medium runner (36 mesh rows) plan on 8–10 leaves per side; leave spacing of about 3–4 mesh rows between leaf centers. The leaf pattern below is written as a single leaf worked flat. Block each leaf lightly to shape before sewing.
Round 1 :
Ch 12, sc in 2nd ch from hook and across to last ch, sc in last ch – working back across opposite side of foundation chain: sc across the other side of the chain to form a base oval. Join with sl st to first sc to create a small ringed strip. Approx st count around = 22 sc.
Round 2 :
Ch1, sc in same st, *ch2, skip 1 st, sc in next st; rep from * around to make scalloped foundation, ending with sc in last st. (this creates base spaces to work the leaf shaping). Approx number of base points: 11
Round 3 :
Ch1, sc in same st, ch1, (hdc, dc, tr, dc, hdc) all in next ch-2 sp to create a central peak; ch1, sc in next sc; rep across to form three main lobes along the leaf length. Turn only if necessary; this rounds shapes peak points.
Info :
We’re forming a pointed leaf with lobes; stitches increase to create fullness. Maintain consistent tension so peaks remain defined and not bulky.
Round 4 :
Along the first half of the leaf (working to the mid point): ch1, sc in first st, *hdc in next st, dc in next, tr in next (peak), dc in next, hdc in next, sc in next; rep until midpoint. This shapes the left side ridge. Count: approximately 11 shaped stitches to midpoint.
Round 5 :
Mirror the sequence for the right half: ch1, sc in next, hdc, dc, tr (peak), dc, hdc, sc to end. Sl st into first sc to close leaf. (leaf around = 22 shaping stitches)
Round 6 :
Edge ridge: With RS facing, join yarn to base edge of leaf with sl st at center base. Ch1, sc in same st, *ch3, skip 1, reverse sc (rev sc) into next for picot-like ridges across the base and sides; rep to end and sl st to join. This gives a scalloped decorative base and provides a firm seam allowance for sewing to the runner.
Info :
For a crisper, more defined leaf edge, try working Rnd 6 in BLO so the edge stands away from the runner slightly. Block leaves pinned flat to accentuate serrated edges.
Round 7-12 :
Optional texture rounds: Work 6 additional rounds of 1 sc in each st around the leaf, working 2 sc in the highest peak stitches to maintain shape where necessary. These rounds create thickness and body so leaves lie flat against the runner. After Round 12 fasten off leaving a 20cm tail for sewing. (leaf approx final edge circumference = 30 sc depending on your working tension)
Info :
Make 16–20 leaves. Place them under the runner to determine the best spacing. Leaves will overlap slightly to create a continuous garland effect. Block each leaf before attaching for best presentation.
— Red Berry (Make 18–24 berries; assemble in clusters of 3) :
Info :
Each berry is a small, tightly worked puff/sphere that looks like traditional holly berries. We will make each berry individually then form clusters of three by sewing them together and attaching the cluster to the junction of leaves along the runner edge.
Round 1 :
Make a small magic ring with red yarn. Ch1, 6 sc in MR. Pull ring tight. (6)
Round 2 :
2 sc in each st around (inc every stitch). (12)
Round 3 :
1 sc in next st, inc in next st - *1 sc, inc; rep around (18)
Round 4 :
1 sc in each st for one round (18) — start stuffing slightly with a small amount of fiberfill to give a rounded shape.
Round 5 :
(1 sc, dec) x 6 (12) — continue stuffing lightly so berry keeps a small, firm ball shape.
Round 6 :
6 dec (6) — close the berry by sewing through remaining stitches with yarn tail and pull tight. Weave in tail and leave a longer tail (~10cm) for sewing the berry to cluster base. Make three per cluster and sew clusters together by stitching through the base of each berry so they sit flush. Fasten off securely.
Info :
Alternative berry: Use 3 tightly worked 6-sc balls without decreases - just close with sl st and sew onto leaf junction for a slightly flatter berry. Use a tiny dab of fabric glue for extra security if the runner will be handled frequently.
— Leaf & Berry Placement Planning :
Info :
Before sewing anything, lay the center panel on a flat surface and place the leaves along each long side. Aim for leaf centers roughly every 3 rows of mesh (approx every 3/4in) – you can vary spacing for a more natural look. Place berry clusters at the junctions where three leaves naturally overlap or where two leaves meet to create balanced visual interest.
Round 1 :
Lay out and pin one side of leaves first from one end to the other, then mirror on the opposite side. Use T-pins to fix leaf bases to the green border foundation or to the mesh stitches — pins should go into the fabric board, not into the yarn edges which can be dented.
Info :
Step back and take a photo from above to check symmetry. Adjust spacing and flip leaves to make the garland flow naturally along the runner edge.
— Attaching Leaves (Sewing with Mattress or Whip Stitch) :
Round 1 :
Use the long tail left from each leaf (or a new length of matching yarn) to sew leaf base to the foundation round along the runner edge. Start at one short end and sew across one long side. Use small whip stitch or mattress stitch into the sl st/sc row along the mesh foundation so the seam is invisible from the top. Sew the base edge and then treat each side edge of the leaf with a few securing stitches into the mesh to prevent lifting. Fasten off securely and weave in ends into the leaf and mesh for a tidy join.
Info :
Make sure leaves overlap slightly — sew the leaf closest to the runner lightly and the overlapping leaf more securely so the seam hides under the next leaf. This creates the layered garland look visible in the photos.
Round 2 :
Repeat this for all leaves on both sides. For a continuous look, stagger leaves left to right: the first on left side at row 3 from end, then on the right side at row 5, then left at row 7 etc. This creates a scalloped silhouette along the runner edges.
Info :
If attaching leaves while the runner is still attached to the hook (working leaves on as-you-go), make sure to work through both the leaf and the border foundation stitches to anchor them securely.
— Attaching Berry Clusters :
Round 1 :
Place three berries together where two or three leaves overlap. Use the berry tail to sew each berry to the others in a triangular cluster — stitch through the base and knot securely. Then anchor the cluster to the runner at the leaf junction with several stitches through the foundation round and into the base of the leaves so the cluster sits snugly into the foliage. Weave in and trim tails.
Info :
Try to position clusters so they sit slightly above the leaf surface, not sunk into it. A few securing stitches into the leaf underside will keep berries in place without damaging the leaf shape. Add clusters to both sides of the runner in a mirrored fashion for symmetry.
— Final Edge Shaping & Decorative Picot Border :
Round 1 :
With green yarn and RS facing, join at any base seam on the long side. Ch1, sc in every st around the runner edge including around leaf tips and berry bases. For leaf tips where you prefer more definition, work 2 sc into the tip stitch. Sl st to join. This unifies the look and gives a structured edge for the final decorative round.
Round 2 :
Decorative picot row: Ch1, *sc in next 2 st, picot (ch3, sl st in 3rd ch from hook), sc in next 2 st; rep around. In tight corners or dense leaf peaks, replace picot with sc to avoid bunching. Sl st to join and fasten off. Weave ends into the underside of leaves and mesh.
Info :
Picot spacing creates that tiny scalloped finish you see in the photos. If you prefer a simpler finish, use reverse single crochet (crab stitch) around instead to create a twisted rope edge.
— Final Blocking & Finishing :
Round 1 :
Lightly mist the entire runner with water and pin it to shape on a blocking board, paying attention to leaf points and berry clusters. Pin each leaf gently at the base and at the outermost tip to keep the serrated edges open. Allow to dry completely.
Info :
After blocking, remove pins and touch up any loose stitches. Weave in all remaining ends securely on the underside of the runner. Trim tails flush but not too close — leave a tiny inch woven in to avoid pull-through if the runner is washed.
Round 2 :
Optional: For extra stability if this runner will be placed on a high-traffic table, consider adding a lightweight interfacing or felt backing cut to runner dimensions and hand-sewn to the underside. This prevents stretching and protects delicate stitches from wear.
Info :
Care instructions: Hand wash in cool water with gentle detergent. Reshape while damp and dry flat. Iron on low with pressing cloth if necessary but avoid direct high heat on acrylic yarns.
This holly-and-berry table runner is a charming seasonal addition that combines texture, color, and thoughtful finishing to create a piece that feels both handmade and heirloom-quality. Each leaf and berry adds a touch of festive cheer, and the pattern is flexible so you can make it longer, shorter, or scaled to match any table. Enjoy the satisfaction of turning simple stitches into a joyful holiday accent — and don’t forget to share your creation with friends and family! 🎄🧶