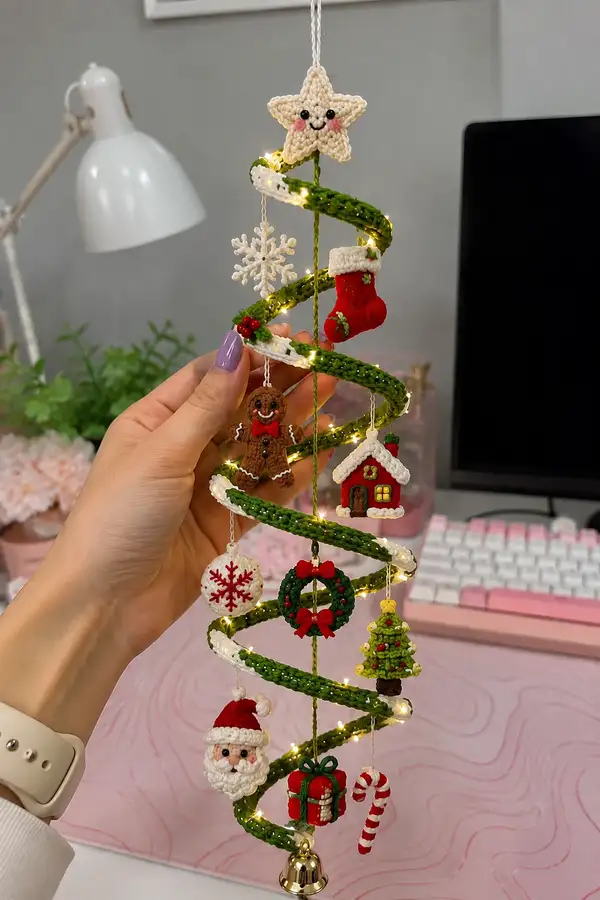
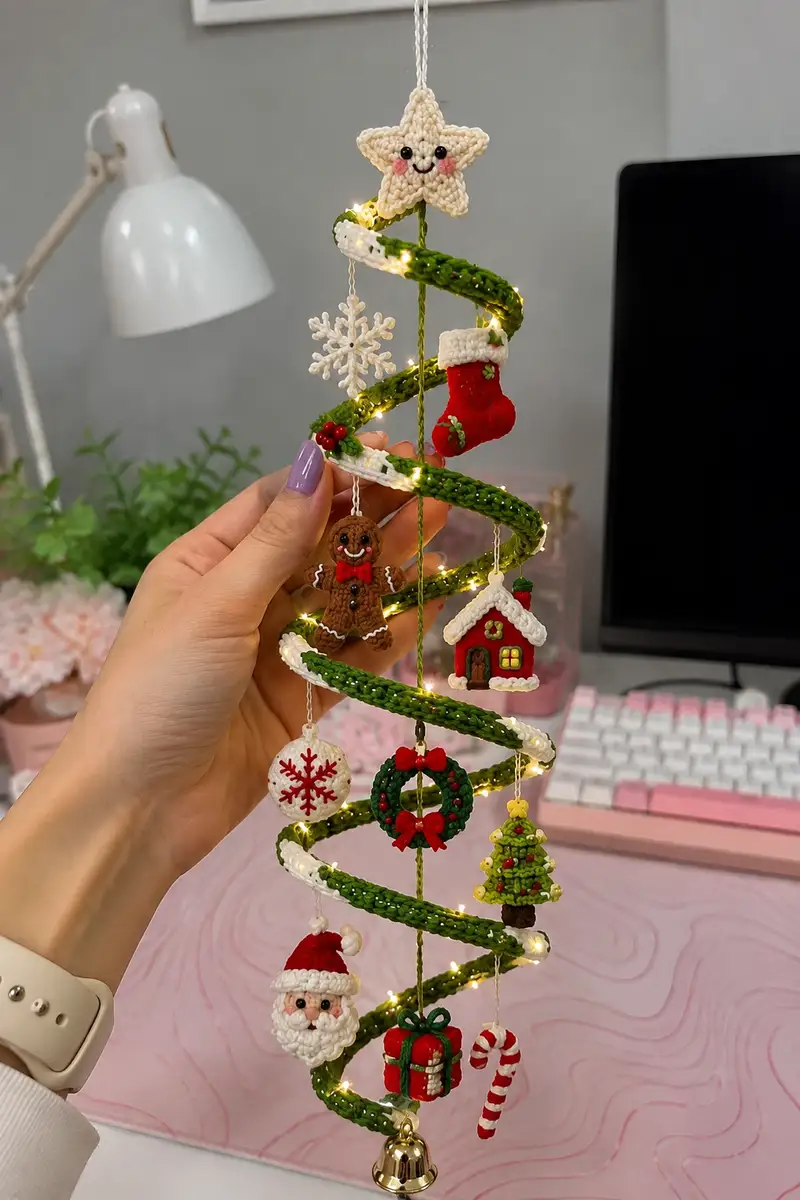
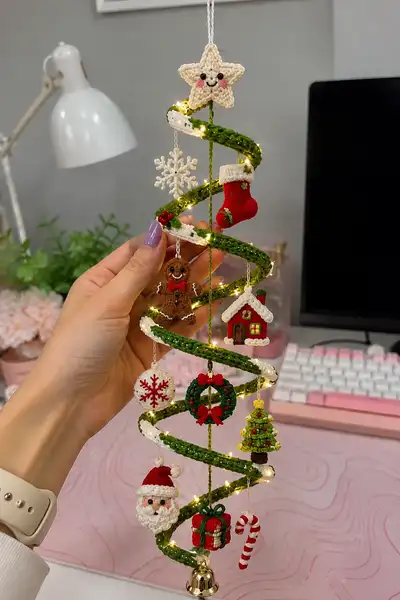
Create a whimsical spiral garland with tiny amigurumi ornaments — Santa, gingerbread, wreath, house, stocking, and more — perfectly sized for small trees or hanging decor. This pattern includes step-by-step rounds for a coiled green-and-white spiral tree base and detailed miniature ornaments with colorwork, surface embroidery, and assembly tips. Add micro-LED fairy lights for a magical finish. Ideal for making a charming holiday display or thoughtful handmade gifts.
Progress Tracker
0% Complete
— Spiral Base (coiled tree) :
Info :
This spiral is worked as a long tubular strip in continuous rounds using green worsted weight yarn and later edged with white. The strip is slotted around a central cord and coiled; micro LED lights can be woven in along the inside. Work tightly to keep stuffing inside and the tube firm enough to hold shape. Final coil height in pictures is approx 25-30 cm; adjust length to taste.
Round 1 :
mr, 6 sc into ring (6)
Round 3 :
(1 sc, inc) x6 (18)
Round 4 :
(2 sc, inc) x6 (24)
Round 5 :
(3 sc, inc) x6 (30)
Info :
We now have a firm small tube base. Continue increasing to reach a tube circumference similar to the photo (about 30–36 sts). Keep rounds continuous (do not join) and use a stitch marker for the start of round.
Round 6 :
(4 sc, inc) x6 (36)
Round 7 :
1 sc in each st (36)
Round 8 :
1 sc in each st BLO (36)
Info :
Working a row in BLO creates a faint ridge that helps the spiral hold its curve later. If you want extra texture, repeat BLO every 8 rounds.
Round 9-14 :
1 sc in each st (36) — work 6 rounds to build length (36)
Info :
At this point you can insert micro LED string along the inside of the tube: gently split the tube spiral later and tuck LEDs inside or stitch around the thin wire to hold in place. Alternatively, leave LEDs to weave when assembling.
Round 15-40 :
1 sc in each st (36) — work 26 rounds building the long tube for coiling (36)
Info :
Measure as you go — the example coil used approximately 40 rounds of 36 stitches each to achieve 5-6 turns when coiled around a 22 cm central cord. If you want a taller spiral, add rounds in multiples of 3-6 to preserve proportions.
Round 41-44 :
Switch to white yarn. 1 sc in each st (36)
Info :
These 4 rounds of white create a snow-edge stripe on the spiral. Carry green yarn inside or fasten off and reattach later. Work these white rounds tightly for a neat edge look.
Round 45-52 :
Change back to green. 1 sc in each st (36) — continue length (36)
Info :
Alternate small white trims every 10-12 rounds to mimic the snowy spiral pattern; the sample features a white stripe roughly every 12 rounds. Secure color changes with an invisible join or carry inside tube.
Round 53-56 :
1 sc in each st BLO (36) — create inner ridge for coiling (36)
Round 57-60 :
Even rounds, 1 sc in each st (36)
Info :
Fasten off leaving a long tail for sewing the ends closed. Lightly stuff the tube if you prefer a plump appearance; for a firmer spiral, insert the central cord (thin plastic tube or stiff cord) into the tube before fully closing. Leave the cord protruding from top center for attaching the star topper.
Round 61 :
Optional decrease rounds to taper bottom slightly: (5 sc, dec) x6 (30)
Round 62 :
(4 sc, dec) x6 (24)
Info :
These decreases are optional and help the bottom coil sit flatter. After finishing, pin the long tube onto your work surface coiled around the central cord with spacing similar to the photograph: even spacing between coils, slight outward tilt to resemble a tree spiral. Use pins to set the shape then sew through overlapping points to fix the spiral shape.
— Star Topper :
Info :
Small five-point star, stuffed lightly and sewn to the top of the central cord protruding from the spiral. Worked in cream/ivory color with slight face embroidery. Use 2.5mm hook for compact stitches.
Round 1 :
ch5, sl st to first ch to form ring, ch1, 6 sc into ring (6)
Round 3 :
(1 sc, inc) x6 (18)
Round 4 :
1 sc in each st (18)
Info :
To form points, divide the round into 5 equal sections of 3–4 sts each. Work a little peak into each section as follows.
Round 5 :
*ch2, (tr, dc, tr) in next st, sl st in next st* rep * to * 5 times to create five points. Fasten off leaving long tail for sewing (approx 12 cm). Stuff lightly.
Info :
Place eyes and embroider a tiny smile: use 2 tiny black seed beads or 2 mm safety eyes positioned within center front on fewer stuffing rounds. Add two small blush spots using light pink yarn or paint.
Round 6 :
Sew star to top of central cord, firmly stitching through cord and star base. Hide ends inside spiral or weave into star body.
— Gingerbread Ornament (Make 1) :
Info :
Working in brown yarn with tiny white icing lines and red bow. This little gingerbread is made as one piece (head connected to body) using continuous rounds and separate arms/legs sculpted with minimal seams. Use 2.5mm hook for dense fabric. Finished height ~6 cm.
Head :
Round 3 :
(1 sc, inc) x6 (18)
Round 4 :
(2 sc, inc) x6 (24)
Round 5 :
(3 sc, inc) x6 (30)
Round 6-8 :
1 sc in each st (30)
Info :
Place safety eyes between Rounds 6 and 7, about 6-8 sts apart for cute expression. Embroider smiling mouth with white yarn later. Start stuffing head firmly now.
Round 9 :
(3 sc, dec) x6 (24)
Round 10 :
(2 sc, dec) x6 (18)
Round 11 :
(1 sc, dec) x6 (12)
Info :
Finish stuffing head as you decrease. Leave remaining opening unclosed; body will be worked directly onto head to create a single seamless piece for authentic gingerbread look.
Body :
Round 12 :
Without fastening off, ch1 and work 12 sc evenly around opening on head base and continue around entire body opening to create body foundation — work in continuous rounds to shape torso. (12)
Round 13 :
inc in each st around (24)
Round 14 :
(1 sc, inc) x12 (36)
Round 15-18 :
1 sc in each st (36)
Info :
Round 15-18 builds a short torso. At Round 17, mark two points on the front where buttons will be placed; leave small back opening for stuffing if needed.
Round 19 :
(4 sc, dec) x6 (30)
Round 20 :
(3 sc, dec) x6 (24)
Round 21 :
(2 sc, dec) x6 (18)
Info :
Stuff the body firmly now. Keep the torso slightly flatter than head so the gingerbread hangs front-facing when suspended.
Round 22 :
(1 sc, dec) x6 (12)
Round 23 :
6 dec (6) — Fasten off leaving long tail for sewing. Close opening and hide tail inside body.
Arms (Make 2) :
Round 2 :
1 sc in each st (6)
Round 3 :
(1 sc, inc) x3 (9)
Round 4-7 :
1 sc in each st (9) — make arm tube length around 4 rounds (9)
Round 8 :
(1 sc, dec) x3 (6)
Round 9 :
1 sc in each st (6) — fasten off leaving tail for attaching. Stuff slightly—hands should be firm but thin.
Legs (Make 2) :
Round 3 :
(1 sc, inc) x6 (18)
Round 4-8 :
1 sc in each st (18) — work foot/leg length about 5 rounds
Round 9 :
(1 sc, dec) x6 (12)
Round 10 :
1 sc in each st (12) — fasten off leaving tail for sewing. Stuff legs moderately firm.
Info :
Sew arms to sides around Round 16–18 of body, and legs to bottom at positions that mimic the gingerbread stance. Embroider white icing lines using surface slip stitch or chain-stitched embroidery; add two tiny black seed beads or black French knots for buttons and a small red bow between shoulder area.
Face & Decoration :
Info :
Embroider smile with white yarn using whip stitch to create a curved smile. Add small pink blush with light pink thread or fabric paint. Attach 2 black 4mm safety eyes in the head placement described earlier. Sew on red bow between shoulders using red yarn.
— Santa Head Ornament :
Info :
Small Santa face with white beard, red hat, and fluffy trim. Work head sphere then add beard piece and hat as separate pieces sewn on. Use flesh-tone yarn for face, white for beard, and red for hat. Finished height approx 5–6 cm.
Head :
Round 3 :
(1 sc, inc) x6 (18)
Round 4 :
(2 sc, inc) x6 (24)
Round 5-9 :
1 sc in each st (24)
Info :
Sew 6mm safety eyes between Rounds 6 and 7 approx 7 stitches apart. Embroider small nose with a tiny tuft of flesh color yarn or work a 3rd round bump. Stuff head firmly here.
Round 10 :
(3 sc, dec) x6 (18)
Round 11 :
(2 sc, dec) x6 (12)
Round 12 :
(1 sc, dec) x6 (6) — Fasten off leaving long tail for sewing if you will attach hat and beard separately. Stuff before closing if not adding beard.
Beard (Make 1) :
Round 1 :
Using white yarn, ch 8, sl st back along chain to make narrow arch; then attach to lower front of head with sl st across 6–8 stitches to create beard base. Alternatively crochet a semicircle: mr, 6 sc, inc x6 (12), (1 sc, inc) x6 (18) then fasten off leaving long tail to sew to chin area.
Hat :
Round 1 :
With red yarn, mr, 6 sc (6)
Round 3 :
(1 sc, inc) x6 (18)
Round 4-6 :
1 sc in each st (18) — work to desired hat height
Round 7 :
Decrease at crown slowly: (2 sc, dec) x4 (14)
Round 8 :
(1 sc, dec) x4 (10)
Round 9 :
5 dec (5) — fasten off and shape point. Add white trim by crocheting a short chain foundation of white then joining around hat base with sc or simply whip-stitch a white ruff.
Info :
Sew beard to chin area first, then position hat over top and sew through head to secure. Add small white pompom to hat tip using a tiny crocheted ball or pompom maker. Embroider rosy cheeks with light pink yarn or blush powder.
— Stocking Ornament :
Round 1 :
With red yarn, ch9, join to first ch to make ring, 9 sc into ring (9)
Round 3-6 :
1 sc in each st (18)
Info :
Create the foot shape by working half of the round as short rows. Mark front half for toe shaping.
Round 7 :
1 sc in next 9 sts, ch3, turn and work back across chain with 3 sc, then rejoin and sc remaining 9 sts — gives a toe bulge (18)
Round 8-10 :
1 sc in each st (18)
Round 11 :
Change to white yarn. 1 sc in each st (18)
Round 12 :
1 sc in each st (18) — create cuff texture using BLO if desired
Round 13 :
Fasten off leaving tail for hanging loop. Sew a small green embroidered holly leaf and attach three tiny red beads for berries to decorate the stocking.
— Little House Ornament :
Info :
A small red house with cream roof and yellow window. Work a flat square for house front/back and sew sides to make a box; roof is separate triangular piece.
House Base - Round 1 (Front) :
ch5, turn, sc across to make 4 sc foundation, then work in rows to create a 4x4 small square (approx 4 rows by 4 sts)
House Base - Round 2-6 :
Work in rows until you have a 4x4 or 5x5 square (approx 4-5 rows). Make two identical squares for front and back.
Info :
Sew sides together by joining edges with sl st or whip stitch to form a narrow box. Leave top open for roof attachment and light stuffing placement.
Roof :
Round 1 :
With cream yarn, ch6, sl st to form ring, 6 sc into ring (6)
Round 3 :
(1 sc, inc) x6 (18)
Round 4 :
Fold semicircle into roof peak and sew to top edges of house base. Add scalloped white edge using picot or small shell stitches for snowy roof detail.
Info :
Sew a tiny yellow square patch on the front as the window using yellow yarn woven into place. Add a brown door and tiny wreath above door if desired.
— Wreath Ornament :
Round 3 :
1 sc in each st (16)
Round 4 :
Work surface loop leaves: *ch3, sl st into next st* around to make leaf loops (16 loops)
Round 5 :
Fasten off and sew a small red bow (crochet a 6-8 ch band, fold and stitch) to wreath front. Attach three tiny red beads as berries.
Info :
For extra volume, stitch an inner ring of fluffy yarn or hairpin lace behind the wreath before sewing on bow for fullness.
— Mini Christmas Tree Ornament :
Round 1 :
With green yarn, mr 6 sc (6)
Round 3 :
(1 sc, inc) x6 (18)
Round 4 :
1 sc in each st (18)
Round 5 :
Switch to yellow for tiny star or top bead, then return to green. For tiered branches, work short row shells: *ch3, (dc3 in next st), sl st back into same st* repeat to create layered branch triangles. Make 3 tiers decreasing in stitch count for top to bottom.
Info :
Embellish with tiny French knots in red and yellow as ornaments. Attach a tiny brown trunk (small 4-6 sc tube) at base and sew securely to underside of a coil in your spiral.
— Candy Cane :
Round 1 :
With white yarn, ch10, join; sc around to create small tube circumference of 6-8 sc and work about 8-10 rounds for cane length.
Round 2 :
Change to red and work 2 rounds, then white 2 rounds, alternate to create stripes. To form hook, fold top and sew a few stitches into curve and shape tightly.
Info :
Use a crochet hook to create a smooth bend in the hook area by adding a single row of increases on the inside of the bend if needed to puff shape, then stuff lightly and sew closed.
— Gift Box Ornament :
Round 1 :
Work small 4x4 square base in red yarn similar to house front method; make front/back and sides to create a cube. Assemble and add green ribbon by crocheting thin chain then wrapping around box and sewing a bow on top.
Info :
Secure ribbon ends inside the box and add a tiny bead center for the bow knot for a polished finish.
— Bell (Metal) Hanging Loop :
Info :
Attach a small real metal bell to the bottom of the spiral with a short length of white twisted yarn or small metal jump ring. Stitch through bell top securely and hide tails inside spiral or knot behind coil.
— Snowflake Flat Ornament :
Round 1 :
ch6, join with sl st, ch3 (counts as dc), (dc in ring) x11 (12)
Round 2 :
*ch4, sl st in 3rd dc from previous round to create arm* rep 6 times for classic six-arm snowflake. Fasten off and add small beads at arm tips.
Info :
Use starched white yarn if you want firm snowflakes; block while wet and allow to dry pinned in shape.
— Round-Up & Assembly Prep :
Info :
For every ornament, make a small hanging loop by crocheting a 6–8 ch loop in matching color and attaching to top of piece. Or attach a short twisted yarn cord. Pre-position the ornaments on the spiral to check spacing and balance. The sample shows 9–11 ornaments spaced approximately every 2–3 spiral turns; adjust to taste. Weave micro LED lights along inner coil using small tacking stitches if desired.
This spiral ornament garland brings a little winter wonder to your home with tiny handmade details and merry accents! Each miniature ornament adds personality and charm to the coiled tree, and the soft glow of micro lights makes it extra cozy. Enjoy assembling the set and customizing colors or buttons to make it uniquely yours — it'll become a favorite seasonal keep-sake. 🎁🎄✨