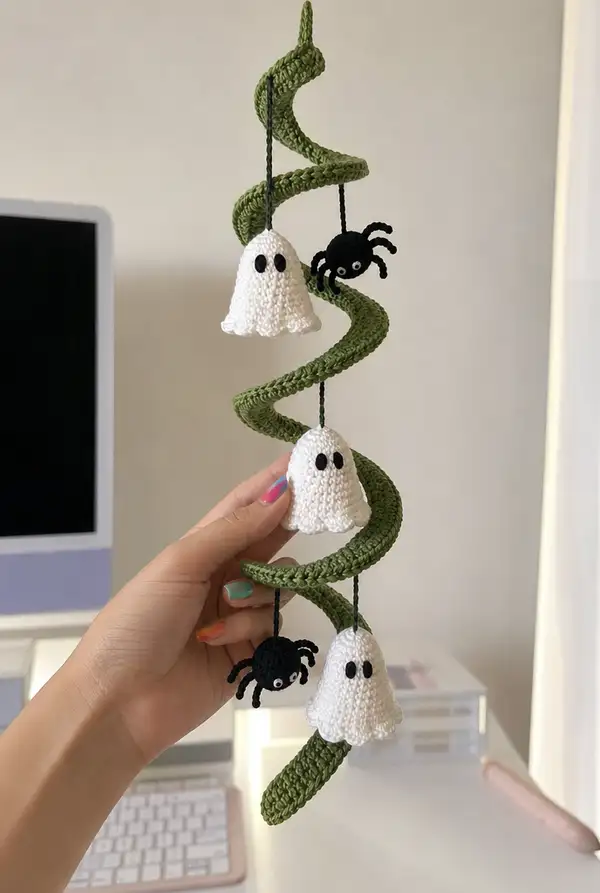
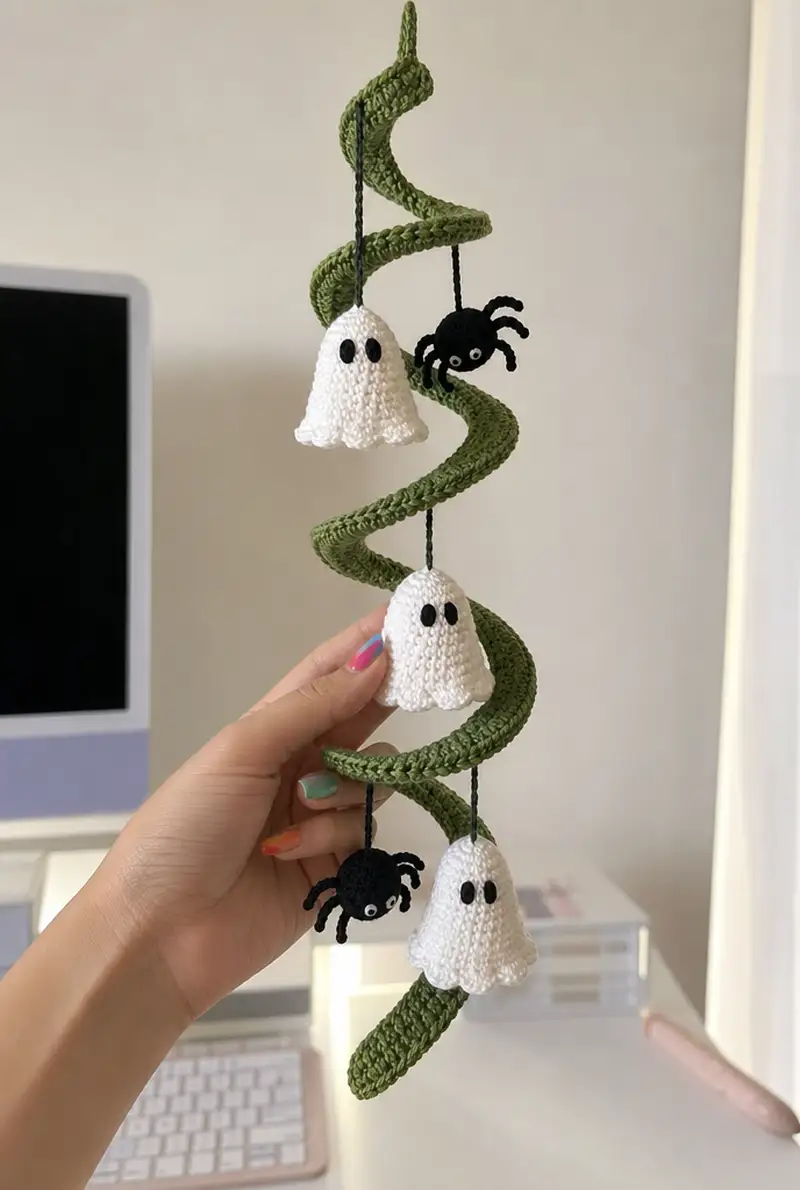
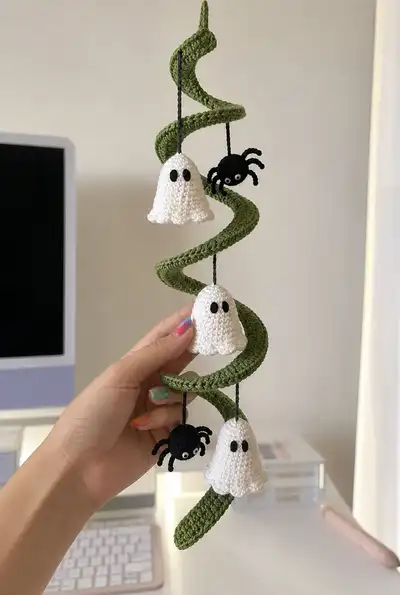
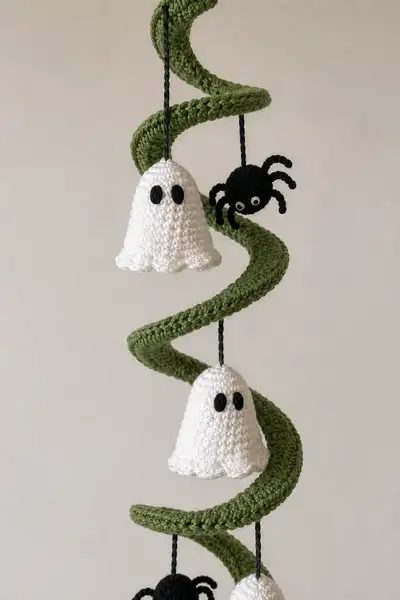
A whimsical hanging Halloween garland featuring a long green spiral vine studded with three ruffled white phantom bells and two cuddly black spiders. Each ghost has a scalloped hem and oval eyes, while the spiders have round bodies and curled legs. The spiral is sculpted with a flexible core so it holds a perfect corkscrew shape for doorways or mantel displays.
Progress Tracker
0% Complete
— Spiral (Main Vine) :
Info :
Make one long spiral vine that will be twisted into a corkscrew. Work in continuous rounds to create a tube large enough to hold craft wire. The spiral pictured measures approximately 60-70cm long from top loop to bottom tip; you can shorten or lengthen by adjusting rounds. Use olive/forest green DK yarn and a 3.25mm hook. Insert flexible craft wire inside before shaping. I recommend working 70 rounds for a substantial spiral; adjust length as desired.
Round 1 :
6 sc in magic ring (6)
Round 3 :
(1 sc, inc) x 6 (18)
Round 4 :
(2 sc, inc) x 6 (24)
Round 5 :
(3 sc, inc) x 6 (30)
Round 6 :
(4 sc, inc) x 6 (36)
Info :
By round 6 you should have a cylinder about 1.5-2cm wide. Check your gauge: your tube should be firm enough to hold stuffing and wire without gaps. If your yarn/hook yields a very loose fabric, drop down a hook size.
Round 7 :
1 sc in each st (36)
Round 8 :
1 sc in each st (36)
Round 9 :
1 sc in each st (36)
Round 10 :
1 sc in each st (36)
Info :
Work even in the round for long stretches to create a consistent tube. Stuff lightly with fiberfill as you go to avoid lumps and to keep the tube round. Do not overstuff: the goal is to have a firm but bendable core.
Round 11-20 :
1 sc in each st (36)
Info :
At this point you can insert the flexible craft wire: push the wire into the tube from one end. If your tube opening is small, fold the tube open slightly, slide wire in, then continue crocheting to close the opening around it. Make sure the wire extends slightly beyond both ends (you will bend and tuck ends later).
Round 21-30 :
1 sc in each st (36)
Info :
Continue working even rounds. Every 10 rounds check the diameter — if you want a slightly flatter spiral, for every 12th round work 36 sc in BLO to create a faint ridge that helps the spiral sit better when twisted.
Round 31-40 :
1 sc in each st (36)
Round 41-50 :
1 sc in each st (36)
Info :
If your spiral should widen slightly in the middle for a natural look, at round 46: (4 sc, inc) x 6 to increase to 42 sts, then continue 3-4 rounds even (42), then reduce back by (4 sc, dec) x 6 returning to 36. This creates a bulbous center similar to the reference photo where the spiral has gentle curves.
Round 51-60 :
1 sc in each st (36)
Round 61-68 :
1 sc in each st (36)
Info :
When your tube reaches the desired length (the sample used 68 rounds before tapering), start tapering to create a neat end for the spiral tip. You want the bottom to finish in a smooth tip to resemble the photo.
Round 69 :
(4 sc, dec) x 6 (30)
Round 70 :
(3 sc, dec) x 6 (24)
Round 71 :
(2 sc, dec) x 6 (18)
Round 72 :
(1 sc, dec) x 6 (12)
Info :
Do not fasten off fully yet. Leave a 20-30cm tail for sewing the top loop and for threading top hanging cord. Tuck and bend the wire end inward then pad with a little stuffing to make a rounded tip. Sew the tip closed around the wire securely.
Round 74 :
Fasten off leaving long tail for sewing and shaping. Weave tail inside a few rounds for neatness then pull through and secure.
Info :
Shape the spiral by twisting the wired tube into a corkscrew. Wrap loosely around a dowel or use the wire to bend into wide spiral loops. Pin into shape and allow to rest. Optional: a light smear of fabric glue at a few contact points will keep loops stable on display.
— Ghost (Bell) – Make 3 :
Info :
Each ghost is a small bell with a scalloped hem. Work in white DK yarn with 3.25mm hook for a soft drape. Make three identical ghosts. Eyes are small black ovals sewn on or embroidered. The pattern below creates a ghost roughly 6-8cm tall depending on yarn and tension.
Round 1 :
6 sc in magic ring (6)
Round 3 :
(1 sc, inc) x 6 (18)
Round 4 :
(2 sc, inc) x 6 (24)
Round 5 :
(3 sc, inc) x 6 (30)
Round 6 :
(4 sc, inc) x 6 (36)
Info :
By round 6 you have the dome base. From rounds 7-14 you will grow height with even rounds. This build forms the ghost body; keep stitches tight enough to hide stuffing later.
Round 7-12 :
1 sc in each st (36)
Round 13 :
(5 sc, inc) x 6 (42)
Round 14-18 :
1 sc in each st (42)
Info :
Place eyes between rounds 14-15, about 10-12 sts apart depending on expression. Use small black ovals or embroider. If using safety eyes, attach backs now before stuffing.
Round 19 :
(5 sc, dec) x 6 (36)
Round 20 :
1 sc in each st (36)
Info :
Begin stuffing lightly now, focusing on the dome so the ghost keeps shape but remains light to hang. Add small amounts of fiberfill and spread evenly; do not overstuff—ghosts should drape softly.
Round 21 :
1 sc in each st (36)
Round 22 :
(3 sc, dec) x 6 (30)
Round 23 :
1 sc in each st (30)
Round 24 :
(2 sc, dec) x 6 (24)
Round 25 :
1 sc in each st (24)
Round 26 :
(1 sc, dec) x 6 (18)
Round 27 :
1 sc in each st (18)
Info :
Create the scalloped hem starting next. We will work shell stitches into the last round to get the ruffled effect visible in the photos. Keep stuffing light to allow a nice flow at the hem.
Round 28 :
(Scallop set: *ch1, skip 1, 5 dc in next st, skip 1, sl st in next*) around to make 6 scallops; adjust spacing so scallops are evenly distributed (18 sts should yield 6 scallops)
Round 29 :
Sl st into each scallop base to secure scallops. Fasten off leaving a long tail for hanging cord. Weave tail into top of ghost and leave sufficient length (~12-15cm) to attach to spiral; or create a separate crocheted hanging cord (see hanging cord section).
Info :
Finishing touches: sew small black oval eyes made from black yarn or felt onto the dome; place them symmetrically. If embroidering eyes, use satin stitch for a neat oval shape. Trim yarn ends and hide by weaving through inside of dome.
— Spider Body – Make 2 :
Info :
Each spider is a small sphere about 2.5-3.5cm across with eight curly legs. Work in black DK yarn. The legs are crocheted tubes worked in rounds and attached with sewing to the body. You will make two spider bodies.
Round 1 :
6 sc in magic ring (6)
Round 3 :
(1 sc, inc) x 6 (18)
Round 4 :
(2 sc, inc) x 6 (24)
Round 5 :
(3 sc, inc) x 6 (30)
Round 6-8 :
1 sc in each st (30)
Info :
These rounds create the widest part of the sphere. After round 8, begin decreasing to form a small ball. Stuff lightly after round 7-8 to hold shape. Leave small opening to attach legs later but do not fully close.
Round 9 :
(3 sc, dec) x 6 (24)
Round 10 :
(2 sc, dec) x 6 (18)
Round 11 :
(1 sc, dec) x 6 (12)
Round 13 :
Fasten off leaving long tail for sewing. Stuff the ball firmly but not hard; the spider should be plump for attachment of legs. Use a yarn needle to close the last opening and secure stuffing.
Info :
Sew on two small white beads or French knots using white thread for tiny eyes. Place them near the front top of the sphere. If using safety eyes, attach before closing and stuffing to secure back disc inside the body.
— Spider Legs (Make 8 per Spider) :
Info :
Each spider has eight short curved legs (4 on each side). Legs are little crocheted tubes that will be sewn to the spider body. Work 8 legs per spider or a total of 16 legs if making two spiders.
Round 1 :
ch 6, sl st in 2nd ch from hook and in each remaining ch to end (5 sl st) — this creates a short chain foundation for a tightly twisted leg
Round 2 :
Turn and work 5 sc across chain (5)
Round 3 :
1 sc in each st (5)
Round 4 :
1 sc in each st (5)
Round 5 :
1 sc in each st (5)
Info :
To curl legs, work the next rounds in a spiral that increases slightly and then leave some slack when sewing; another method is to wind the leg around a small dowel and block it with a little water to help the leg keep its curve. For a stronger curl, cut a short piece of floral wire and insert into the leg before stuffing lightly and closing.
Round 6-8 :
1 sc in each st (5)
Round 9 :
Fasten off leaving long tail for sewing to body. Repeat to make a total of 8 legs per spider. Attach by sewing the middle of legs into the body seam so they radiate outwards in gentle curves.
Info :
Arrange legs while sewing so they stagger: two slightly forward, two slightly back on each side. Use a tapestry needle to catch the body stitches and weave legs securely. Bend ends of inserted wire inward so they cannot poke through outer fabric.
— Hanging Cord and Small Details :
Round 1 :
ch 30 (or desired hanging length), sl st into 2nd ch from hook and each ch back (29 sl st) to create a thin cord (or use braided yarn for an even cord)
Round 2 :
Fasten off leaving long tails for attaching. Make one cord per hanging element (one for each ghost and one for each spider). For the spiral top, make a 10cm loop cord and secure to the top end of the spiral.
Info :
Alternatively knot three yarn strands and braid for a thicker cord. To attach elements invisibly, thread cord inside the ghost at top and tie a small knot; the knot will be hidden inside and the tail can be used for sewing.
— Assembly :
Info :
Plan placement: the pictured garland has three ghosts spaced roughly evenly along the spiral and two spiders suspended between them. Measure and pin positions while the spiral is laid out to be sure spacing pleases you before sewing.
Step 1 :
Thread the hanging cord of the top ghost through the spiral by looping around the inside of a spiral loop or sewing the cord to the inside seam. Pin the ghost in place so it hangs at the desired depth inside the loop.
Step 2 :
Sew the top of the ghost securely to the spiral tube by stitching through the tube's rounds and into the tail left at the top of the ghost. Use invisible ladder or whip stitch and hide knots inside the tube.
Step 3 :
For spiders, sew a short hanging cord to the top of the spider body or simply stitch the spider body to the spiral where you want them to hang. If you want them dangling, use the crocheted cord or a short length of thread to suspend them.
Step 4 :
Sew spider legs into position: arrange four on each side, sew the leg midpoints to the belly seam so legs curve downward. Adjust legs into a curved position and add a drop of fabric glue at attachment points if extra security is needed.
Step 5 :
Finish by tucking and weaving all tails inside the spiral tube or the ghost bodies. Bend the wire inside the spiral into a gentle corkscrew and pin to a flat surface until it holds shape. Trim any exposed wire ends then cover by sewing a final small cap of green yarn around the tip.
Info :
Balance is important: if a ghost pulls one side more than the other, slightly adjust its position or add a second small stitch to the opposite side of the tube to keep it centered. Hang the garland and check movement; adjust leg curls and ghost drape for the most dynamic look.
— Variations & Finishing Touches :
Info :
Make longer cords for dangling elements, add more ghosts, or use variegated green yarn for a mottled vine. You can also alternate scallop patterns on the ghosts for differing hems. For a softer spiral edge use half double crochets in the tube rounds in places where you want a slightly flatter appearance.
Info :
To make ghosts child-safe, embroider the eyes with black yarn instead of using safety eyes. For a glowy effect, use thin thread of metallic for subtle shimmer along scallops (one or two rounds of metallic thread carried alongside white yarn).
This playful spiral garland brings a touch of handmade Halloween charm to any doorway or mantel. Each ruffled ghost and tiny spider adds personality while the wired spiral makes a sculptural statement. The detailed rounds and careful assembly will produce a balanced, stable decoration you can proudly display or give as a special seasonal gift. 🧶✨🎃