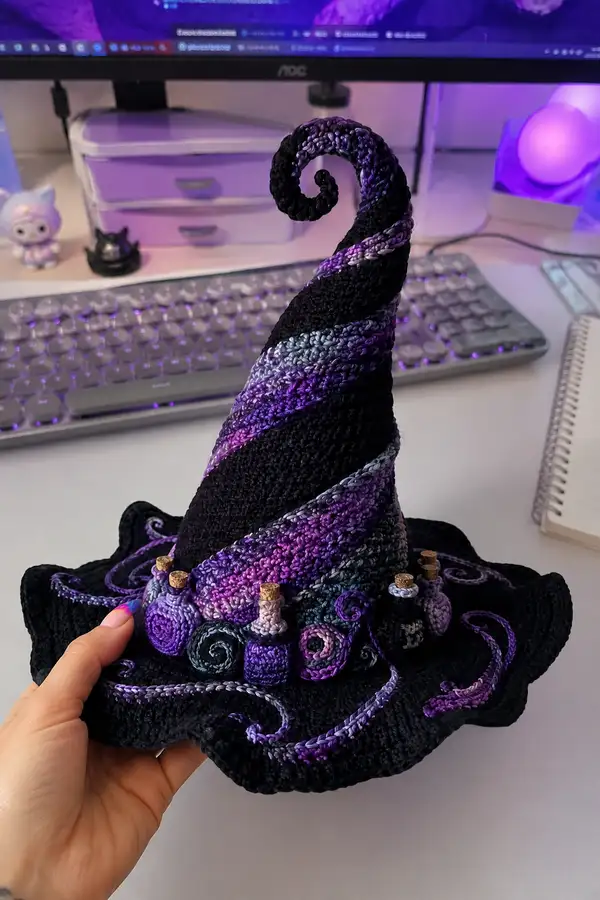
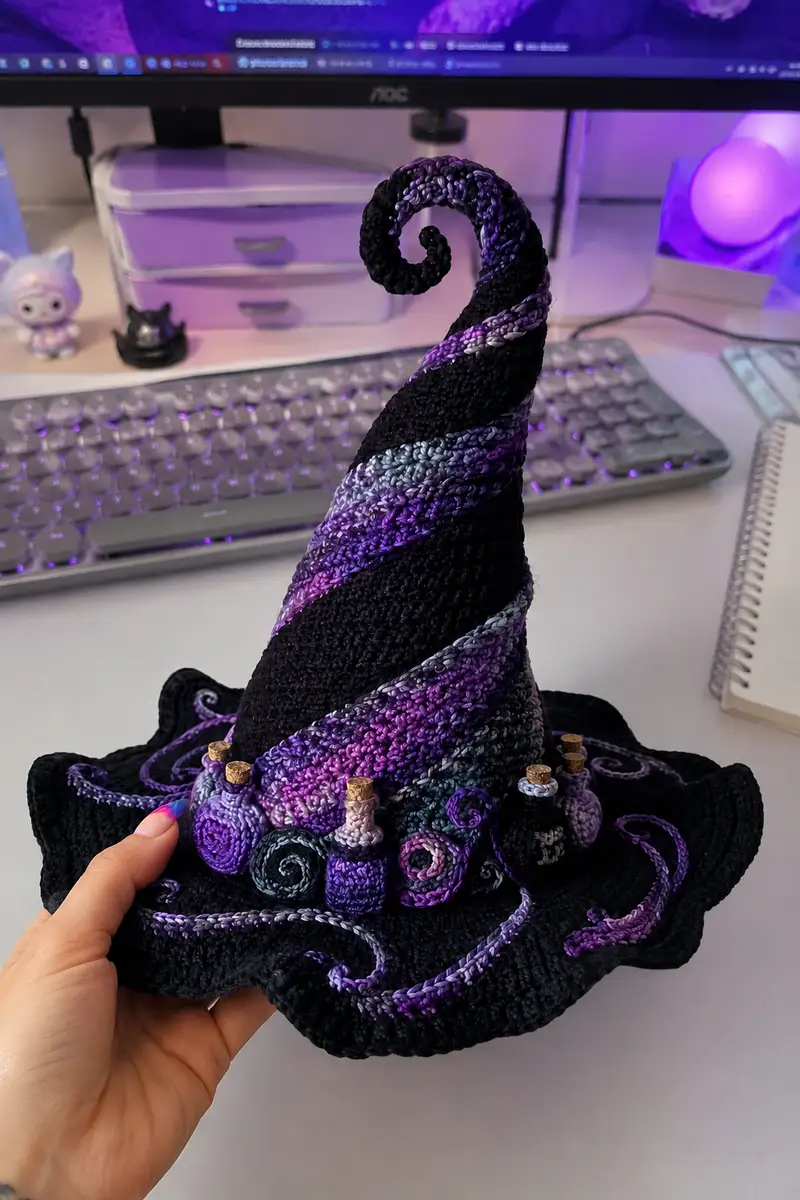
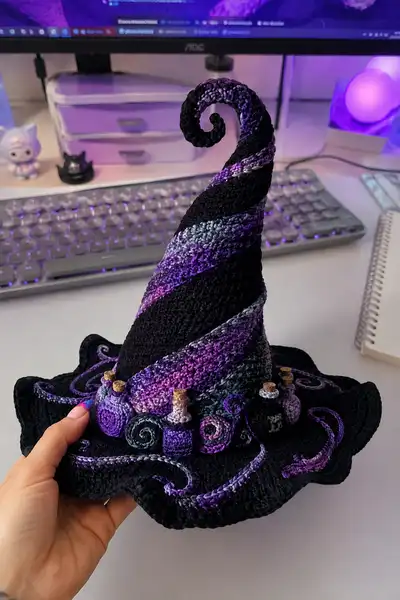
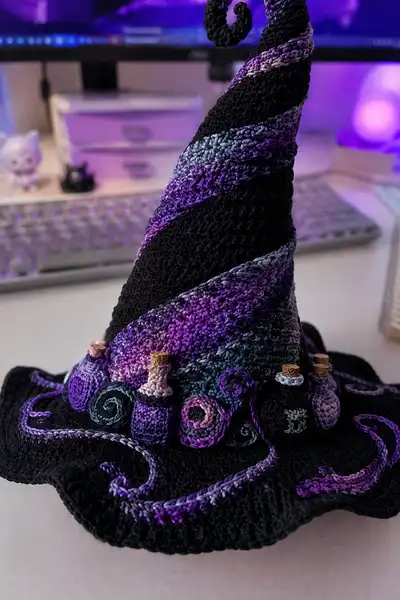
Create an enchanted, oversized witch hat with a dramatic spiraled cone, ruffled brim, and a parade of tiny crochet potion bottles wrapped around the crown. This pattern recreates the majestic black hat with purple-to-teal variegated swirls pictured — complete with corked vials, decorative coils, and embroidered vines for magical detail. An expressive project that doubles as seasonal decor or a showpiece costume accessory.
Progress Tracker
0% Complete
— Cone (top of hat) :
Round 1 :
6 sc in magic ring (6)
Round 3 :
(1 sc, 1 inc) x 6 (18)
Round 4 :
(2 sc, 1 inc) x 6 (24)
Round 5 :
(3 sc, 1 inc) x 6 (30)
Round 6 :
(4 sc, 1 inc) x 6 (36)
Round 7 :
(5 sc, 1 inc) x 6 (42)
Info :
We are starting the cone from the very tip of the hat; work tightly and keep tension firm so the cone holds shape. Place a stitch marker in the first stitch of each round to track round starts; remove and move marker each round.
Round 8 :
(6 sc, 1 inc) x 6 (48)
Round 9 :
(7 sc, 1 inc) x 6 (54)
Round 10 :
(8 sc, 1 inc) x 6 (60)
Round 11 :
(9 sc, 1 inc) x 6 (66)
Round 12 :
(10 sc, 1 inc) x 6 (72)
Info :
You should now have a firm cone base of 72 sts. If your tension is tighter or looser and you are aiming for a slightly different final circumference, adjust increases in rounds 10-12 to reach between 66 and 78 stitches. Leave cone unstuffed for the moment and plan to add a bit of filling later to help shape the curl.
Round 13-22 :
1 sc in each st around (72) — work 10 rounds to build height
Info :
Work these rounds in continuous rounds (do not join) to avoid a visible seam. Keep stitch marker at start and slide each round. Check the cone height periodically — these 10 rounds will form the primary sloped body of the cone.
Round 23 :
(10 sc, 1 dec) x 6 (66)
Round 24 :
(9 sc, 1 dec) x 6 (60)
Round 25 :
(8 sc, 1 dec) x 6 (54)
Info :
Begin to taper the cone gently so the top can be curved later; these decreases are subtle and reduce circumference but still leave enough fabric to create the curl and to attach the brim later. Begin stuffing lightly from this point downward to give the cone internal support.
Round 26 :
(7 sc, 1 dec) x 6 (48)
Round 27 :
(6 sc, 1 dec) x 6 (42)
Round 28 :
(5 sc, 1 dec) x 6 (36)
Info :
Stuff lightly but firmly through the wider part of the cone; do not overstuff the tip area — you want enough support to hold the hat upright but still allow the top to be trimmed and curled. If you plan to insert a thin wire inside to help shape the curl, insert it now and wrap with a bit of leftover yarn to pad it.
Round 29 :
(4 sc, 1 dec) x 6 (30)
Round 30 :
(3 sc, 1 dec) x 6 (24)
Round 31 :
(2 sc, 1 dec) x 6 (18)
Round 32 :
(1 sc, 1 dec) x 6 (12)
Info :
We will now form the curled tip. Leave the last 12 stitches fairly snug but avoid heavy stuffing directly at the tip. Fasten off with a long tail if you intend to close the tip, or continue working the curl directly without fastening off.
Round 33 :
6 dec around (6) — if making a small closed tip; if you prefer a tapered spiral tip, instead of decreasing fully, leave 12 sts, then work 6-8 rows of 1 sc in each st and then begin shaping the curl by working slip stitches and single crochets that progressively reduce width as you wind the tip around itself.
Info :
To sculpt the curl: after reducing to 12 sts, work 4-6 rounds even to create a short stub, then use a combination of sc2tog, sl st and short rows to spiral the tip. If using wire, form a small spiral and wrap with the yarn fabric using sc stitches around it to hide the wire. When satisfied with shape, secure and weave in ends tightly.
— Spiral Accent Rope (variegated band) :
Info :
The dramatic variegated swirl in the photos is created using a long crocheted rope that is sewn around the cone in a spiral. This rope is worked separately in a long chain then sc into rounds to make a tubular cord — you will make enough length to wrap diagonally around the cone 4-5 times from brim to tip.
Round 1 :
With variegated yarn, ch 120 (or longer for more wraps) — test length by laying along cone; adjust to wrap diagonally up cone 4 full passes.
Round 2 :
Join into round taking care not to twist, ch1, 1 sc in each ch around (120) — this forms the first round of the rope tube
Round 3-8 :
1 sc in each st around (120) — work 6 rounds for a thick rope (or fewer for a flatter rope)
Info :
Make rope long enough for desired spiral. If you prefer a thinner spiral, work fewer rounds or use a smaller hook for the rope. Fasten off leaving a long tail for sewing. Stretch the rope/cord gently to help it sit flat when sewn on.
— Brim :
Info :
We will crochet a wide, wavy brim and later sew it to the cone. The brim is made from a flat circle that flares outward with increases, then a ruffled edge is added for wave and movement.
Round 1 :
6 sc in magic ring (6)
Round 3 :
(1 sc, 1 inc) x 6 (18)
Round 4 :
(2 sc, 1 inc) x 6 (24)
Round 5 :
(3 sc, 1 inc) x 6 (30)
Round 6 :
(4 sc, 1 inc) x 6 (36)
Round 7 :
(5 sc, 1 inc) x 6 (42)
Round 8 :
(6 sc, 1 inc) x 6 (48)
Round 9 :
(7 sc, 1 inc) x 6 (54)
Round 10 :
(8 sc, 1 inc) x 6 (60)
Round 11 :
(9 sc, 1 inc) x 6 (66)
Round 12 :
(10 sc, 1 inc) x 6 (72)
Round 13 :
(11 sc, 1 inc) x 6 (78)
Round 14 :
(12 sc, 1 inc) x 6 (84)
Round 15 :
(13 sc, 1 inc) x 6 (90)
Round 16 :
(14 sc, 1 inc) x 6 (96)
Round 17 :
(15 sc, 1 inc) x 6 (102)
Round 18 :
(16 sc, 1 inc) x 6 (108)
Round 19 :
(17 sc, 1 inc) x 6 (114)
Round 20 :
(18 sc, 1 inc) x 6 (120)
Info :
At 120 stitches you should have a broad brim. If you want a larger brim, continue with the increase pattern (add 6 sts per round) until reaching desired size. Ensure your circle remains flat by spacing increases evenly; if the brim ruffles prematurely, reduce the number of increases in the next round.
Round 21 :
1 sc in each st around BLO (120) — this creates a ridge at the brim's crown line
Round 22 :
1 sc in each st around (120)
Round 23 :
Start ruffle: *sc in next 2 sts, 3 dc in next st* rep around (keep counts even) — this begins a gentle wave
Round 24 :
Work shell edging: *sl st in next st, 5 dc in next st, sl st in next st* rep around to create scallops
Info :
The wavy brim in the photo is pronounced yet controlled. If you prefer deeper waves, add shells more frequently (e.g., every 3 sts). For a subtler edge, reduce the number of dc per shell. Stiffen brim lightly with diluted fabric stiffener if you want it rigid for display.
— Sew Cone to Brim :
Info :
Position the cone centered over the brim opening. Use pins to temporarily secure. You will sew the cone to the brim using the final rounds of the cone and the crown center of the brim. Make sure the seam is even before final stitching.
Round 1 :
Align cone opening (last round where cone circumference matched brim center). Using a blunt yarn needle and long tail from cone, whip stitch through the inner loops of the brim center and the last round of cone, sewing all the way around until the cone is securely attached to the brim. Fasten off and weave in ends.
— Potion Bottle (Make 6 — assorted sizes) :
Info :
Each potion bottle is small amigurumi: a flattened round base that grows into a short cylindrical body, then a narrow neck and a tiny cork. Use worsted yarn and a smaller hook for tight stitches. Vary colors: deep purple, lilac, teal, black, variegated — and decorate with embroidered symbols if desired.
Bottle A — Round 1 :
6 sc in magic ring (6)
Round 3 :
(1 sc, 1 inc) x 6 (18)
Round 4 :
(2 sc, 1 inc) x 6 (24)
Round 5-8 :
1 sc in each st around (24) — work 4 rounds to build body height
Round 9 :
(2 sc, 1 dec) x 6 (18) — start neck shaping
Round 10 :
1 sc in each st around (18)
Round 11 :
Switch to contrasting color for bottle neck rim if desired. 1 sc in each st around (18)
Round 12 :
Dec to 12 sts: (1 sc, 1 dec) x 6 (12)
Round 13 :
1 sc in each st around (12)
Round 14 :
Make cork: with brown/tan yarn, ch 4, join into a ring and sc 6 into ring, then 1 sc in each around for 2 rounds to form a tiny cork cap. Fasten off leaving long tail for sewing.
Info :
Before closing bottle, stuff lightly but firmly. Insert a small amount of stuffing to help the bottles keep plump shape; the cork will be sewn on afterwards. For glass look, embroider a tiny highlight using white thread or floss on bottle surface after assembly.
Make 5 more bottles :
Vary height: for shorter bottle, stop body rounds at 6 instead of 8; for taller, work 10-12 body rounds. Use variegated yarn for some to echo spiral band colors.
— Tiny Bottle Embellishments :
Info :
To replicate the band of bottles pictured, you will make several bottle sizes and then attach tiny corks (crocheted or store-bought). Some bottles also have an embroidered or crocheted collar — make a single round of contrasting color slipped over the neck and sew in place.
Round 1 :
Make small collar: with light yarn, ch 10, sl st to join, 1 sc in each ch around, fasten off leaving tail to sew to bottle neck.
— Coiled Swirls (Make 8-10) :
Info :
These are flat spirals made from foundation chains and worked in the round to create flat spiral discs that are then coiled and sewn as decorative cork mats behind bottles or as free-floating tendrils.
Round 1 :
Ch 30 (or less for smaller spiral), join being careful not to twist, ch1, 1 sc in each ch around (30)
Round 2 :
1 sc in each st around (30)
Round 3 :
Start spiral: working into the outside edge, sc 10, hdc 6, dc 4, 3 dc in last stitch to create flared outer coil. Fasten off leaving long tail to sew and coil.
Info :
After stitching, coil the flat spiral tightly into itself to form a small decorative rosette and sew the layers together through the center to keep coil shape. Use contrasting colors to mimic the multi-hued spirals from the picture.
— Curled Tendrils & Vines :
Round 1 :
Make cord: ch 40, join, 1 sc in each ch to create a narrow cord (40)
Round 2-6 :
1 sc in each st around (40) — work 5 rounds for thickness; fasten off leaving long tail for sewing to brim and crown in flowing shapes
Info :
For a spiral tendril, sew one end to hat and then wind cord freehand into curls; tack in a few spots to secure. Use a thin wire inside for a poseable vine if desired — wrap wire with yarn to avoid poking through stitches.
— Decorative Embroidery & Surface Crochet :
Info :
To recreate the swirling embroidered lines visible on the brim and crown, use surface slip stitch or chain-and-sew technique. Pick a contrasting variegated or purple yarn and work long surface sl st lines, finishing with little spirals sewn on top.
Round 1 :
Attach yarn at brim edge, pull up a long loop, then work surface slip stitches along a marked curve. Anchor ends with small invisible stitches on the underside of brim.
Info :
Tend to spacing and keep lines fluid. Pin your design first with sewing pins to get layout right before committing to stitches. Use different thicknesses for variety — a thin line for vines and a thicker cord for the main spiral accent.
— Final Shaping of Cone Curl :
Round 1 :
If you reduced the cone to a small nub, re-open the last 12-18 stitches and work short rows of sc to wrap around and form a curl. Example shaping: sc12 for two rounds, then (sc4, dec) x2 to narrow the tip and start winding.
Round 2 :
Work partial rounds reducing by 2 sts each short row as you wind the fabric around itself; pin shape and secure with several passing stitches through the layers.
Info :
If you used wire, bend the wire into the desired curl and crochet/cover with the final small rounds of single crochet to hide the wire. Ensure wire ends are blunted and wrapped so they cannot poke through the fabric.
— Assembly & Finishing :
Info :
Arrange bottles and spirals around the base of the cone. Pin positions until you like the arrangement. The photo shows a cluster at the front of the crown (about 5-6 bottles) with spirals interspersed and a long variegated rope wrapped around the cone.
Step 1 :
Sew the variegated rope to the cone: start at brim-level, tack rope firmly with small whip stitches every 1-2 cm. Keep rope spiral angle constant as you wrap up to the tip and sew the end securely where the curl begins.
Step 2 :
Sew bottle bases to the brim/crown seam: place each bottle so it sits against the cone just above the brim. Use the long tails from bottles to sew through the brim and cone, stitching several times for stability. Reinforce with extra passes if displaying the hat upright.
Step 3 :
Sew coiled spirals behind or between bottles as decorative background; tack in a few stitches through coil center to secure.
Step 4 :
Use surface crochet or embroidered stitches to add vine lines on brim: pick a fluent curved layout and stitch surface slip stitches in contrasting yarn to mimic the pictured swirling motifs.
Step 5 :
Add cork tops: sew crocheted or real corks to the bottle necks. For extra security, run a stitch through the cork and into the bottle neck and knot tightly, then weave tails into the body.
Info :
Weave and hide all ends; block the brim lightly (steam or wet block as appropriate for your yarn) to get the final wavy shape. If you prefer a stiffer brim for display, brush on diluted craft stiffener to underside and allow to dry fully before final embellishing.
Final Touch :
Apply a tiny highlight stitch of white thread to bottle surfaces and add any free embellishments like metallic beads or tiny charms sewn among the bottles to match the reference photo styling.
This giant swirl potion witch hat is a joyful mix of sculptural crochet and tiny amigurumi accents that transform simple yarn into a magical showpiece. From the tall curled cone to the band of corked potion bottles, every element adds character and whimsy. Whether you display it on a shelf or wear it for a dramatic costume moment, this hat is sure to enchant. 🧙♀️🧪 Enjoy making it and don't forget to add your own personal touches! 🧶