🧢 Beautiful ✨ Detailed πŸ’ Adorable

Groot Amigurumi Pattern

Groot Amigurumi Pattern
4.9β˜… Rating
5-7 Hours Time Needed
3.5K Made This
βœ‚οΈ

Intermediate Level

Ideal for those with basic knitting experience, featuring slightly more advanced stitches and techniques to expand your skills.

⏱️

Weekend Treat

Takes 5-7 hours, making it an enjoyable project to finish over a couple of days.

🧸

Cute Companion

An adorable friend to cherish, handcrafted with love to bring comfort and joy for years to come.

About This Groot Amigurumi Pattern

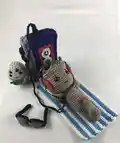
This Groot amigurumi pattern guides you through crocheting a sweet miniature Groot with clear step-by-step rounds and lots of supporting photos. The pattern covers legs, body, head, crown, arms, facial details, embroidered decorations and tiny headphones. Use fingering/fine weight yarn and a small hook for neat stitches and good shaping.

Groot Amigurumi Pattern crochet pattern - detailed view of completed project

Each section is given row-by-row so you always know where you are, and the pattern includes tips for stuffing and finishing. Decorative embroidery is explained so you can recreate Groot’s vine details.

Why You'll Love This Groot Amigurumi Pattern

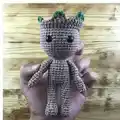
I love how this pattern balances simplicity with charming detail β€” the crown, embroidery, and little headphones give Groot tons of character. I also enjoy that the pattern is photo-supported, so I feel confident at every step while making a little handmade friend.

Groot Amigurumi Pattern step 1 - construction progress Groot Amigurumi Pattern step 2 - assembly progress Groot Amigurumi Pattern step 3 - details and accessories Groot Amigurumi Pattern step 4 - final assembly and finishing

Switch Things Up

I often change up small details when I make amigurumi β€” for Groot I sometimes add extra embroidered vines for more texture.

I also like to try slightly different yarn blends; a cotton-rich yarn gives a clean stitch definition while an acrylic mix makes the toy softer.

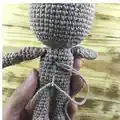
I recommend stuffing gradually and checking the shape as you go β€” I always adjust stuffing where needed as I follow the photos.

If you prefer, I sometimes swap the safety eyes for embroidered eyes for a fully washable toy.

Try adding tiny wire inside the arms if you want posable limbs β€” I only do this for display pieces, not toys for small children.

I also experiment with the crown height: a few more FLO rounds makes a taller crown that I sometimes prefer.

If you feel adventurous, I like to add subtle color changes with a slightly lighter brown to give depth to Groot’s body.

I find pinning parts in place with straight pins helps me visualize before sewing; I always take a photo of placement as reference.

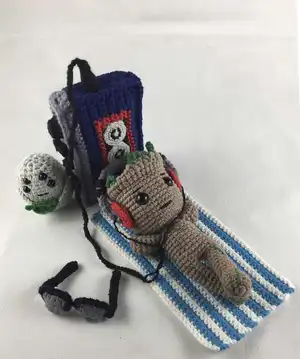
Switching up headphone colors is a fun way to personalize Groot β€” I often use purple or teal for a playful look.

Finally, I enjoy documenting changes in the pattern notes so I can repeat my favorite variations next time.

Common Mistakes & How to Fix Them

βœ— Not stuffing while crocheting leads to gaps and poor shape; stuff gradually as instructed after the indicated rows. βœ— Cutting the threads after the first leg will prevent continuing seamlessly into the body; leave threads and join as shown. βœ— Forgetting to crochet into the back loop only (BLO) or front loop only (FLO) will change the crown or leg texture; check the instruction when BLO or FLO is noted. βœ— Using too-large a hook will make the stitches loose and the stuffing show through; use the recommended small hook for tight stitches.

Groot Amigurumi Pattern

Create an adorable crocheted Groot with this photo-led pattern that walks you step-by-step from legs to the finishing embroidered details. Clear photos and precise round-by-round instructions help you shape, stuff and assemble a charming little tree-friend. Perfect for gifting or keeping as a sweet handmade companion.

Intermediate 5-7 Hours

Materials Needed for Groot Amigurumi Pattern

β€” Main Fabric

  • 01
    Brown yarn (main) - fingering/#2 fine (55% cotton + 45% acrylic, 180 yds/1.76 oz)
  • 02
    Green yarn (decoration)
  • 03
    Red yarn (headphone details)
  • 04
    Black yarn (smile/eyebrows/embroidery)
  • 05
    Blue yarn (optional accessory color)
  • 06
    Gray and light gray yarn (headphones)
  • 07
    White and azure (optional accent threads)

β€” Tools Required

  • 01
    Crochet hook size 2.5mm
  • 02
    Small hook for embroidery (approx 1.40mm) for the smile
  • 03
    Needle for sewing parts and embroidery
  • 04
    Filler / stuffing
  • 05
    Scissors
  • 06
    Two 9mm black plastic safety eyes
  • 07
    Four 6mm plastic safety eyes
  • 08
    Stitch markers / pins

Progress Tracker

0% Complete

β€” Legs : start brown.

1) :

6sc in MR;

2) :

6inc (12);

3) :

12sc BLO (crochet in the back loop of the stitches) (12);

4-5) :

12sc (2row);

6) :

dec, 4sc, dec, 4sc (10);

7) :

dec, 8sc (9);

8-14) :

9sc (7rows);

15) :

8sc, slst;

Info :

Do not forget to fill the toy with filler while knitting. We do not cut the threads from the second leg, we continue to knit the body.

β€” Body : continue.

16) :

2ch, attach the first leg 9sc, 2sc by ch, 9sc on the second leg, 2sc by ch (22);

17-25) :

22sc (9rows);

26) :

(3sc, dec)*4, 2sc (18);

27) :

(1sc, dec)*6 (12);

28) :

12sc;

Info :

Do not forget to fill the toy with filler while knitting. We continue to knit the head.

β€” Head : continue.

29) :

12inc (24);

30) :

(1sc, inc)*12 (36);

31-32) :

36sc (2row);

33) :

(5sc, inc)*6 (42);

34-41) :

42sc (8rows);

Info :

Insert eyes in row 37, 5sc between the eyes. Check that everything is exactly and you like it and only then put on the puck. Do not forget to fill the toy with filler while knitting.

42) :

(5sc, dec)*6 BLO (36);

43) :

(4sc, dec)*6 (30)

44) :

(3sc, dec)*6 (24)

45) :

(2sc, dec)*6 (18)

46) :

(1sc, dec)*6 (12)

47) :

6dec. Cut and hide the thread.

β€” Crown : brown.

Info :

We return to the 42nd row, FLO (crochet in the front loop of the stitches).

43) :

2ch, 42hdc, slst (42);

44) :

ch, 11sc, 4hdc, 6dc, 2ch, slst into the next stitch, 2ch, 3dc, 1hdc, 16sc, slst (41); Tie and hide excess threads.

Info :

Insert the green thread into the 17th loop of the 44th row of the crown.

45) :

2ch, 2dc, 1hdc. Tie and hide excess threads.

Info :

Insert the thread again in the 44th row in the 22nd loop from the beginning of the row.

45) :

2ch, 1hdc, 1sc. Cut and hide the threads.

Info :

Once again, insert the thread now into the 29th loop of the 44th row of the crown.

45) :

2ch, 1hdc, 1sc. Tie and hide excess threads.

β€” Arms : brown.

1) :

5sc in MR;

2) :

5sc;

3) :

inc, 4sc (6);

4) :

6sc;

5) :

inc, 5sc (7);

6) :

7sc;

7) :

inc, 6sc (8);

8-14) :

8sc (7rows);

Info :

Fill the lower part of the arm to the 8th row, then fold and hold the 8th row to fill the upper part of the arm.

15) :

fold the edges together and knit 3sc.

Info :

Cut off the thread, leaving 4 inch for sewing. With another thread of the same color, sew the 8th row, tie and hide the extra threads.

Info :

Sew on arms in row 26, tie and hide excess threads.

Info :

Divide a large piece of yarn into two thinner threads. Mark and embroider eyebrows.

β€” Smile : black.

Info :

Divide a large piece of yarn into two thinner threads. Then divide the thin thread into two more thin threads. We knit with the thinnest single thread. Hook 1.40mm.

1) :

5ch.

Info :

Cut off the thread, leaving 4 inch for sewing. Sew on a smile in the 33rd row, tie and hide the extra threads.

β€” Decorations : green.

Info :

Divide a large piece of yarn into two thinner threads. Embroider the decoration as shown in the pictures. Then one of the separated threads is divided again into two thinner threads. Use a single thread to embroider thin jewelry as shown in the pictures.

Info :

Pin and sew the hands to the head as shown in the pictures.

β€” Headphones : start black.

1) :

6sc in MR

2) :

at the beginning change color to red 6inc (12)

3) :

(1sc, inc)*6 (18)

4) :

18sc

5) :

(1sc, dec)*6 (12)

6) :

6dec. Cut and hide the threads.

β€” Headphones part 2 : gray.

1) :

33ch, turn;

2) :

32sc, ch, turn (32);

3) :

32sc.

Info :

Cut off the thread, leaving 8 inch for sewing. Fold the first row to the third and sew along the entire length. Then sew the second part of the headphones to the first and to the head. Do as shown in the pictures.

Info :

Insert the thread into the rim of the headphones and embroider about 0.3 inches. Then tie and hide the extra threads.

Assembly Instructions

  • Insert safety eyes between rounds/rows 37 (head) with 5sc between the eyes and secure according to the eye size used.
  • Sew arms to the body at row 26, tie off and hide thread ends, pinning in place before final sewing to ensure correct placement.
  • Pin and sew the folded hand pieces to the top of the head as shown in the photos; use the long thread tails left for sewing.
  • Embroider decorations and thin vines with divided green thread, securing and hiding thread ends after completing each embroidered element.
  • Sew headphones pieces together and attach them to the head; embroider black rim details and hide all excess threads.
  • Sew the smile into row 33 using the thinnest thread and a 1.4mm needle/hook for a neat finish.
  • After assembly, weave in and hide all thread tails and ensure stuffing is evenly distributed before closing any remaining openings.

Important Notes

  • πŸ’‘Do not forget to fill the toy with filler while knitting (stuff gradually) to preserve the shape.
  • πŸ’‘Do not cut the threads from the second leg; continue crocheting the body by joining the two legs as instructed.
  • πŸ’‘Return to the specified row when instructed to work in BLO or FLO (back/front loop only) to achieve correct texture.
  • πŸ’‘Leave longer tails when finishing pieces intended for sewing (arms, headphones, smile) to make assembly easier.
  • πŸ’‘Tie and hide excess threads securely after embroidering decorations and attaching small parts to avoid unraveling.

This charming Groot amigurumi brings a tiny, leafy friend to life with simple rounds and delightful embroidered details. Perfect for gifting or displaying β€” small enough to hold, big enough to delight. πŸŒΏπŸ§ΆπŸ’š

You ask,

we answer.

FAQs

Where should I place the safety eyes on Groot?

Insert the safety eyes in row 37 of the head with 5 single crochet stitches between them as noted in the pattern; secure the washers tightly and check placement before final sewing.

Can I substitute yarn weight or hook size?

Yes, but changing yarn weight or hook size will affect the finished size and stitch tension; use a small hook and yarn with similar fiber (cotton/acrylic blend) for best results and adjust stuffing accordingly.