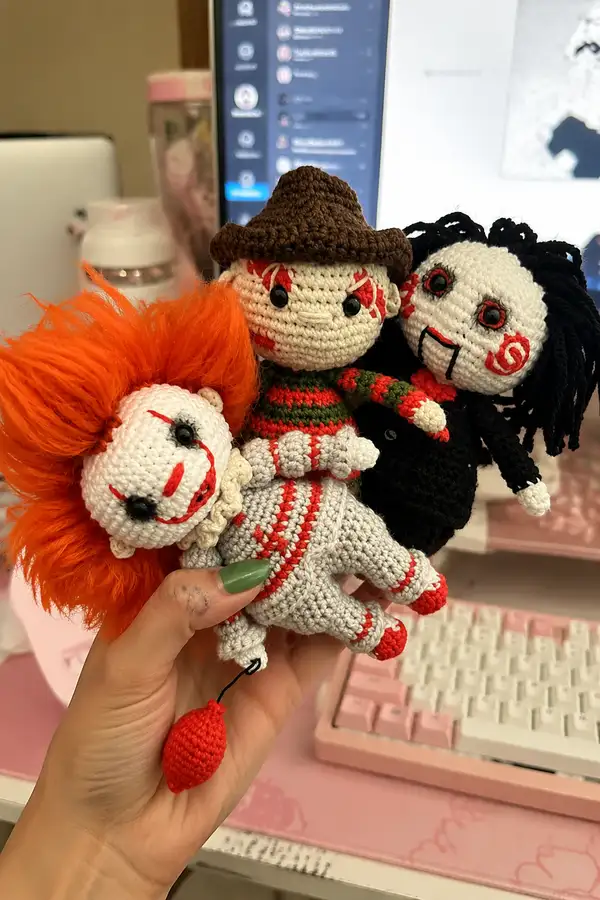
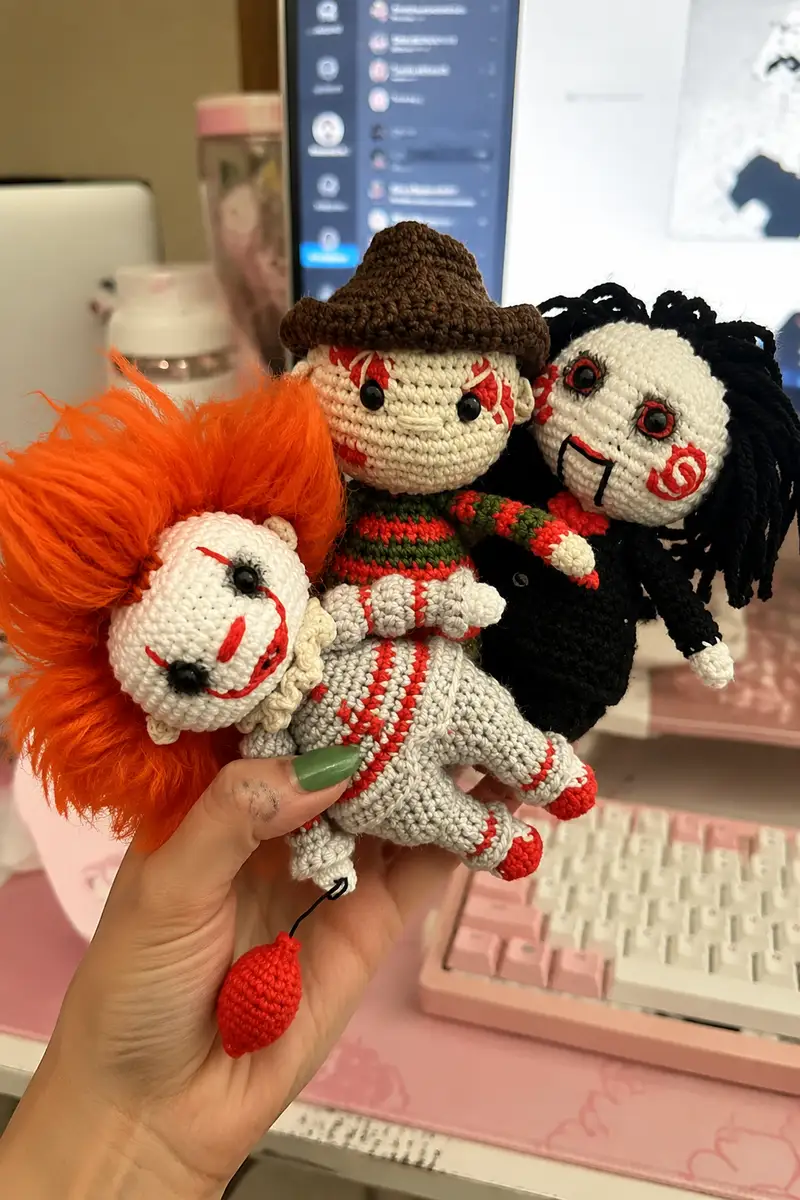
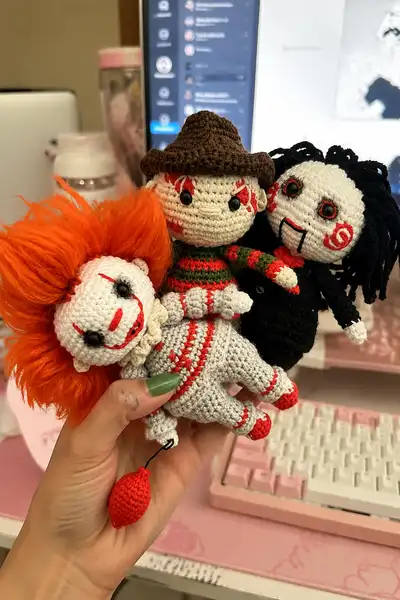
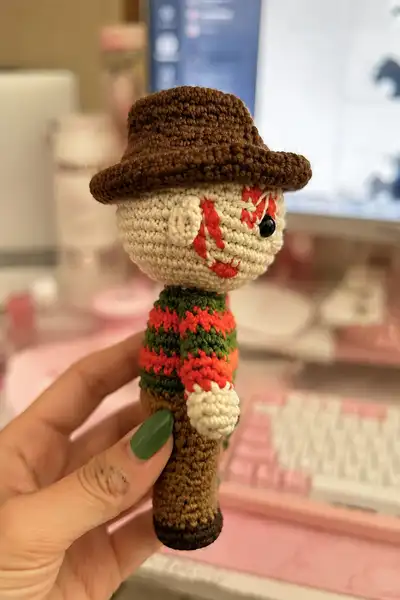
Make a trio of spooky pocket-sized horror dolls inspired by classic movie villains — Pennywise, Freddy Krueger and Billy (Saw). This detailed pattern shows step-by-step shaping, color changes, hair, hat and accessories. Finished dolls are approximately 14–15 cm tall with tight amigurumi fabric and secure safety eyes. Perfect as a collectible set or a creepy-cute gift.
Progress Tracker
0% Complete
— Notes & Gauge :
Info :
Gauge is not critical for shape but is important for final size and tightness. With YarnArt Jeans and a 2.25 mm hook you should get a finished doll about 14–15 cm tall. Work tightly to prevent stuffing from showing. Use a stitch marker at the start of each round. All parts are worked in continuous rounds unless noted otherwise.
— General Head (base for all three dolls):
Round 1 :
6 sc in magic ring (6)
Round 3 :
(1 sc, inc) x 6 (18)
Round 4 :
(2 sc, inc) x 6 (24)
Round 5 :
(3 sc, inc) x 6 (30)
Round 6 :
(4 sc, inc) x 6 (36)
Round 7 :
(5 sc, inc) x 6 (42)
Round 8 :
(6 sc, inc) x 6 (48)
Round 9-12 :
1 sc in each st around (48)
Info :
Place safety eyes between rounds 11-12 approximately 8-10 stitches apart (this yields a wide expressive look). If using embroidered eyes, mark centers and embroider after round 12. For puppet face (Billy), you will add larger embroidered red circles around the eyes later.
Round 13-16 :
1 sc in each st around (48)
Round 17 :
(6 sc, dec) x 6 (42)
Round 18 :
(5 sc, dec) x 6 (36)
Info :
Start stuffing the head firmly but evenly from the bottom up when you reach round 18. Use small amounts of fiberfill and sculpt the cheeks and jaw as you stuff. Keep stuffing fairly firm so facial features stay pronounced.
Round 19 :
(4 sc, dec) x 6 (30)
Round 20 :
(3 sc, dec) x 6 (24)
Round 21 :
(2 sc, dec) x 6 (18)
Round 22 :
(1 sc, dec) x 6 (12)
Info :
Fasten off leaving a long tail for sewing. If you plan to attach the head later to a neck tube on the body, leave an extra 12-15 cm tail. For puppet (Billy) face, stop decreasing at round 20 to create a slightly flatter, wider face, then continue with neck rounds (see variations below).
— Head Variations & Facial Details :
Info :
Pennywise (Clown) face: Use white yarn for head base. After rounds 12-16, embroider lips and red lines. Secure 5 mm black safety eyes at rounds 11-12. Add felted orange mane after finishing the head by either gluing or felting roving into the head opening. For Billy (puppet) use a white face with red embroidery around eyes and black mouth lines. For Freddy use beige/skin tone for head and small cut stitches for scars.
Info :
Facial embroidery tips: Use stranded embroidery floss or yarn threaded in a yarn needle. Do not pull too tight; create smooth curves, especially for puppet red spirals. For the clown mouth, embroider an upward smile with short back stitches and then fill with red yarn for thickness. For scars on Freddy, use red yarn to make short vertical bars and fix with a few extra securing stitches at the back of the head.
— Neck & Head Finish :
Round 24 :
Ch 1, 1 sc in each of next 6 sts to make a short neck tube or 1 sc in each st of remaining opening if closed (12) - adjust per your head closure
Info :
If you closed the head to 6 sts, you can create a neck tube by reattaching yarn at the center back and working 4-6 rounds of 1 sc in each st to form a neck that will be sewn into the body opening. This helps create a secure seam and a natural junction between head and torso.
— Body (Base torso for all dolls):
Round 1 :
6 sc in magic ring (6)
Round 3 :
(1 sc, inc) x 6 (18)
Round 4 :
(2 sc, inc) x 6 (24)
Round 5 :
(3 sc, inc) x 6 (30)
Round 6-9 :
1 sc in each st (30)
Info :
At this point decide clothing style. For Freddy use alternating rounds of green and red stripes on the upper torso starting now. For the clown use gray body with thin red stripes as shown in photos, change color every round as required. For the puppet use black for jacket starting after round 7 and use BLO for jacket edge to create a lapel ridge (see jacket instructions later).
Round 10 :
1 sc in each st (30)
Round 11-14 :
1 sc in each st (30)
Info :
Begin stuffing the body lightly from round 12-14; the body should be moderately firm but still slightly squat so head attachment looks natural. Leave the top opening unstuffed until you attach the head to ensure a flat seam.
Round 15 :
(3 sc, dec) x 6 (24)
Round 16 :
(2 sc, dec) x 6 (18)
Round 17 :
(1 sc, dec) x 6 (12)
Info :
Stop stuffing slightly under firm so when you sew the head on you can add fiberfill into the neck opening to match head firmness. If you want a heavier bottom for stability, add a small pellet bag or extra stuffing at the base before decreasing to close.
Round 18-20 :
Work 1 sc in each st for 3 rounds to form waist/neck attachment tube (12)
Round 21 :
Optional: (1 sc, inc) x 6 to flare at hips for seated or stylized look (18)
Round 22 :
1 sc in each st (18)
Info :
Fasten off leaving a long tail for sewing. For puppet jacket you will crochet a separate jacket body and sew it over the torso; see Clothing & Jacket section. For Freddy, continue body in brown for pants by switching to brown yarn at the hip rounds.
— Arms (Make 2) :
Round 1 :
6 sc in magic ring (6) - start with skin/beige for left or brown for Freddy right as required
Round 3 :
1 sc in each st (12)
Round 4 :
1 sc in each st (12)
Info :
These first rounds shape the little hand. Stuff the hand very lightly, just enough to keep the shape. For Freddy insert a short length of 0.9 mm wire to make the blade connection if you will attach blade pieces, or use unfilled for floppy arms for the clown and puppet.
Round 5-7 :
Change to clothing color now (stripe pattern or solid). 1 sc in each st (12)
Round 8 :
(3 sc, inc) x 3 = (pattern to slightly increase wrist) — work (3 sc, inc) x 3 to go from 12 to 15 (15)
Round 9-14 :
1 sc in each st (15)
Info :
Stuff arms lightly along their length from round 10 onwards. Keep ends softer so they bend naturally when attached. For striped sleeves change color every round (Freddy: alternate green and red). For puppet glove ends and clown sleeve cuffs, add a contrasting round in red.
Round 15 :
(2 sc, dec) x 5 (10)
Round 16 :
1 sc in each st (10)
Round 17 :
1 sc in each st (10)
Round 18 :
Fasten off, leave tail for sewing (10)
Info :
For more tapered arms, add one or two rounds of decreases earlier. Attach arms to body by sewing through both arm and body rounds around torso at the arm placement described in assembly section. Use ladder stitch or mattress whip stitch for neat seams.
— Legs (Make 2) :
Round 1 :
6 sc in magic ring (6)
Round 3 :
(1 sc, inc) x 6 (18)
Round 4 :
1 sc in each st (18)
Round 5 :
(2 sc, inc) x 6 (24)
Round 6-8 :
1 sc in each st (24)
Info :
Create the foot shaping by increasing the front half to give a flattened foot base. To do this, continue with 24 sts and when forming sole, work short rows or use surface increases as described below for shoe shaping.
Round 9 :
(3 sc, dec) x 6 (18) — begin ankle shaping
Round 10-14 :
1 sc in each st (18) — leg shaft
Info :
For shoe or sock contrast change color at round 12: for puppet and clown add a red round at cuff and one at toe. For Freddy make the bottom of the leg dark brown/black to mimic boots. Stuff feet quite firmly to create a stable base.
Round 15 :
(2 sc, dec) x 6 (12)
Round 16-18 :
1 sc in each st (12)
Round 19 :
Insert wire if using for poseable limbs now through the center and continue stuffing around it. Secure wire end by folding or taping before stuffing completely.
Round 20 :
Fasten off leaving a long tail for sewing (12)
— Ears (Make 2) :
Round 1 :
4 sc in magic ring (4)
Round 3 :
1 sc in each st (8)
Round 4 :
1 sc in each st (8)
Round 5 :
Shape by (1 sc, dec) x 2 = 6
Round 6 :
Fasten off leaving tail for sewing (6)
Info :
Sew ears to sides of head between rounds 8-10, slightly angled forward. For Pennywise make ears smaller and tuck behind hair. For Freddy, place ears visible at the sides to show small cuts or scars nearby if desired.
— Clown Hair Mane (Pennywise) :
Info :
We recommend using felting wool (orange) or fluffy mohair yarn. For a dense mane prepare a wig cap crocheted in rounds mounted onto the head opening then felt or attach roving strands. The wig cap below gives secure anchoring for many strands.
Round 1 :
6 sc in magic ring (6) with orange or matching cap color
Round 3 :
(1 sc, inc) x 6 (18)
Round 4 :
(2 sc, inc) x 6 (24)
Round 5-8 :
1 sc in each st (24)
Info :
Fasten off leaving long tail. Attach through the head opening with a yarn needle and attach felting wool either by sewing or by needle felting directly onto the cap. For a very full mane, attach multiple layers of roving and trim into shape with scissors. Use fabric glue to secure stray fibers if needed.
— Puppet Hair (Billy) :
Info :
Puppet hair is created as many short yarn strands looped through head stitches to create a shaggy bob. Use black worsted yarn. Cut 6–8 cm lengths and attach with a latch hook technique or simply fold in half and pull through with a crochet hook then pull ends through the loop to knot.
Round 1 :
Cut 60–80 strands of black yarn 6–8 cm long. Attach strands densely from the hairline (round 6-9) back to the crown.
Info :
Trim ends neatly so hair frames the white puppet face. For extra volume add a second layer near the crown. Tidy hair with scissors and add a few securing stitches at the scalp if necessary.
— Freddy Hat :
Round 1 :
6 sc in magic ring with brown yarn (6)
Round 3 :
(1 sc, inc) x 6 (18)
Round 4 :
(2 sc, inc) x 6 (24)
Round 5-7 :
1 sc in each st (24)
Round 8 :
Fold brim area and work 1 sc in each st BLO for one round to create layered brim (24)
Round 9 :
Fasten off leaving a long tail for sewing (24)
Info :
Pin hat to head and sew around the open brim. Shape brim by pulling a couple of gathering stitches at the back so it sits tilted as in photos. You can lightly stuff the crown with fiberfill to keep shape.
— Puppet Jacket (Billy) :
Info :
The jacket is made as a separate flat rectangle seamed into a cardigan shape and then sewn to the body. Work in black yarn. Use BLO rounds where you want a lapel ridge and add tiny black buttons or embroidered dots for buttons.
Round 1 :
Ch 24, join to work in rounds if you want a tube body or work as a flat rectangle 24 sts wide and 12 rows tall for a cropped jacket
Round 2-12 :
1 sc in each st for 11 rounds to build height (24)
Info :
Mark the center front, fold the rectangle in half to create sleeves openings and seam the back. Attach small buttons to the front or embroider buttonholes on the other side. Sew the jacket over the torso and stitch through the shoulder rounds for stability.
— Ruffle Collar (Clown) :
Round 1 :
With white yarn ch 30 and join to form a circle being careful not to twist
Round 2 :
1 sc in each ch around (30)
Round 3 :
*(1 sc, 1 hdc, 2 dc) in next st, skip next st* rep around to create ruffled scallops (approx 45–50 sts)
Info :
Sew ruffle collar around neck seam between head and body; gather slightly so ruffle sits full and frames face. Use a few small stitches to keep ruffle upright if desired.
— Freddy Blade & Glove Element :
Info :
For the iconic Freddy blade, crochet a thin tube and attach flat crocheted blades around a small piece of wire. You can also fashion blades from felt glued to a wire core. If using metal wire, ensure ends are folded back and taped to avoid sharp points inside the arm.
Round 1 :
Using gray yarn ch 7, join and work 6 sc in tube for 6 rounds to create a tight tube (6)
Round 2-6 :
1 sc in each st (6)
Round 7 :
Fold a thin scrap of felt as the blade shape and insert alongside wire; sew tube closed around it to secure
Info :
Sew the blade assembly into the right hand of Freddy before closing the final hand rounds. Use extra stitches to anchor the blade so it does not pull out during play or display.
— Small Accessories & Balloon (Clown) :
Round 1 :
Balloon: 6 sc in magic ring (6)
Round 3 :
(1 sc, inc) x 6 (18)
Round 4-6 :
1 sc in each st (18)
Round 7 :
(1 sc, dec) x 6 (12)
Info :
Fasten off and attach balloon to a short length of floral wire or craft wire. Bend the wire to a curly shape and attach it into the clown's hand by threading through the hand and anchoring with a few stitches. For a floating effect, hide the wire along arm seam.
— Finishing & Assembly :
Info :
Pin all parts before sewing. Arrange limbs symmetrically and ensure head sits straight. Weave ends inside the body for a neat finish and secure knots with fabric glue if desired. Below are recommended assembly steps with rounds referenced for accuracy.
This horror mini-doll trio is a delightful blend of character design and small-scale crochet technique — perfect for collectors and gift-givers alike. The detailed step-by-step sections make the process enjoyable and manageable, and the finished set has personality to spare. Have fun experimenting with hair textures, tiny accessories, and facial expressions to make your dolls truly unique. 🧶🕯️