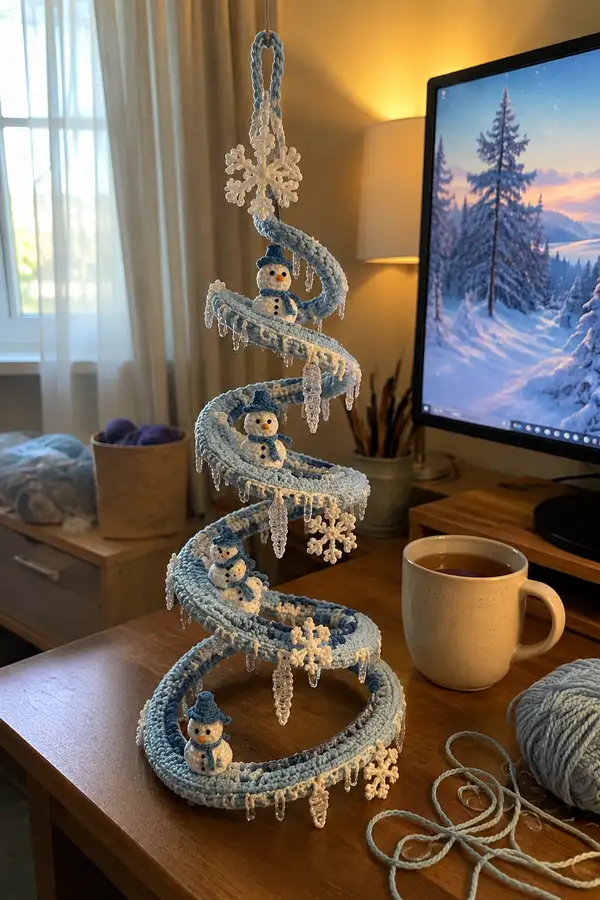
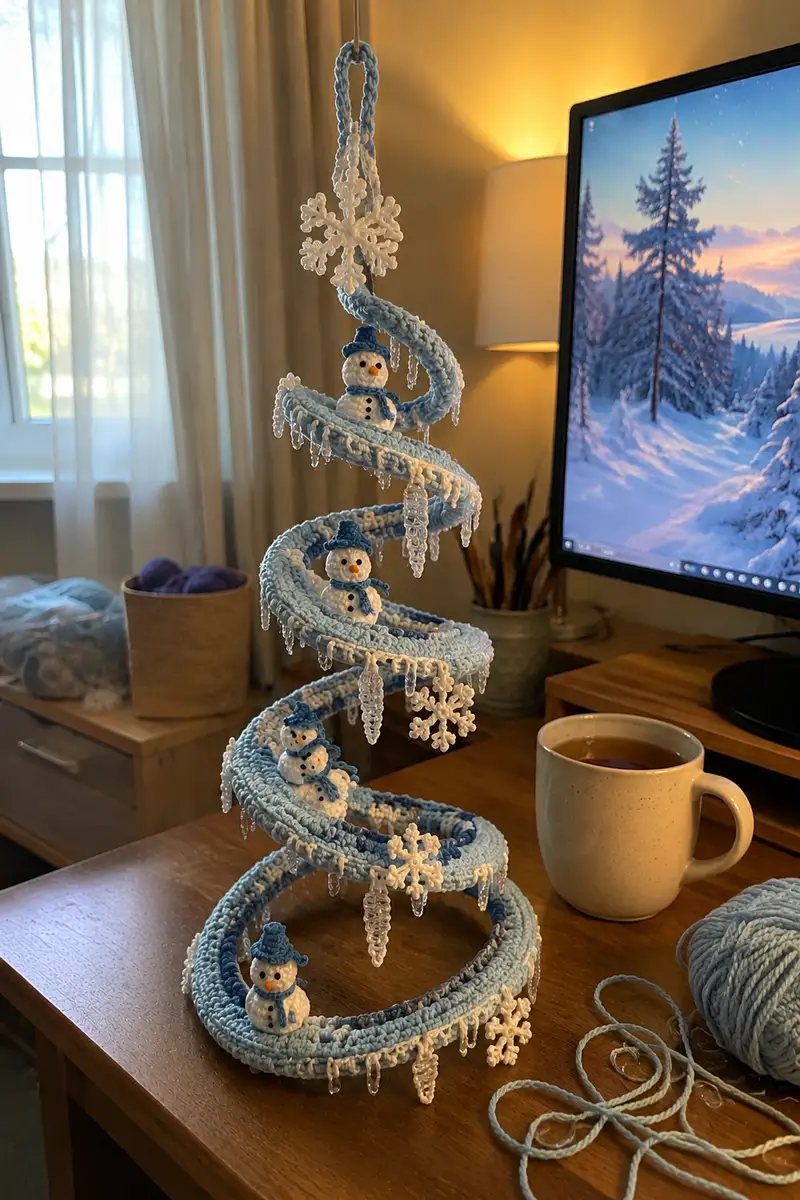
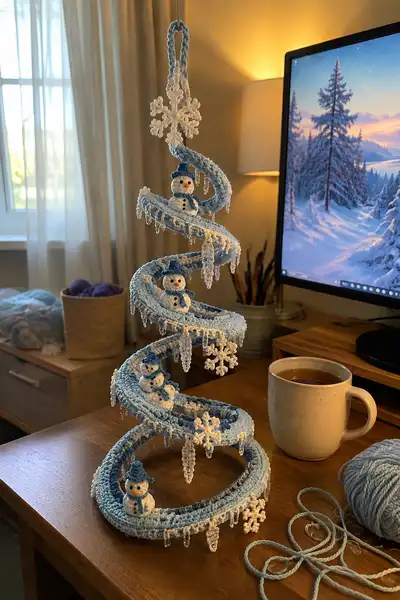
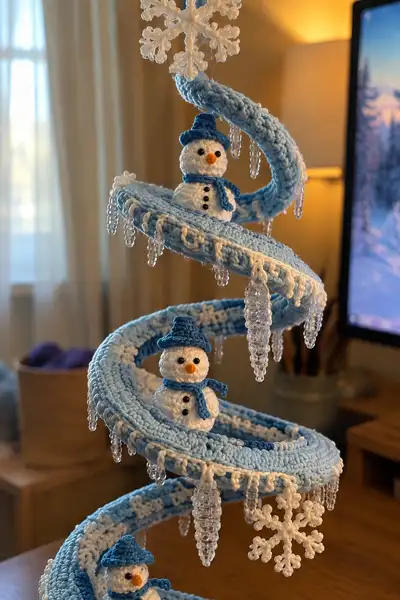
A whimsical spiral garland crocheted in icy blues and snowy white, decorated with three tiny snowmen, crystal-like icicles, and delicate snowflakes. This hanging decoration coils like a frosty ribbon and makes a magical winter centerpiece or tree topper. Detailed stitch-by-stitch instructions walk you through building the spiral frame, crocheting the snowmen, and adding sparkling bead icicles. Intermediate to advanced techniques included for shaping and secure assembly.
Progress Tracker
0% Complete
— Materials & Prep :
Info :
Before beginning, prepare your spiral frame. Use a length of 16-18 gauge craft wire, formed into a continuous spiral approximately 28-36cm tall and 18-22cm wide at the base depending on desired final size. You can also use a pre-made plastic spiral or a stiff tubing wrapped around a dowel. This pattern covers crocheting a tubular cover that slips over the wire and is sewn shut; adjust length to match your wire spiral.
Info :
For tensile stability, cut a length of wire approx 80-120cm (longer if extra coils). Coil it loosely around a cylinder (a vase or cone) to form an evenly-spaced spiral; leave enough straight wire at top for hanging and a loop at base for stability. Test fit often while building the crochet cover.
— Spiral Tube (Make 1 long tube to cover the wire) :
Round 1 :
6 sc in magic ring (6)
Round 3 :
(1 sc, 1 inc) x 6 (18)
Round 4 :
(2 sc, 1 inc) x 6 (24)
Round 5 :
(3 sc, 1 inc) x 6 (30)
Round 6 :
(4 sc, 1 inc) x 6 (36)
Round 7 :
(5 sc, 1 inc) x 6 (42)
Round 8 :
(6 sc, 1 inc) x 6 (48)
Info :
You now have a tube circumference of 48 sts which will create a nice flattened oval tube when stuffed/closed. If you prefer a thicker tube, increase further by continuing pattern: Round 9 would be (7 sc, inc) x 6 (54). The example object uses 48 for a mid-thickness rail.
Round 9-18 :
1 sc in each st (48)
Info :
Work even rounds to create the straight length of the tube. For each 1 cm of coil length you want, work about 2-3 rounds (depending on yarn). The sample spiral used rounds 9-80 to produce a long continuous tube approximately 180-220 rounds long in total when finished — however here we will provide measured stopping points and join technique instead of listing hundreds of identical lines.
Round 19-40 :
1 sc in each st (48)
Info :
At this stage, plan how many coils you will form. The project pictured uses 5-6 full loops from base to top; measure your spiral wire and calculate required length. To calculate approximate length: circumference (~12cm per coil) x number of coils + extra for spacing. Work evenly until your crocheted tube can wrap comfortably around the coil. Keep rounds even; mark every 10th round to track length.
Round 41-80 :
1 sc in each st (48)
Info :
If making color gradient, change color at the start of a round. To reproduce the icy look, work inner stripe of darker baby blue for 10 rounds, switch to pale sky blue for the outer band for approx 30-40 rounds, then add white at the edge rounds later. Carry unused yarn inside the tube or fasten off and join new color neatly with a sl st and 1 ch.
Round 81-88 :
1 sc in each st (48)
Info :
At the point you will place the snowmen, measure and mark 3 evenly-spaced positions along the length of the tube where the snowmen will appear. You will create small oval openings in the tube to seat the snowmen on the inner rail — plan now and mark with safety pins or removable stitch markers every ~30-40 rounds depending on coil spacing.
Round 89-94 :
1 sc in each st (48)
Info :
When your tube is long enough, align it along the pre-formed wire spiral. Test slip the tube over the wire. If the wire is slightly larger than the tube inner opening, you can make a lengthwise seam to tighten around wire: work sl st along a chosen length and pull slightly to close. Another option is to run a length of thin cord inside to anchor the tube around the wire.
Round 95-98 :
1 sc in each st (48)
Info :
End the long tube by closing its end around the base of the wire. We recommend slipping the tube over the wire and folding the open end inside itself by 6-8 rounds, then sewing closed with mattress stitch for a neat hidden join. Fasten off with a long tail for later sewing.
Round 99 :
FO leaving a 40-60cm tail for securing the tube to the wire spiral. Weave and tuck ends inside tube wall.
— Spiral Edge Ruffle (White decorative icicle border) :
Info :
The white ruffle is crocheted along the outer edge of the tube after the tube is secured to the wire. Work slip-stitch anchors along the outer rim every 2-3 sts, then work ruffle loops that mimic dripping snow. This gives the frosty scalloped edge visible in the photos.
Round 1 :
With white yarn, join at outer edge with sl st into any outermost stitch. Ch 1, sc in same st (1)
Round 2 :
*ch 6, sl st in next outer stitch*, rep along outer edge (approx one loop per 2-3 tube stitches)
Round 3 :
To create drips: in each ch-6 loop work (1 sc, 1 hdc, 3 dc, 1 hdc, 1 sc) then sl st to tube to anchor. Repeat for each loop creating a series of pointed drips.
Info :
Alternate drip lengths to create a natural look (some long, some short). You will later add bead icicles beneath many of these drips by threading beads onto fine yarn and tying to the base of the drip.
Round 4 :
Work a second round of small picot accents: *sl st 2, ch 3, sl st into base of picot*, rep to add delicate snow edges (optional)
— Icicle Bead Drops (Make approx 28-40) :
Info :
Thread clear seed beads or small drop beads onto a length of yarn or fishing line. Tie a small knot to anchor, then sew the remaining length to underside of ruffle drips. Alternatively crochet a bead-drop chain using ch loops with beads slid in between.
Method A - Beaded Yarn Drops :
Cut lengths of yarn 10-12cm. Thread 6-12 small beads onto each. Knot the end and sew through the last bead to anchor. Attach the knotted end to underside of a drip using yarn needle. Trim and secure with a dab of glue if needed.
Method B - Crocheted Bead Icicle :
With clear bead-ready yarn, ch 10, slip bead onto yarn and slide into position, sc back along chain securing beads every 1-2 ch. FO and attach to base of drip. Repeat for desired quantity.
Info :
Make more icicles for a heavy frosty look; the example shows an icicle under almost every white drip on the outer edge. Keep beads lightweight to prevent sagging.
— Base Stabilizing Ring (Bottom loop) :
Round 1 :
6 sc in magic ring (6)
Round 3 :
(1 sc, 1 inc) x 6 (18)
Round 4 :
(2 sc, 1 inc) x 6 (24)
Round 5 :
(3 sc, 1 inc) x 6 (30)
Round 6-10 :
1 sc in each st (30)
Info :
Create a flat ring that will accept the bottom of the spiral wire. After round 10, fold center open and join with sl st across to create a large donut ring. You will later sew the spiral base into this ring to keep it upright. Optionally, insert a cardboard disk trimmed to fit the ring for extra stiffness, then cover it with crochet.
Round 11 :
(3 sc, 1 dec) x 6 (24)
Round 12 :
(2 sc, 1 dec) x 6 (18)
Round 13 :
(1 sc, 1 dec) x 6 (12)
Info :
Fasten off and leave long tail to whip-stitch the spiral wire base into position in the center of the ring.
— Snowman (Make 3 identical; place at marked positions) :
Info :
Each snowman is a two-sphere amigurumi (head + body), with a small hat, scarf, carrot nose, button eyes and embroidered smile. The pattern below yields a snowman about 3.5-4.5cm tall (without hat). Use white worsted for body, navy or medium blue for hat and scarf, orange for nose, and black beads or embroidery for eyes and buttons.
— Head :
Round 1 :
6 sc in magic ring (6)
Round 3 :
(1 sc, 1 inc) x 6 (18)
Round 4 :
(2 sc, 1 inc) x 6 (24)
Round 5 :
(3 sc, 1 inc) x 6 (30)
Round 6 :
(4 sc, 1 inc) x 6 (36)
Round 7-9 :
1 sc in each st (36)
Info :
Place safety eyes between rounds 8-9, spaced about 6 sts apart for the sweet expression. If embroidering eyes, mark the positions with pins and embroider after finishing the head but before stuffing fully.
Round 10 :
(4 sc, 1 dec) x 6 (30)
Round 11 :
(3 sc, 1 dec) x 6 (24)
Info :
Begin stuffing the head firmly here; small amounts of stuffing at a time produce a smooth sphere. Use a stuffing tool or blunt pencil to push fill into the small opening.
Round 12 :
(2 sc, 1 dec) x 6 (18)
Round 13 :
(1 sc, 1 dec) x 6 (12)
Round 14 :
6 dec (6) - FO leaving long tail for sewing
Info :
Weave the tail through remaining 6 sts and pull tight to close. Hide tail inside head by threading back through several stitches.
— Body :
Round 1 :
6 sc in magic ring (6)
Round 3 :
(1 sc, 1 inc) x 6 (18)
Round 4 :
(2 sc, 1 inc) x 6 (24)
Round 5 :
(3 sc, 1 inc) x 6 (30)
Round 6-9 :
1 sc in each st (30)
Info :
Stuff the body firmly after round 9 and before you decrease. The snowmen pictured are packed fairly firmly to keep them upright on the spiral rail.
Round 10 :
(3 sc, 1 dec) x 6 (24)
Round 11 :
(2 sc, 1 dec) x 6 (18)
Round 12 :
(1 sc, 1 dec) x 6 (12)
Info :
Leave a long tail for sewing the head to the body. Sew head to body securely with ladder stitch; position the head slightly forward to mimic the pose seen in the photos. Use a dab of glue inside the seam for stability if needed.
— Hat (Make 3) :
Round 1 :
With blue yarn, 6 sc in magic ring (6)
Round 3 :
(1 sc, 1 inc) x 6 (18)
Round 4-6 :
1 sc in each st (18)
Round 7 :
(1 sc, 1 dec) x 6 (12)
Round 8 :
1 sc in each st (12) - FO leaving long tail for sewing
Info :
Create a tiny brim by folding the bottom edge and working sc around the lower round in FLO to create a brim ridge. Alternatively, work ch 6 then sl st around base to mimic the turned-up brim seen in the images.
— Scarf (Make 3) :
Round 1 :
With blue yarn, ch 21, sc in 2nd ch from hook and across (20)
Round 2-3 :
1 sc in each st (20)
Round 4 :
Fold length and sl st short ends together to create a loop, leaving a short tail to stitch as the scarf tail. FO.
Info :
Wrap scarf around the neck area between head and body; stitch tails to body to secure. Add small fringe by cutting short 1cm lengths and knotting into the ends for texture.
— Carrot Nose & Buttons & Eyes :
Nose :
With orange yarn, ch 2, 3 sc in 2nd ch from hook (3), FO leaving long tail to sew. Stuff lightly and stitch into face between the eyes.
Buttons :
Sew three tiny black beads or French knots down the center of the body to create buttons. Space evenly. Use slightly larger beads or embroidery for a charming look.
Eyes :
Use 6-8mm safety eyes or stitch small black French knots. Place with 6 sts spacing as instructed in head section. If using safety eyes, install before closing head completely.
Info :
To embroider the smile, use backstitch with black embroidery floss to make a small upturned mouth beneath the nose. Keep stitches tiny to match photo scale.
— Snowflake Motif (Make 3-6) :
Round 1 :
6 sc in magic ring (6)
Round 2 :
*ch 4, sl st in next st* repeat to create 6 loops (6 loops)
Round 3 :
In each ch-4 loop work (sc, ch 3, 3 dc, ch 3, sc) to form points. FO and weave ends.
Info :
Make snowflakes in white and stiffen with spray starch or a small dab of fabric stiffener on paper to keep them flat. Attach with a short sewn thread to hang from inner edge or between coils as shown in the images.
— Short Icicle Crochet (Make many small acrylic-look icicles) :
Round 1 :
Ch 10 with clear thread or white yarn with beads, sl st to first ch to form a ring (10)
Round 2 :
Working down the chain: sc in each ch back towards start (10)
Round 3 :
Dec rounds: *2 sc, dec* repeat until 6 sts remain (6)
Round 4 :
*1 sc, dec* repeat until 4 sts remain (4)
Round 5 :
Dec across to close, FO and attach bead cluster to top. Alternatively string beads before working to achieve a transparent icicle effect.
Info :
Make lots of these and hang under each white drip on the spiral. Spacing and length variation create the natural dripping look. Secure the top by stitching through the outer tube wall and adding a small dab of glue to hold beads if needed.
— Assembly Overview :
Info :
After crocheting tube, ruffle, icicles and snowmen, complete assembly in this order: secure spiral tube onto wire, sew tube end to base ring, attach ruffle around outer edge, add icicles, place snowmen, then sew snowflakes and final hanging loop.
Step 1 :
Slip crocheted tube over the pre-formed spiral wire carefully. Fold and stitch the starting end onto the top coil to form a neat hanging loop. Use the long tail left from the tube to sew the seam invisibly using whipstitch and weave ends inside.
Step 2 :
Work the white ruffle along the outer edge by anchoring slip stitches through the outer-most tube stitches. Maintain even spacing so icicles fall vertically.
Step 3 :
Attach the bottom of the spiral to the base ring with whipstitch using the long tail left from the base. Add glue or an internal cardboard disk for additional stiffness as desired.
Step 4 :
Sew the snowmen into the marked positions by stitching the bottom sphere to the inner curve of the tube. Reinforce with multiple passes and a dab of glue for permanent hold. Position the middle snowman slightly more recessed to mimic depth perception in the photo.
Info :
Balance is critical — add small fishing weights into the base ring if the spiral tips. Conceal weight inside the ring or under the base disk.
Step 5 :
Sew icicles under each white drip. For bead drops, stitch the knotted end into the base of the drip and hide the knot inside the tube wall with a yarn needle. Add snowflakes between coils by stitching a short thread to the inner wall and tying with a small loop for movement.
Final Info :
Create a hanging loop of chain or leave extra wire at top to form a loop; cover with yarn for a finished look. Hang indoors where it can gently spin — avoid outdoor exposure to prevent moisture damage.
Assembly Instructions
- Attach the crocheted tube to the spiral wire by sliding it over the wire. Align the top end and fold it over the wire loop; sew the folded edge to itself with whipstitch for a secure hanging loop. Use the long tail to secure every 6-8 stitches to the wire along the first coil for a snug fit.
- Sew the bottom of the spiral into the Base Stabilizing Ring at the base. Pin the spiral into the center of the ring, then stitch through the tube wall and ring fabric in multiple passes, distributing stitches evenly around the attachment point to avoid lopsidedness.
- Position the three snowmen at the previously marked positions along the inner curve. Use pins to hold each snowman and stitch through the bottom sphere into the tube inner rounds (approx rounds 35-38 of the tube). Reinforce with extra stitches and a dab of fabric glue inside for permanence.
- Attach the white ruffle along the outside edge by slip-stitching at 2-3 stitch intervals. Once anchored, stitch the bead icicles beneath each drip. For bead icicles, sew the knotted end of the beaded yarn through the base of the drip and into the tube wall, hiding knots inside.
- Sew snowflake motifs at selected outer positions using a short thread loop so they hang slightly below the tube edge. Make sure they do not tangle with icicles and are evenly spaced to avoid weight imbalance.
- Weave and hide all tails into the tube wall and down into the base ring. If the spiral tilts, add a small hidden weight inside the base ring (metal washer or small fishing weights wrapped in tape) and re-balance until it hangs straight.
Important Notes
- 💡Use stitch markers consistently at the beginning of each round to avoid counting errors and maintain proper shaping.
- 💡Stuff snowmen gradually as you work rather than waiting until the end, especially for small openings — use a stuffing tool for even fill.
- 💡For safety eyes, position and secure before stuffing head fully — they cannot be repositioned once locked in place.
- 💡Maintain consistent tension throughout the project; too tight creates stiff, small pieces, too loose creates floppy, holey fabric.
- 💡When sewing the tube to the wire, use long, even stitches and hide the thread inside the tube for neatness.
- 💡Pin all pieces in position before final sewing to ensure proper placement and symmetry.
- 💡Keep a row counter or notepad to track extended even rounds, especially when creating the long spiral tube.
- 💡Test hang the spiral frequently while adding icicles and snowflakes to ensure the weight distribution keeps it balanced.
This Icy Blue Spiral Christmas Garland brings wintry charm and a little bit of magic to any room. Each loop and tiny snowman is a labor of love that transforms into a whimsical hanging sculpture. The sparkling bead icicles catch the light and the soft blues and whites keep the look elegant and frosty. Hang it with pride — it makes a beautiful handmade centerpiece or a thoughtful seasonal gift. ❄️🎁