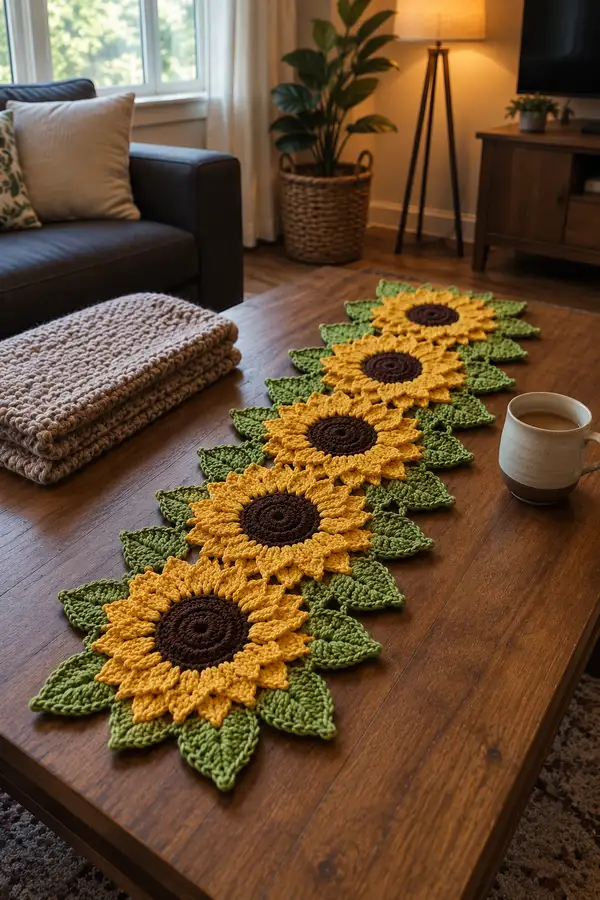
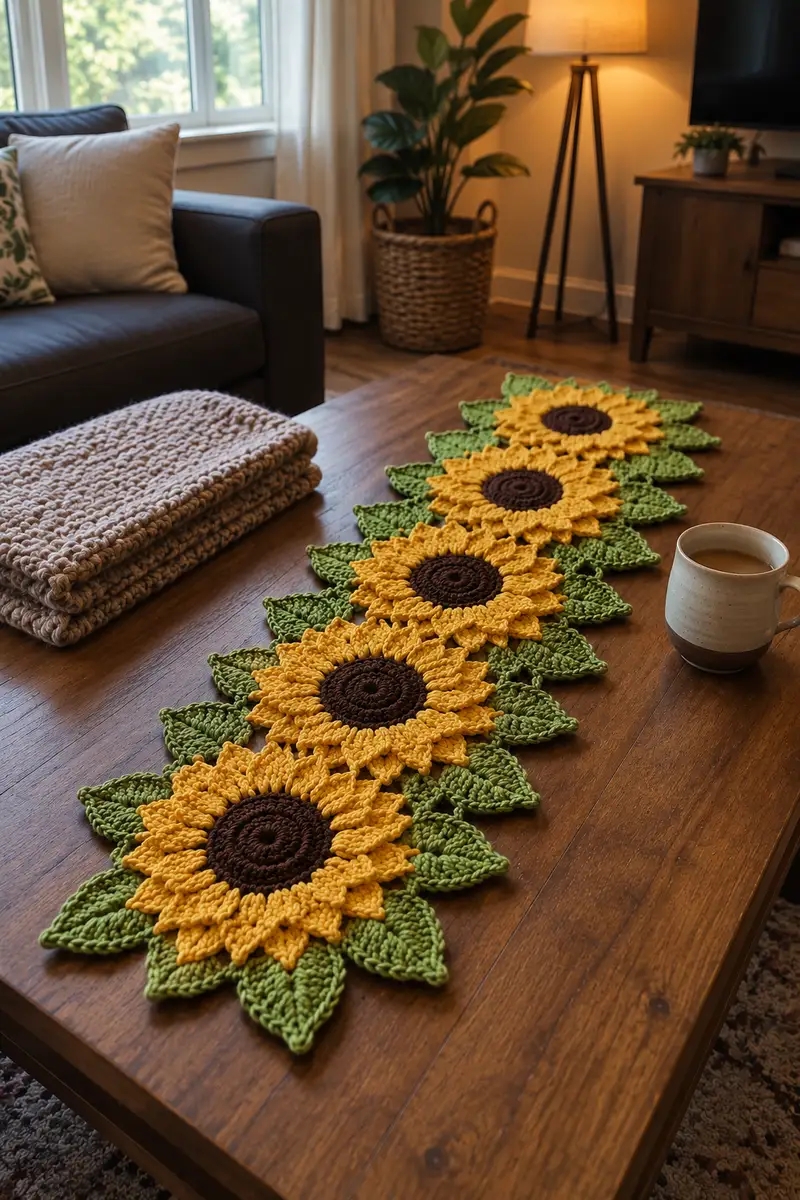
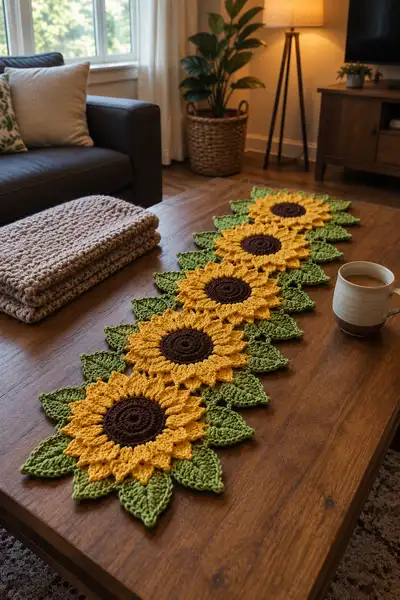
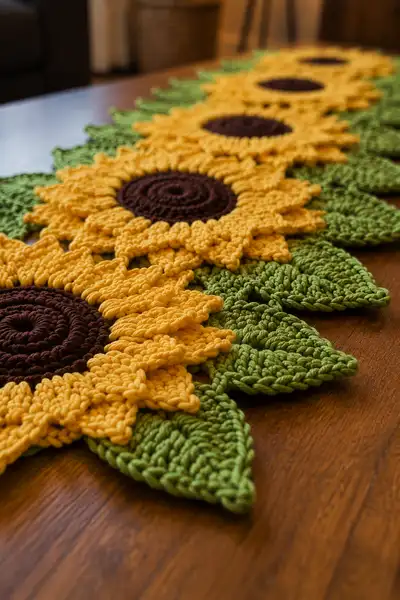
Create a bright, farmhouse-style table runner made of joined sunflower motifs with layered yellow petals and scalloped green leaves. This pattern walks you through making the textured brown centers, two-layer sunflower petals, shaped leaves, and the method to join motifs into a long runner. The finished runner lays flat and decorative on a dining or coffee table and showcases 3D petals and bold contrast for a handmade statement piece.
Progress Tracker
0% Complete
— Center Disk (brown) :
Round 1 :
6 sc in magic ring (6)
Round 3 :
(1 sc, 1 inc) x 6 (18)
Round 4 :
(2 sc, 1 inc) x 6 (24)
Round 5 :
(3 sc, 1 inc) x 6 (30)
Round 6 :
(4 sc, 1 inc) x 6 (36)
Info :
These rounds build a tight, slightly domed center. Use a smaller hook or tighter tension for a firm center that won’t collapse. Carry brown yarn inside while you switch to yellow for petals if you prefer fewer ends.
Round 7 :
1 sc in each st around (36)
Round 8 :
1 sc in each st around (36)
Round 9 :
(4 sc, 1 inc) x 6 (42)
Round 10 :
1 sc in each st around (42)
Info :
Fasten off brown leaving a 12-18" tail for sewing the center to the petal base if you aren’t crocheting the petal round directly into the center. If working continuously, join yellow now with a sl st to any stitch of last brown round.
— Petal Base Round (foundation for petals, worked in golden yellow) :
Round 1 :
Join yellow with sl st to any st from the brown center round. Ch 1, 1 sc in same st, *ch 3, sk 1 st, 1 sc in next st* around to create 21 chain-3 loops (for 42 sts center use spacing to create 21 loops) (21 ch-3 loops)
Info :
Adjust the number of ch-3 loops to match your center circumference. Aim for a multiple that will give an even number of petals (commonly 12 or 16 petals). The sample uses 16 petals; with a 42-44 stitch center, spacing every other stitch yields ~21 loops and we will work petals over pairs of loops to form 16 prominent petals using cluster increases.
— Petal Layer A (inner petal layer, golden yellow) :
Round 1 :
*In next ch-3 sp: (sc, hdc, 3 dc, hdc, sc) in ch-3 sp; sl st to next ch-3 sp; rep from * around to create 16 full petals (16 petals)
Info :
Each petal is worked into a chain space. If you have more or fewer chain-3 spaces adjust the petal grouping: work into every 1 or 2 spaces to achieve 12-16 petals evenly spaced. Keep petals tall but not loose; maintain consistent tension.
Round 2 :
Ch 1, 1 sc across each stitch along the base of each petal (work 5 sc along the base of each petal to create a band) (approx. 80 sc)
Round 3 :
1 sc in each st around to smooth base (approx. 80 sc)
Round 4 :
(BLO) 1 sc in each st around (approx. 80 sc)
Info :
Working in BLO creates a small ridge that helps the second petal layer pop forward. Place a stitch marker at the start of this round to keep count of repeats.
Round 5 :
Ch 1, *prepare petal group: (sc in next 3 sts) then in next st work (sc, hdc, 3 dc, hdc, sc) across to create a second short petal between the larger ones; rep from * around (approximately 16-18 small petals fitting between larger ones)
Round 6 :
1 sc in each st around to secure small petals (approx. 112 sc)
Info :
If your petals appear crowded, adjust by reducing base sc counts between petals. This round is useful to flatten and secure the first petal layer before adding the outer layer.
— Petal Layer B (outer ruffled petals, golden yellow) :
Round 1 :
Join with sl st at the tip of a small petal base, ch 3 (counts as dc), *sk 2 sts along base, in next st work (1 dc, ch 1, 1 dc, ch 1, 1 dc) to form a picot-shaped petal stitch; sk 2 sts, sl st into next base stitch; rep from * around to create 16 outer petal clusters (16 clusters)
Round 2 :
Ch 2, turn, work (2 dc, ch 1, 2 dc) in each outer petal cluster to deepen and widen petals (16 expanded clusters)
Round 3 :
Ch 1, working behind outer petal tips: *in next ch-1 sp between petals, (3 dc, ch 1, 3 dc) to form a scalloped ridge; rep from * around (16 scallops)
Round 4 :
Ch 1, sc in each st around working through back loops of scallops to anchor petals (approx. 128 sc)
Info :
These rounds create the dimensional ruffle. Vary dc and ch counts to achieve the look you prefer—more dc = fuller petals. Keep counts even so the outer layer aligns with inner petals.
Round 5 :
Ch 1, *(sc in next 4 sts), in next st work (sc, hdc, 5 dc, hdc, sc) as an accent petal to add textured height; rep from * around (16 accent petals)
Round 6 :
1 sc in each st around (approx. 160 sc)
Round 7 :
Fasten off yellow, weave in ends or leave tail for joining. If you prefer, join petal round directly to center to avoid sewing later. Block petals gently to shape.
— Petal Texture Round (optional raised texture) :
Round 1 :
With RS facing, rejoin yellow to base behind each petal: *ch 1, in base sc work 1 hdc FLO, rep around to create a ridge behind each petal (approx. 80 hdc FLO)
Info :
This FLO round gives a subtle furrow that helps petals stand away from the center creating depth. Use this if you want extra shadow and dimension.
Round 2 :
1 sc in each st around to tidy ridge (approx. 80 sc)
— Leaf Motif (green) :
Round 1 :
Make a leaf module separately. Ch 7, sc in 2nd ch from hook and across (6 sc), ch 1, turn (6)
Round 2 :
1 sc in first st, hdc in next, 2 dc in next 2 sts, hdc in next, sc in last (creates a central point) (6)
Round 3 :
Ch 3 at tip to begin turning point, working on opposite side of foundation chain: *sc in next st, hdc in next, 2 dc in next 2 sts, hdc in next, sc in last; sl st to first sc to close (12 stitches around both sides)
Info :
This creates a flat, double-sided leaf. Work lightly; do not overstuff—leaves are flat motifs to be joined between sunflowers. Keep edges neat for joining.
Round 4 :
Work border round: ch 1, *sc in next 3 sts, (hdc, dc, hdc) in tip ch-3, sc in next 3 sts; sl st to join (about 16-18 sts total depending on spacing)
Round 5 :
Work veins: rejoin yarn at center base, ch 1, sc in center base, ch 3, sl st back down to create raised vein; repeat twice on each leaf to add three veins. Fasten off and weave ends.
Info :
Leaves in the sample show deep ridges. To achieve this, after Round 4 work one round of BLO sc to create raised ridges on the leaf face: 1 sc in each st BLO around.
Round 6 :
Optional decorative edge: with contrasting green, work picot edging around leaf: *sc, ch 3, sl st in ch-3; rep around. Fasten off.
— Leaf Deep Texture (alternate method for sculpted leaves) :
Round 1 :
Create central ridge: rejoin green at leaf midline, ch 1, *1 sc in next st, hdc in next, tr in tip, hdc down opposite side, 1 sc; rep for each leaf to add deep mid vein (approx. 8-10 stitches extra texture)
Info :
Use BLO rounds before the edging to create raised ribs. This mirror stitch technique shapes leaves to look hand-shaped and natural.
— Joining Motifs (method A: join-as-you-go between sunflowers) :
Info :
This sample runner uses four sunflower motifs joined by alternating leaf modules across the runner axis. Each sunflower shares leaves with its neighbor—work join-as-you-go on final leaf round or use whip stitch to sew flat motifs after completing them.
Round 1 :
Position two finished sunflower motifs RS up. Align outer petal points so they overlap slightly. With green yarn and a yarn needle, whip stitch through outer base ridges where petals meet to secure motifs together at three or four contact points (approx. 4-6 stitches per contact).
Round 2 :
Place leaf motifs between motif pairs so leaf tips point outward from the runner edge. Sew leaf bases to both sunflowers with small, even stitches through the petal bases and leaf edge. Repeat to attach 2 leaves between each pair of flowers (or 3 depending on layout).
Info :
Pin motifs and leaves together before sewing. Use blocking pins to get even spacing. Keep joins on the underside if you prefer a cleaner RS. The sample uses visible green joins that complement the leaves.
Round 3 :
For stronger joins, work a single round of sc with green along the seam where petals meet leaves: insert hook through both motifs and sc evenly to create a continuous green seam (approx. 1 sc every 3-4 stitches). Fasten off and weave ends.
Round 4 :
Attach a set of leaves to each joined edge in a staggered pattern so runner edges look scalloped. Sew leaves with 6-8 small stitches across base and 2-3 stitches near tip to keep them flat.
Info :
When joining motifs, keep tension relaxed to prevent pulling the motifs out of shape. If seams pucker, add a backing of narrow felt or use larger stitches to distribute stress.
— Joining Motifs (method B: join by crocheting) :
Round 1 :
With motifs pinned RS facing each other, join green yarn at a point where a petal tip meets a leaf base. Ch 1, work sc through both motif edges every 3 stitches to create a visible crochet join. Continue around the joining area until motifs are securely attached.
Round 2 :
For a decorative join, after the sc seam, work a crab stitch (reverse single crochet) along the seam edge to create a braided look. This also stiffens the join and helps the runner lie flat.
Info :
Joining by crochet eliminates the need for needle sewing and produces a tidy, continuous edge. Choose whichever method fits your skill and desired appearance.
— Edge Finish (green) :
Round 1 :
Once all motifs and leaves are joined in a long strip, work a decorative border along the entire runner edge. Join green yarn at one corner edge: ch 1, 1 sc evenly around entire perimeter placing 1 sc in each visible outer stitch (approx. count will vary with runner length, estimate 300-400 sc for 4-motif runner)
Round 2 :
*(sc in next 3 sts, picot) repeat across curves: sc in next 3 sts, ch 3, sl st in 3rd ch to form picot; continue to end. Turn corners with (sc, hdc, dc) to keep edges flat.
Info :
Use the picot or shell edging to add a refined finish. If you prefer a simpler edge, 2 rounds of sc are sufficient. Ensure you keep your stitches even to preserve runner shape.
Round 3 :
Work 1 round of reverse sc (crab stitch) into the outer edge for a rope-like finished look. This round also tightens and stabilizes edges so petals don’t curl outward.
Round 4 :
Fasten off, weave all ends on the underside thoroughly. Lightly steam-block the runner to flatten petals and shape leaves. Do not press too hard; steam from a distance to avoid flattening texture.
— Finishing Touches :
Info :
Weave in all ends, trim threads close to fabric. If the runner has a slight wave, pin flat on blocking mats and spray lightly with water or steam until dry. For extra stability, you can attach a thin fabric backing using a ladder stitch to keep motifs flat on a tabletop.
Round 1 :
Inspect runner for loose joins. Reinforce any seam with a few extra mattress stitches under the petals. Add a small dot of fabric glue under leaf tips if they tend to lift.
Info :
Label your runner underside with a small fabric tag or embroidered initials if giving as a gift. Store flat or rolled to avoid creasing petals.
Completing this sunflower runner brings a little sunshine into any room! Each layered petal and sculpted leaf creates a handmade focal point that’s warm, rustic, and delightful. I love how the dimensional petals pop and the leaves tuck between flowers to form a flowing, organic edge. Enjoy blocking and joining—the final reveal is always worth the effort. 🌻🧶