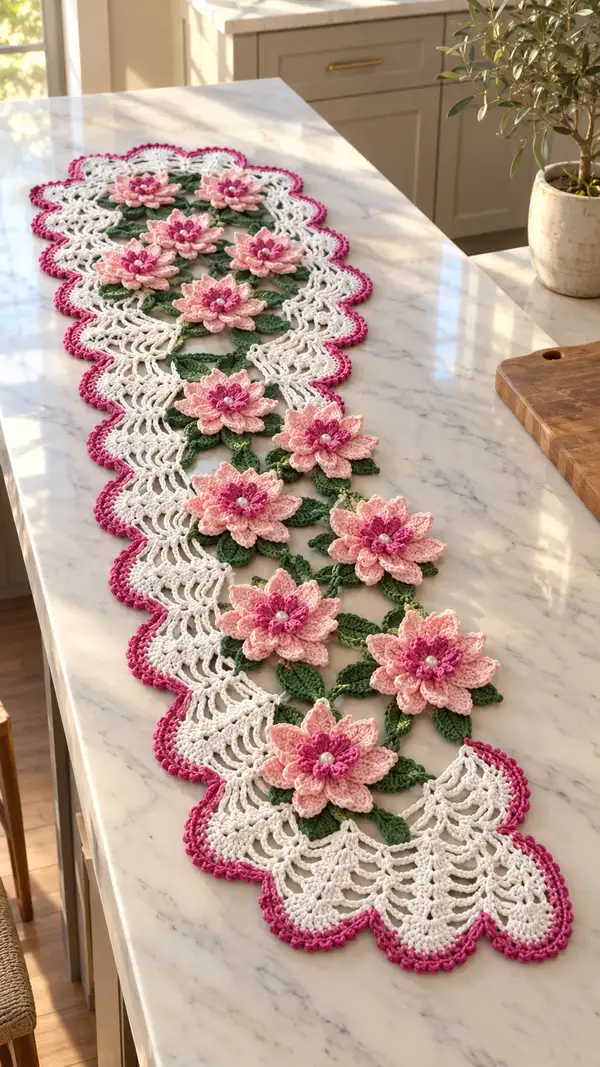
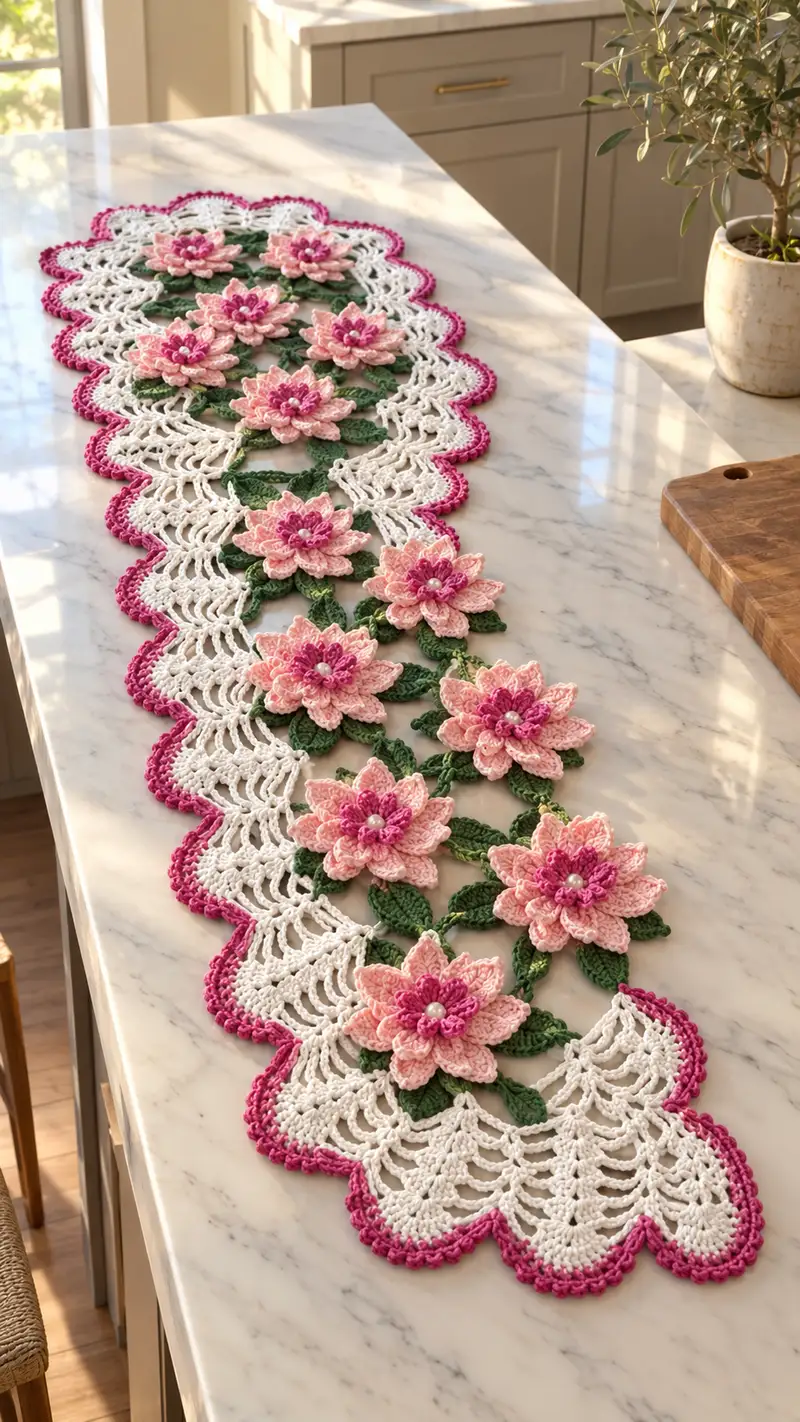
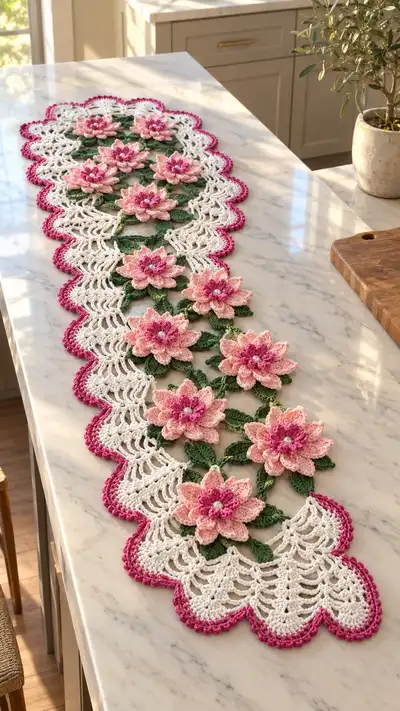
Create a stunning lace table runner featuring layered lotus flowers, leafy connectors and a scalloped picot edge. This pattern uses delicate cotton yarn in soft pinks, rosy accent and fresh green leaves set on an elegant white lacy background. The runner is worked as multiple floral motifs joined by crocheted vines and completed with a decorative scalloped border in contrasting rose. A showstopping centerpiece perfect for dining tables and special occasions.
Progress Tracker
0% Complete
— Flower Motif (Make 9-11, assemble as shown) :
Round 1 :
With deep rose/pink and 3.0mm hook, make a magic ring. Ch1, 10 sc into ring, pull tight (10)
Round 2 :
Inc in each st around (20)
Round 3 :
(1 sc, inc) x10 (30)
Round 4 :
1 sc in each st around (30)
Info :
This small round forms the flower center base. Keep tension firm so the base stays slightly domed. Add a small dab of cream-colored thread if you plan to sew on a bead center for stability.
Round 5 :
Switch to medium rose pink. *(ch2, skip 1, sc in next) across to end. This creates 15 ch2 loops around for petal anchors (15 ch2-sp)
Round 6 :
Working in each ch2 loop: (sc, hdc, 3 dc, hdc, sc) in each loop to make 15 small petals. Join with sl st to first sc (15 petals)
Info :
Fasten off medium rose layer, weave in tail to the underside. Use stitch marker at top of one petal to keep track of first petal for symmetry when adding next layer.
Round 7 :
Attach light pink in ch2 space at base between two inner petals. Ch3 (counts as dc), 2 dc in same sp, ch1, *(3 dc) in next space, ch1; rep around joining to top of ch3 (15 groups of 3 dc separated by ch1)
Round 8 :
In each 3-dc group: (sl st to center of group, ch2, 1 hdc, 3 dc, 1 hdc, ch2, sl st) to form fuller outer small petal cups. Work evenly to shape 15 outer petals.
Info :
Use 2.5mm hook if you prefer tighter, more pronounced petals for the smallest rose center; otherwise keep 3.0mm for consistent scale. Block each flower flat initially to shape petals before layering.
Round 9 :
Fasten off light pink. With hot rose/pink, attach behind each existing petal base where ch1 spaces show. Ch1, sc around base of each existing petal into the stitch space, making 30 sc evenly distributed around the motif to form a secure anchor for the next layer (30)
Round 10 :
Grow petal layer: *(3 sc, ch3, 3 sc) in next stitch base to form a shell; skip 1; rep around creating 15 small shell anchors (15 shells)
Round 11 :
In each shell: (sl st to center, ch2, 1 hdc, 5 dc, 1 hdc, ch2, sl st) to make fuller mid petals (15 mid petals)
Info :
At this stage the flower has two visible petal tiers (small inner petals and medium mid-petals). Keep petals layered outward so inner petals show above mid petals. Gently bend and shape each petal with finger during blocking.
Round 12 :
Switch to light pink for outermost petals. Join at a point between mid-petals: ch1, sc in same sp, *(ch4, skip to next ch-space, sc) repeat to create 15 ch4 loops (15 loops)
Round 13 :
In each ch4 loop work: sc, hdc, (3 dc, ch1, 3 dc), hdc, sc to create dramatic outer petals. Fasten off and weave tails. Shape petals forward to create layered lotus effect (15 large petals)
Round 14 :
Optional bead cup: With deep rose and 2.5mm hook, make tiny picot cluster over center: join behind center, (ch4, sl st in 2nd ch from hook) repeat 6 times around center then fasten off. Sew a 6-8mm pearl to center using strong thread and backstitch to secure.
Info :
Make 9 flower motifs for a medium-length runner as shown in the photo (3 columns of 3 staggered) or 11 for a longer table. Block each flower using pins and spray mist to open petals and flatten the base where it will join to leaves.
— Leaf Motif (Make 18-22) :
Round 1 :
With leaf green and 3.0mm hook ch9, sc in 2nd ch from hook and across to create foundation (8 sc)
Round 2 :
Turn: 2 sc in first st, sc across until last st, 2 sc in last st (10)
Round 3 :
Ch1, sc in each st across (10)
Round 4 :
Start shaping: (2 sc, hdc, 3 dc, hdc, 2 sc) across center row to form leaf swell. Work into both ends to curve the leaf tip: ch2, sl st in tip then continue along opposite side working symmetrical stitches back to base. Fasten off after shaping. (Leaf finished)
Info :
Each leaf is worked flat and turned; the long ch9 and worked edges create a pointed tip. Make two leaves per flower: one slightly smaller for tucked placement, one full-size for outward display.
Round 5 :
Optional vein detail: Reattach green in center. Ch1, work 1 sc in center top then (ch3, sl st) back towards base for a faux central vein. Alternatively embroider veins with contrasting olive thread after blocking.
Info :
Make 2 leaves per flower and 2 smaller accent leaves for each flower cluster. For a runner with 9 flowers you will need about 22-24 leaves total. Block leaves flat, pinning the points for a crisp silhouette.
— Connecting Vine & Stem Chain :
Round 1 :
With leaf green, ch40 for a standard-distance vine between flower centers. Sl st in each ch back along chain to make a rope-like stem (40 sl st)
Round 2 :
On the top of the chain, every 6th ch make a small leaf anchor: *(ch6, sc in 3rd ch from hook to make small bud) rep across to create subtle leaflets. Fasten off after full vine.
Info :
Vines are crocheted separately then sewn to the underside of flowers and joined to the lace panel. Make lengths to connect flower groups as shown - generally 8 vine lengths for a 9-flower runner. Allow extra length for gentle curves during assembly.
Round 3 :
Optional reinforcement: Work a second chained row underneath and join with sc through both rows to create a thicker braid-like vine which holds shape better across the runner (work along entire vine length).
— Lace Fan Panel (White background, make panels and join; this creates the long scalloped runner base) :
Round 1 :
With white cotton and 3.0mm hook, ch36, join to form ring carefully to avoid twist. Ch3 (counts as dc), 2 dc in same ch, *skip 2 ch, 5 dc in next ch (shell), skip 2 ch; repeat along to end, join to top of ch3 to form 6 shells (6 shells)
Round 2 :
Ch3, dc in same st, in each shell work (3 dc, ch2, 3 dc) to create enlarged shells; join (6 shells)
Round 3 :
Ch1, sc in same st, *ch5, skip to center of next shell, sc; rep around to create 6 large ch5 loops which become airy fans (6 ch5 loops)
Info :
This small circular panel forms a single fan unit; multiple fan units are joined into an oval runner repeating the fan motif side-by-side. The photo runner uses a long continuous fan chain of 7-9 fans joined in an alternating pattern.
Round 4 :
In each ch5 loop: (sc, hdc, 9 dc, hdc, sc) to create airy open fans. Fasten off and block each fan flat (6 fan petals per unit)
Round 5 :
Join fans: Arrange 7 fans in a line. Using white, join edges by working sc through outermost stitches of adjacent fans every 2-3 dc to create a stable seam. Join so fans interlock, creating an elongated oval shape matching runner length.
Round 6 :
Edge reinforcement: Work 1 sc across all seam joins around the elongated chain to stabilize joins and even out spacing (work continuously around entire oval).
Round 7 :
Create outer openwork row: *ch7, sl st down to base between two shells to make a large open arc; repeat around entire oval interspersing arcs to follow scalloped shape (approximately 42 arcs depending on fan count)
Info :
Make the lace panel as large as needed by adding or removing fans. For a standard table runner as pictured, arrange 7 fans lengthwise and 1 fan central across width creating a gentle oval. Block the entire assembled lace base thoroughly before attaching decorative elements.
Round 8 :
Reinforce arcs: In each ch7 arc work (sc, hdc, 5 dc, hdc, sc) to form a lacy scallop. This gives the base a clean structure for attaching leaves and flowers (work evenly around).
Round 9 :
Optional background braid: In spaces between scallops add a chain and sc join to create small diamond meshes for added stability where leaf veins will be sewn.
Round 10 :
Work two rounds of sc around entire panel to give a firm foundation for sewing motifs: 1 sc around then 1 sc in BLO to create a subtle ridge separating base from picot edge (approx stitch count varies with fan count; maintain even spacing).
Info :
Throughout lace work, count shell repeats and mark the center of each fan unit with a stitch marker. These centers are where leaf pairs and flower stems will be sewn—use markers to ensure even spacing of motifs across the runner.
Round 11 :
Using a lighter hand, add decorative loopwork between fans: ch3 loops worked into the large arcs to create visual airiness. Keep loops consistent in size for symmetrical scallops.
Round 12 :
Final base finishing: Work a final round of sl st uniformly around edges to tidy up raw loops and prepare for color contrast edging (do not fasten off).
— Scalloped Picot Border (Hot Rose edge) :
Info :
Change to hot rose yarn before starting border. Carry white tail to back and secure. The scalloped border uses a combination of shells and picot stitches for a crisp, decorative frame. Work evenly around entire lace panel.
Round 1 :
With hot rose and 3.0mm hook: Join with sl st. *Ch3, 7 dc in same st (shell), sl st in next 3 sl st spaces (or between shell peaks), picot (ch3, sl st in 3rd ch), sl st to join to next shell; repeat around. Adjust number of shells to fit fan count (approx 42 shells)
Round 2 :
One more round of scallop refinement: In each shell work (sc, hdc, 5 dc, hdc, sc) followed by picot finish at each join to make small raised points. Fasten off and weave ends neatly to back.
Info :
Work the border slowly and count shell repeats carefully. Blocking after the border will open scallops into the crisp scalloped edge seen in the photograph. If your shells appear small, add one extra dc to each shell to widen the effect.
— Small Accent Petals & Bead Centers (Optional extra texture) :
Round 1 :
With deep rose and 2.5mm hook, ch6, join to ring. Ch1, 8 sc in ring (8)
Round 3 :
Slip to front, ch2, 8 dc in ring, creating a tiny raised cup for bead mounting. Fasten off leaving long tail to sew to flower center and attach pearl bead (1 per flower)
Info :
Sew the small bead cups into the center of each layered lotus before attaching the petals permanently to leaves. This hides the sewing and gives a professional, neat center finish.
— Assembly & Joining Individual Motifs :
Info :
Block all components thoroughly: each flower, each leaf, and the assembled lace panel. Blocking will make joining accurate and keep petals lifted. Lay the lace panel flat and plan placement of flowers and leaves visually before sewing.
Step 1 :
Layout: On your blocked lace base mark centers where flowers will be sewn. For a runner of the size in the photo, place nine flowers evenly spaced in three staggered columns across the runner length. Use pins to mark positions then place leaves under each flower to check overlap.
Step 2 :
Attach vines: Position connecting vines first, using whip stitch to secure vine chain to the underside of lace at marked stem points. Sew every 6-8 stitches along the vine to keep it flat and to create gentle curves. Leave vine ends long for sewing to leaf bases.
Info :
Sew vines and leaves before placing flowers as leaves will help hide vine stitches and create depth. Use small, even stitches and knot securely on underside. Match thread color to leaf yarn to make seams invisible.
Step 3 :
Sew leaves: Place two leaves per flower—one behind and one slightly offset. Sew leaves through their bases to the lace panel using ladder stitch for nearly invisible joins. Ensure leaf tips face outward in a natural angle.
Step 4 :
Attach flowers: Center each flower over its paired leaves. From the underside, stitch through the flower base and the lace panel using small whip stitches at 6-8 equal points around the base. Avoid pulling too tight; stitches should secure but allow petals to remain slightly elevated.
Info :
Sew bead centers last. Use a sharp beading needle and strong thread; thread through pearl several times and back through the flower base to secure. Tie off on the underside and weave tail into the back.
Step 5 :
Edge finishing: After all motifs are attached, pin the finished runner to your blocking board and steam/block the entire piece again. This final blocking unifies the runner and sets the border scallops into crisp shape.
Info :
If any petals overlap into the lace scallops, adjust by shifting the sewn-in position slightly and resecuring—small adjustments can make a big difference in symmetry.
— Finishing Touches & Variations :
Info :
Optional embroidery: With a fine tip and contrasting thread you can add small French knot accents between flowers or a tiny center bud detail on leaves. Add extra beads along vine centers for sparkle.
Info :
Color swaps: Use cream instead of white for a warmer look or switch border color to gold or soft sage for a toned aesthetic. To make a longer runner simply add more fans and corresponding flowers in pattern units described above.
Info :
Care instructions: Hand wash gently in cool water and lay flat to dry. Re-block if necessary to restore shape after washing. Avoid tumble drying which can shrink and distort cotton threads.
This lace lotus table runner combines nuanced stitchwork with soft floral layers for a beautiful table centerpiece. Each petal and leaf is a small act of care, and the final blocked piece feels like a floral tapestry you can place down and admire. Whether you make one for yourself or as a thoughtful gift, the assembled runner will bring a handcrafted charm to any room. 🌸🧶✨