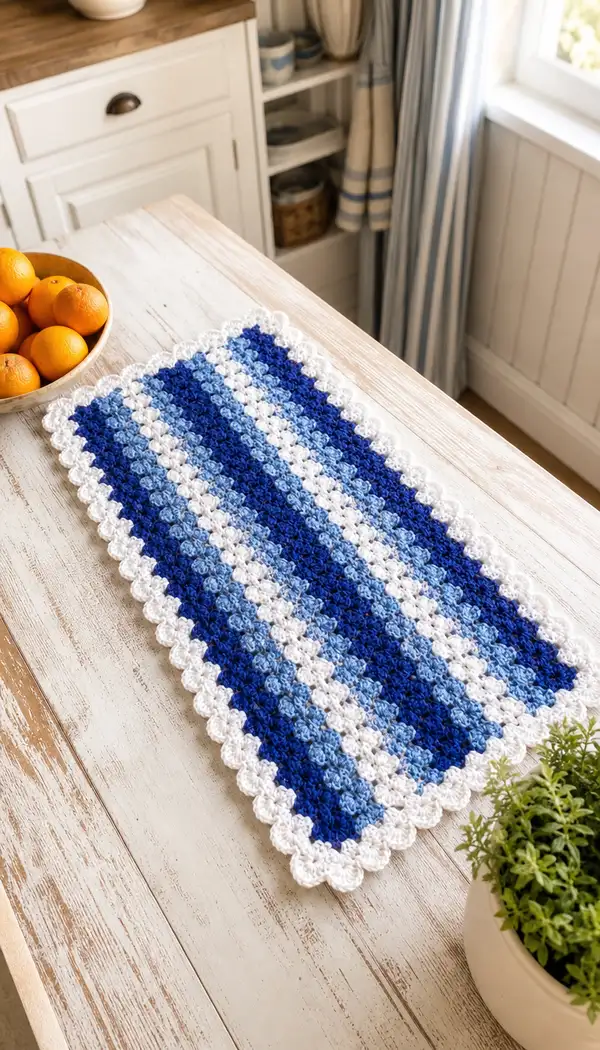
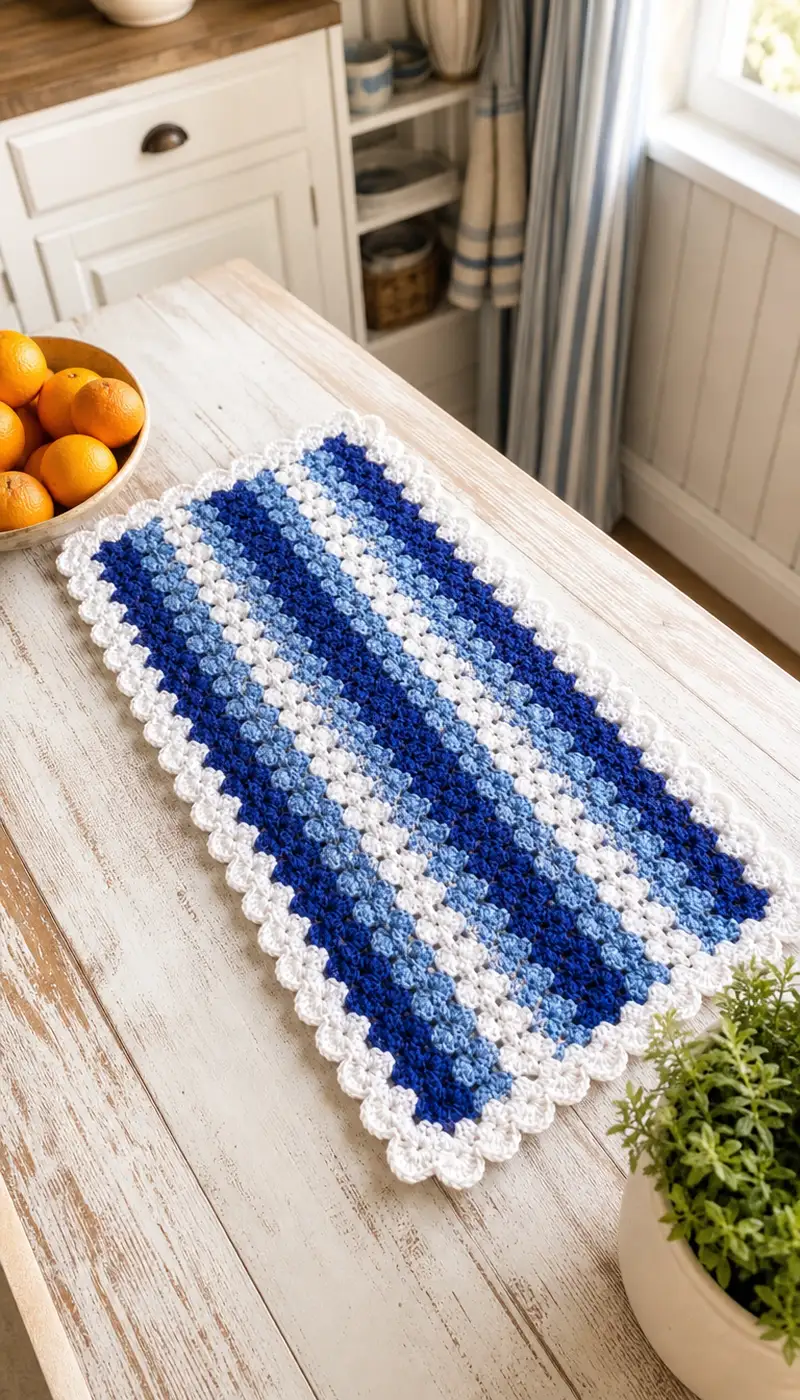
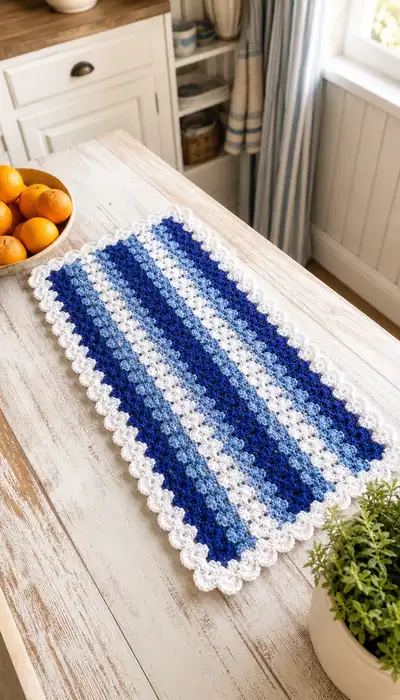
Create a coastal-inspired table runner featuring textured cluster stripes in three shades of blue and a crisp scalloped white border. This runner uses simple cluster and shell stitches to build a plush, eye-catching texture that lays flat and blocks beautifully. The pattern includes detailed row-by-row instructions, tips for color changes, and a decorative scalloped edging to finish. Ideal for kitchen tables, sideboards, or seasonal decor.
Progress Tracker
0% Complete
— Notes & Gauge :
Info :
Gauge is not critical for this runner, but for similar texture aim for approximately 14 clusters by 12 rows = 4 inches square using 5.0mm hook with worsted weight yarn. Adjust hook size to achieve desired drape. The sample runner measures approximately 12 inches wide x 36 inches long (30 x 92 cm). Pattern is worked in straight rows; no turning in the round.
Info :
Cluster stitch used: 3-dc cluster (cl) = yo, insert hook, pull up loop, yo, pull through 2 loops (leave last loop on hook) — repeat two more times into same stitch (you will have 4 loops on hook), yo and pull through all 4 loops. Chain 1 between clusters where indicated to form spacing. Each cluster counts as the main textured unit. Where counts are indicated, cluster count is shown first with approximate total double crochet equivalents in parentheses.
— Foundation Row :
Row 1 :
Chain 66. (Multiple of 3 + 3; this foundation creates 21 cluster positions across.)
Info :
Chain 66 gives you 21 cluster positions (21 x 3 dc clusters). If you prefer a wider runner, increase foundation chain in multiples of 3 to add extra clusters. Add 3 extra chains at the start to act as first turning chain where a dc or cluster will be anchored.
Row 2 :
Working into 4th chain from hook: make first cluster (cl) into that chain, *ch 1, skip 2 ch, cl into next ch; rep from * across until you have 21 clusters. End with cl in final chain. (21 clusters - approx 63 dc equivalent)
Info :
Keep tension even. The chain-1 spaces between clusters will make small gaps that soften as you work following rows. At the end of Row 2, turn your work and always begin the next RS row with ch 3 (counts as first dc) unless otherwise instructed.
— Body : (Textured Cluster Stripe Panel) — Rows 3 to 120 :
Row 3 :
Change to dark navy blue (if not already). Ch 3 (counts as dc), turn. Work cl in ch-1 space of Row 2 right after the ch-3, *ch 1, cl in next ch-1 sp; rep across so you again have 21 clusters. (21 clusters)
Info :
Each row after Row 2 will be worked into the ch-1 spaces created between clusters of the previous row. This staggered placement produces the textured floral look. The ch-3 turning chain at the beginning is used as the first dc equivalent; place the first cl immediately after it to keep edges straight.
Row 4 :
Continue in dark navy blue. Ch 3, turn. Work cl in first ch-1 space, *ch 1, cl in next ch-1 space; rep across — 21 clusters. (21 clusters)
Row 5 :
Change to medium royal blue. Ch 3, turn. Work cl pattern across into ch-1 spaces — 21 clusters. (21 clusters)
Info :
Color change note: to switch yarn cleanly, finish the last cl of the previous row. Complete the final cluster leaving 1 loop on hook, drop old color, pick up new color and pull through to finish the last step of the cl so the new color starts at the beginning of the next row. Alternatively fasten off and join new color at beginning of the next row. Carrying yarn across the back of the work is optional but may create a heavier, less drapey fabric; for long stripes we recommend fastening off and weaving ends.
Row 6 :
Medium royal blue. Ch 3, turn. Cl in first ch-1 space, *ch 1, cl in next ch-1 space; rep across. (21 clusters)
Row 7 :
Medium royal blue. Ch 3, turn. Work cl across — 21 clusters. (21 clusters)
Row 8 :
Change to sky/light blue. Ch 3, turn. Work cl across — 21 clusters. (21 clusters)
Info :
Following the photo, the stripe pattern is repeatable: dark navy 2 rows, medium royal 3 rows, light blue 2 rows, white 2 rows, alternating to form elongated vertical stripes down the runner's length. The sample uses long stripes by repeating these short row groupings to create the long vertical effect when the runner is oriented lengthwise. For this pattern we will list rows to create an approximate 36-inch length using repeated stripe groups, but you may adjust the number of stripe repeats to make the runner longer or shorter.
Row 9 :
Sky/light blue. Ch 3, turn. Work cl across — 21 clusters. (21 clusters)
Row 10 :
Change to crisp white. Ch 3, turn. Work cl across — 21 clusters. (21 clusters)
Info :
When working with white between colored rows, take extra care to keep white joins tidy to avoid color bleeding on light yarn. Weave ends thoroughly into the white section or carry a thin tail to the border for trimming later. If you prefer, do all color joins on the WS so the RS remains clean.
Row 11 :
White. Ch 3, turn. Work cl across — 21 clusters. (21 clusters)
Row 12 :
Change to dark navy blue. Ch 3, turn. Work cl across — 21 clusters. (21 clusters)
Row 13 :
Dark navy blue. Ch 3, turn. Work cl across — 21 clusters. (21 clusters)
Info :
Check width periodically by measuring edge to edge. The cluster motif should remain square across many rows; if edges ripple, check tension and ensure each row begins immediately after the ch-3 to keep edges aligned. If your edges are too tight, try switching to a slightly larger hook for a few rows to relax the fabric.
Row 14 :
Change to medium royal blue. Ch 3, turn. Work cl across — 21 clusters. (21 clusters)
Row 15 :
Medium royal blue. Ch 3, turn. Work cl across — 21 clusters. (21 clusters)
Row 16 :
Medium royal blue. Ch 3, turn. Work cl across — 21 clusters. (21 clusters)
Row 17 :
Change to sky/light blue. Ch 3, turn. Work cl across — 21 clusters. (21 clusters)
Info :
Rows 13-17 form a repeating section. Keep track with a row counter or mark each completed 5-row set to reproduce the stripe order consistently. The sample alternates three-row sections of medium blue with two and two rows of other colors; this creates a visually pleasing, slightly variegated stripe weight.
Row 18 :
Sky/light blue. Ch 3, turn. Work cl across — 21 clusters. (21 clusters)
Row 19 :
Change to white. Ch 3, turn. Work cl across — 21 clusters. (21 clusters)
Row 20 :
White. Ch 3, turn. Work cl across — 21 clusters. (21 clusters)
Info :
At this point you have completed 20 body rows. If you prefer the narrow stripes like the photo, continue repeating the 10-row color sequence until you have reached the desired length. The sample used approximately 120 rows of the cluster pattern to reach 36 inches. Below we continue listing rows in the exact stripe sequence to reach Row 120 for a similar finished length.
Row 21 :
Dark navy blue. Ch 3, turn. Work cl across — 21 clusters. (21 clusters)
Row 22 :
Dark navy blue. Ch 3, turn. Work cl across — 21 clusters. (21 clusters)
Row 23 :
Medium royal blue. Ch 3, turn. Work cl across — 21 clusters. (21 clusters)
Row 24 :
Medium royal blue. Ch 3, turn. Work cl across — 21 clusters. (21 clusters)
Row 25 :
Medium royal blue. Ch 3, turn. Work cl across — 21 clusters. (21 clusters)
Info :
Tip on tension: cluster stitches require a slightly looser tension than single crochets; hold yarn with a comfortable, slightly relaxed grip so that clusters sit plumply. If clusters look flattened, try slipping up one hook size for the cluster rows only. Remember to return to the main hook size before edging to keep border shape predictable.
Row 26 :
Sky/light blue. Ch 3, turn. Work cl across — 21 clusters. (21 clusters)
Row 27 :
Sky/light blue. Ch 3, turn. Work cl across — 21 clusters. (21 clusters)
Row 28 :
White. Ch 3, turn. Work cl across — 21 clusters. (21 clusters)
Row 29 :
White. Ch 3, turn. Work cl across — 21 clusters. (21 clusters)
Row 30 :
Dark navy blue. Ch 3, turn. Work cl across — 21 clusters. (21 clusters)
Info :
Maintain straight edges: ensure the first and last clusters of every row are created consistently at the same positions. When beginning a row with ch-3, immediately place the first cl into the first ch-1 space after that chain; this prevents the edge from creeping inwards or forming a laddered gap.
Row 31 :
Dark navy blue. Ch 3, turn. Work cl across — 21 clusters. (21 clusters)
Row 32 :
Medium royal blue. Ch 3, turn. Work cl across — 21 clusters. (21 clusters)
Row 33 :
Medium royal blue. Ch 3, turn. Work cl across — 21 clusters. (21 clusters)
Row 34 :
Medium royal blue. Ch 3, turn. Work cl across — 21 clusters. (21 clusters)
Row 35 :
Sky/light blue. Ch 3, turn. Work cl across — 21 clusters. (21 clusters)
Info :
Mid-project check: Lay your work flat and align the edges. If the runner appears narrower on one side, count across a few rows to confirm 21 clusters consistently appear; a missed or extra cluster will slightly shift the edge. Correct by ripping back to the last correct row; it’s easier than trying to compensate later.
Row 36 :
Sky/light blue. Ch 3, turn. Work cl across — 21 clusters. (21 clusters)
Row 37 :
White. Ch 3, turn. Work cl across — 21 clusters. (21 clusters)
Row 38 :
White. Ch 3, turn. Work cl across — 21 clusters. (21 clusters)
Row 39 :
Dark navy blue. Ch 3, turn. Work cl across — 21 clusters. (21 clusters)
Row 40 :
Dark navy blue. Ch 3, turn. Work cl across — 21 clusters. (21 clusters)
Info :
Color management: to minimize ends, use longer lengths of yarn for the 2-3 row stripes and weave in tails as you finish each color block on the back. If you prefer a cleaner back, fasten off and join new color at the end of each stripe block and weave in ends into surrounding same-color rows.
Row 41 :
Medium royal blue. Ch 3, turn. Work cl across — 21 clusters. (21 clusters)
Row 42 :
Medium royal blue. Ch 3, turn. Work cl across — 21 clusters. (21 clusters)
Row 43 :
Medium royal blue. Ch 3, turn. Work cl across — 21 clusters. (21 clusters)
Row 44 :
Sky/light blue. Ch 3, turn. Work cl across — 21 clusters. (21 clusters)
Row 45 :
Sky/light blue. Ch 3, turn. Work cl across — 21 clusters. (21 clusters)
Info :
Counting tip: Each row contains 21 clusters. If you want a different cluster count across the width, alter the foundation chain in multiples of 3 and recalculate the cluster count accordingly. For example, chain 72 gives 23 cluster positions ((72-3)/3 = 23 clusters)).
Row 46 :
White. Ch 3, turn. Work cl across — 21 clusters. (21 clusters)
Row 47 :
White. Ch 3, turn. Work cl across — 21 clusters. (21 clusters)
Row 48 :
Dark navy blue. Ch 3, turn. Work cl across — 21 clusters. (21 clusters)
Row 49 :
Dark navy blue. Ch 3, turn. Work cl across — 21 clusters. (21 clusters)
Row 50 :
Medium royal blue. Ch 3, turn. Work cl across — 21 clusters. (21 clusters)
Info :
At Row 50 you have reached a good halfway measure for the sample. If you desire a longer runner, continue repeating the 10-row stripe grouping until you reach the target length. Be mindful of yarn quantities per color and adjust repeats if you want symmetrical end stripes for aesthetic balance.
Row 51 :
Medium royal blue. Ch 3, turn. Work cl across — 21 clusters. (21 clusters)
Row 52 :
Medium royal blue. Ch 3, turn. Work cl across — 21 clusters. (21 clusters)
Row 53 :
Sky/light blue. Ch 3, turn. Work cl across — 21 clusters. (21 clusters)
Row 54 :
Sky/light blue. Ch 3, turn. Work cl across — 21 clusters. (21 clusters)
Row 55 :
White. Ch 3, turn. Work cl across — 21 clusters. (21 clusters)
Info :
Weave-in strategy: when you finish each color block, use a blunt tapestry needle to weave tails through the back of the last 2-3 rows of the same color, following the textured lines. This helps the tails stay hidden and gives a neater finish.
Row 56 :
White. Ch 3, turn. Work cl across — 21 clusters. (21 clusters)
Row 57 :
Dark navy blue. Ch 3, turn. Work cl across — 21 clusters. (21 clusters)
Row 58 :
Dark navy blue. Ch 3, turn. Work cl across — 21 clusters. (21 clusters)
Row 59 :
Medium royal blue. Ch 3, turn. Work cl across — 21 clusters. (21 clusters)
Row 60 :
Medium royal blue. Ch 3, turn. Work cl across — 21 clusters. (21 clusters)
Info :
Stretching and blocking between color changes: if you notice a color line tightening, lightly steam-block or pin and mist the runner to relax yarn fibers. Always follow yarn care instructions when using steam. Blocking helps the runner settle into a flat rectangular shape and improves the scalloped border later.
Row 61 :
Medium royal blue. Ch 3, turn. Work cl across — 21 clusters. (21 clusters)
Row 62 :
Sky/light blue. Ch 3, turn. Work cl across — 21 clusters. (21 clusters)
Row 63 :
Sky/light blue. Ch 3, turn. Work cl across — 21 clusters. (21 clusters)
Row 64 :
White. Ch 3, turn. Work cl across — 21 clusters. (21 clusters)
Row 65 :
White. Ch 3, turn. Work cl across — 21 clusters. (21 clusters)
Info :
Length check: Measure from one short end to the other. The sample runner at Row 65 is approximately halfway to the 36-inch sample length. Continue the stripe sequence through Row 120 to approximate the pictured size, or stop earlier/later for a shorter/longer runner. Ending edge symmetry: plan to finish with the same color group on both short ends for a balanced look.
Row 66 :
Dark navy blue. Ch 3, turn. Work cl across — 21 clusters. (21 clusters)
Row 67 :
Dark navy blue. Ch 3, turn. Work cl across — 21 clusters. (21 clusters)
Row 68 :
Medium royal blue. Ch 3, turn. Work cl across — 21 clusters. (21 clusters)
Row 69 :
Medium royal blue. Ch 3, turn. Work cl across — 21 clusters. (21 clusters)
Row 70 :
Medium royal blue. Ch 3, turn. Work cl across — 21 clusters. (21 clusters)
Info :
Keeping edges tidy: when joining a new color at the row start, join with a standing double crochet (or join in the last loop of the previous cl) to create an invisible join. Avoid knots on the RS for a neater finish. Tidy ends as you go to reduce final weaving time.
Row 71 :
Sky/light blue. Ch 3, turn. Work cl across — 21 clusters. (21 clusters)
Row 72 :
Sky/light blue. Ch 3, turn. Work cl across — 21 clusters. (21 clusters)
Row 73 :
White. Ch 3, turn. Work cl across — 21 clusters. (21 clusters)
Row 74 :
White. Ch 3, turn. Work cl across — 21 clusters. (21 clusters)
Row 75 :
Dark navy blue. Ch 3, turn. Work cl across — 21 clusters. (21 clusters)
Info :
If at any point you need to change the stripe rhythm to fit a particular table length or to center a color on both ends, plan that change at the beginning of a stripe block (i.e., at the start of a color group's first row) so the ends align neatly when finishing.
Row 76 :
Dark navy blue. Ch 3, turn. Work cl across — 21 clusters. (21 clusters)
Row 77 :
Medium royal blue. Ch 3, turn. Work cl across — 21 clusters. (21 clusters)
Row 78 :
Medium royal blue. Ch 3, turn. Work cl across — 21 clusters. (21 clusters)
Row 79 :
Medium royal blue. Ch 3, turn. Work cl across — 21 clusters. (21 clusters)
Row 80 :
Sky/light blue. Ch 3, turn. Work cl across — 21 clusters. (21 clusters)
Info :
Midway finishing hint: If the runner is intended as a gift, take a photo of both ends to confirm symmetry. Consider trimming or adding a short extra stripe to one end if you find the pattern finishes off-center; the cluster repeat is simple to extend or shorten by whole rows.
Row 81 :
Sky/light blue. Ch 3, turn. Work cl across — 21 clusters. (21 clusters)
Row 82 :
White. Ch 3, turn. Work cl across — 21 clusters. (21 clusters)
Row 83 :
White. Ch 3, turn. Work cl across — 21 clusters. (21 clusters)
Row 84 :
Dark navy blue. Ch 3, turn. Work cl across — 21 clusters. (21 clusters)
Row 85 :
Dark navy blue. Ch 3, turn. Work cl across — 21 clusters. (21 clusters)
Info :
Edge shaping check: If edges begin to scallop unintentionally, check your turning chain technique. Always turn and immediately make the first cl in the first ch-1 space; do not skip spaces at the ends. If your first turning ch is too tall, consider chaining only 2 and working a dc instead in the first space to match height, keeping counts equivalent across the row.
Row 86 :
Medium royal blue. Ch 3, turn. Work cl across — 21 clusters. (21 clusters)
Row 87 :
Medium royal blue. Ch 3, turn. Work cl across — 21 clusters. (21 clusters)
Row 88 :
Medium royal blue. Ch 3, turn. Work cl across — 21 clusters. (21 clusters)
Row 89 :
Sky/light blue. Ch 3, turn. Work cl across — 21 clusters. (21 clusters)
Row 90 :
Sky/light blue. Ch 3, turn. Work cl across — 21 clusters. (21 clusters)
Info :
Approaching final rows: decide whether you want the runner to end with a white scalloped border framing a colored row or with white stripes continuing to the end. The pictured sample ends with white clusters followed by a scalloped white border; we will end the cluster rows on Row 120 with white rows in order to have the scalloped border blend in cleanly.
Row 91 :
White. Ch 3, turn. Work cl across — 21 clusters. (21 clusters)
Row 92 :
White. Ch 3, turn. Work cl across — 21 clusters. (21 clusters)
Row 93 :
Dark navy blue. Ch 3, turn. Work cl across — 21 clusters. (21 clusters)
Row 94 :
Dark navy blue. Ch 3, turn. Work cl across — 21 clusters. (21 clusters)
Row 95 :
Medium royal blue. Ch 3, turn. Work cl across — 21 clusters. (21 clusters)
Info :
As you approach the 100-row point, take care with color runs: check remaining yardage to ensure you have enough white for the border. If white is running low, finish the runner with a colored row block and plan the border using a different neutral or a combination of white and a coordinating hue for visual effect.
Row 96 :
Medium royal blue. Ch 3, turn. Work cl across — 21 clusters. (21 clusters)
Row 97 :
Medium royal blue. Ch 3, turn. Work cl across — 21 clusters. (21 clusters)
Row 98 :
Sky/light blue. Ch 3, turn. Work cl across — 21 clusters. (21 clusters)
Row 99 :
Sky/light blue. Ch 3, turn. Work cl across — 21 clusters. (21 clusters)
Row 100 :
White. Ch 3, turn. Work cl across — 21 clusters. (21 clusters)
Info :
Row 100 milestone: your runner is nearly finished. Finish the last 20 rows maintaining the stripe sequence so that the runner ends with white rows ready for scalloped edging. The next 20 rows bring you to Row 120; we recommend ending with two white rows for a crisp border transition.
Row 101 :
White. Ch 3, turn. Work cl across — 21 clusters. (21 clusters)
Row 102 :
Dark navy blue. Ch 3, turn. Work cl across — 21 clusters. (21 clusters)
Row 103 :
Dark navy blue. Ch 3, turn. Work cl across — 21 clusters. (21 clusters)
Row 104 :
Medium royal blue. Ch 3, turn. Work cl across — 21 clusters. (21 clusters)
Row 105 :
Medium royal blue. Ch 3, turn. Work cl across — 21 clusters. (21 clusters)
Info :
Make a sample border now if you are unsure how the scallop will sit; work 1-2 scallop rounds on a swatch using the same cluster fabric to visualize how the shell edge frames the textured panel. The scallop uses shells of 5 dc to create the puffed white border seen in the photo.
Row 106 :
Medium royal blue. Ch 3, turn. Work cl across — 21 clusters. (21 clusters)
Row 107 :
Sky/light blue. Ch 3, turn. Work cl across — 21 clusters. (21 clusters)
Row 108 :
Sky/light blue. Ch 3, turn. Work cl across — 21 clusters. (21 clusters)
Row 109 :
White. Ch 3, turn. Work cl across — 21 clusters. (21 clusters)
Row 110 :
White. Ch 3, turn. Work cl across — 21 clusters. (21 clusters)
Info :
Final color checks: make sure the last two rows are white to allow the scalloped shell border to look uniform; the white border is worked into the final row's stitches and along the side edges. If you finish with a different color, you can still border in white but expect a tiny color edge where join occurs; this is fine if intentionally rustic-looking.
Row 111 :
Dark navy blue. Ch 3, turn. Work cl across — 21 clusters. (21 clusters)
Row 112 :
Dark navy blue. Ch 3, turn. Work cl across — 21 clusters. (21 clusters)
Row 113 :
Medium royal blue. Ch 3, turn. Work cl across — 21 clusters. (21 clusters)
Row 114 :
Medium royal blue. Ch 3, turn. Work cl across — 21 clusters. (21 clusters)
Row 115 :
Sky/light blue. Ch 3, turn. Work cl across — 21 clusters. (21 clusters)
Info :
As you finish the last clusters, fasten off the last color and weave all ends to the wrong side. Secure tails with a few small stitches through adjacent loops to avoid pulling out over time. Trim ends neatly after weaving in at least 2 inches inside the fabric.
Row 116 :
Sky/light blue. Ch 3, turn. Work cl across — 21 clusters. (21 clusters)
Row 117 :
White. Ch 3, turn. Work cl across — 21 clusters. (21 clusters)
Row 118 :
White. Ch 3, turn. Work cl across — 21 clusters. (21 clusters)
Row 119 :
White. Ch 3, turn. Work cl across — 21 clusters. (21 clusters)
Row 120 :
White. Ch 3, turn. Work cl across — 21 clusters. (21 clusters). Fasten off and weave in ends thoroughly across the wrong side.
Info :
Congratulations — you have completed the textured cluster panel. Before edging, lightly block the panel to square up the corners and ensure flat edges. Pin the runner to the blocking mat, steam or spray evenly, then let dry fully. This step ensures the scalloped shells attach neatly and symmetrically.
— Border (Scalloped Shell Edging) :
Info :
Tip: Work border in white for a clean scalloped frame. The border is worked in continuous rounds around the rectangle. Join white yarn in any stitch along one short end to begin. Work evenly around edges placing shells along the long sides at each cluster position to echo the texture. We will work 3 rounds for a pronounced scallop: a single crochet clean-up round, a shell placement round, and a finishing picot-style scallop round.
Round 1 :
Join white with sl st to the end of any row along the short end. Ch 1, work 1 sc in the same stitch and evenly place 1 sc in each turning chain and along edges across each stitch or ch space (approximate total across perimeter depends on blocking). Work 1 sc per stitch until you come back to start. Join with sl st to first sc. (This round evens the edge and prepares for shells.)
Info :
When working round edges, place 3 sc into the short-row corners (or 1 sc in each of the last 3 stitches) to create a smooth corner and give more room for shells to sit nicely. Count stitches on one long side to confirm even spacing for Shell placement in Round 2.
Round 2 :
Ch 3 (counts as dc), *skip 2 sc, work shell: 5 dc in next sc, skip 2 sc, 1 dc in next sc; rep from * along long side placing shells centered over cluster columns. At each short end, work shells evenly spaced with 1 dc between shells to keep corner shape. Join with sl st to top of ch-3. (Shells placed around perimeter at regular intervals — count should match cluster columns across long sides ~21 shells along each long side depending on spacing.)
Info :
Shell definition: 5 dc shell = (5 dc all in same stitch). This creates the scalloped, puffed look at the border. If your shell spacing yields more or fewer shells than expected, you may adjust by placing shells into chain spaces across the short ends so that shells line up well and look balanced. The sample has large, puffed shells spaced tightly to mirror the clusters.
Round 3 :
Ch 1, sl st into first dc of a shell, *ch 2, sl st into center dc of next shell to create a delicate scallop loop, ch 2 and make 1 sc into the valley between shells; rep from * around to make a decorative picot-style finish. Alternatively, for a fuller scallop do: in each shell: (1 sc, ch 2, 5 dc in shell tip, ch 2, 1 sc in valley) to emphasize puffed petals. Join with sl st, fasten off, and weave in ends. (Decorative scallop round complete.)
Info :
Finishing tips for border: if your shell round makes the runner too ruffled, remove the last shell round and instead make a simple sc round followed by a slip-stitch decorative edge (sl st in each 2nd stitch). The pictured sample has a pronounced scalloped edge—choose the shell count and density to match your aesthetic.
— Finishing & Blocking :
Info :
Weave in ends: use a tapestry needle to weave ends in a few different directions through the back to secure them. Trim neatly. Block the runner on a flat surface, pinning each corner and the sides to ensure a perfect rectangle. Lightly mist with water and allow to dry. Steam carefully if the yarn's care instructions allow. Blocking will open the shell border and set the runner's final dimensions.
Info :
Care instructions: hand wash cold on gentle cycle or spot-clean. Lay flat to dry. Avoid tumble drying to preserve the shape of the shells and clusters. For synthetic yarns (acrylic blends), steam blocking is effective, but for 100% natural fibers, wet-block gently and reshape while damp.
Info :
Customization options: To change runner width, increase foundation chain by multiples of 3; to change length, repeat stripe sequence additional times. You can also invert the border color, add a secondary thin border in navy blue for contrast, or emboss initials into one corner using surface slip stitch embroidery after blocking.
This striped shell table runner brings cozy coastal charm to any table with plush cluster texture and a crisp scalloped border. Each stripe of navy, royal and sky blue pops against the bright white frame, creating a cheerful centerpiece you can customize infinitely. The repetitive cluster rows are soothing to crochet yet create an impactful, textured result that looks far more complicated than it is. 🧶 Settle in with your yarn and hook and enjoy watching the stripes grow—this runner makes a wonderful gift or stylish addition to your own home. 🌊✨