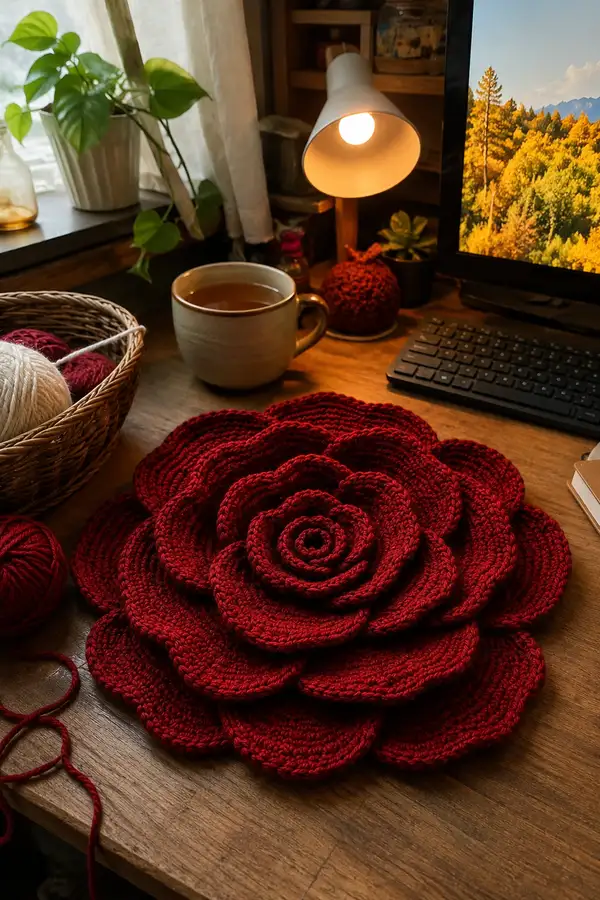
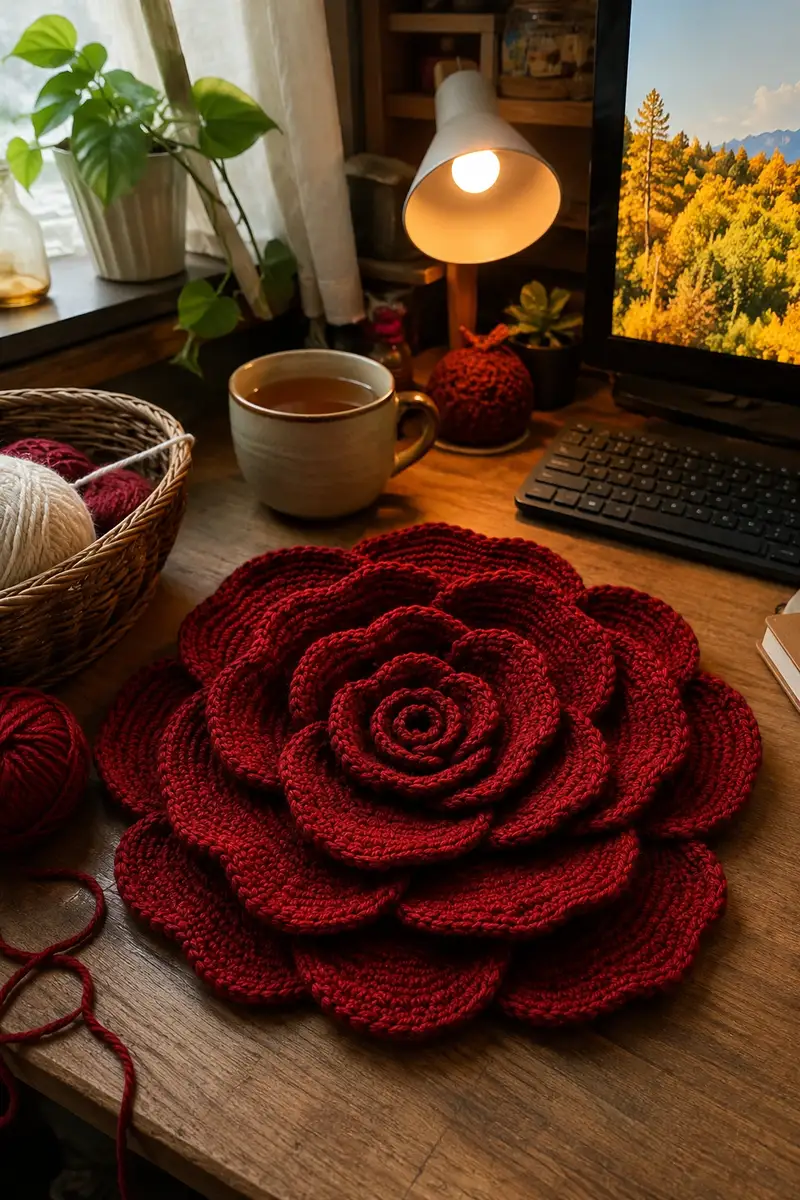
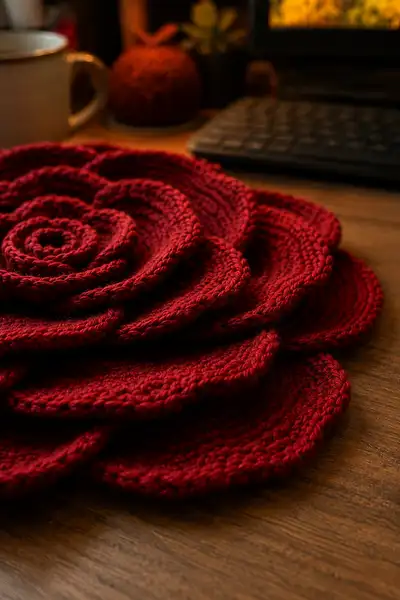
A rich, sculpted layered rose placemat worked in deep wine-red worsted yarn. This decorative table piece features concentric petal discs that stack to form a realistic blooming rose with soft, sculpted edges and subtle ridges for texture. Ideal as a centerpiece, trivet, or cozy accent for autumn and holiday décor.
Progress Tracker
0% Complete
— Materials & Gauge :
Info :
Yarn: worsted weight (#4). Hook: 4.0mm recommended. Gauge is not critical but for reference: centre disc 12 rounds = ~8 cm diameter worked tightly in sc.
Info :
Finished size: approximately 32-36 cm (12.5-14 in) across when using 4.0mm hook and yarn listed. Size will vary with hook, yarn and tension.
— Center Spiral Disc (Make 1) :
Round 1 :
6 sc in magic ring (6)
Round 3 :
(1 sc, 1 inc) x 6 (18)
Round 4 :
(2 sc, 1 inc) x 6 (24)
Round 5 :
(3 sc, 1 inc) x 6 (30)
Round 6 :
(4 sc, 1 inc) x 6 (36)
Info :
Keep tension slightly firm so the center disc is tight and sculpted. This small disc becomes the raised center of the rose.
Round 7 :
(5 sc, 1 inc) x 6 (42)
Round 8 :
(6 sc, 1 inc) x 6 (48)
Round 9 :
1 sc in each st (48)
Round 10 :
1 sc in each st (48)
Round 11 :
1 sc in each st BLO (48)
Info :
Working round 11 in BLO creates a subtle ridge around the center to help the inner petals nestle and adds definition.
Round 12 :
1 sc in each st (48)
Round 13 :
(7 sc, 1 inc) x 6 (54)
Round 14 :
1 sc in each st (54)
Info :
Fasten off leaving a 30 cm tail for sewing center to first petal disc. Weave in any short ends on the underside for a clean finish.
— Inner Petal Disc (Make 1 — small, tight petals) :
Round 1 :
6 sc in magic ring (6)
Round 3 :
(1 sc, 1 inc) x 6 (18)
Round 4 :
(2 sc, 1 inc) x 6 (24)
Round 5 :
(3 sc, 1 inc) x 6 (30)
Info :
These early increases set up the disc that will be folded and gathered to form the first ring of inner petals. Keep this disc slightly smaller than the center disc so it tucks under the center when layered.
Round 6 :
1 sc in each st (30)
Round 7 :
(4 sc, 1 inc) x 6 (36)
Round 8 :
1 sc in each st (36)
Round 9 :
1 sc in each st BLO (36)
Info :
Working BLO on round 9 adds a ridge to form a subtle valley that helps each petal cup and produce a sculpted look when folded.
Round 10 :
1 sc in each st (36)
Round 11 :
(3 sc, shell) x 6 across (shell = (2 dc, ch1, 2 dc) in same st) (42)
Info :
Round 11 creates six small scallops. Each shell sits in the middle of a petal; use stitch markers to mark shell centers for later folding and sewing.
Round 12 :
1 sc between shells (42)
Round 13 :
Edge finish: *sl st in next st, ch2, 3 dc in next st, ch2, sl st in next* around shells to accentuate scallops. Adjust to make 6 visible petals (42)
Info :
Fasten off leaving long tail (≈40 cm) for sewing. Lightly fold each scallop upward and tack down where it meets the inner circle so each petal has a cupped profile.
— Second Petal Disc (Make 1 — medium inner petals) :
Round 1 :
6 sc in magic ring (6)
Round 3 :
(1 sc, 1 inc) x 6 (18)
Round 4 :
(2 sc, 1 inc) x 6 (24)
Round 5 :
(3 sc, 1 inc) x 6 (30)
Round 6 :
(4 sc, 1 inc) x 6 (36)
Info :
Increase evenly to create a disc that will be larger than the inner petal disc so petals can overlap outwardly.
Round 7 :
(5 sc, 1 inc) x 6 (42)
Round 8 :
1 sc in each st (42)
Round 9 :
(6 sc, 1 inc) x 6 (48)
Round 10 :
1 sc in each st (48)
Round 11 :
(7 sc, 1 inc) x 6 (54)
Info :
We will create 6 larger scallops/petals. Use markers at every 9th stitch to divide the round into 6 equal segments for petal placement.
Round 12 :
*Sk2, 5 dc in next st, sk2, sl st in next* repeat 6 times to create 6 tall scallops (54)
Round 13 :
1 sc around including through shells to anchor (54)
Round 14 :
1 sc in each st BLO (54)
Info :
Fold and shape each scallop so they have a lifted petal edge. Stitch the lower edge of each scallop to the base disc with small whip stitches to give depth.
Round 15 :
Edge finish: *sl st, ch1, (sc, hdc, sc) in shell peak, ch1* repeat around (54)
Info :
Fasten off leaving a long tail (~50 cm) for assembly. Do not trim ends until discs are sewn together.
— Third Petal Disc (Make 1 — wide mid petals) :
Round 1 :
6 sc in magic ring (6)
Round 3 :
(1 sc, 1 inc) x 6 (18)
Round 4 :
(2 sc, 1 inc) x 6 (24)
Round 5 :
(3 sc, 1 inc) x 6 (30)
Round 6 :
(4 sc, 1 inc) x 6 (36)
Round 7 :
(5 sc, 1 inc) x 6 (42)
Round 8 :
(6 sc, 1 inc) x 6 (48)
Round 9 :
(7 sc, 1 inc) x 6 (54)
Round 10 :
(8 sc, 1 inc) x 6 (60)
Info :
We are expanding more here to create a disc roughly 60 stitches around; this becomes the foundation for larger, overlapping petals.
Round 11 :
1 sc in each st (60)
Round 12 :
(9 sc, 1 inc) x 6 (66)
Round 13 :
1 sc in each st (66)
Round 14 :
1 sc in each st BLO (66)
Round 15 :
Divide into 8 segments: mark every 8th stitch (66)
Round 16 :
*In marked stitch: (sk1, 7 dc shell over next 7 sts), sk1, sl st in next* repeat 8 times making 8 large shells (66)
Round 17 :
1 sc around through shells to anchor (66)
Info :
Gently fold each large shell into a petal shape; secure base of each shell with a few small stitches to create gentle cupping.
Round 18 :
Edge finish: *sc, hdc, sc* over each shell peak to tidy edge (66)
Round 19 :
Fasten off leaving long tail (~60 cm). Lightly steam or block to shape petals for sewing.
— Fourth Petal Disc (Make 1 — large outer petals) :
Round 1 :
6 sc in magic ring (6)
Round 3 :
(1 sc, 1 inc) x 6 (18)
Round 4 :
(2 sc, 1 inc) x 6 (24)
Round 5 :
(3 sc, 1 inc) x 6 (30)
Round 6 :
(4 sc, 1 inc) x 6 (36)
Round 7 :
(5 sc, 1 inc) x 6 (42)
Round 8 :
(6 sc, 1 inc) x 6 (48)
Round 9 :
(7 sc, 1 inc) x 6 (54)
Round 10 :
(8 sc, 1 inc) x 6 (60)
Round 11 :
(9 sc, 1 inc) x 6 (66)
Round 12 :
(10 sc, 1 inc) x 6 (72)
Info :
We want a wide foundation for the largest outer petals; 72 stitches creates a broad disc that will sit under the mid petals with generous overlap.
Round 13 :
1 sc in each st (72)
Round 14 :
1 sc in each st BLO (72)
Round 15 :
Divide into 10 segments: mark every 7th stitch (70) then adjust by making two increments to restore to 72 if needed
Round 16 :
*In marked area: (sk2, 9 dc shell over next 9 sts), sk2, sl st in next* repeat 10 times to make 10 wide shells (72)
Round 17 :
1 sc around through shells to anchor (72)
Round 18 :
Edge finish: *sl st, ch2, (3 dc, ch2, 3 dc) in shell peak, ch2, sl st* around for a deep scallop (72)
Info :
Fasten off leaving long tail (~80 cm) for assembly. You may lightly block this large disc to set a gentle curve upward on petals.
— Fifth Petal Disc (Optional Extra Wide Outer Layer) :
Round 1 :
6 sc in magic ring (6)
Round 3 :
(1 sc, 1 inc) x 6 (18)
Round 4 :
(2 sc, 1 inc) x 6 (24)
Round 5 :
(3 sc, 1 inc) x 6 (30)
Round 6 :
(4 sc, 1 inc) x 6 (36)
Round 7 :
(5 sc, 1 inc) x 6 (42)
Round 8 :
(6 sc, 1 inc) x 6 (48)
Round 9 :
(7 sc, 1 inc) x 6 (54)
Round 10 :
(8 sc, 1 inc) x 6 (60)
Round 11 :
(9 sc, 1 inc) x 6 (66)
Round 12 :
(10 sc, 1 inc) x 6 (72)
Round 13 :
(11 sc, 1 inc) x 6 (78)
Round 14 :
1 sc in each st (78)
Round 15 :
Divide into 12 segments: mark every 6th or 7th stitch for even spacing (78)
Round 16 :
*shell (11 dc over next 11 sts) anchored between two scs* repeat 12 times to form 12 broad outer shells (78)
Info :
This optional layer adds dramatic outer petals. Only make if you want the placemat extra large. Fasten off leaving a generous tail for sewing.
— Alternate Petal Technique: Working Petals as Separate Ovals (Optional) :
Info :
If you prefer, make individual oval petals and sew them in concentric rings instead of scalloped discs. This gives more pronounced petal shapes.
Oval Petal Round 1 :
ch 8, 1 sc in 2nd ch from hook, sc across (7), 3 sc in last ch, continue around opposite side of chain, sc across to first ch, 3 sc in first ch (22) - join with sl st (working in rounds)
Oval Petal Round 2 :
1 sc in each st (22)
Oval Petal Round 3 :
(2 sc, inc) around to expand lengthwise as needed (approx 28)
Info :
Make many ovals in graduated sizes (small, medium, large) then pinch and sew bases of each petal to a base disc in overlapping rings to mimic the layered rose.
— Assembly & Layering :
Info :
Layout order: center spiral → Inner Petal Disc → Second Petal Disc → Third Petal Disc → Fourth Petal Disc → Optional Fifth Disc. Adjust overlaps so each ring of petals covers the seam of the ring beneath.
Step 1 :
Pin center spiral to the center of the Inner Petal Disc. Using the long tail from the center, sew through the inner disc’s middle using mattress or whip stitch; do not pull tight — create a small gathered effect so the spiral sits raised.
Step 2 :
Position the Second Petal Disc under the Inner Petal Disc so its scallops rest between the inner petals. Using the long tail from the Second Disc, sew the inner disc to the second disc at 6 or 8 evenly spaced points, anchoring each petal base. Keep stitches small and even.
Info :
When sewing two discs, use the underside/starting rounds to hide sewing passes. Slightly overlap edges and tack at about 6-10 points around the disc to maintain volume.
Step 3 :
Sew Third Petal Disc beneath the Second following the same method — aim to offset petals so that petals of one ring sit between petals of the ring above for a natural, layered look.
Step 4 :
Attach Fourth and optional Fifth discs the same way, adjusting the amount of gather and overlap for desired fullness. Leave a little space between rings if you want deeper valleys between petals.
Info :
Weave in tails along the underside by stitching into a few stitches below the seam, then trim close. Optionally use a small dab of fabric glue under a few petals to help hold dramatic curves.
— Finishing & Blocking :
Info :
Lightly block each disc before final assembly to shape petals. Use steam or a spray bottle and pin into a gentle curve. Allow to dry completely. This makes sewing easier and helps the rose retain a sculpted shape.
Step :
Trim all tails and secure by weaving them into several stitches. If you want a very firm placemat, lightly apply starch or fabric stiffener to the underside and allow to dry.
Info :
For table protection, place a thin cork or felt pad beneath the finished rose or add a flat crochet backing disc (worked as a tight 1-piece flat circle) and sew it to the underside to make the surface even.
— Optional Leaves (Make 2-4) :
Round 1 :
Using green yarn: ch 10, sc in 2nd ch from hook and across (9), 3 sc in last ch, sc across opposite side, 3 sc in first ch to form pointed tip; fasten off leaving tail for sewing (approx 22 sts around)
Round 2 :
1 sc around (22)
Round 3 :
Work FLO 1 sc around to create a midrib ridge or surface crochet a vein down the center after assembly
Info :
Sew leaves to underside near outer petals to peek out slightly if desired.
— Care Instructions :
Info :
Hand wash gently in cool water with mild detergent. Reshape and lay flat to dry. Avoid high heat if you’ve used starch or stiffener; test an inconspicuous area first.
Info :
Store flat to avoid crushing petals or lightly pad between gifts when gifting to preserve shape.
Finishing this layered rose is so rewarding — each row of petals brings the bloom to life and the rich wine color feels luxurious and cozy. The modular construction makes it satisfying to sew the pieces together and watch them transform into a sculpted centerpiece. Display it as a placemat, trivet, or gift it to someone special; it's a handmade accent that warms any space. 🌹🧶