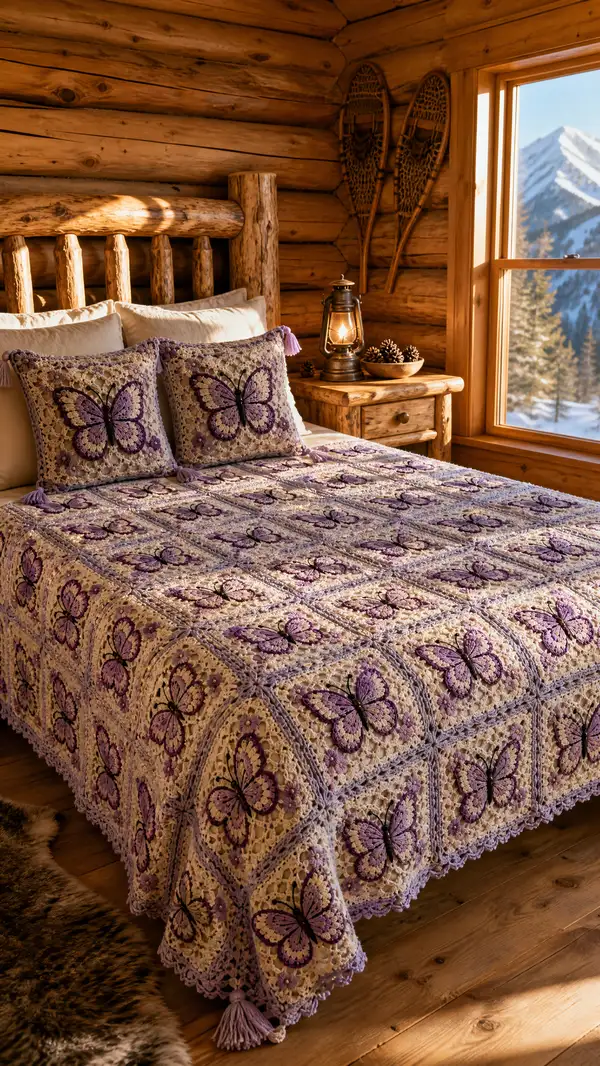
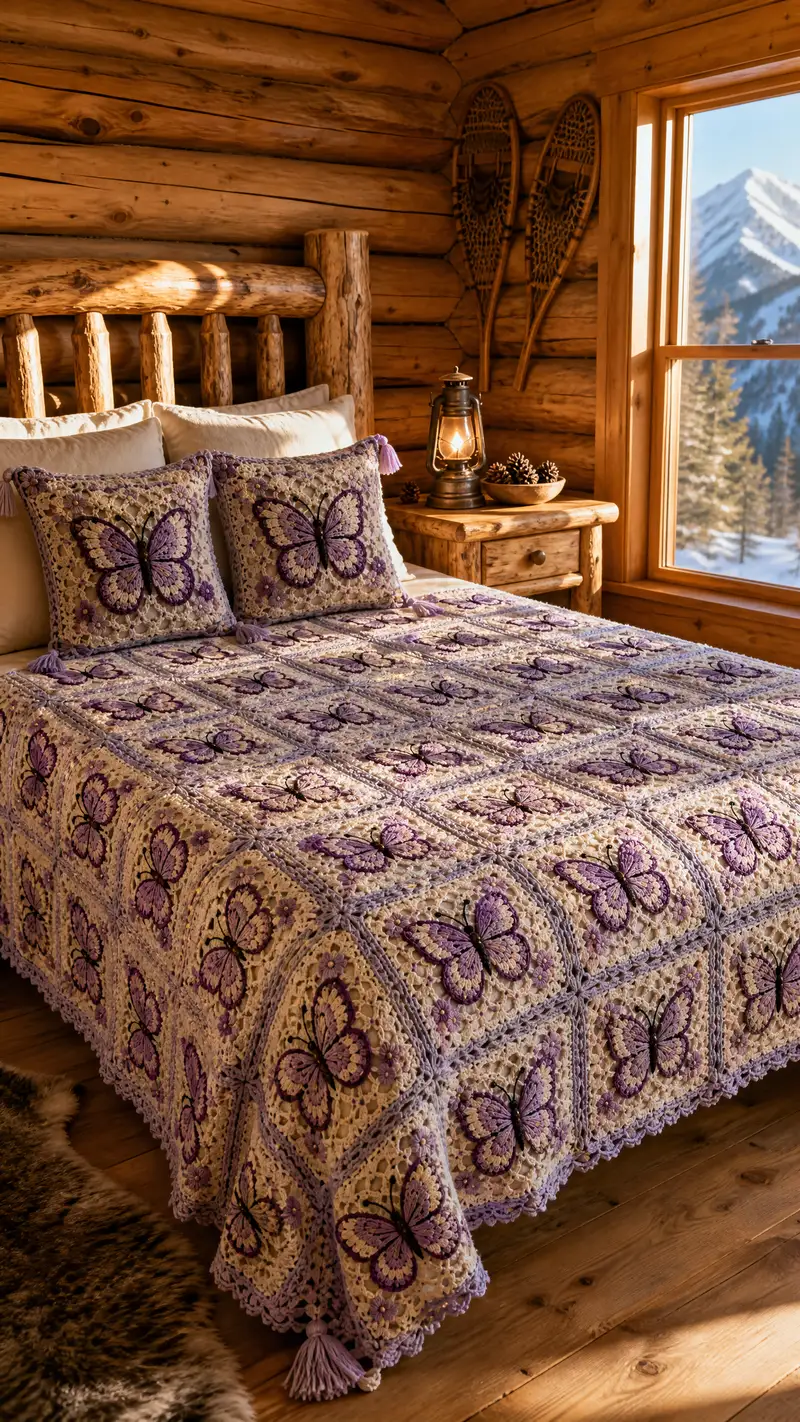
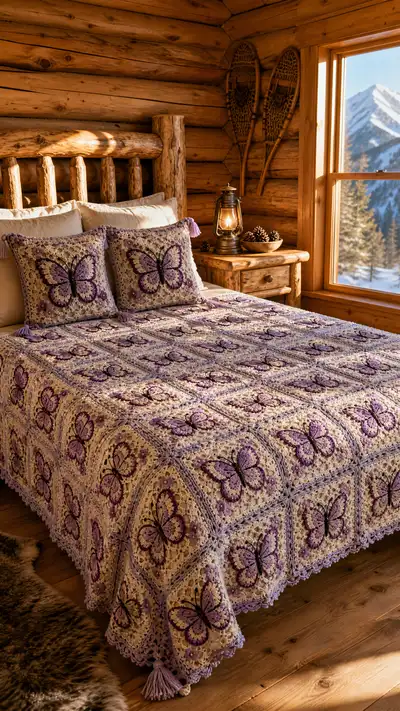
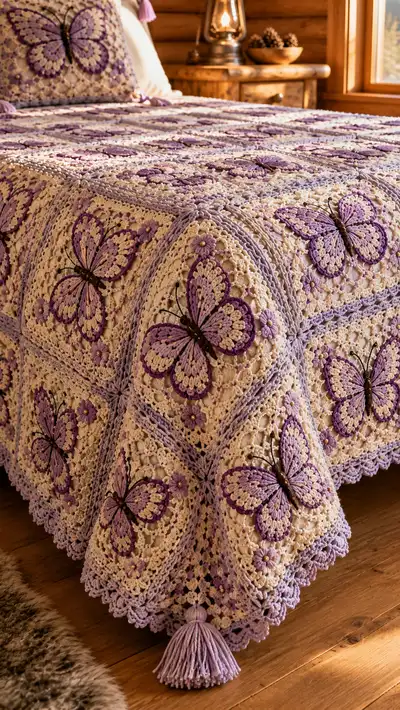
A romantic, vintage-inspired bedspread made from textured granny squares with raised lilac butterfly appliques. Each square features a layered butterfly in three purples on a warm cream openwork background, joined into a full bedspread with a scalloped lilac border and tasseled corners. This pattern walks you through making motifs, assembling the bedspread, and finishing pillow shams to match. The finished set creates a cozy, cottage-chic look perfect for a guest room or heirloom gift.
Progress Tracker
0% Complete
— Notes & Techniques :
Info :
Before beginning the motifs, read through the entire pattern. The bedspread is made from identical butterfly squares joined together. Each square is worked in rounds and measures approximately 10.5" (27 cm) finished after blocking using the recommended yarn and hooks. Puff and cluster stitches create the raised butterfly wings; practice the puff stitch (yarn over, insert hook, yarn over pull up loop x 4-5 times depending on height, yarn over pull through all loops, ch 1 to close) until tension is even.
— Butterfly Applique (make 1 per square) :
Info :
Each butterfly is worked flat in rounds that create two wings and a small central body. Work with contrast colors: Light Lilac for wing fill, Medium Purple for outline, Deep Plum for outer edge. Use 3.5mm hook for crisp puff stitches. Make one butterfly per square (or substitute an embroidered butterfly if preferred).
Round 1 :
With Light Lilac, ch 12. Sl st to first ch to form a tiny loop or work a short foundation chain and turn to begin wing base (12 ch).
Round 2 :
Work along the chain: sc in 2nd ch from hook, sc in next 8, 3 sc in last ch (turning point), continue on opposite side of chain sc in next 8, sc in last ch where you began; (approx. 22 sc total). Join with sl st to first sc.
Info :
This creates a small oval foundation for wings. Keep tension consistent; this piece will be anchored to the square later. Leave a long tail for sewing if you plan to work wings separately and sew on later.
Round 3 :
Ch 1, sc in each sc around (22). Join with sl st. This evens the base for the first row of wing petals.
Round 4 :
Change to Medium Purple. Ch 2 (counts as first hdc), *puff in next st, ch1, sk1; repeat from * across to center turning point, place 3 puff-ch1-puff cluster across the center turning 3 sc that created 3 sc cluster; continue puff-ch1 across the opposite side. Aim for 10 puffs per side (approx total 22 puffs including center cluster). Join with sl st.
Info :
Puff height: yarn over, insert, pull up loop 4 times (for a tall textured petal), yarn over and pull through all loops, ch1 to stabilize. Keep each puff at consistent height and spacing; ch1 spaces define the scalloped wing edges.
Round 5 :
Ch 1, sc into each ch1 space and sc between clusters around to create a neat edge (approx 44 sc). Join with sl st. This secures puffs and prepares for outer wing shaping.
Round 6 :
Change to Light Lilac. Ch 3 (counts as dc), *dc in next sc, puff in next sc, dc in next sc, ch2; repeat from * around for scalloped secondary wing texture (approx 22 repeats). Join with sl st to top of ch3.
Round 7 :
Ch 1, sc in each st and ch space around (approx 66 sc). Join with sl st.
Info :
At this point you have created one continuous wing unit which will be shaped into left and right wings by folding and additionally outlining later. Place stitch marker at top center for orientation; this helps when aligning on square.
Round 8 :
Work the upper wing loops: change to Medium Purple. Ch 1, *sc in next 3 sts, (puff, ch1, puff) in next st to form a double petal, sc in next 3 sts; repeat across both wing halves. Join with sl st (maintain symmetry, 6 larger double petals per wing side).
Round 9 :
Change to Deep Plum. Ch 1. Work 1 sc in each st around, adding an extra sc at outermost point of each petal to accentuate edge; (approx total 78 sc). Join with sl st.
Round 10 :
Ch 1, work 1 sc BLO in each st around to create a subtle ridge at wing edges (78). Join.
Info :
Use a small length of dark yarn or a wooden bead for the butterfly body. If using yarn, make a 6-ch chain, sc back across chain to form a tubular body approximately 6 stitches long, fasten off leaving tail for sewing. Attach center at the fold between wings with ladder stitch, then add two antennae by chaining 10 and attaching each side at top center, knot ends or secure with a tiny bead.
Round 11 :
Body: With Deep Plum, ch 6, sc in 2nd ch from hook and across (5 sc), turn and sc across for 6 rows total (a 5x6 rectangle). Fasten off leaving long tail for sewing. Option: embroider segmented body lines with contrasting thread after attachment.
Round 12 :
Assembly prep: Fold wing base gently to create left and right wing symmetry; tack base at two points (top and bottom) using yarn tail so wings flare evenly once sewn to square.
— Granny Square Background (make one square per applique) :
Info :
Each granny square is worked in rounds, starting with a central floral medallion, followed by open lacy rounds, then a neutral cream field of openwork large enough to showcase the butterfly. The finished blocked square is approximately 10.5" (27 cm). Block to exact size before joining.
Round 1 :
With Cream, make a magic ring. Ch 3 (counts as first dc), work 11 dc into magic ring. Join with sl st to top of ch3. (12 dc)
Round 2 :
Ch 1, sc in same st, ch 3, *sc between next 2 dc, ch 3; rep from * around to create 6 ch-3 loop petals. Join with sl st to first sc. (6 ch-3 loops)
Info :
This round builds a tiny flower center. You will place a small 5-petal slip-stitch flower into each corner later for decorative accents if desired.
Round 3 :
Change to Light Lilac. In each ch-3 space: (sc, ch2, 3 dc, ch2, sc) to create petal clusters around (6 petals). Join to first sc. (6 petals)
Round 4 :
Change to Cream. Ch 4 (counts as tr), *sk next petal top, tr in next petal top, ch1; rep from * around to make an airy ring (12 tr, 12 ch1). Join. (24 stitch positions counting ch spaces)
Round 5 :
Ch 1, sc into each tr and each ch1 around (24 sc). Join.
Round 6 :
Ch 3 (counts as dc), *ch2, skip 1 st, dc in next st; rep across to form a lacy filet ring creating 12 open V-spaces. Join (12 V-spaces).
Info :
The lacy V-spaces will visually sit behind the butterfly wings for lightness. Keep your tension even; this round determines much of the overall drape of the square.
Round 7 :
Ch 1, sc in each st and ch space around (approx 48 sc). Join.
Round 8 :
Change to Light Lilac. Form corner framework: Ch 3 (counts as dc), dc in next 4 sts, ch 2 for corner, dc in next 5 sts across side, repeat for four sides making 4 ch2 corners. Join. (approx 4 sides x 6 dc per side)
Round 9 :
Ch 1, sc around working 2 sc into each ch2 corner to stabilize (approx 64 sc). Join.
Info :
Now we will create a slightly raised square center to which the butterfly applique will be sewn. Use the stitch marker to indicate the top center of the square matching the butterfly orientation.
Round 10 :
Change to Cream. Ch 2 (counts as hdc), hdc in next 2, *(3-dc shell in next st, ch1, skip 1) across each side to form a delicate shell field; place shells into corner ch2 spaces as well giving 5 shells per side. Join. (shells create decorative texture)
Round 11 :
Ch 1, sc in each st and ch space across shells (approx 80 sc). Join.
Round 12 :
Change to Medium Purple. Work a decorative 'flower dot' cluster in the center of each side: *ch 2, (puff, ch1) in every 6th st across side to create small floral accents; 4 accents per square. Join.
Info :
These purple dots echo the smaller flowers seen on the photos. Add small golden or ivory seed beads if desired at center of each dot for shimmer; sew beads securely after squares are joined or before assembly if easier.
Round 13 :
Ch 1, sc in each st around to square off edges (approx 96 sc). Join.
Round 14 :
Change to Cream. Work an open lacy round: *ch 3, sk 1 st, sc in next st; rep around, placing (3 ch) at corners to keep square shape. Join. (lacy grid)
Round 15 :
Ch 1, sc in each st and ch space (maintain panels, approx 110 sc). Join.
Info :
Now prepare placement: center the butterfly applique over the central medallion with its body aligned to the round 1-3 marker. If you prefer to make the butterfly separately, lay it on top and pin to check placement before stitching.
Round 16 :
Sewing prep: Using long tail yarn from butterfly body or a separate needle and matching thread, tack butterfly body to the square center with three small whip stitches at base, middle and top to secure. Then tack the base of each wing with 4 small stitches distributed across the wing root. Avoid pulling stitches too tight to keep 3D effect.
Info :
For a raised wing effect, tack only at three root points per wing: inner base, mid-base and outer base leaving the tips free and slightly upturned. This mimics the floating wings in the image.
Round 17 :
After sewing applique, with Cream, sc around the finished square edge to tidy and re-enforce stitches where appliques were attached (approx 120 sc). Join.
Round 18 :
Change to Light Lilac. Work 1 sc in each st BLO around to create a subtle ridge and feint frame (120 sc). Join.
Round 19 :
Change to Medium Purple. Work a simple decorative picot round: *sc in next 3 sts, ch3, sl st in 3rd ch for tiny picot; repeat around to create dotted outline around square center. Join. (approx 30-35 picots)
Info :
Block the square now flat to 10.5" (27 cm) square. Pin carefully at each corner and lightly steam or wet block depending on yarn. Blocking brings out the openwork and levels edges for joining.
Round 20 :
Edging round to complete square: Change to Cream. Ch 1, *(sc in next 2, ch 2, sc in next 2), join to make a neat frame with gentle scallop. Fasten off and weave in ends. Square complete.
— Joining & Center Assembly (repeat joining rounds after all squares are blocked) :
Info :
Squares are joined with a visible lilac slip-stitch join in the round, creating a raised join that visually matches the photo. Join squares in rows first, then assembly rows together. Leave a small gap where you want to add tassels on corners until final border is added.
Joining Round 1 (Row join) :
With Light Lilac, place two squares right sides together. Insert hook through both outer loops of both squares at the corner and sl st through both, ch 1, continue sl st through both loops of each stitch across the side to join. At end, fasten off and weave tail. Repeat to join all squares into full rows. (Join each side with sl st seam)
Info :
Space joins evenly; use pins to align squares before joining. The visible lilac join will appear as a raised rope between squares when done in slip-stitch. Alternatively, you can join with a continuous join-as-you-go method working the last round of each square and joining to previous squares with sl sts at corners and sides.
Joining Round 2 (Row-to-row join) :
When joining rows together, align squares carefully. Work Light Lilac: sl st through corresponding stitches of the two adjacent square edges, working 1 sl st per sc or one sl st per shell to maintain pattern alignment. Fasten off at end of each joined seam and weave ends securely.
Info :
For a sturdier join, after the visible sl-st join, reinforce on the wrong side with a few whip stitches using matching yarn. This prevents separation with use and washing.
Joining Round 3 (Blocking after full join) :
After the entire blanket panels are joined, give the whole assembled bedspread a final blocking to square it and even out joins. Pin the outer edge to desired final dimensions and lightly steam or wet block according to yarn manufacturer's instructions. Allow to dry fully before continuing to border.
— Outer Border & Scalloped Edge :
Info :
The outer border uses a layered scallop in Light Lilac and Deep Plum to echo the photo. Add 4 rounds of structured border followed by 3 decorative rounds culminating in a scalloped shell edge and tassels in the corners.
Round 1 :
With Cream, join at any outer seam and sc evenly around the outside edge of the joined blanket, placing 3 sc in each outer corner ch2 space to maintain shape (approx stitch count depends on number of squares; you will be working continuous sc around). Join with sl st.
Round 2 :
Change to Light Lilac. Ch 3 (counts as dc), *ch2, skip 1 sc, dc in next sc; repeat around, placing (dc, ch2, dc) at corners. This forms airy scalloped spaces for the next decorative shell round. Join.
Info :
Keep turning at corners with extra chains to preserve square contour. If your bedspread is large (queen or king), you may prefer to work an additional identical set of rounds to increase border width proportionally.
Round 3 :
With Medium Purple, work shells: *(5 dc) in next ch2 space, ch1, sl st in 2nd dc of shell to form a visible scallop; rep around. At corners work two shells separated by ch2 for flexibility. Join.
Round 4 :
Change to Deep Plum. Ch1, sc in each st and ch space around working extra sc across each shell to flatten seam (approx). Join.
Round 5 :
Change to Light Lilac. Decorative picot scallop: *(sc in next 2, ch 3, sl st in 3rd ch for picot, sc in next 2, (shell: 3 dc, ch2, 3 dc) in next ch space); repeat across edge. Join.
Info :
Work slowly around long borders to maintain symmetry. If the border narrows or widens, adjust by adding or subtracting small sc groups in long straight stretches so shell repeats fall in consistent spacing.
Round 6 :
With Deep Plum, finish scallop edge with one last round of 3-dc shells across each shell from previous round, placing (sl st, ch1) between shells for delicate separation. Fasten off and weave ends. Add tassels to corners now or after final blocking.
— Tassels & Corner Details :
Round 1 :
Make tassels to match photos using Light Lilac. Wrap yarn around a 2.5" cardboard 40 times for a generous tassel. Tie a small reserving loop at the top with a 12" tail. Remove, fold, and secure the top with a small piece of yarn in Deep Plum to create a decorative 'neck'. Trim ends evenly. Make 4 large tassels for bedspread corners and smaller tassels for pillow shams if desired.
Info :
Attach tassels by threading the long tail onto a yarn needle and stitching through corner stitches several times on the wrong side; fasten with multiple knots and hide tail inside the nearest join. Add a small dab of fabric glue at knot for extra security if the item will be washed often.
— Pillow Sham (make 2 matching) :
Info :
Pillow shams are made from the same square motif with an added border and an envelope closure on the back. Use two matching butterfly squares for the front and back or one large panel and a solid back panel made from squares joined into a smaller rectangle the size of your pillow.
Round 1 :
Make 4 matching squares as per Granny Square Background; block to 10.5" squares. Join 4 squares in a 2x2 layout to make a 21" square front panel for a 20" pillow or adjust to your pillow size. Join with Light Lilac slip-stitch join matching bedspread method.
Round 2 :
Border for sham front: With Light Lilac, sc around outside edge 1 round to tidy (approx 120 sc for a 2x2 block). Join.
Round 3 :
Change to Deep Plum. Work a decorative scalloped edge: *(shell 5 dc) in every 6th st along edge, sc between shells. Repeat around. Join. Fasten off and weave ends.
Info :
Back panel: Make two rectangular panels of the same height as the front and 2/3 the width each to create an envelope overlap. Use the same joining and border rounds with a simpler edge to keep backs flat. Sew or join the three pieces together along sides, leaving the overlap open at the back for the pillow insert.
— Finishing Touches & Embellishments :
Round 1 :
Embroider antennae and body details with Black or Deep Plum yarn: use stranded backstitch or surface slip stitch to create two slender antennae rising from the butterfly head and stitch a few segmented lines along the body. If using beads, sew them firmly at antenna ends or body center for shimmer.
Info :
Add small 3D flower buds to random square corners as seen in the photo by applying small 5-loop eyelash flowers: ch 5, join, make 5 sc into ring, then around each sc create a small puff loop of 3 loops anchored by a sl st to look like a blossom. Secure with tiny bead at center.
Round 2 :
Final inspection: Weave all tails into neighboring stitches, trim flush, and check all joins. If you used wooden beads for bodies, ensure they are sewn and glued from the wrong side for safety. Give a final pressing/blocking if needed for a polished presentation.
Info :
Care instructions: hand wash gently or machine wash on cold delicate in a protective bag, reshape when wet and dry flat. Avoid high heat in the dryer to maintain shape and colors.
Finishing this Lilac Butterfly Granny Bedspread is such a satisfying moment — watching dozens of textured squares join into a single, dreamy spread feels like magic. The raised butterfly wings and scalloped lilac edge add vintage charm and make a real heirloom. Add tasseled corners and matching pillow shams to complete the set for a cozy bedroom upgrade. 🧶🦋✨