🧶 Beautiful ✨ Detailed 💝 Adorable

Lily Bunny Amigurumi Pattern

Lily Bunny Amigurumi Pattern
3.9★ Rating
5-7 Hours Time Needed
2.2K Made This
✂️

Intermediate Level

Ideal for those with basic crochet experience, featuring slightly more advanced stitches and techniques to expand your skills.

⏱️

Weekend Treat

Takes 5-7 hours, making it an enjoyable project to finish over a couple of days.

🧸

Cute Companion

An adorable friend to cherish, handcrafted with love to bring comfort and joy for years to come.

About This Lily Bunny Amigurumi Pattern

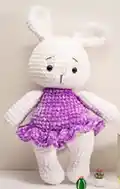
This pattern creates a soft chenille Lily Bunny complete with a ruffled pink skirt and embroidered facial features. It uses sport/chenille yarn and a 5 mm hook to produce a plush toy about 35 cm tall. Each section is worked in rounds and assembled for a sturdy, huggable finish.

Lily Bunny Amigurumi Pattern crochet pattern - detailed view of completed project

The pattern uses US terminology and includes detailed round-by-round instructions for legs, body, head, ears, arms and skirt. Perfect as a gift or nursery companion, the finished bunny has a sweet, handmade charm.

Why You'll Love This Lily Bunny Amigurumi Pattern

I absolutely love this pattern because it turns simple stitches into a charming, huggable bunny with a playful ruffled skirt. I enjoy how the chenille yarn makes the finished toy feel extra soft and cozy in your hands. I especially love the clear assembly cues that make joining the parts straightforward and neat. I find the small details like embroidered eyebrows and the dress attachment really bring Lily Bunny to life.

Lily Bunny Amigurumi Pattern step 1 - construction progress Lily Bunny Amigurumi Pattern step 2 - assembly progress Lily Bunny Amigurumi Pattern step 3 - details and accessories Lily Bunny Amigurumi Pattern step 4 - final assembly and finishing

Switch Things Up

I love experimenting with colors for Lily Bunny; try pastel shades for a soft nursery friend or bright hues for a playful toy.

I sometimes switch to bulky chenille and a larger hook to make a chunkier, cuddlier version that works well as a pillow companion.

I often change the skirt color or make the dress removable by stitching on a few snaps instead of crocheting it directly to the body.

I add embroidery details like eyelashes or a stitched smile to give each bunny a unique expression and personality.

I recommend trying different eye sizes; swapping to smaller or larger safety eyes will dramatically change the facial look.

I like to use cotton thread for facial embroidery when I want crisp, defined features instead of the softer chenille look.

I sometimes make a mini keychain version by using thin yarn and a smaller hook, perfect for purse charms or gifts.

I also experiment with textured stitches for the skirt ruffle — puff stitches or picots add lovely frill variations.

I occasionally insert a small bell or weighted pellet in the bottom for a different sensory toy, but always keep safety in mind for children.

I encourage you to add accessories like a tiny crocheted bow, scarf or felt patches to personalize your Lily Bunny and make each one special.

Common Mistakes & How to Fix Them

✗ Skipping the recommended stuffing guidance leads to misshapen limbs; stuff the arms only two-thirds full and stuff legs/body as instructed to maintain proper proportions. ✗ Not placing safety eyes at the correct rounds causes uneven facial placement; insert the safety eyes between rounds 8 and 9 with eight stitches between them to match the pattern photo. ✗ Forgetting to change to the pink yarn at the correct round will alter the dress placement; change the yarn to pink color after round 6 of the body as indicated to form the skirt edge. ✗ Cutting the yarn too early on the right leg disrupts the join for the body; do not cut the yarn for the right leg (18 sc) so you can continue seamlessly with the body join.

Lily Bunny Amigurumi Pattern

Make a cuddly Lily Bunny with soft chenille yarn and simple shaping techniques. This pattern walks you through each part — legs, body, head, ears, arms and a ruffled skirt — with clear step-by-step rounds. You will create a 35 cm tall plush bunny that is perfect for gifting or nursery decor. Enjoy a cozy crochet project that combines classic amigurumi construction with a sweet dress detail.

Intermediate 5-7 Hours

Materials Needed for Lily Bunny Amigurumi Pattern

— Main Fabric

  • 01
    Sport yarn (chenille) - White (Chenille 01) - amount: enough for head, body, arms, legs (approximately 150-200g total depending on tension)
  • 02
    Sport yarn (chenille) - Purple/Pink (Chenille 13) - amount: approximately 50-100g for dress/skirt
  • 03
    Brown embroidery thread - for eyebrows and muzzle detailing - small amount
  • 04
    Pink embroidery thread - for the nose - small amount
  • 05
    White thread - for head sculpting - small amount
  • 06
    Safety eyes 14 mm (2 pieces)
  • 07
    Polyester fiber fill stuffing - sufficient to stuff head, body and limbs (recommended to achieve ~35 cm finished height)

— Tools Required

  • 01
    Crochet hook 5 mm
  • 02
    Safety eyes 14 mm (2 pieces)
  • 03
    Polyester fiber fill stuffing
  • 04
    Brown embroidery thread for eyebrows and muzzle
  • 05
    Pink embroidery thread for the nose
  • 06
    White thread for head sculpting
  • 07
    Scissors
  • 08
    Needle for sewing and embroidery (to sew parts and embroider features)
  • 09
    Stitch marker (recommended to mark beginning of rounds)

Progress Tracker

0% Complete

— Arms :

Info :

CCrochet with white yarn. Stuff only 2/3 of the arm.

Round 1 :

6 sc into a magic ring (6)

Round 2 :

6 inc (12)

Round 3 :

(3 sc, inc) * 3 (15)

Round 4-5 :

15 sc (2 rounds)

Round 6 :

(3 sc , dec ) * 3 ( 12 )

Round 7-14 :

8 sc ( 8 rounds )

Round 15 :

( 4 sc , dec ) * 2 ( 10 )

Round 16 :

10 sc

Info :

Fold the arm in half and crochet 5 sc through both sides. Fasten off and cut the yarn, leaving a tail for sewing. Sew the arms two rounds under the beginning of the head.

— Legs :

Info :

Crochet with white yarn. Stuff as you go.

Round 1 :

7 sc into a magic ring (7)

Round 2 :

7 inc (14)

Round 3 :

(sc, inc) * 7 (21)

Round 4-5 :

21 sc (2 rounds)

Round 6 :

7 sc, 4 dec, 6 sc (17)

Round 7 :

7 sc, 2 dec, 6 sc (15)

Round 8-10 :

15 sc (3 rounds)

Round 11 :

(4 sc, inc) * 3 (18)

Round 12 :

18 sc

Round 13 :

For the left leg: crochet only 14 sc Fasten off, cut the yarn.

Round 13 :

For the right leg: 18 sc Don't cut the yarn, we will continue with the body:

— Body :

Round 1 :

Crochet 7 sc on the right leg; make 3 chains; 18 sc on the left leg; 3 sc on the chain; 18 sc on the right leg ; 3 sc on the chain; put the marker here ( 42 )

Round 2 :

(6 sc, inc ) * 6 ( 48 )

Round 3-6 :

48 sc (4 rounds). Change the yarn to pink color:

Round 7 :

48 sc

Round 8 :

back loops only: 48 sc

Round 9 :

( 6 sc, dec ) * 6 ( 42 )

Round 10-11 :

42 sc ( 2 rounds )

Round 12 :

( 5 sc, dec ) * 6 ( 36 ).

Round 13-14 :

36 sc ( 2 rounds )

Round 15 :

( 4 sc, dec ) * 6 ( 30 )

Round 16-17 :

30 sc ( 2 rounds )

Round 18 :

( 3 sc, dec ) * 6 ( 24 ).

Round 19 :

24 sc

Round 20 :

( 6 sc, dec ) * 3 ( 21 )

Info :

Stuff the body firmly, especially in the neck. Cut the pink yarn, we will continue with the head, but first, we need to make the dress.

— Skirt :

Info :

Attach the pink yarn to the back of the body in the front loops of round 8. Crochet with the body turned upside down:

Round 1 :

( 2 dc in one stitch ) * 48 ( 96 )

Round 2 :

96 dc Fasten off, and cut the yarn. Hide the thread inside the body.

— Head :

Info :

Change the yarn to white color. Stuff as you go.

Round 1 :

21 sc

Round 2 :

21 inc ( 42 )

Round 3 :

( 6 sc, inc ) * 6 ( 48 )

Round 4 :

( 7 sc, inc ) * 6 ( 54 )

Round 5-9 :

54 sc ( 5 rounds ) Insert the safety eyes between rounds 8 and 9 with 8 st between them.

Round 10 :

( 7 sc, dec ) * 6 ( 48 )

Round 11-13 :

48 sc ( 3 rounds )

Round 14 :

( 6 sc, dec ) * 6 ( 42 )

Round 15 :

42 Sc

Round 16 :

( 5 sc, dec ) * 6 ( 36 ) ( 30 )

Round 17 :

( 4 sc, dec ) * 6

Round 18 :

( 3 sc, dec ) * 6 ( 24 )

Round 19 :

( 2 sc, dec ) * 6 ( 18 )

Round 20 :

( sc, dec ) * 6 ( 12 )

Round 21 :

6 Dec ( 6 ) Make sure that the head is stuffed firmly. Close the opening and hide the yarn inside. Head sculpting

— Ears :

Info :

Crochet with white yarn .

Round 1 :

6 sc into a magic ring ( 6 )

Round 2 :

6 inc ( 12 )

Round 3 :

( sc , inc ) * 6 ( 18 )

Round 4 :

( 2 sc , inc ) * 6 ( 24 )

Round 5-6 :

24 sc ( 2 rounds )

Round 7 :

( 6 sc , dec ) * 3 ( 21 )

Round 8 :

( 5 sc , dec ) * 3 ( 18 )

Round 9 :

( 4 sc , dec ) * 3 ( 15 )

Round 10-12 :

15 sc ( 3 rounds ) Fasten off and cut the yarn , leaving a tail for sewing. Fold the ear in half and sew the ends together. Sew the ears on the top of the head with 4 stitches between them.

Assembly Instructions

  • Fold each arm in half and crochet 5 sc through both sides to close; fasten off leaving a long tail and sew the arms two rounds under the beginning of the head for correct placement.
  • Sew the left leg (fastened off at 14 sc) and the right leg (left open with 18 sc) into the body join when working round 1 of the body, ensuring the marker aligns the seam.
  • Attach the pink yarn to the front loops of round 8 at the back of the body to crochet the skirt; hide the yarn tail inside the body after fastening off.
  • Insert safety eyes between rounds 8 and 9 of the head with 8 stitches between them; secure backs and continue stuffing before closing the head.
  • Fold each ear in half and sew the edges together, then sew the ears to the top of the head with four stitches between them and secure firmly.

Important Notes

  • 💡Stuff the arms only about two-thirds full to keep their shape and allow a neat seam when folding and crocheting them closed.
  • 💡Stuff legs and body as you go; especially stuff the neck area firmly to support the head and keep the toy upright.
  • 💡Insert safety eyes between rounds 8 and 9 with eight stitches between them and secure safety backs before continuing to shape the head.
  • 💡When attaching the skirt, work into the front loops of round 8 and hide yarn tails inside the body for a clean finish.

This sweet Lily Bunny is designed to be soft, snuggly and full of personality, crafted in plush chenille yarn for a luxurious feel. Whether you make one for a little one or keep it as a decorative companion, it will bring warmth and handmade charm to any space. Happy crocheting and may your stitches be even and your stuffing just right! 🧶🐰

You ask,

we answer.

FAQs

What size will the finished piece be?

The finished amigurumi is around 35 cm tall when using the recommended chenille sport yarn and a 5 mm crochet hook.

Can I use different yarn weights for this pattern?

Yes, you can change yarn weight, but the final size and texture will vary; adjust hook size accordingly and expect a different finished height.

Do I need prior crochet experience for this pattern?

This pattern is rated intermediate and assumes familiarity with working in the round, increases, decreases, and basic sewing for assembly.

How long does this project typically take to complete?

Most crocheters finish this bunny in about 5-7 hours, depending on experience, finishing, and assembly time.