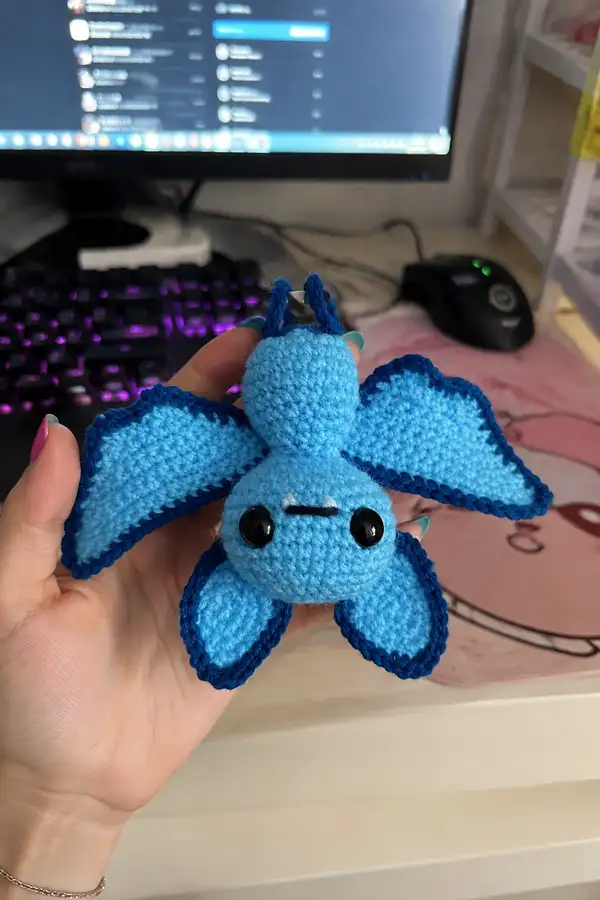
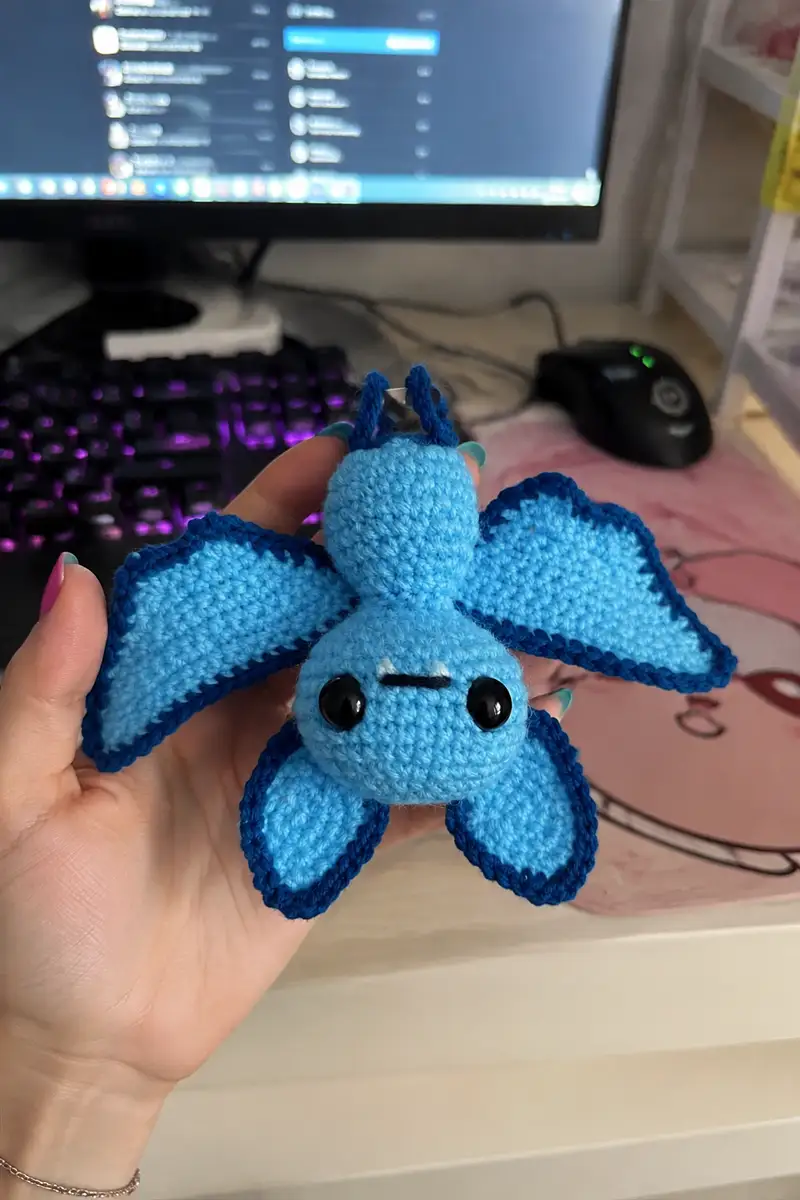
Make your own adorable little blue bat amigurumi with rounded head, compact body and dramatic scalloped wings edged in a darker blue. This palm-sized bat features shiny safety eyes, a tiny embroidered mouth, and layered wing shapes for a playful, cuddly look. The pattern uses simple amigurumi construction and modular pieces so you can customize size and color.
Progress Tracker
0% Complete
— Head :
Round 1 :
6 sc in magic ring (6)
Round 3 :
(1 sc, 1 inc) x 6 (18)
Round 4 :
(2 sc, 1 inc) x 6 (24)
Round 5 :
(3 sc, 1 inc) x 6 (30)
Round 6 :
(4 sc, 1 inc) x 6 (36)
Round 7 :
(5 sc, 1 inc) x 6 (42)
Round 8 :
(6 sc, 1 inc) x 6 (48)
Round 9-14 :
1 sc in each st (48)
Info :
Place safety eyes between rounds 11 and 12, approximately 10-12 stitches apart depending on how wide you want the expression. Mark first stitch of each round with a stitch marker. If you plan embroidered highlights, leave a small gap above the eyes for a tiny white stitch.
Round 15-18 :
1 sc in each st (48)
Round 19 :
(6 sc, 1 dec) x 6 (42)
Round 20 :
(5 sc, 1 dec) x 6 (36)
Info :
Begin stuffing head firmly but evenly. Use small amounts of fiberfill and push into the face area first to prevent dimples. Continue stuffing as you progress through decreases so the head remains round and plump.
Round 21 :
(4 sc, 1 dec) x 6 (30)
Round 22 :
(3 sc, 1 dec) x 6 (24)
Round 23 :
(2 sc, 1 dec) x 6 (18)
Round 24 :
(1 sc, 1 dec) x 6 (12)
Info :
Fasten off or stop here leaving a long tail for sewing if attaching directly to the body later. If you are making a distinct neck to join to the body, continue with neck rounds below before closing; otherwise finish stuffing fully and close with invisible decrease and sew closed, leaving tail for joining.
Round 26 :
Attach main color yarn to the top back of the head and ch1, work 10 sc evenly over the back of the head to create the start of the neck (10)
Round 27 :
1 sc in each st (10)
Round 28 :
1 sc in each st (10)
Info :
This short neck tube will be sewn into the opening of the body. Keep it lightly stuffed so it holds shape without making it too bulky at the seam. If you prefer the head to be detachable, stop and leave a long tail for sewing instead of continuing to close the neck completely.
Round 29 :
1 sc in each st (10)
Round 30 :
1 sc in each st (10)
Round 31 :
dec x5 (5) - flatten tube and use tail to close leaving long tail for attaching to body (if you will sew on)
Round 32 :
Weave in remaining yarn tail securely inside the head or leave tail for sewing to body. Embroider small horizontal mouth between the eyes using black yarn (see Info for placement).
Info :
For mouth placement: find the center line between the safety eyes and embroider a short horizontal line of 4-6 single floss yarn stitches just below eye level (approximately between rounds 11-13). Add a single white stitch above mouth if you want the tiny highlight seen in the photo.
— Body :
Round 1 :
6 sc in magic ring (6)
Round 3 :
(1 sc, 1 inc) x 6 (18)
Round 4 :
(2 sc, 1 inc) x 6 (24)
Round 5 :
(3 sc, 1 inc) x 6 (30)
Round 6-9 :
1 sc in each st (30)
Info :
If you want the head to sit snugly on the body, work rounds 6-9 a little tighter to make a slightly narrower top. Use stitch marker to mark the center back where the neck of the head will be sewn later.
Round 10-14 :
1 sc in each st (30)
Round 15 :
(3 sc, 1 dec) x 6 (24)
Round 16 :
(2 sc, 1 dec) x 6 (18)
Info :
Begin stuffing the body moderately from the bottom up. Keep stuffing lighter than the head so the head remains the focal point and the body sits easily in your hand.
Round 17 :
(1 sc, 1 dec) x 6 (12)
Info :
Leaving a long tail, fasten off and close the base with invisible decrease. If you prefer a more elongated body, add a few extra even rounds before decreasing (work 2-4 rounds of 1 sc in each st to lengthen). The pictured bat has a compact rounded body about 1/2 - 2/3 the size of the head.
Round 19 :
Re-attach yarn at the top opening and work 6 sc into the opening to create a neat join area for the head neck tube (work evenly around to create a 6 or 10-stitch opening depending on how your neck fits)
Round 20 :
1 sc in each st (6 or 10 as required to match neck) - leave long tail for sewing the neck into this opening
Info :
Pin head neck tube into the top opening of the body to determine fit. Some heads will require sewing through the neck rounds and a few body rounds to make a secure join. Make sure to position the head slightly forward so the eyes face out and wings will be able to attach to the sides.
— Large Wing (Make 2, Left and Right) :
Round 1 :
6 sc in magic ring (6)
Round 3 :
(1 sc, 1 inc) x 6 (18)
Round 4 :
(2 sc, 1 inc) x 6 (24)
Round 5 :
(3 sc, 1 inc) x 6 (30)
Info :
These wings are worked in the round to create a teardrop/leaf shape that will be flattened and shaped after the final round. Keep tension slightly looser than the head to allow the wing to lie flat without puckering.
Round 6 :
(4 sc, 1 inc) x 6 (36)
Round 7 :
(5 sc, 1 inc) x 6 (42)
Round 8 :
(6 sc, 1 inc) x 6 (48)
Round 9-11 :
1 sc in each st (48)
Round 12 :
(6 sc, 1 dec) x 6 (42)
Round 13 :
(5 sc, 1 dec) x 6 (36)
Round 14 :
(4 sc, 1 dec) x 6 (30)
Info :
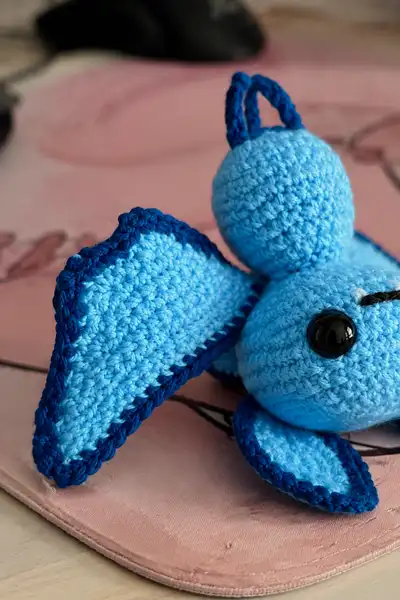
At this point the piece becomes more triangular. Flatten the wing gently and use pins to test the scalloped edging. The pictured wings have a scalloped dark edge that follows the outer curve; we will add the dark edging after finishing rounds.
Round 15 :
1 sc in each st (30)
Round 16 :
(3 sc, 1 dec) x 6 (24)
Round 17 :
(2 sc, 1 dec) x 6 (18)
Round 18 :
(1 sc, 1 dec) x 6 (12)
Round 19 :
6 dec (6) - close slightly but do not stuff; instead flatten and shape the wing by folding along one axis to create the characteristic wing fold seen in the photo
Round 20 :
Fasten off leaving long tail for sewing to body. Block or pin wings flat to get the nice open triangular shape before adding edging.
Info :
Alternative method: instead of a tightly closed MR finish, stop at round 12-15 and then work in rows to extend the wing tip for a larger wing. The measured rounds above replicate the mid-sized wings in the pictured bat.
— Small Lower Flap / Foot (Make 2) :
Round 1 :
6 sc in magic ring (6)
Round 3 :
(1 sc, 1 inc) x 6 (18)
Round 4 :
(2 sc, 1 inc) x 6 (24)
Round 5 :
1 sc in each st (24)
Info :
These smaller flaps sit under the head and are slightly cupped to echo the large wings. Work them slightly tighter than the large wings to give more body and curvature.
Round 6 :
(2 sc, 1 dec) x 6 (18)
Round 7 :
(1 sc, 1 dec) x 6 (12)
Round 9 :
Flatten and finish off leaving a long tail for sewing. You may lightly stuff the flap tip with a small amount of fiberfill to maintain a slight cup.
Info :
When attaching, position these small flaps slightly forward and below the head, spaced approximately 8-10 stitches apart around the lower front of the head depending on the head circumference. Pin before sewing to check symmetry.
— Ear/Loop (Make 2) :
Round 1 :
6 sc in magic ring (6)
Round 3 :
1 sc in each st (12)
Round 4 :
1 sc in each st (12)
Round 5 :
Fold ear in half and sl st through both sides 6 times to create a small loop (6)
Round 6 :
Fasten off leaving a tail for sewing. Alternatively: make a longer ear by chaining 6-8 and slip stitching back to create a loop, then work around the loop with sc to create the tube ear shown on the bat.
Info :
The pictured bat has narrow tube-like ears/loops on top. To create these use a tight hook and work a small tube of 6-8 rounds and then sew the ends to the top back of the head creating a little arch. You can also insert a small wire inside the ear loop for shaping.
— Dark Contrast Edging (Scalloped) :
Info :
Using the dark navy yarn, we will crochet a decorative edge around each wing and flap. Work this edging after you have blocked and flattened each wing. Edging is worked as a single round of sc followed by a scallop round (picot/cluster) to get the scalloped look.
Round 1 :
Attach dark yarn to the outermost stitch of the wing, ch1, sc evenly around the entire outer edge of the wing working 1 sc in each stitch (work additional sc in tight corners to maintain shape)
Round 2 :
*sc in next 2 stitches, (ch3, sl st in first ch to make picot) or (3 dc in same stitch for a cluster), sc in next 2 stitches; rep from * around to create scallops. Join with sl st and fasten off (scallop count will vary with wing size, aim for 10-14 scallops on large wing)
Info :
For a sharper scallop as in the photo, use the following: (sc in next 2, 5 sc in next st for a small bump) repeated. Alternatively use ch3 picots if you want small pointed scallops. Make sure to work evenly so scallops are uniform.
— Assembly & Final Shaping :
Info :
Before sewing parts together, arrange everything on a flat surface. Pin the head to the body, the two large wings to the sides of the body, the two small flaps beneath the head, and ears to the top back of the head. Check proportions and symmetry carefully and adjust before sewing.
Round 1 :
Attach the head neck tube into the top opening of the body; using mattress or whip stitch sew the neck rounds into the body opening, making sure the seam is even and secure (use the long tail saved from the body and head)
Round 2 :
Sew the two small lower flaps to the lower front of the head: position them so their top edges meet the bottom front rounds of the head and secure with tight small stitches to the head and a few stitches to the body to anchor them (see Assembly notes)
Round 3 :
Sew large wings to the side of the body, aligning wing inner edge with the widest round of the body (work stitches through both wing and body fabric to secure). Make 10-14 sewing passes, then lock off with a knot and weave tail inside body.
Round 4 :
Sew ears to top back of head using the long tails left. Position them so they are slightly behind the eyes and pointing upward. If using wire inside ears, thread wire ends into body and wrap with yarn tail before finishing to avoid pokey wire ends.
Info :
To achieve the sculpted look on the wing when sewing, insert a small strip of felt or a row of tight stitches along the inner seam to create a wing 'ridge' that keeps the wing open slightly. This is optional but helps the bat hold the posed wing look.
Round 5 :
Attach safety eyes before final stuffing of the head if you didn't insert them earlier. Add a small felt circle behind each safety eye for extra security if desired. Embroider the small horizontal mouth between the eyes with black yarn and add a small white highlight stitch above it.
Round 6 :
Weave in all tails carefully: thread the long tails through a yarn needle and weave through multiple stitches inside the body and head before trimming close to fabric. This secures the joins and prevents unraveling when the toy is handled.
Info :
Final blocking: if you like the wings to be very flat, lightly steam-block them using a steam iron held above the fabric (do not press directly) while pinned to a foam board. Allow to cool and dry before removing pins and attaching. Always test on scrap yarn first.
This little blue bat is a delightful, compact amigurumi that comes together fast and looks wonderful in a group or sitting on a shelf. The contrast scalloped edging adds personality and the simple shapes make it quick to stitch up. I hope you enjoy making this little bat—each stitch adds lots of charm and character to your tiny friend! 🧶🦇