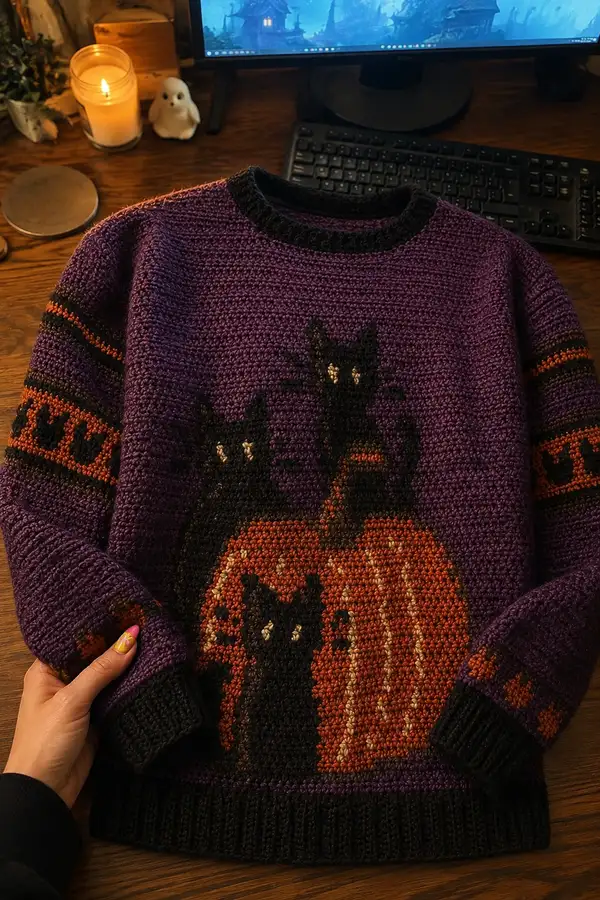
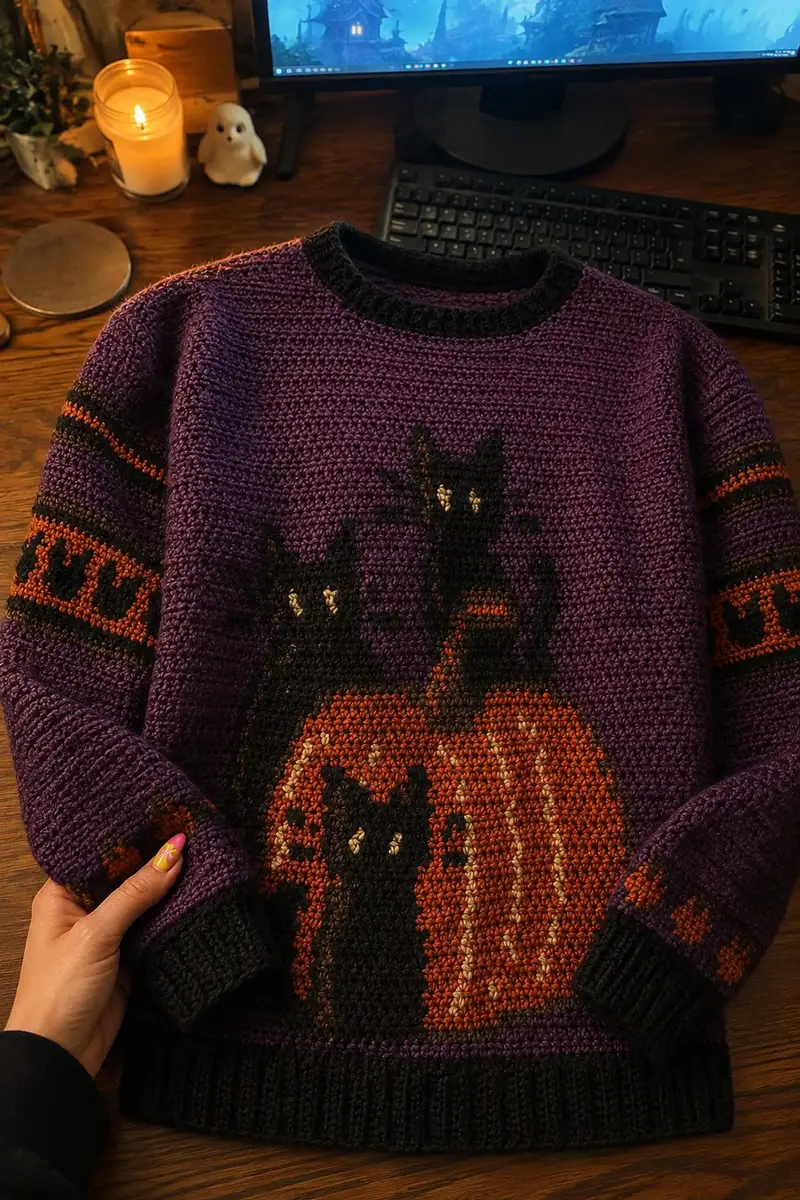
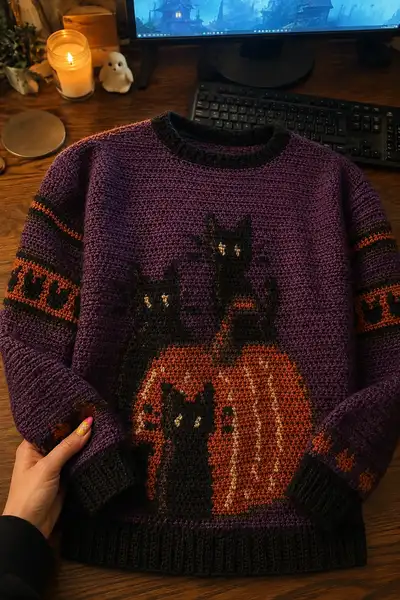
A cozy, textured crochet sweater in rich purple with a bold central pumpkin and black cat motif, accented with orange and black sleeve bands and ribbed hem, cuffs, and neck. This pattern uses tapestry crochet colorwork for the front graphic and creates a warm, dense fabric perfect for crisp autumn evenings. Detailed instructions guide you through ribbing, body construction, sleeve shaping, and colorwork placement. Ideal for crocheters who love seasonal statement pieces and wearable tapestry techniques.
Progress Tracker
0% Complete
— Notes & Gauge :
Info :
Gauge: 17 sc = 10 cm (4 in) across, and 18 rounds = 10 cm (4 in) when worked in single crochet in the round with 4.5mm hook. Swatch in main stitch and color carries if you plan to replicate final fabric density. Adjust hook size to match gauge. The pattern is written for an adult medium with finished chest circumference ~110 cm (43.5 in). To resize, change total stitch counts in multiples of the motif grid width (see 'Sizing' info below).
Info :
Construction overview: Work body in continuous rounds from hem to shoulders; front tapestry colorwork is worked in-round using stranded/tapestry technique, carrying or bobbin-managing colors across the back. Sleeves are worked in the round from cuff to armhole, then joined to body at underarm. Ribbing (hem, cuffs, neck) is worked in BLO or in alternating hdc/hdc back loop rows to create elastic texture.
— Sizing & Stitch Math :
Info :
The sample body circumference is 160 sc. This gives a finished chest of approximately 43.5 in (110 cm) with a comfortable positive ease. The front motif is centered and occupies 80 stitches width. Side panels (plain purple) are each 40 stitches wide. If you resize, keep the motif width centered and increase side panels evenly.
— Hem / Ribbing :
Round 1 :
With Black, ch 160 and join into rnd (160) OR make foundation sc 160 and join. Place marker at first st.
Round 2 :
Work 1 sc in each st BLO (160)
Round 3 :
1 sc in each st BLO (160)
Round 4 :
1 sc in each st BLO (160)
Round 5-8 :
1 sc in each st (160) — continue working ribbing texture. Fasten off Black if finishing ribbing color change is needed; we keep Black for 8 rounds total rib.
Info :
Ribbing tip: Working in BLO for 3-4 rounds in Black creates a compact, stretchy hem. If you prefer deeper ribbing, work additional BLO rounds in multiples of 2. Keep a slightly looser tension on BLO rounds so the sweater hem will stretch easily over hips.
— Body (Back and Front worked continuously in the round) :
Info :
Change to Purple (main color) and place marker at start of round. From here body rounds are worked in single crochet in the round. Total round stitch count remains 160 unless shaping is introduced. The motif will be worked over the next rounds centered on the front; for the first 20 rounds work plain purple to reach the start height of the motif.
Round 9-12 :
1 sc in each st (160)
Info :
Measure from hem up ~8-10 cm and confirm measurement for where you want the motif to begin. Mark center front on the round with a removable stitch marker; motif will be centered on this point.
Round 13-16 :
1 sc in each st (160)
Round 17-20 :
1 sc in each st (160)
Info :
Prepare bobbins: Wind small amounts of Black, Pumpkin Orange, Brown and Golden Yellow onto separate bobbins to avoid long floats. If carrying across many stitches, plan to catch floats every 6-8 sts. The motif width is 80 sts centered; pattern will list colors stitch-by-stitch for each motif round. Keep tension consistent — color changes produce thicker fabric.
— Motif Panel (Front Graphic: Pumpkin & Cats) :
Info :
The motif occupies the 80 center stitches of each round; side panels (plain Purple) of 40 sts on each side remain single-colored and are worked in Purple only. For clarity, each round below lists sequence as: left side purple (40), motif (80), right side purple (40) — total 160 sts.
Round 21 :
Left 40: 1 sc in Purple x 40; Motif 80: (Purple x 80); Right 40: Purple x 40 (160)
Round 22 :
Left 40: Purple x 40; Motif 80: Purple x 80; Right 40: Purple x 40 (160)
Round 23 :
Left 40: Purple x 40; Motif 80: Purple x 80; Right 40: Purple x 40 (160)
Info :
Motif will begin to show on Round 25. Keep careful count of the 40/80/40 divisions. Use a removable marker at the start of the motif section (st 41) on the round to help tally motif stitches easily.
Round 24-25 :
Left 40: Purple x 40; Motif 80: Purple x 80; Right 40: Purple x 40 (160)
Round 26 :
Left 40: Purple x 40; Motif 80: Purple x 36, Pumpkin Orange x 8, Purple x 36 (160)
Round 27 :
Left 40: Purple x 40; Motif 80: Purple x 34, Pumpkin Orange x 12, Purple x 34 (160)
Round 28 :
Left 40: Purple x 40; Motif 80: Purple x 30, Pumpkin Orange x 20, Purple x 30 (160)
Info :
These early orange insertions form the top curve of the pumpkin. When switching to Pumpkin Orange, drop Purple and pick up Orange, carrying the unused yarn neatly across the wrong side or using small bobbins for intarsia. Keep floats caught every 6 sts behind the work to avoid long loose strands.
Round 29 :
Left 40: Purple x 40; Motif 80: Purple x 26, Pumpkin Orange x 28, Purple x 26 (160)
Round 30 :
Left 40: Purple x 40; Motif 80: Purple x 22, Pumpkin Orange x 36, Purple x 22 (160)
Round 31 :
Left 40: Purple x 40; Motif 80: Purple x 20, Pumpkin Orange x 40, Purple x 20 (160)
Round 32 :
Left 40: Purple x 40; Motif 80: Purple x 18, Pumpkin Orange x 44, Purple x 18 (160)
Info :
Introduce Brown for shading here and there in the pumpkin: replace a few Pumpkin Orange stitches with Brown on the right-side rows to create depth. The sample uses Brown set in stripes of 2-3 stitches placed asymmetrically to mimic pumpkin ribs. Insert Golden Yellow for a few highlight stitches inside the orange to simulate reflected light (see rounds 34-36).
Round 33 :
Left 40: Purple x 40; Motif 80: Purple x 16, Pumpkin Orange x 46, Purple x 18 (160)
Round 34 :
Left 40: Purple x 40; Motif 80: Purple x 14, Pumpkin Orange x 44, Brown x 4, Purple x 18 (160)
Round 35 :
Left 40: Purple x 40; Motif 80: Purple x 12, Pumpkin Orange x 44, Brown x 6, Purple x 18 (160)
Round 36 :
Left 40: Purple x 40; Motif 80: Purple x 12, Pumpkin Orange x 40, Brown x 10, Purple x 18 (160)
Info :
At rounds ~36-40 the top silhouette of the cats begins emerging. Switch to Black for cat body sections. The cats sit behind the pumpkin so Black stitches will appear above the pumpkin area and extend into the motif. Plan black blocks to create the cat silhouettes and eyes in Golden Yellow.
Round 37 :
Left 40: Purple x 40; Motif 80: Purple x 10, Pumpkin Orange x 36, Black x 8, Brown x 6, Purple x 20 (160)
Round 38 :
Left 40: Purple x 40; Motif 80: Purple x 8, Pumpkin Orange x 32, Black x 16, Brown x 6, Purple x 18 (160)
Round 39 :
Left 40: Purple x 40; Motif 80: Purple x 6, Pumpkin Orange x 26, Black x 26, Purple x 22 (160)
Round 40 :
Left 40: Purple x 40; Motif 80: Purple x 4, Pumpkin Orange x 20, Black x 36, Purple x 24 (160)
Info :
Cat eyes: Insert two Golden Yellow stitches separated across the black silhouette to create glowing eyes. Place them symmetrically on each cat by replacing the appropriate Black stitch with Golden Yellow at the correct columns. See rounds 42 and 44 for exact stitch placement details.
Round 41 :
Left 40: Purple x 40; Motif 80: Purple x 4, Pumpkin Orange x 18, Black x 38, Purple x 24 (160)
Round 42 :
Left 40: Purple x 40; Motif 80: Purple x 4, Pumpkin Orange x 14, Black x 42 (replace st 20 of Black block with Golden Yellow for left cat eye), Purple x 24 (160)
Round 43 :
Left 40: Purple x 40; Motif 80: Purple x 4, Pumpkin Orange x 12, Black x 44, Purple x 24 (160)
Round 44 :
Left 40: Purple x 40; Motif 80: Purple x 4, Pumpkin Orange x 10, Black x 46 (replace st 38 of Black block with Golden Yellow for right cat eye), Purple x 24 (160)
Info :
Work slowly across these rounds — changing yarn constantly will feel fiddly but produces the crisp silhouette. Use a blunt tapestry needle to secure tails neatly on the wrong side as you go if you prefer. Keep the tension even between colors to avoid puckering.
Round 45-48 :
Left 40: Purple x 40; Motif 80: Continue Black silhouette shaping by reducing Pumpkin Orange and increasing Black where necessary for cat ears and tails. Example Round 45: Purple x 4, Pumpkin Orange x 6, Black x 54, Purple x 24 (160). Round 46: Purple x 4, Pumpkin Orange x 4, Black x 56, Purple x 24 (160). Round 47: Purple x 4, Pumpkin Orange x 2, Black x 58, Purple x 24 (160). Round 48: Purple x 4, Black x 60, Purple x 24 (160)
Info :
If you'd like a simplified version of the motif, convert to fewer colors (just Pumpkin Orange and Black with Purple background) and omit Brown shading. The visual effect will still read clearly from a distance.
Round 49-56 :
Left 40: Purple x 40; Motif 80: Work alternately to complete lower pumpkin curve and cat bases: R49: Purple x 6, Black x 58, Purple x 24 (160). R50: Purple x 8, Black x 54, Pumpkin Orange x 14, Purple x 24 (160). R51: Purple x 10, Pumpkin Orange x 26, Black x 44, Purple x 20 (160). R52: Purple x 12, Pumpkin Orange x 34, Brown x 6, Purple x 18 (160). R53: Purple x 12, Pumpkin Orange x 38, Brown x 6, Purple x 14 (160). R54: Purple x 12, Pumpkin Orange x 40, Purple x 28 (160). R55: Purple x 14, Pumpkin Orange x 36, Purple x 30 (160). R56: Purple x 16, Pumpkin Orange x 34, Purple x 30 (160)
Info :
At Rounds 57-68 we round out the bottom of the pumpkin and transition back to plain purple for body height below motif. Keep Golden Yellow highlight stitches scattered across the pumpkin rounds 50-60 for sparkle effect.
Round 57-60 :
Left 40: Purple x 40; Motif 80: continue decreasing Orange toward center base: R57 Purple x 18, Orange x 30, Purple x 32 (160). R58 Purple x 20, Orange x 26, Brown x 4, Purple x 34 (160). R59 Purple x 22, Orange x 20, Purple x 38 (160). R60 Purple x 24, Orange x 14, Purple x 42 (160)
Round 61-68 :
Left 40: Purple x 40; Motif 80: R61 Purple x 28, Orange x 6, Purple x 46 (160). R62-68 Purple x 80 (motif area becomes purple again), Right 40: Purple x 40 (160)
Info :
Now that motif is complete, continue working even rounds in Purple for torso length until you reach the underarm/armhole join height. The motif used ~48 rounds; count carefully when you shape for sleeves.
Round 69-88 :
1 sc in each st (160) — work 20 rounds of even Purple to form torso below motif (counts remain 160)
Info :
Measure from hem to underarm: sample measurement is approximately 40 cm (15.5 in). Adjust the number of even rounds to suit your torso length before shaping shoulders. When you reach desired armhole height, prepare to split for sleeves/neckline if working raglan or set-in sleeve construction. This pattern is designed to join pre-worked sleeves into openings after working yoke few rounds; continue body until you have approximately 3-4 cm below where sleeve joins will be made.
— Sleeve Preparation & Joining :
Info :
Sample construction: body is worked to underarm, then sleeve stitches are removed from the main rounds to create openings and set-in sleeves will be attached. Mark the intended sleeve openings: each opening is 48 stitches wide (24 sts front + 24 sts back). On the sample, place markers at these points on a round, leaving 64 sts on front and back between openings. We'll work two rounds to define the opening edge and later seam the sleeve edges into the opening.
Round 89 :
1 sc in each st (160) — place markers to denote sleeve openings (st count unchanged)
Round 90-92 :
1 sc in each st (160)
Info :
Fasten off leaving long tail for seaming if you prefer to set in sleeves after completing them separately. Alternatively, you can leave live stitches for crochet-joining later. This sample continues by finishing body to shoulder height and then seaming shoulders after blocking.
— Sleeves (Make 2) :
Info :
Sleeves are worked in the round from cuff up. The cuff is worked in Black rib to match hem, switching to Purple for sleeve body with orange/black band motifs placed at mid-sleeve height. Total sleeve top stitch count matches the armhole opening; sample cuff starts at 48 sts and increases gradually to 60 sts to shape elbow/upper sleeve width as desired.
Round 1 (Cuff) :
With Black, ch 48 and join (48). Place marker.
Round 2-4 (Cuff) :
1 sc in each st BLO (48)
Info :
Cuff length: sample cuff 4 rounds BLO gives snug fit. For thicker cuff, work 6-8 rounds. If you want a more elastic rib, you may substitute alternating hdc BLO/flo rounds or use front-post/back-post hdc rib.
Round 5 :
Change to Purple; 1 sc in each st (48)
Round 6 :
1 sc in each st (48)
Round 7 :
Increase round: (3 sc, inc) x 12 = 48+12 = 60 sts — work evenly spaced increases to 60 sts (60)
Info :
Distribute increases evenly across the round to prevent a visible seam bulge. Aim to place increases at the underside of the sleeve where it will be less visible.
Round 8-12 :
1 sc in each st (60)
Round 13 :
Info: Change to Brown; work 1 sc in each st for stripe effect
Round 13-14 :
Work Brown x 2 rounds (60)
Round 15 :
Change to Black; 1 sc in each st (60)
Round 16 :
Change to Pumpkin Orange; 1 sc in each st (60)
Round 17 :
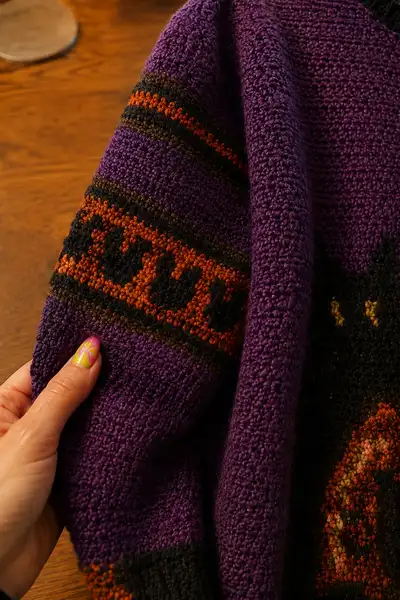
Black pattern band: Work tapestry pattern across 60 sts — sample motif repeats 6 times across the sleeve band, each motif 8 sts wide: (Black x 3, Pumpkin Orange x 5) x 6 = 60
Info :
The sleeve band design on the photo shows small black cat-face/heart-like shapes in orange band. The sample repeats a small 8-st motif (3 black, 5 orange) across the band. Adjust repeat count if your sleeve has different stitch count.
Round 18-24 :
Work Purple rounds even (60) to build sleeve length to underarm. Sample uses 28 rounds total from cuff to underarm. Work until sleeve length from cuff to underarm measures ~41 cm (16 in) or desired length.
Info :
At the sleeve top, shape sleeve cap to match armhole opening (if set-in). For join-in-the-round construction, leave top stitches live and join into body. Sample uses seamed sleeves: fasten off leaving enough tail to sew into armhole opening (48 sts assigned). Reduce to 48 sts at the cap with evenly placed decreases across last 4-6 rounds before finishing.
Round 25 :
(8 sc, dec) x 6 = (60 - 6) = 54 sts
Round 26 :
(7 sc, dec) x 6 = (54 - 6) = 48 sts
Round 27 :
1 sc in each st (48)
Info :
Fasten off leaving long tail for seaming if finishing as set-in sleeve. Pin sleeve into body opening aligning underarm seam and center top of sleeve to shoulder seam. Sew with mattress or whip stitch for neat attachment.
— Shoulder & Neck Shaping :
Info :
Sample shoulders are finished by seaming front and back across top 14 sts each shoulder and leaving a 30-st neckline opening. After joining sleeves, seam shoulders using mattress stitch and leave neck stitches for ribbing.
Round 1 (Neck preparation) :
With RS facing, pick up and join live stitches around neck opening: place 30 sts front neck and 30 sts back neck for total 60 sts. Join Black for neck rib (60)
Round 2-4 (Neck Rib) :
1 sc in each st BLO (60)
Round 5 :
1 sc in each st (60) — finish and fasten off, weave in ends
Info :
Neck ribbing in BLO keeps a neat rolled edge that frames the face. If you prefer a taller collar, work additional BLO rounds in multiples of 2. For a stretchier crew neck, substitute hdc BLO for the sc rounds.
— Finishing & Blocking :
Info :
Sew sleeves into openings using matching yarn and a yarn needle; make small, even ladder stitches for an invisible join. Weave in all ends on the wrong side, trimming close. Block the sweater lightly to even stitches and set shape: wet block or steam block on low setting, pinning to desired dimensions but avoid stretching the tapestry section to keep motif proportions.
Info :
Optional embroidery: Use Golden Yellow to add small dot highlights to pumpkin where you think light catches (single French knots or embroidered satin stitches). Use Brown to outline pumpkin ribs if you want an emphasized ribbed pumpkin look. All embroidery should be applied after final blocking.
— Alternate Techniques & Tips :
Info :
If you prefer not to work heavy colorwork in the round, consider intarsia panels: crochet front panel flat in rows, follow chart, then seam into body. This reduces floats but requires more sewing. For a lighter sweater, use a larger hook or lighter yarn weight and adjust stitch counts to maintain proportions.
Info :
To customize fit: change total stitch multiple and keep motif centered. For larger size, add 8-16 sts evenly distributed in side panels (each side 4-8 sts), ensuring motif remains 80 sts wide.
Info :
Care instructions: Hand wash in cool water and lay flat to dry to preserve yarn and colorwork integrity. Avoid agitation to prevent felting or color bleeding, especially with dark Black and Purple yarns.
This cozy Halloween sweater brings playful charm to your autumn wardrobe with a classic pumpkin and black cat motif woven into a dense crochet fabric. Each section is designed for a satisfying build-up from ribbed hem to finished neckline, with tapestry colorwork that creates a crisp image. Enjoy the tactile satisfaction of working dense single-crochet rounds and the delight of seeing the design emerge row by row. 🧶🎃 Wrap up in handmade charm and show off your seasonal style with pride! 🎃🖤