About This Little Spark Amigurumi Pattern
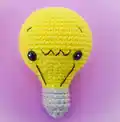
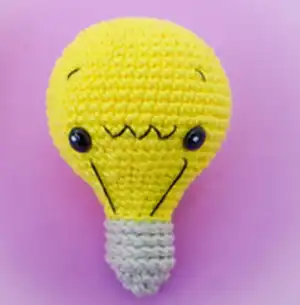
This pattern creates a tiny lightbulb amigurumi called Little Spark, perfect as a keychain-sized gift or cute shelf buddy. The design uses simple single crochet rounds and a small screw-fitting detail in a contrasting color. Techniques include working in the round, invisible decreases, and simple embroidery for facial features. The pattern is compact and beginner-friendly, with clear instructions throughout.
Suitable for beginners who know basic stitches, it finishes at approx. 8 cm tall using recommended yarn and hook. Comes with full round-by-round instructions and finishing notes for embroidery and the screw cap.
Why You'll Love This Little Spark Amigurumi Pattern
I absolutely love this pattern because it turns a simple crochet shape into a delightful, characterful bulb with very little fuss. I enjoy the balance of quick rounds and tiny finishing details that bring real personality to each piece. Making multiple in bright colors is addictive and perfect for gifting to friends. The pattern is straightforward yet flexible, letting me experiment with embroidery and color combinations every time.
Switch Things Up
I love using different color combinations to create entirely new characters with this pattern; try pastel yellows or bold neons depending on the mood I want.
I often swap the yarn weight and hook to change the size — using a thicker yarn and bigger hook makes a chunkier, cuddlier bulb.
For a child-safe toy, I replace safety eyes with embroidered eyes using black thread so the piece is secure and durable.
I sometimes embroider different mouth shapes or eyebrows to change the expression from sleepy to surprised or mischievous.
Try adding a small loop at the top with a few chain stitches to turn the bulb into a keyring or ornament — I attach a metal ring and it makes a great gift.
To make a hanging garland, I crochet several bulbs in alternating colors and string them together with a length of yarn; I like to space them evenly and secure each with a few stitches.
I sometimes add a tiny felt tag or a crocheted scarf to give my bulbs seasonal character — a little accessory can add so much personality.
If I want a textured screw fitting, I experiment with slip stitches or front/post techniques instead of just BLO/FLO to create extra dimension.
I enjoy combining embroidery and tiny surface crochet details to outline facial features or add freckles; these little touches make each finished piece unique.
For gifting, I place my finished bulbs in small organza bags or attach a handmade swing tag; presentation makes them feel extra special.
Common Mistakes & How to Fix Them
✗ Skipping stitch markers during shaping can make rounds hard to follow; place a marker at the start of each round to keep track of your progress.
✗ Not stuffing evenly while crocheting causes lumps and uneven shaping; add stuffing gradually and shape as you go to maintain smooth curves.
✗ Forgetting to insert safety eyes at the correct round results in misplaced features; attach eyes between rounds 16-17 with ten stitches visible between them before stuffing too tightly.
✗ Changing color or yarn too late can create loose ends and gaps; switch to silver yarn exactly after round 25 and secure the join before continuing the screw fitting.
✗ Ignoring loop instructions (BLO/FLO) will alter the look of the screw fitting; work rounds 26-30 in the back loops only, then use the front loops as instructed when finishing.