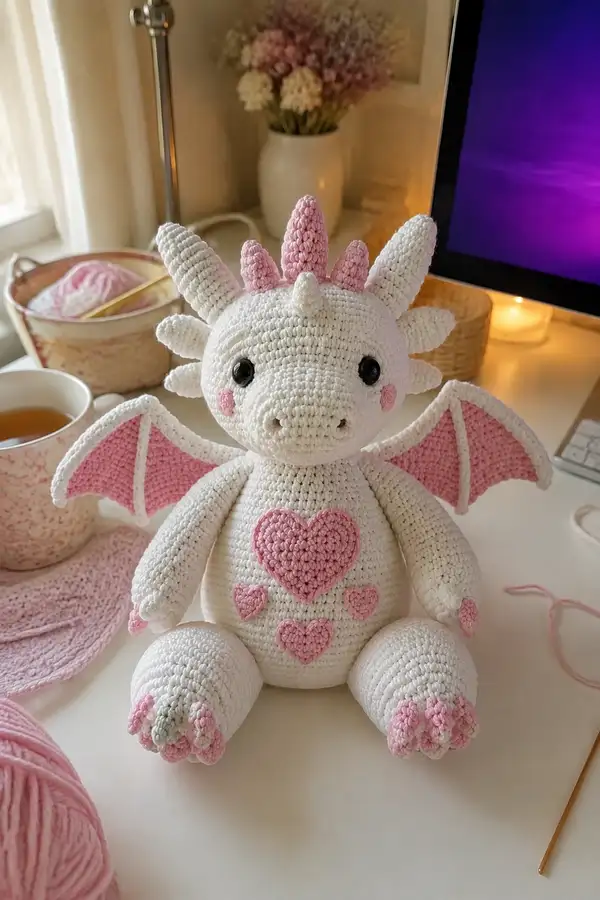
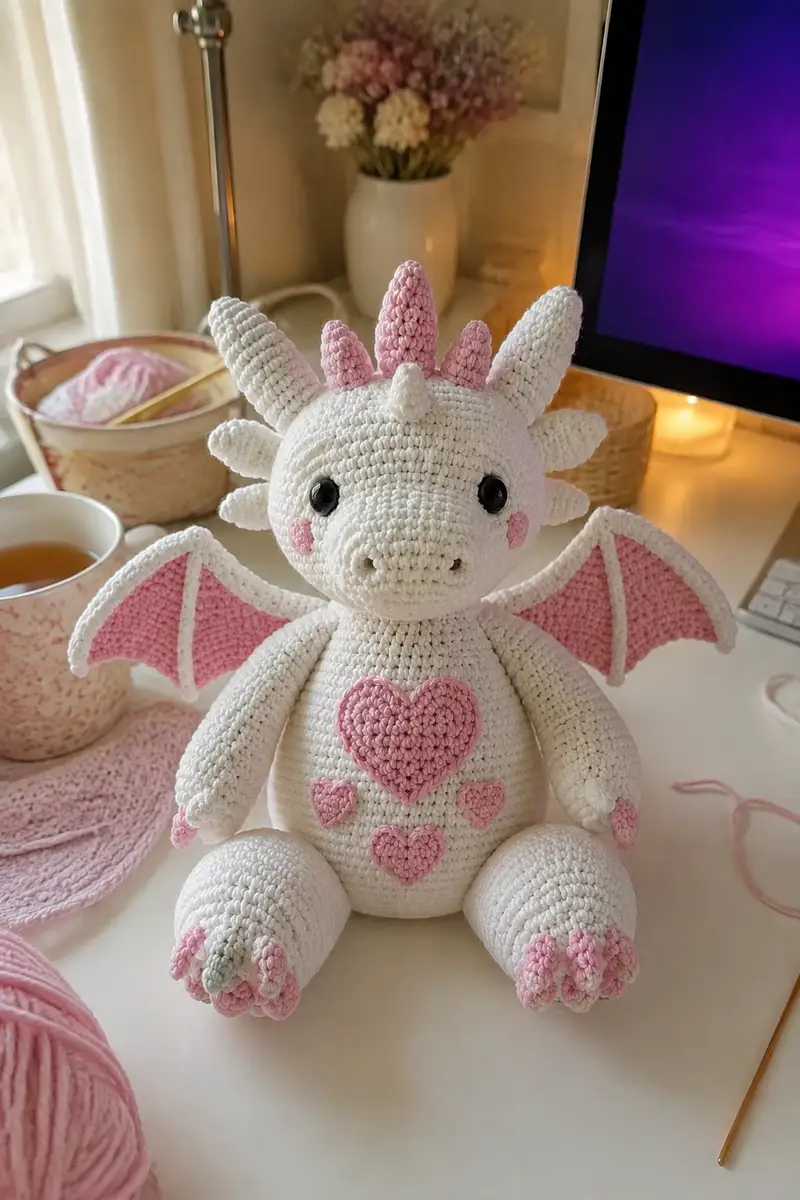
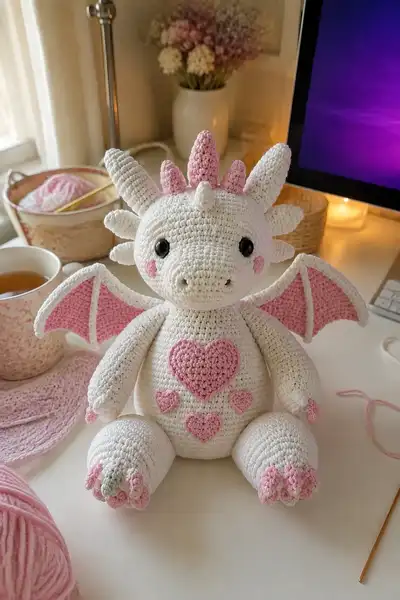
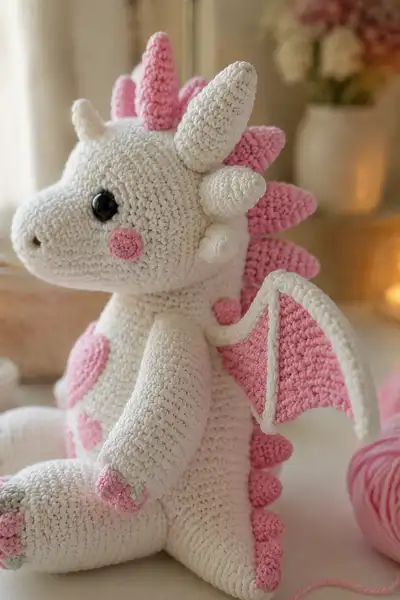
Create an irresistibly sweet white dragon with soft pink accents, heart appliques, and delicate wings. This plush amigurumi features a rounded snout, black safety eyes, rosy cheeks, and layered spikes down its back. The pattern includes detailed shaping for head, body, limbs, wings, claws, horns, and appliques to recreate the finished dragon pictured. A warm, cuddly project ideal for gifting or decorating a nursery.
Progress Tracker
0% Complete
— Materials & Gauge :
Info :
Use worsted weight yarn with a 3.5mm hook to achieve firm stitches for amigurumi. Gauge is less critical than stitch consistency; finished dragon measures approximately 29-33 cm (11-13 in) tall when seated. Keep tension tight so stuffing does not show through.
— Head :
Round 1 :
6 sc in magic ring (6)
Round 3 :
(1 sc, 1 inc) x 6 (18)
Round 4 :
(2 sc, 1 inc) x 6 (24)
Round 5 :
(3 sc, 1 inc) x 6 (30)
Round 6 :
(4 sc, 1 inc) x 6 (36)
Round 7 :
(5 sc, 1 inc) x 6 (42)
Round 8 :
(6 sc, 1 inc) x 6 (48)
Round 9 :
(7 sc, 1 inc) x 6 (54)
Round 10 :
(8 sc, 1 inc) x 6 (60)
Info :
At this size the head is broad. Place stitch marker at the start of each round. Decide which round will align with the eyes—we recommend placing eyes between rounds 14-15 for a proportion similar to the reference photos.
Round 11-14 :
1 sc in each st (60)
Info :
Place safety eyes between rounds 14-15, approx 12 stitches (or 2.0-2.5 cm) apart center-to-center depending on desired expression. Insert eyes and secure washers before continuing to stuff head. Mark muzzle center and nostrils placement later.
Round 15-20 :
1 sc in each st (60)
Info :
Begin light stuffing now. Stuff just enough to hold shape—head will be stuffed firmer as you reach decreases. Keep stuffing accessible as you shape muzzle.
Round 21 :
(8 sc, 1 dec) x 6 (54)
Round 22 :
(7 sc, 1 dec) x 6 (48)
Round 23 :
(6 sc, 1 dec) x 6 (42)
Info :
Transfer extra stuffing into the front of the head to create the rounded forehead and allow space for the snout which will be added as a separate piece. Continue stuffing gently but firmly.
Round 24 :
(5 sc, 1 dec) x 6 (36)
Round 25 :
(4 sc, 1 dec) x 6 (30)
Round 26 :
(3 sc, 1 dec) x 6 (24)
Round 27 :
(2 sc, 1 dec) x 6 (18)
Round 28 :
(1 sc, 1 dec) x 6 (12)
Info :
Fasten off leaving a long tail for sewing if you are finishing the lower neckline here. We will attach the neck/body later; leave head open if you prefer to stuff more after sewing muzzle and sewing into the body opening.
— Snout / Muzzle (Make 1) :
Round 1 :
6 sc in magic ring (6)
Round 3 :
(1 sc, 1 inc) x 6 (18)
Round 4 :
(2 sc, 1 inc) x 6 (24)
Round 5-7 :
1 sc in each st (24)
Info :
Work muzzle slightly elongated to create the dragon's rounded nose. Flatten the bottom slightly to create a small opening for two nostrils. Add two small 3-4 stitch openings by skipping or using surface embroidery for nostrils after sewing in place.
Round 8 :
(2 sc, 1 dec) x 6 (18)
Round 9 :
(1 sc, 1 dec) x 6 (12)
Info :
Fasten off leaving a tail for sewing. Stuff lightly to keep the snout shape. Sew the snout onto the front center of the head between rounds 12-16 (refer to head placement notes). Embroider two small nostrils with brown or soft gray yarn using small satin stitches for a neat finish.
— Neck :
Round 1 :
6 sc in magic ring (6)
Round 3 :
(1 sc, 1 inc) x 6 (18)
Round 4-5 :
1 sc in each st (18)
Info :
Work 4-6 rounds to create a short neck tube. Stuff lightly; this piece will be sewn into the body opening for a seamless join. Fasten off leaving long tail for joining.
— Body :
Round 1 :
6 sc in magic ring (6)
Round 3 :
(1 sc, 1 inc) x 6 (18)
Round 4 :
(2 sc, 1 inc) x 6 (24)
Round 5 :
(3 sc, 1 inc) x 6 (30)
Round 6 :
(4 sc, 1 inc) x 6 (36)
Round 7 :
(5 sc, 1 inc) x 6 (42)
Round 8 :
(6 sc, 1 inc) x 6 (48)
Round 9-14 :
1 sc in each st (48)
Info :
Begin adding belly appliques later. Work in continuous rounds. At round 12 mark the front center of the body for heart placement. Stuff body moderately starting at round 12-14—do not overstuff; body should be firm enough to support head but soft enough for shaping.
Round 15 :
(6 sc, 1 dec) x 6 (42)
Round 16 :
(5 sc, 1 dec) x 6 (36)
Round 17 :
(4 sc, 1 dec) x 6 (30)
Round 18 :
(3 sc, 1 dec) x 6 (24)
Round 19 :
(2 sc, 1 dec) x 6 (18)
Round 20 :
(1 sc, 1 dec) x 6 (12)
Info :
Leave a long tail and do not close final rounds fully if you plan to insert the neck tube; instead sew the neck in place, then close the remaining opening. Make sure the body front (where the heart goes) is aligned with the head center before final closure.
— Arms (Make 2) :
Round 1 :
6 sc in magic ring (6)
Round 3 :
(1 sc, 1 inc) x 6 (18)
Round 4-6 :
1 sc in each st (18)
Info :
These rounds form the hand portion. Stuff the hand firmly to create shape. Mark center of top of hand for thumb/claw placement.
Round 7 :
(2 sc, 1 dec) x 6 (12)
Round 8-12 :
1 sc in each st (12)
Info :
Work the forearm as a straight tube. Stuff lightly to mid fullness; leave the top of the arm open for sewing to the body. If using wire, insert now before final stuffing.
Round 13 :
(1 sc, 1 dec) x 4 (8)
Round 14 :
1 sc in each st (8)
Round 15 :
1 sc in each st (8)
Round 16 :
(1 sc, inc) x 4 (12)
Round 17 :
1 sc in each st (12)
Round 18 :
Fasten off leaving long tail for sewing (12)
Info :
Create 3 small claw tips per hand by crocheting three small petal pieces (see Claws section) and sew evenly spaced across the top of the hand, or crochet tiny bumps directly into the hand tip with contrasting pink color before final stuffing to replicate the pink-tipped fingers shown.
— Legs (Make 2) :
Round 1 :
8 sc in magic ring (8)
Round 3 :
(1 sc, 1 inc) x 8 (24)
Round 4 :
(2 sc, 1 inc) x 8 (32)
Round 5 :
(3 sc, 1 inc) x 8 (40)
Round 6-9 :
1 sc in each st (40)
Info :
These rounds create a broad foot bed allowing the dragon to sit flat. Stuff the foot firmly to create weight and a stable base for seating. The visible toes will be added separately as small petal pieces attached to the front.
Round 10 :
(4 sc, 1 dec) x 8 (32)
Round 11-16 :
1 sc in each st (32)
Round 17 :
(3 sc, 1 dec) x 8 (24)
Round 18 :
(2 sc, 1 dec) x 8 (16)
Round 19-22 :
1 sc in each st (16)
Info :
Leave long tail for sewing hip area to body. Position legs symmetrically on the bottom of the body opening and sew securely; reinforce with extra stitches where the upper leg meets the body for a sturdy join.
— Ears / Side Horns (Make 6 small white horns) :
Round 1 :
5 sc in magic ring (5)
Round 3 :
1 sc in each st (10)
Round 4 :
(2 sc, 1 dec) x 2, 4 sc (8)
Round 5-6 :
1 sc in each st (8)
Round 7 :
(1 sc, 1 dec) x 2, 4 sc (6)
Round 8 :
1 sc in each st (6)
Info :
These short curved horns sit around the head and give the dragon its spiky-cute silhouette. Stuff very lightly and sew around head edge between rounds 8-12, spacing evenly (3 per side or as pictured). The very front tiny horn at forehead is smaller—use only rounds 1-5 for that one.
— Back Spikes (Make 5 pink spikes - center row) :
Round 1 :
6 sc in magic ring (6)
Round 3 :
1 sc in each st (12)
Round 4 :
(2 sc, 1 dec, 1 sc) x 3 (9)
Round 5-6 :
1 sc in each st (9)
Round 7 :
(1 sc, 1 dec) x 3 (6)
Round 8 :
1 sc in each st (6)
Round 9 :
6 dec to close or fasten off with tail (3)
Info :
Make five of these in pink; vary sizes slightly for a natural stepped look—make the central one with an additional row 10 of 1 sc in each st to extend length. Stuff very lightly with a small amount of fiberfill to keep shape but remain soft. Sew centered along the back starting at the top of the neck and continuing down to the tail area, spacing approx 6-8 stitches between spikes.
— Wing Frames (Make 2 white frames) :
Round 1 :
6 sc in magic ring (6)
Round 3 :
(1 sc, 1 inc) x 6 (18)
Round 4 :
(2 sc, 1 inc) x 6 (24)
Round 5 :
(3 sc, 1 inc) x 6 (30)
Round 6 :
(4 sc, 1 inc) x 6 (36)
Round 7 :
1 sc in each st (36)
Round 8 :
Work 18 sc, ch 10, sl st to next st, continue sc around to shape wing curve (36) - form a deep scalloped edge for the outer frame
Info :
The frame acts as the wing rim. Keep stitches firm. We create a channel for a separate pink membrane to be sewn into the frame for the inner wing. The ch 10 loop gives the wing height and curve—adjust length of chain to change wing depth.
Round 9-10 :
1 sc in each st (36)
Round 11 :
Fasten off leaving long tail for assembly
— Wing Membranes (Make 2 pink panels) :
Info :
Work the membrane as a triangular flat panel that will be sewn into the wing frame. Use pastel pink and a 3.0mm hook for a slightly denser fabric.
Row 1 :
Ch 12, 2 sc in 2nd ch from hook, sc across to end (11 sc)
Row 2 :
Ch 1, turn, sc across (11)
Row 3 :
Ch 1, turn, dec at first two sts, sc across until last 2 sts, dec (9)
Row 4 :
Ch 1, turn, sc across (9)
Row 5 :
Repeat dec row to shape triangle: dec both ends (7)
Row 7 :
Dec row to 5, sc across 5
Row 8 :
Sc across 5, fasten off and weave ends (5)
Info :
Sew the pink membrane into the white frame by aligning top points and stitching around the edges. Use the frame's chain loop and internal stitches as anchors to create the visible white ribs (sew a narrow white cord over the seam area for the wing rib if desired).
— Claws / Toes (Make 6 sets total: 3 for each foot and 3 for each hand) :
Claw Piece 1 :
Ch 2, 3 sc in 2nd ch from hook (3)
Round 3 :
1 sc in each st (6)
Round 4 :
(1 sc, 1 dec) x 2 (4)
Round 5 :
1 sc in each st (4)
Info :
Fasten off leaving short tail for sewing. Use pastel pink for the toes and small pale green highlight for one toenail as seen. Attach three claws to each foot's front by sewing at evenly spaced intervals. For hands use smaller claws (omit round 2 to keep them tiny).
— Heart Appliques :
Large Heart (Center) :
Ch 3, work 6 sc in 2nd ch from hook and next ch to form a small circle (6)
Round 1 :
(1 sc, inc) x 3 (9)
Round 2 :
(2 sc, inc) x 3 (12)
Round 3 :
1 sc in each st (12)
Round 4 :
Shape heart top by working 2 sc in next 3 sts, sl st across 6 remaining chain stitches made to mimic the heart indentation—(work shaped surface by using sc and sl st) (12)
Info :
Work the heart flat, shaping the lobes with small surface chains and slip stitches. Fasten off and leave a long tail for sewing. Make one large heart and three small hearts (small hearts use same shape but stop at Round 2 or 3 to keep compact).
Small Heart :
Ch 3, 6 sc into circle (6), (1 sc, inc) x 3 (9), fasten off (9)
Round Info :
Sew the large heart centered on the front of the body at the marked front center, then position three small hearts around it using photos as guides (two below the large center and one above or side as pictured). Secure with hidden mattress stitches for a neat finish.
— Cheeks & Eye Detail :
Cheek Circle (Make 2) :
Ch 3, 8 sc in 2nd ch from hook and next chain to make a flat circle (8)
Round 2 :
1 sc in each st (8)
Info :
Use pastel pink and sew these flat circles on the cheeks slightly below and out from the eyes. Place approximately between rounds 13-15 on the head and stitch around the edge. Add a small satin stitch for blush highlight with embroidery thread if desired.
— Assembly Instructions :
Info :
Weave and secure all tails. Pin parts first and baste to confirm placement. Use strong yarn for final seams and matching color for invisible joins. See separate Assembly Steps section for precise positioning.
— Final Finishing Touches :
Info :
Weave in all loose ends, trim close. Add safety eye washers, then apply light blush to cheeks if desired. Optionally add a small bit of craft glue to innermost stitches of safety eyes for extra security on gifts. Steam block lightly on low to even out stitches if necessary, avoiding eyes and stuffing.
— Extra Small Details & Tips :
Info :
Work small pieces with a slightly smaller hook (3.0mm) to improve definition. Use ladder stitch or whip stitch for joining; for invisible joins, use the mattress stitch. If your counts do not match, unravel to the last correct round—don’t try to compensate later in the pattern.
This charming love dragon brings sweetness and personality to any shelf or nursery—its pastel pink hearts and delicate wings make it a tactile delight to both make and hug. Each step of this pattern is designed to guide you carefully through shaping, stuffing, and assembly so your finished dragon looks polished and professional. I hope you enjoy every stitch and detail, and that this little dragon finds a loving home. 🧶💕✨