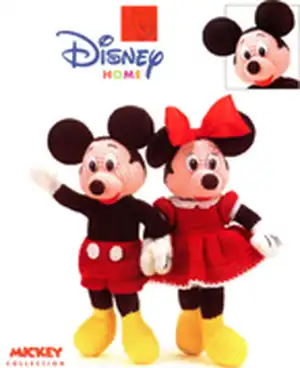
Make classic Mickey and Minnie dolls with this complete crochet pattern. Youll create fully dressed, poseable dolls with clear step-by-step rounds, materials, and assembly notes. The pattern uses easy stitches and includes outfit pieces and finishing details like felt eyes and eyelashes. Perfect for gifting or display, these dolls bring Disney charm to your handmade collection.
Progress Tracker
0% Complete
— HEAD (Front) :
Rnd 1 :
(Right side): With Peach, ch 2, 10 sc in second ch from hook; do not join, place marker (10)
Info :
Note: Loop a short piece of yarn around any stitch to mark Rnd 1 as right side.
Rnd 2 :
2 Sc in each sc around: 20 sc (20)
Rnd 3 :
(Sc in next sc, 2 sc in next sc) around: 30 sc (30)
Rnd 4 :
(Sc in next 2 sc, 2 sc in next sc) around: 40 sc (40)
Rnd 5 :
(Sc in next 3 sc, 2 sc in next sc) around: 50 sc (50)
Rnd 6 :
Sc in each sc around (50)
Rnd 7 :
Sc in next 8 sc, 2 hdc in each of next 5 sc, sc in next 24 sc, 2 hdc in each of next 5 sc, sc in last 8 sc: 60 sts (60)
Rnd 8 :
Sc in next 8 sc, hdc in next 10 hdc, sc in next 24 sc, hdc in next 10 hdc, sc in last 8 sc (60)
Rnd 9 :
Sc in next 26 sts, † hdc in next st, 2 hdc in next st, hdc in next sc †, sc in next 2 sts, repeat from † to † once, sc in last 26 sc: 62 sts (62)
Rnd 10 :
Sc in next 28 sts, 2 hdc in next hdc, hdc in next hdc, slip st in next 2 sc, hdc in next hdc, 2 hdc in next hdc, sc in next 28 sts: 64 sts (64)
Rnd 11 :
(Sc decrease) twice, sc in next 27 sts, slip st in next 2 slip sts (top of forehead), sc in next 31 sts; slip st in next sc, finish off: 62 sts (62)
— HEAD (Back) :
Rnd 1 :
(Right side): With Black, ch 2, 10 sc in second ch from hook; do not join, place marker. Note: Mark Rnd 1 as right side. (10)
Rnd 2 :
2 Sc in each sc around: 20 sc (20)
Rnd 3 :
(Sc in next sc, 2 sc in next sc) around: 30 sc (30)
Rnd 4 :
(Sc in next 2 sc, 2 sc in next sc) around: 40 sc (40)
Rnd 5 :
Sc in each sc around (40)
Rnd 6 :
(Sc in next 3 sc, 2 sc in next sc) around: 50 sc (50)
Rnd 7 :
Sc in each sc around (50)
Rnd 8 :
(Sc in next 4 sc, 2 sc in next sc) around: 60 sc (60)
Rnd 9-13 :
Sc in each sc around (60)
Rnd 14 :
Sc in next 29 sc, (hdc, dc) in next sc, (dc, hdc) in next sc, slip st in next sc, sc in next 28 sc: 62 sts (62)
Rnd 15 :
Sc in next 30 sts, (hdc, dc) in next dc, (dc, hdc) in next dc, sc in next 30 sts: 64 sts (64)
Rnd 16 :
Hdc in next 32 sts, 2 hdc in next dc, hdc in next 31 sts; slip st in next hdc, finish off: 65 sts (65)
— SIDEBURNS (Make 2) :
Item Name (P1) :
With Black, ch 7; sc in second ch from hook, hdc in next ch, dc in next ch, ch 3, leave remaining 3 chs unworked; finish off leaving a long end for sewing.
— NOSE AND MOUTH :
Rnd 1 :
(Right side): With Black, ch 2, 8 sc in second ch from hook; do not join, place marker (8)
Rnd 2 :
2 Sc in each sc around: 16 sc (16)
Rnd 3 and 4 :
Sc in each sc around (16)
Rnd 5 :
(Skip next sc, sc in next sc) around: 8 sc (8)
Rnd 6 :
Sc in each sc around; finish off (8)
Rnd 7 :
With right side facing, join Peach with sc in last sc made; 2 sc in next sc, (sc in next sc, 2 sc in next sc) around; do not join, place marker: 12 sc (12)
Rnd 8 :
(Sc in next 2 sc, 2 sc in next sc) around: 16 sc (16)
Rnd 9 :
(Sc in next sc, 2 sc in next sc) around: 24 sc (24)
Rnd 10 and 11 :
Sc in each sc around (24)
Rnd 12 :
Hdc in next 12 sc, sc in last 12 sc: 24 sts (24)
Rnd 13 :
Sc in next hdc, hdc in next 10 hdc, sc in next hdc; place loop from hook onto safety pin to keep piece from unraveling, do not finish off; join Red with sc in third hdc of Rnd 13; sc in next hdc, 2 dc in each of next 2 hdc, sc in next hdc, slip st in next hdc (Mouth made); finish off Red.
Rnd 14 :
Place loop from safety pin onto hook; slip st in next 12 sc on Rnd 12, sc in next sc on Rnd 13, hdc in next 2 hdc, hdc in Back Loop Only of next 8 sts, working in both loops, hdc in next 2 hdc, sc in next sc, slip st in next slip st; finish off leaving a long end for sewing.
Info :
Stuff Nose and Mouth firmly.
— HEAD ASSEMBLY :
Info :
To attach Nose and Mouth, thread yarn needle with long end. Sew to Front of Head with top of Nose across beginning ch of Rnd 1; secure end.
Info :
Thread soft-sculpture needle with a 12" length of Peach. To make the cheek indentations, insert needle from side of chin to point 5 sts out from and even with top of Nose. Pull needle through, insert it over one stitch and then back to chin, pulling tightly. Skip next 5 sts beneath and repeat for second cheek indentation.
Info :
To attach Sideburn, thread yarn needle with long end. Sew to side of Head with point in center of cheek indentation. Stitch 3 chs on each side even with last rnd of Head Back, covering joining sts between Front and Back of Head; secure ends. Repeat for second Sideburn on opposite side.
Info :
Stuff Head firmly, defining cheek area. Sew opening closed; secure ends.
— EAR (Make 2) :
Outer Ear Rnd 1 :
(Right side): With Black, ch 2, 10 sc in second ch from hook; do not join, place marker (10)
Outer Ear Rnd 2 :
2 Sc in each sc around: 20 sc (20)
Outer Ear Rnd 3 :
(Sc in next sc, 2 sc in next sc) around: 30 sc (30)
Outer Ear Rnd 4 and 5 :
Sc in each sc around (30)
Outer Ear Rnd 6 :
(Sc in next 2 sc, 2 sc in next sc) around: 40 sc (40)
Outer Ear Rnd 7 :
(Sc in next 3 sc, 2 sc in next sc) around; finish off: 50 sc (50)
Inner Ear Rnds 1-7 :
Work same as Outer Ear; at end of Rnd 7, do not finish off.
Joining Rnd :
Hold Inner and Outer Ear with wrong sides together and Inner Ear facing you, and matching stitches. Working through both thicknesses, sc in each sc around; finish off leaving a long end for sewing.
Assembly :
Thread yarn needle with long end. Using cover photo as a guide, sew Ears to Head; secure ends. Optional: To keep Ears in place, a piece of wire can be run through the Ear, then back into the Head.
— BODY (Basic Body) :
Rnd 1 :
With Black, ch 2, 10 sc in second ch from hook; do not join, place marker (10)
Rnd 2 :
2 Sc in each sc around: 20 sc (20)
Rnd 3 :
(Sc in next sc, 2 sc in next sc) around: 30 sc (30)
Rnd 4 :
Sc in each sc around (30)
Rnd 5 :
(Sc in next 2 sc, 2 sc in next sc) around: 40 sc (40)
Rnd 6 :
(Sc in next 3 sc, 2 sc in next sc) around: 50 sc (50)
Rnd 7-30 :
Sc in each sc around (50)
Rnd 31 :
(Sc in next 3 sc, sc decrease) around: 40 sc (40)
Rnd 32 :
(Sc in next 2 sc, sc decrease) around: 30 sc (30)
Rnd 33 :
Sc in each sc around; slip st in next sc, finish off leaving a long end for sewing (30)
Assembly :
Thread yarn needle with long end, sew Head to Body; secure end.
— ARM (Make 2) HAND :
Rnd 1 :
(Right side): With White, ch 7, 2 sc in second ch from hook, sc in next 4 chs, 4 sc in last ch; working in free loops of beginning ch (Fig. 3, page 2), sc in first 4 chs, 2 sc in last ch; do not join, place marker: 16 sc (16)
Rnd 2 :
2 Sc in next sc, sc in next 6 sc, 2 sc in next 2 sc, sc in next 6 sc, 2 sc in last sc: 20 sc (20)
Rnd 3-5 :
Sc in each sc around (20)
Rnd 6 :
Ch 2, skip first 2 sc (thumb opening), sc in last 18 sc: 2 chs and 18 sc (18)
Rnd 7 :
Sc in each ch and in each sc around: 20 sc (20)
Rnd 8 :
(Sc in next 3 sc, sc decrease) around: 16 sc (16)
Rnd 9 :
(Sc in next 2 sc, sc decrease) around: 12 sc (12)
Rnd 10-12 :
Sc in each sc around. Finish off.
— THUMBS :
Rnd 1 :
With right side facing and working in free loops of ch-2 and in skipped sc of thumb opening, join White with slip st in first ch; hdc in same st and in next ch, hdc in side of first sc, hdc in same st and in next sc, hdc in side of same st; do not join, place marker: 6 hdc (6)
Rnd 2 :
Sc in each hdc around.
Rnd 3 :
(Skip next sc, slip st in next sc) around; finish off.
— ARM (continued) BODY AND ARM ATTACHMENT :
Body Rnd 1 :
With right side facing and working in Back Loops Only, join Black with sc in last sc made; sc in each sc around: 12 sc (12)
Body Rnd 2 :
(Sc in next 2 sc, 2 sc in next sc) around: 16 sc (16)
Body Rnd 3-12 :
Sc in each sc around (16)
For Left Arm Rnd 13 :
Sc in next 8 sc, hdc in next 8 sc.
Rnds 14 and 15 :
Sc in each st around.
Rnd 16 :
(Sc in next sc, 2 sc in next sc) 4 times, (hdc in next sc, 2 hdc in next sc) 4 times; slip st in next sc, finish off leaving a long end for sewing. Stuff Arm firmly.
For Right Arm Rnd 13 :
Hdc in next 8 sc, sc in last 8 sc.
Rnds 14 and 15 (Right) :
Sc in each st around.
Rnd 16 (Right) :
(2 Hdc in next sc, hdc in next sc) 4 times, (2 sc in next sc, sc in next sc) 4 times; slip st in next hdc, finish off leaving a long end for sewing. Stuff Arm firmly.
Hand Shaping :
Using cover photo as a guide for placement: Thread tapestry needle with an 18" length of White, add straight stitches to form fingers on each Hand. Thread yarn needle with an 18" length of Black, add three straight stitches on back of each Hand for accent lines.
Assembly :
Thread yarn needle with yarn end. Using cover photo as guide for placement, sew Arms to Body at sides just below neck edge, making sure Thumbs point toward center; secure ends.
— LEG (Make 2) FOOT :
Rnd 1 :
(Right side): With Yellow, ch 2, 10 sc in second ch from hook; do not join, place marker (10)
Rnd 2 :
2 Sc in each sc around: 20 sc (20)
Rnd 3 :
(Sc in next sc, 2 sc in next sc) around: 30 sc (30)
Rnd 4-11 :
Sc in each sc around.
Info :
Begin working in rows.
Row 1 :
Sc in next 10 sc, slip st in next sc.
Row 2 :
Ch 1, turn; skip first slip st, sc in next 10 sc, slip st in next sc.
Row 3 :
Ch 1, turn; skip first slip st, sc in next 10 sc, sc in next sc on Rnd 11, slip st in next sc.
Row 4 :
Ch 1, turn; skip first slip st, sc in next 11 sc, sc in next sc on Rnd 11, slip st in next sc.
Row 5 :
Ch 1, turn; skip first slip st, sc in next 12 sc, sc in next sc on Rnd 11, slip st in next sc.
Row 6 :
Ch 1, turn; skip first slip st, sc in next 13 sc, sc in next sc on Rnd 11, slip st in next sc.
Info :
Begin working in rounds.
Rnd 1 :
Ch 1, turn; skip first slip st, sc in next 14 sc, sc in next 10 sc on Row 5; do not join, place marker: 24 sc (24)
Rnd 2 :
Skip first ch, sc in each sc around.
Rnd 3 :
Sc decrease, sc in next 12 sc, (sc decrease) 5 times: 18 sc (18)
Rnd 4 :
Sc in each sc around.
Rnd 5 :
Sc in next 5 sc, (sc decrease) twice, sc in next 9 sc: 16 sc (16)
Rnds 6-8 :
Sc in each sc around. Finish off.
Body Rnd 1 :
With right side facing, join Black with sc in last sc made; sc in each sc around; do not join, place marker: 16 sc (16)
Rnd 2 :
(Sc in next 3 sc, 2 sc in next sc) around: 20 sc (20)
Rnds 3-15 :
Sc in each sc around.
Rnd 16 :
Sc in next 18 sc, leave remaining 2 sc unworked. Stuff Body firmly.
Joining Row :
Ch 1, with Foot toward you and ch-1 at edge, fold Leg in half, matching sts, and working through both thicknesses, sc in each sc across; finish off leaving a long end for sewing: 10 sc.
Assembly :
Thread yarn needle with long end, sew Legs to Rnd 6 along front of Body; secure ends.
— FINISHING EYES :
Info :
Thoroughly cover each 2" x 4" piece of white felt and black felt with fabric glue and place glued sides of both pieces together; set aside to dry. Trace pattern; when dry, cut two Outer Eye pieces. Trace pattern, cut two Inner Eye pieces from 2" square piece of black felt. Using cover photo as guide for placement: Glue one Inner Eye piece to white side of each Outer Eye piece. Allow to dry. Glue each Eye to Head.
— MICKEY'S EYEBROWS :
Info :
Thread yarn needle with a 12" length of Black, working between Rnds 9 and 10 on Head, and leaving the width of 5 sc between Eyebrows; add Eyebrows using 3 backstitches for each Eyebrow.
— MINNIE'S EYELIDS AND EYELASHES :
Info :
With Peach, ch 3; finish off. Pin each Eyelid to top of Outer Eye to secure while adding Eyelashes. Using cover photo as a guide for placement and black fabric covered floral wire, add 3 Eyelashes to each Eye. Glue Eyelids and Eyelashes in place. Allow to dry. Remove pins. Using cover photo as a guide for placement, add one dot of white dimensional fabric paint to each Inner Eye.
— MICKEY'S OUTFIT (Shorts and Buttons) :
Materials :
Sport Weight Yarn: Red - 1/2 ounce (45 grams, 130 yards); White - 3 yards. Crochet hook, size E (3.50 mm) or size needed for gauge. Yarn needle.
Gauge :
12 dc and 6 rows = 2". Gauge Swatch: 2" square Ch 14. Row 1: Dc in fourth ch from hook (3 skipped chs count as first dc) and in each ch across: 12 dc. Rows 2-6: Ch 3 (counts as first dc), turn; dc in each dc across. Finish off.
Shorts Body Row 1 :
With Red, ch 67. Row 1: Sc in second ch from hook and in each ch across: 66 sc.
Shorts Begin Working in Rounds Rnd 1 :
(Right side): Ch 3 (counts as first dc, now and throughout), turn; dc in next 4 sc, 2 dc in next sc, (dc in next 5 sc, 2 dc in next sc) across; being careful not to twist sts, join with slip st to first dc: 77 dc.
Rnd 2 :
Ch 3, do not turn; dc in next dc and in each dc around; join with slip st to first dc.
Rnds 3-7 :
Ch 3, dc in next dc and in each dc around; join with slip st to first dc.
Rnd 8 :
Ch 3, dc in next 18 dc, sc in next 39 dc, dc in last 19 dc; join with slip st to first dc: 38 dc and 39 sc.
Rnd 9 :
Ch 3, dc in next 18 dc, sc in next 39 sc, dc in last 19 dc; join with slip st to first dc.
Rnd 10 :
Ch 3, dc in next dc, dc decrease, (dc in next 2 dc, dc decrease) 4 times, sc in next 37 sc, (dc decrease, dc in next 2 dc) across; join with slip st to first dc: 67 sts.
Rnd 11 :
Ch 3, dc in next 13 dc, dc decrease, sc in next 35 sc, dc decrease, dc in last 14 dc; join with slip st to first dc: 65 sts.
Rnd 12 :
Ch 2, dc in next 13 dc, place marker around first dc made to mark Second Leg joining, dc decrease, sc in next 18 sc, place marker around last sc made for st placement, sc in next 15 sc, dc decrease, dc in last 14 dc; join with slip st to first dc: 62 sts.
Buttons :
With White, ch 2, (2 hdc, 3 dc, 3 hdc, 3 dc, hdc) in second ch from hook; join with slip st to first hdc, finish off leaving a long end for sewing: 12 sts. Thread tapestry needle with long end. Weave end through several stitches on back of Button; then using straight stitches add cross stitch to center front of Button; secure end. Using cover photo as guide for placement, glue Buttons to front of Shorts.
— MINNIE'S OUTFIT (Dress and Skirt) :
Materials :
Sport Weight Yarn: Red - 2 3/4 ounces (80 grams, 235 yards); White - 1 1/2 ounces (45 grams, 130 yards). Crochet hook, size E (3.50 mm) or size needed for gauge. Yarn needle. 3"w Red satin ribbon - 1/2 yard.
Gauge :
12 dc and 6 rows = 2". Gauge Swatch: 2" square Ch 14. Row 1: Dc in fourth ch from hook (3 skipped chs count as first dc) and in each ch across: 12 dc. Rows 2-6: Ch 3 (counts as first dc), turn; dc in each dc across. Finish off.
Dress Bodice :
With Red, ch 46. Row 1: Sc in second ch from hook and in each ch across: 45 sc. Row 2 (Right side): Ch 3 (counts as first dc, now and throughout), turn; dc in same st, (dc in next sc, 2 dc in next sc) across: 68 dc. Note: Loop short piece of yarn around any stitch to mark Row 2 as right side.
Row 3 :
Ch 1, turn; sc in each dc across.
Row 4 :
Ch 3, turn; dc in next 11 sc, 2 dc in next sc, (dc in next sc, 2 dc in next sc) 5 times, dc in next 22 sc, 2 dc in next sc, (dc in next sc, 2 dc in next sc) 5 times, dc in last 12 sc: 80 dc.
Row 5 :
Ch 1, turn; sc in next 12 dc, ch 9 (armhole), skip next 17 dc, sc in next 22 dc, ch 9 (armhole), skip next 17 dc, sc in last 12 dc: 46 sc.
Row 6 :
Ch 3, turn; dc in each sc and in each ch across: 64 dc.
Row 7 :
Ch 1, turn; sc in each dc across.
Row 8 :
Ch 3, turn; dc in next sc and in each sc across.
Rows 9-11 :
Repeat Rows 7 and 8 once, then repeat Row 7 once more.
Skirt Row 1 :
Ch 3, turn; working in Back Loops Only (Fig. 2, page 2), dc in same st, 2 dc in next sc and in each sc across: 128 dc.
Skirt Row 2 :
Ch 3, turn; working in both loops, dc in next 2 dc, (2 dc in next dc, dc in next 4 dc) across: 153 dc. Begin working in rounds.
Rnd 1 :
Ch 3, turn; dc in next dc and in each dc across; join with slip st to first dc.
Rnds 2-7 :
Ch 3, do not turn; dc in next dc and in each dc around; join with slip st to first dc. Finish off.
Rnd 8 :
With right side facing, join White with sc in same st as joining (Figs. 1a & b, page 2); ch 3, (skip next dc, sc in next dc, ch 3) around; join with slip st to first sc, finish off.
— SLEEVE :
Rnd 1 :
With right side facing and working in free loops of ch-9 (Fig. 3, page 2) and skipped dc at armhole, join Red with slip st in first ch; ch 3, dc in same ch and in next 8 chs, dc in side of next sc on Rnd 5 of Body, 2 dc in each of next 17 skipped dc, dc in side of next sc on Rnd 5 of Body; join with slip st to first dc: 46 dc.
Rnd 2 :
Ch 3, dc in next dc and in each dc around; join with slip st to first dc.
Rnd 3 :
Ch 2, dc in next dc, dc decrease around; join with slip st to first dc; finish off: 23 dc.
Rnd 4 :
With right side facing, join White with sc in same st as joining; sc in each dc around; join with slip st to first sc.
Rnds 5 and 6 :
Ch 1, sc in each sc around; join with slip st to first sc. Finish off. Repeat for second Sleeve.
— COLLAR :
Row 1 :
With right side facing and working in free loops of beginning ch, join White with slip st in ch at base of first sc; ch 3, (2 dc in next ch, dc in next ch) 10 times, (dc, ch 2, slip st) in next ch, slip st in next ch, (slip st, ch 2, dc) in next ch, dc in next ch, (2 dc in next ch, dc in next ch) across: 67 sts and 4 chs.
Row 2 :
Ch 4, turn; skip first 2 dc, (slip st in Back Loop Only of next dc, ch 3, skip next dc) 15 times, slip st in Back Loop Only of next ch, ch 3, skip next ch, slip st in both loops of next 2 slip sts, ch 3, skip next slip st and next ch, ch 3, skip next ch, slip st in Back Loop Only of next dc across; finish off.
— TIES :
First Side :
With Red, ch 40, with right side facing and working in end of rows on Bodice opening, work 14 sc evenly spaced across, ch 40; finish off.
Second Side :
With Red, ch 40, with right side facing and working in end of rows on Bodice opening, work 14 sc evenly spaced across, ch 40; finish off.
Finishing :
Tie satin ribbon into a bow; then glue to Minnie's Head between Ears.
Assembly Instructions
- Sew Head to Body: Thread yarn needle with long end; with wrong sides of Head Front and Head Back together, match hdc at point on Back to slip sts on Front (center of forehead) and, working through both loops of each stitch, whipstitch Front and Back together starting at point on forehead; whipstitch across 27 sts on one side toward neck, then across 27 sts on opposite side; secure and stuff head firmly before closing.
- Attach Nose and Mouth: Thread yarn needle with long end and sew Nose and Mouth to front of head with top of nose across beginning ch of Rnd 1; secure end. Use soft-sculpture needle to create cheek indentations and sew Sideburns centered on the cheek indentations.
- Attach Ears: Hold inner and outer ear together and join through both thicknesses; using the long end, sew ears to head using cover photo as a guide, securing ends. Optionally run a piece of wire through each ear and back into the head for stability.
- Attach Arms and Hands: Using cover photo guide, sew arms to body at sides just below the neck edge, making sure thumbs point toward the center; secure ends and shape hands with straight stitches to form fingers and back accent lines.
- Attach Legs: Fold leg in half and join foot edge with sc across the fold; using long end sew legs to Round 6 along front of body for correct spacing and posture; secure ends and stuff legs/feet firmly.
- Add facial details and eyes: Glue felt outer and inner eye pieces together, glue to head using cover photo placement; embroider eyebrows and add eyelashes with floral wire before securing eyelids.
- Finish outfit placement: Sew or glue buttons, attach collar, sleeves, skirt and bodice pieces as indicated in pattern using cover photo as a placement guide; tie satin ribbon for Minnie's bow and glue between ears.
Important Notes
- 💡Use stitch markers to mark the beginning of each round and any right-side rows to keep track of shaping and placement.
- 💡Stuff firmly but evenly; overstuffing can distort shaping while understuffing causes floppy pieces—stuff gradually and frequently check shape.
- 💡Pin and temporarily position eyes, ears, and facial features before gluing or stitching to ensure symmetrical placement.
- 💡Weave in ends and secure seams as you go to avoid loose threads and to make assembly easier at the end.
These beloved Mickey and Minnie dolls are timeless pieces youll be proud to crochet and display. Handcraft every detail from the felt eyes to the tiny outfit accents for an authentic, nostalgic finish. Perfect as gifts or keepsakes, these dolls bring joy to any Disney fan. 🧶🎀