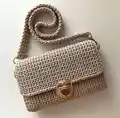
About This Mini Crossbody Bag Pattern
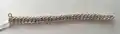
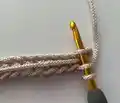
This pattern teaches you how to crochet a compact, structured mini crossbody bag using 2 mm macrame cord and a 3.5 mm hook. Youll work a textured fabric with single crochet in the back loops to create a neat, durable surface. The pattern includes full instructions for the main panel, side pieces, assembly and a crocheted handle option. Photos and placement guides make hardware attachment and finishing easy.
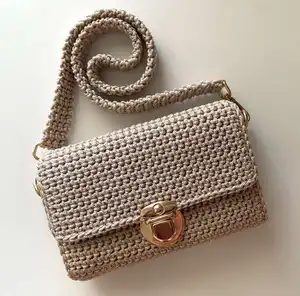
Designed for modern everyday use, the bag fits essentials like a phone and wallet. Detailed assembly steps show how to join pieces with slip stitches and add a clasp and d-rings for a finished look.
Why You'll Love This Mini Crossbody Bag Pattern
I absolutely love this pattern because it turns simple stitches into a chic, wearable accessory that feels professional. I enjoy the clean texture you get by working in the back loops — it gives the bag structure and subtle visual interest. The step-by-step photos and clear assembly directions make finishing and hardware attachment satisfying and straightforward. Making the handle by crocheting allows me to match the bag perfectly and customize length for different wears.
Switch Things Up
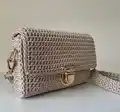
I love customizing this bag by changing the color of the macrame cord to match seasons or outfits; pastel shades make a soft daytime bag while deep neutrals look sophisticated.
To make the bag larger or smaller, I change yarn weight and hook size; using a bulkier cord and larger hook gives a chunkier, roomier bag while thinner cord makes a delicate mini version.
I often swap the bag lock for a magnetic snap or toggle clasp when I want a cleaner closure or faster opening.
If I want a softer bag, I line the interior with cotton fabric and add a small inside pocket for cards or keys.
Try adding decorative topstitching or an embroidered motif on the flap for a personal touch and unique detail.
For different strap styles, I experiment with braided straps, leather straps, or detachable swivel-clasp straps to change the look and wearability.
I sometimes replace the D-rings with sturdier rectangular rings if I plan to carry heavier items, and I always reinforce the attachment area with extra stitching.
To give the bag a vintage look, I use antique-finish hardware and slightly darker cord tones; for a modern look, polished gold or silver hardware works beautifully.
I also test different stitch textures in place of the BLO single crochet; a simple seed stitch or moss stitch can change the drape and appearance while keeping the same construction.
Finally, I suggest experimenting with handle length and placement: make a shorter shoulder strap or a long crossbody strap to suit your everyday needs and style preferences.
Common Mistakes & How to Fix Them
✗ Starting with an incorrect number of foundation chains can make the bag too wide or too narrow; measure your chain and compare to the recommended 31 chains, adjusting the count as needed before proceeding.
✗ Not working in the correct loops (back loop only) will flatten the texture and change gauge; be sure to insert the hook into the back loop of the current row and the back loop of the previous row as instructed.
✗ Cutting the working yarn too early during assembly can leave you stuck before completing the flap connection; do not cut the working yarn until you have completed the slip-stitch join to the middle of the closing flap.
✗ Skipping steaming or shaping after finishing rows causes an uneven rectangle and misaligned hardware placement; steam and shape the fabric gently and measure length and width before marking placement for sides and clasp.