🧢 Beautiful ✨ Detailed πŸ’ Adorable

Miniature Pippi Amigurumi Pattern

Miniature Pippi Amigurumi Pattern
4.2β˜… Rating
2-4 Hours Time Needed
2.2K Made This
βœ‚οΈ

Intermediate Level

Ideal for those with basic crochet experience, featuring slightly more advanced stitches and techniques to expand your skills.

⏱️

Bite-Sized Project

Finishes in 2-4 hoursβ€”perfect for an afternoon of creative relaxation.

🎁

Tiny Treasure

Small, sweet, and gift-worthy creations that fit perfectly in the palm of your hand with detailed charm.

About This Miniature Pippi Amigurumi Pattern

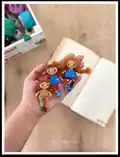
This pattern creates a miniature 7 cm Pippi doll using lace-weight yarn and very small hooks. You will crochet tiny legs, arms, body, head, shoes, hair and an apron with clear round-by-round instructions. The pattern includes options for yarn hair or mohair rope and how to assemble and finish the doll.

Miniature Pippi Amigurumi Pattern crochet pattern - detailed view of completed project

Perfect for advanced beginners and intermediate crocheters who enjoy small detailed work. The instructions include assembly tips, hair techniques and small details to personalize your doll.

Why You'll Love This Miniature Pippi Amigurumi Pattern

I absolutely love this pattern because it captures the charm of Pippi in a tiny, joyful form that fits in your hand. I enjoy the challenge of working with lace-weight yarn and tiny hooks to create crisp, detailed stitches. I also love the hair techniques included β€” both crocheted hair and mohair rope options give you creative freedom. The pattern is compact yet detailed, so finishing a complete doll in an afternoon feels incredibly satisfying.

Miniature Pippi Amigurumi Pattern step 1 - construction progress Miniature Pippi Amigurumi Pattern step 2 - assembly progress Miniature Pippi Amigurumi Pattern step 3 - details and accessories Miniature Pippi Amigurumi Pattern step 4 - final assembly and finishing

Switch Things Up

I love how versatile this tiny Pippi pattern is; you can switch colors to create different outfits and personalities.

I often change the dress color and stripes to make a whole set of miniature friends with matching or contrasting clothes.

If you want a chunkier doll, try a thicker yarn and a larger hook β€” this will scale up the pattern while keeping stitch sequences the same.

For an even smaller keychain version, use finer thread and a smaller steel hook to make a delicate miniature charm.

I sometimes replace safety eyes with embroidered eyes for a softer, child-safe finish, especially when gifting to young children.

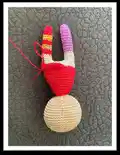
You can experiment with hair by using embroidery floss, mohair rope, or crocheted hair strips for different textures and styles.

I recommend adding tiny accessories like a crocheted pocket, tiny buttons, or an embroidered face detail to personalize each doll.

If you want movable limbs, add a short piece of wire inside arms before stuffing to make posable limbs for display.

Try mixing lace yarn with a slightly fuzzy mohair layer for a unique halo effect in the hair that gives the doll more character.

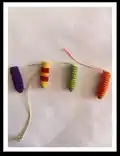
When making sets, vary the leg stripe patterns and shoe colors to create a playful collection that shows off small colorwork changes.

Common Mistakes & How to Fix Them

βœ— Skipping stitch markers when joining legs to the body can lead to lopsided assembly; mark the join points and count stitches carefully before continuing. βœ— Not stuffing gradually can cause lumps and misshaped limbs; add small amounts of fiberfill as you go and shape while stuffing to keep even tension. βœ— Changing colors without securing tails can cause loose ends or unraveling later; weave in ends securely or leave tails to sew into seams when changing color. βœ— Placing safety eyes too close together will alter the doll's expression; measure and keep the recommended distance of 6 sc between eye placements for symmetry. βœ— Pulling yarn too tight when creating small features can distort the shape; maintain even, gentle tension especially with lace yarn to keep your stitches smooth.

Miniature Pippi Amigurumi Pattern

Make a tiny 7 cm Pippi doll with step-by-step crochet instructions that guide you through every small detail. This pattern uses lace-weight yarn and tiny hooks to create a charming, pocket-sized amigurumi you can personalize. You will learn body shaping, small limbs, hair techniques and finishing tips to make a durable, adorable miniature doll.

Intermediate 2-4 Hours

Materials Needed for Miniature Pippi Amigurumi Pattern

β€” Main Fabric

  • 01
    Lace yarn No. 50, approx. 20 g per color (multiple colors for clothes and details)
  • 02
    Skin color lace yarn, approx. 20 g
  • 03
    Accent colors (red, green, yellow, purple, orange) lace yarn, approx. 20 g each
  • 04
    Mohair yarn or hair yarn for hair details, small amount
  • 05
    Fiberfill / stuffing (small amount)
  • 06
    Optional: mohair rope for alternate hair technique

β€” Tools Required

  • 01
    Steel crochet hook size 0.55mm (22) (as specified in pattern)
  • 02
    Small 3.0 mm crochet hook (for some details as noted)
  • 03
    Safety eyes 3 mm (2 pieces)
  • 04
    Scissors
  • 05
    Yarn needle for sewing and weaving ends
  • 06
    Liquid glue (for hair placement and securing)
  • 07
    Stitch markers
  • 08
    Polyester stuffing (fiberfill)
  • 09
    Pins for positioning hair and parts

Progress Tracker

0% Complete

β€” Arms :

Info :

Skin colour;

Round 1 :

magic ring 5sc

Round 2 :

5sc inc (10)

Round 3 :

10sc

Round 4 :

sc, sc in 3dc bobble, 8sc

Round 5 :

2sc dec, 6sc (8)

Round 6-8 :

8sc (3 rounds)

Info :

Red/ green colour;

Round 9-12 :

8sc (7 rounds) and finished. Cloused 4 sc.

β€” Legs :

Info :

(Green+orange/dark purple+yellow/red)

Round 1 :

magic ring 5sc

Round 2 :

5sc inc (10sc)

Round 3-12 :

10sc (10 rounds)

Info :

Skin colours;

Round 13-15 :

10 sc (3 rounds) (filling fiber).

β€” Body :

Info :

**6 ch join the other leg. Let the loops be opposite each other. Let the legs be even. If you want it to be more introverted, combine it accordingly. After joining, crochet 10 sc and set your starting point. 10+6+10+6 in total (32sc)

Info :

Change colour; red/green

Round 1-7 :

32sc (6 round)

Info :

****4. Round BLO **** If you're going to do the red suit, that's BLO, the body's going to die, plus four rows of HDC crocheted.

Round 8 :

14 sc, dec,14 sc, dec (30sc)

Round 9 :

3sc dec*6 (24 sc) (satrt filling fiber)

Round 10-11 :

24 sc (2 rounds)

Round 12 :

2sc dec (18)

Round 13-14 :

18sc (2 round)

Info :

Skin colours;

Round 15 :

Sc dec (12)

Round 16 :

12 sc (1 round)

Info :

**take the beginning of the loop back and center it.

β€” Dress :

Info :

Attach the string to the BLO row on the body section. Make 2 ch and make 32 HDC. Complete the round and combine with cc. Repeat 4 times and finish.

β€” Head :

Info :

Skin colours;

Round 31 :

31 Sc inc*6 (18)

Round 32 :

2sc inc*6 (24)

Round 33 :

Sc inc*12 (36)

Round 34 :

5sc inc*6 (42)

Round 35 :

6sc inc*6 (48)

Round 36-43 :

48 sc (8 rounds)

Info :

**The 38th and 39th rounds are fitted with a locked eye. Keep a distance of 6sc.

Round 44 :

6sc dec

Round 45 :

5sc dec

Round 46 :

4sc dec (start filling fiber)

Round 47 :

3Sc dec

Round 48 :

2sc dec

Round 49 :

sc dec

Round 50 :

closed.

β€” Shoes :

Round 1 :

magic ring 8sc

Round 2 :

8sc inc (16sc)

Round 3 :

blo ; 16sc

Round 4 :

16 sc

Round 5 :

5sc, 3sc dec, 5sc (13)

Round 6 :

5sc, sc dec, 5sc (12)

Round 7 :

FLO ; 12sc, cc

Info :

*Sew the shoes to the legs.

β€” Hair :

Round 1 :

magic ring 6sc

Round 2 :

6sc inc*6 (12)

Round 3 :

1sc inc*6 (18)

Round 4 :

2sc inc*6 (24)

Info :

After that, we will work on RS 24th

Round 1 :

Make 15 chains, scroll with 14 HDC or cc's

Round 2 :

10 ch, 9 HDC

Round 3-5 :

7 ch, 6 HDC (3 times) (Make 6 hairs in the same loop twice.)

Round 6 :

5 ch, 4 HDC (1 times)

Round 7-9 :

7 ch, 6 HDC (2 times) (Make four hairs in the same loop twice.)

Round 10 :

10 ch, 9 HDC

Round 11 :

15 ch, 14 HDC

Round 12-15 :

35 ch, 34 HDC (4 times)

Round 16-21 :

25 ch, 24 HDC (6 times)

Round 22-25 :

35 ch, 34 HDC (4 times)

Info :

Not: turn the hair over and stick it on the head. Let the bangs come forward. Glue the remaining pieces of hair. braid long hair

β€” Hair with Mohair Rope :

Info :

cut the hair rope with the density you want. I'm usually cutting 12 of them, 10 or 12 centimeters long, triple them into the head and then light glue to secure them. Then braid your hair. Glue the hair to the head as in the photo. Or perpendicular to the hair. Cut it in half and knit.

β€” Apron :

Round 1 :

19 Chains make and turn 18 sc make

Round 2 :

2sc inc*6 (24sc) turn and 1 ch

Round 3 :

4sc, 5 ch and make sc in rs4, 10 sc, 5 ch and make sc in rs4, 4 sc

Round 4 :

1 round 26 sc

Round 5 :

4 sc, 2inc,14sc, 2inc, 4sc (30 sc )

Round 6 :

4sc inc*6 (36)

Round 7-12 :

6 round 36 sc and finished.

Info :

**make SC 1 round around Apron. **patch over the apron with needle and thread. It should be like a pocket. Make it square.

Info :

We're at the end of the pattern. Thank you very much.

Assembly Instructions

  • Attach the string to the BLO row on the body section, make 2 ch and 32 HDC rounds, then combine with contrast color and repeat 4 times to finish the dress.
  • Sew the shoes to the legs after completing the shoe rounds, positioning them evenly on each leg and securing with small whipstitches.
  • Turn the hair over and stick it on the head (or use mohair rope as directed), let the bangs come forward, glue remaining pieces and braid long hair as desired.
  • Patch the apron over the dress with needle and thread so it forms a pocket; sew the patch square and make one SC round around the apron for a finished edge.
  • When joining the two legs, make 6 ch and join the other leg with loops opposite each other, crochet 10 sc after joining and set the starting point (10+6+10+6 = 32sc).

Important Notes

  • πŸ’‘Place safety eyes between the 38th and 39th rounds and keep a distance of about 6 sc between them for correct placement.
  • πŸ’‘Stuff parts gradually β€” start filling the feet and legs before joining the body, and begin final stuffing at round 46 of the head.
  • πŸ’‘When joining legs to make the body, ensure the loops are opposite each other so the legs are even and symmetrical.
  • πŸ’‘Make one round of single crochet around the apron to neaten the edge before sewing the pocket patch in place.

This miniature Pippi doll pattern brings tiny, playful charm to life in your hands. Create a pocket-sized keepsake filled with color and personality. Perfect for gifts, collectors, or quick handmade presents. πŸ§ΆπŸŽ€

You ask,

we answer.

FAQs

What size will the finished piece be?

The size of the finished doll is approximately 7 cm tall when using the recommended lace yarn No.50 and the specified hook sizes.

Can I use different yarn weights for this pattern?

Yes, you can change yarn weight, but this will change the final size β€” using bulkier yarn and a larger hook will produce a larger doll while thinner yarn makes a smaller version.

Do I need prior crochet experience for this pattern?

This pattern is rated intermediate; basic knowledge of amigurumi techniques, working in the round, increases and decreases is recommended for best results.

How long does this project typically take to complete?

Most crocheters complete this miniature doll in 2-4 hours depending on experience and whether you use crocheted hair or mohair rope for the hairstyle.