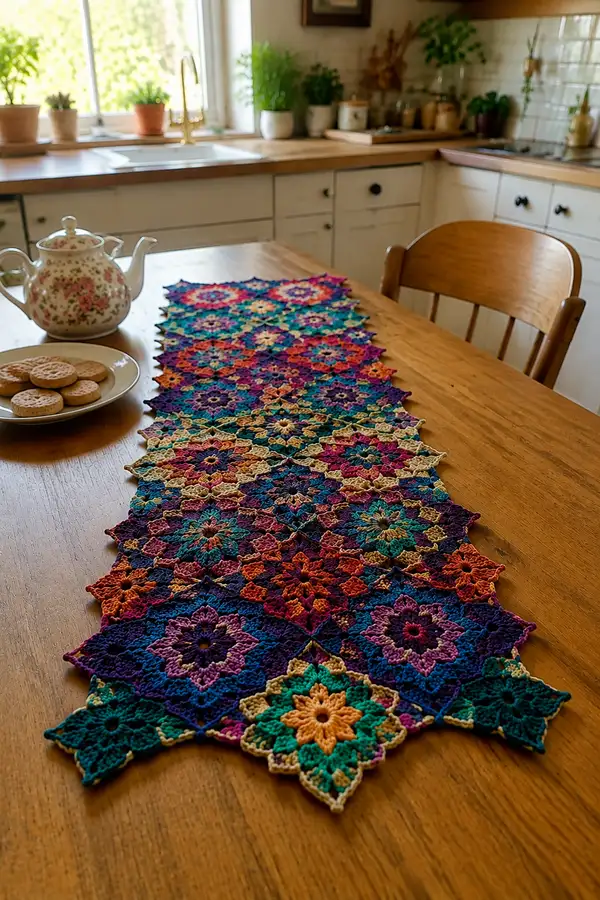
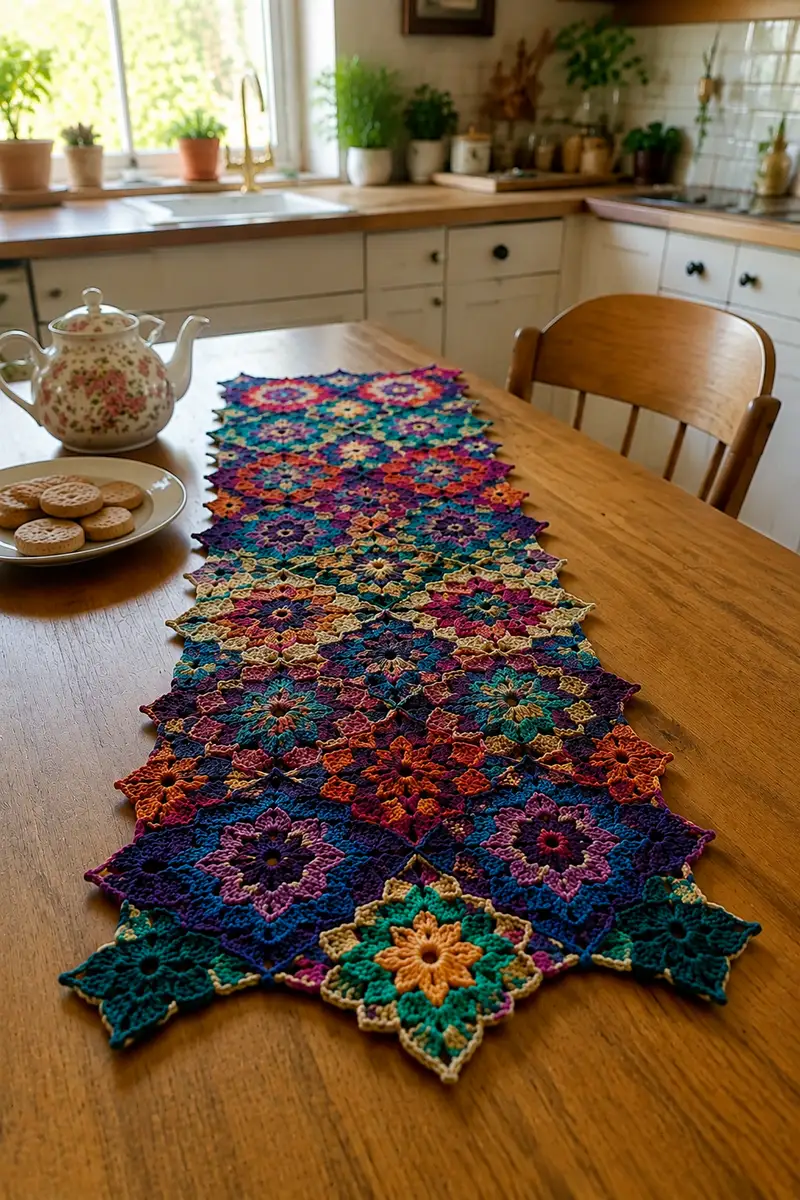
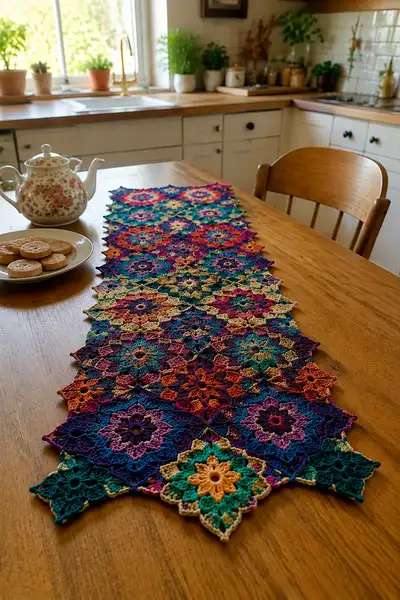
A jewel-toned mosaic tile table runner made of connected star-shaped motifs. This runner features layered floral centers, geometric points and a delicate scalloped edge in rich teals, purples, magentas and golds. Perfect to brighten a dining table or as a decorative accent, it showcases join-as-you-go assembly and a vivid, variegated color play.
Progress Tracker
0% Complete
— Overview :
Info :
This runner is created from three motif types: Motif A (Large Moroccan Star), Motif B (Small Connector Diamond) and Motif C (Corner/Edge Star). Work motifs individually and join using Join-As-You-Go (JAYG) method described in the Joining section. Use a consistent hook and maintain slightly tight tension for crisp joins and points. A sample layout for a runner approximately 40-50 inches long uses 20 large motifs and 40 small connectors; adjust motif counts to desired length.
— Motif A (Large Moroccan Star) :
Round 1 :
MR, ch3 (counts as dc), 15 dc into ring, join with sl st to top of ch3 (16) — makes a solid 16-dc ring as foundation.
Round 2 :
Ch4 (counts as tr), *sk next st, tr in next st, ch1* rep around to create 8 pairs, join with sl st into top of beginning ch4 (16 tr, 8 ch-1 spaces). This sets up 8 petals/spaces.
Round 3 :
Info : Change to contrast color now if using a two-tone center. Work into tr and ch-1 spaces to create deeper petals.
Round 3 :
In each ch-1 sp: (ch2, 3 dc, ch2, sl st into ch-1 sp) — repeat x8 creating rounded petal clusters (each petal occupies one ch-1 sp). After last petal, sl st to base chain of first petal to finish round (8 petals).
Round 4 :
Ch1, *sc in top of petal (center dc), ch3, sc in space between petals (between petals), ch3* rep around to form 8 ch-3 loops, join with sl st (16 sc, 8 ch-3 spaces counting loops).
Round 5 :
Info : Work this round in gold/contrast to create bright ring; carry color or fasten off and join new color at any sc.
Round 5 :
In each ch-3 loop: sc, hdc, 5 dc, hdc, sc (creates fuller petals). Join to first sc with sl st. After completing all 8 loops, fasten off if changing colors.
Round 6 :
Join next color into any 2nd dc of a 5-dc group. Ch3 (counts as dc), 2 dc in same st, *ch2, sk to next 3rd dc and work 3 dc cluster (3 dc in same st), ch2* rep around for 8 clusters separated by ch-2 (stitch count variable; 8 clusters with ch2 spaces).
Round 7 :
Ch1, sc in each dc across cluster tops and in ch-2 sps: (sc, ch2, sc) repeating to keep round flat. Join with sl st. (This establishes 8 small square-like openings around the center.)
Round 8 :
Info : Begin to form the star points. Change to deep purple/teal for star rounds.
Round 8 :
Into each (sc, ch2, sc) group work: *(ch4, sl st into base sc to create a small picot-ish loop), 5 dc shell into the ch-2 space, ch3, sl st into the top of next cluster)* rep 8 times. You will have 8 projecting shell groups forming early points.
Round 9 :
Ch1, sc in each stitch and in each ch-3 and ch-4 loop around to create a stable round. Join with sl st. Ensure shells are evenly anchored (approx 64 sc around if each shell yields 5 dc and there are anchor sc between shells).
Round 10 :
Info : Create angular diamonds between each shell to start the tile geometry. This round uses front loop work to add definition.
Round 10 :
Work in FLO: *ch5, sk 2 sts, (sc, ch2, sc) into top of shell, ch5* rep 8 times; join with sl st. You will have long ch-5 bridges that will be used to form outer points; count should reflect 8 ch-5 loops and the sc pairs (approx stitch count 32-40 depending on anchors).
Round 11 :
Into each ch-5 loop: sc, hdc, 7 dc, hdc, sc (creates a long rounded point). Join with sl st. After completing, check that points are symmetrical; adjust tension if any point sags.
Round 12 :
Ch1, sc across each long point and between points to provide foundation for corner clusters; aim for even stitch count around (approx 120 sc total). Join with sl st.
Round 13 :
Info : This round defines the square-diamond outline. Change to contrasting light color if desired for highlight.
Round 13 :
*Ch3, sk next 2 sc, (3 dc in next sc) to form small shell, ch3, sl st into space at base between points* repeat around creating 8 outer shells and interspersed ch3 loops. Join. (Creates a lace-like diamond edge.)
Round 14 :
Ch1, sc around in each st and ch-loop. After the round you should have a neat, stable edge (stitch count approx 160 sc depending on earlier additions). Join with sl st.
Round 15 :
Info : Start final outer points that will become the motif's star-shaped diamonds used for joining. Use a darker accent for contrast if following the photo palette.
Round 15 :
In every other sc around: *(ch6, sl st into 4th sc ahead to form a raised picot-style point), sc into next stitch*; repeat around to create 8-16 tall points depending on pattern repeats. Join with sl st. Count points to match layout for joining (aim for 16 pronounced points if you used many anchors).
Round 16 :
Ch1, sc around to stabilize points, working evenly across tall ch6 loops: sc, hdc, 5 dc, hdc, sc in each ch6 loop (if you used ch6 as point foundations). Join with sl st (final stitch count may be 180-200 depending on point stitch density).
Round 17 :
Info : Add a decorative outer small shell motif to give the motif a bead-like scallop when joined. Work a lighter color for contrast.
Round 17 :
*sc in next 2 sts, picot (ch3 sl st into first ch), sk 1 st, 5 dc shell in next* rep around, join. The picots sit between shells creating diamond-edge detail.
Round 18 :
Ch1, sc around across shells and picots to firm the edge. This round evens out the motif and prepares it for blocking and joining. Fasten off and weave ends long enough for weaving during blocking if desired.
Info :
Block motif flat, pinning each outer point straight and steam or wet-block lightly. Consistent blocking gives tidy joins and consistent seam sizes. Repeat Motif A to desired number; each motif takes ~30-45 minutes depending on color changes and attention to detail.
— Motif B (Small Connector Diamond) :
Round 1 :
MR, ch4 (counts as tr), 7 tr into ring, join with sl st (8 tr total) — small 8-tr center for compact connector.
Round 2 :
Ch1, sc in same st, *ch3, sk next tr, sc in next tr* rep 8 times to create 8 ch-3 loops around. Join. (Creates small open diamond spaces.)
Round 3 :
Into each ch-3 loop: sc, 3 dc, sc — repeat x8. Join. (8 mini petals.)
Round 4 :
Ch2, *hdc in next petal top, ch2* rep around forming small arches; join with sl st. This establishes connectors that sit nicely between Motif A points.
Round 5 :
Info : Use this round to introduce the join color that will be used on JAYG stitches — use same color as motif edges to make joins invisible.
Round 5 :
Ch1, sc around in each st and ch-2 arch; when positioned to join to existing Motif A during JAYG, work sl st into Motif A anchor instead of sl st to join in place (see Joining section). Fasten off or keep live for JAYG. Final stitch count ~32 sc around.
Round 6 :
Info : If using Motif B as edging filler, work a final round of sc in contrasting color and add picots between arches (ch3, sl st) for extra texture. Fasten off.
— Motif C (Corner/Edge Star) :
Round 1 :
MR, ch3, 11 dc into ring, join (12 dc). This slightly larger center will be used where runner edges require a more pointed finish.
Round 2 :
Ch3, dc in same st, *ch2, sk next st, 2 dc in next* rep around creating 6 two-dc clusters separated by ch2 loops; join with sl st. (12 dc with 6 ch-2 sps.)
Round 3 :
In each ch-2 loop: (sc, ch3, sc, ch3) — alternate small loops to provide base for crested points; join. Fasten off color if desired.
Round 4 :
Join contrast, ch1, sc around across loops and cluster tops creating a firm ring. Join and fasten off leaving long tail for sewing if used as sewn connector rather than JAYG.
Round 5 :
Info : To create pronounced corner points, work 5 dc shells into alternating loops then ch5 between shells creating wide corner points. Block strongly to set shape.
Round 5 :
Work shells as described: in each target loop make 5 dc shell, ch5 and sl st to next shell base. Repeat for 6 shells. Fasten off and weave ends.
— Joining Motifs (Join-As-You-Go method & Layout) :
Info :
Layout the runner design first on a flat surface. The runner shown alternates Motif A in a single long strip connected by Motif B between points, with Motif C used at ends to form symmetrical points. Join using JAYG on Motif A's final round where Motif B/C will be attached. Use same color as motif edge for invisible joins. Keep counts of join points consistent: each Motif A has 8 principal join points; each connection uses one Motif B or half of Motif C depending on edge placement.
Joining Step 1 :
When working Motif A Round 17 (outer decorative shells), stop before finishing a shell that will meet another motif. Instead of sl st to join normally, align Motif B live and sl st through the corresponding sc on Motif B to join. Then complete the remaining stitches of the shell on Motif A. This effectively bonds the two motifs with one stitch row. Repeat for each join point.
Joining Step 2 :
For neat lattice joins: Position motifs so that Motif B occupies diamond centers between 4 Motif As. Use Motif B Round 5 to sl st into Motif A's outer picot or shell bases at 4 equidistant points. Join B to A1, A2, A3, A4 sequentially as you complete final round on Motif B. This leaves no visible bulk if tension is even.
Joining Step 3 :
Info : Always pin motifs in place with pins that won't slip while joining. Check right-side alignment and block each motif lightly before permanent joins to avoid puckers.
Joining Step 4 :
Edge joins with Motif C: where the runner ends require pointed edges, position Motif C so half of its shells attach to external Motif A points. Sew or sl st through paired picots/shell-bases to anchor the corner motif securely. For symmetrical corners, ensure Motif C centers align with midline of runner.
Joining Step 5 :
After completing primary joins across centerline, go back and join any remaining small gaps using single crochet in a matching color. Insert hook through both motifs' edges and work sc across to close micro-gaps; this is useful around tight picot points where JAYG may not perfectly close the space.
Joining Step 6 :
Info : If you prefer a sewn join, leave long tails when finishing motifs. Use a mattress or whip stitch, working inside the outermost loops to hide tail ends. Sew through back loops only of outer round to keep front neat.
— Border & Final Edge Rounds :
Round 1 :
Once all motifs are joined, work a continuous border around entire runner to unify edges. Join yarn at a corner Motif C peak, ch1, sc evenly around the outer edge, placing 3 sc in each shell tip and 1 sc in tight spaces between points. Work steadily to keep border even (expected sc count variable depending on motif count, aim to maintain symmetry).
Round 2 :
Info : Add a scalloped decorative row in contrasting light color to highlight points. Pick a color that ties inner highlights together (gold/cream recommended).
Round 2 :
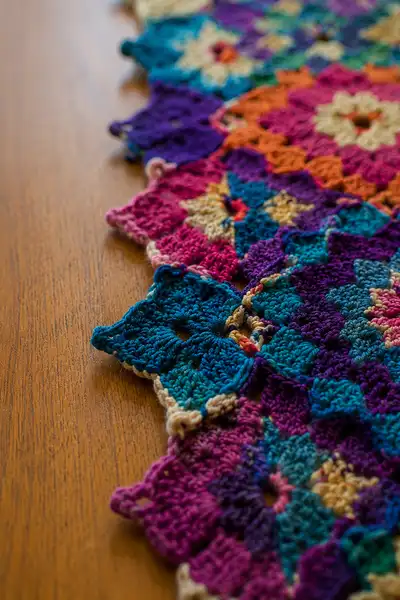
*In each outer shell tip: (ch3, 4 dc, ch3, sl st into same base) to form a large scallop; sl st into next 2 sc; rep around.* Join and fasten off. This creates pronounced scallops matching motif points.
Round 3 :
Ch1, sl st across scallop bases to tidy joins then add small picots between scallops: *ch3, sl st into base* across the edge at regular intervals (approx every 4-6 sc) to form delicate points. Fasten off and weave in ends neatly on back side.
Round 4 :
Info : Alternatively for a flatter, more table-friendly edge, work a single tidy round of sc in a close-matching color instead of scallops. This runner uses scallops in the photos for visual interest.
— Blocking & Finishing :
Info :
Wet-block the assembled runner by pinning it to a blocking surface and gently shaping each point and scallop. Use rust-proof pins and block to measurement so runner lies flat. Allow to dry fully. Steam-blocking spot-wise can refine outer picots and points further. Trim and weave ends securely on underside.
Step :
Optional: Lightly starch for a crisper table runner that resists small dish spills; apply starch sparingly and reblock points after application to maintain shape.
— Color & Design Notes :
Info :
To recreate the jewel-tone gradient: alternate variegated skeins for Motif A centers, reserve a few skeins of deep solid purple and teal for point rounds, and use a bright gold/ochre for highlight rounds. Changing color at the end of a round and carrying ends along the back saves time. Keep a color map if repeating the runner design so symmetry is pleasing along the length.
Info :
To adjust runner length: add or remove Motif A repeats along the center row and add matching Motif B connectors accordingly (each added Motif A requires 2 additional Motif Bs per side connection depending on layout). Adjust final border to maintain proportion.
— Sizing Guide & Stitch Counts :
Info :
Approx motif size: Motif A ~5-6 inches across after blocking (using 3.5mm hook and worsted/DK yarn held comfortably). Motif B ~2.5-3 inches; Motif C ~5.5-6 inches. To achieve a 40-50 inch runner: use 10 Motif A across centerline with connector patterns as shown. Stitch counts vary slightly with yarn and tension; check blocked size at motif 3 before committing to full run.
Info :
Keep a tally of motifs and colors on paper or a digital note to preserve pattern symmetry. Photograph your layout before final joining in case you need to unpick and rearrange colors during assembly.
Completing this Moroccan mosaic table runner is such a joyful process — each motif is like a tiny jewel, and watching them join into a long shimmering ribbon is endlessly satisfying. The layered petals and crisp points create a beautiful play of color and texture that really elevates a dining table. Pin, block and breathe — then enjoy your new handcrafted centerpiece! 🧶🌟