🧢 Beautiful ✨ Detailed πŸ’ Adorable

Nemo Starfish Amigurumi Pattern

Nemo Starfish Amigurumi Pattern
4.7β˜… Rating
2-4 Hours Time Needed
2.2K Made This
βœ‚οΈ

Beginner Friendly Level

Perfect for those just starting their crochet journey, with clear instructions and simple techniques

⏱️

Bite-Sized Project

Finishes in 2-4 hoursβ€”perfect for an afternoon of creative relaxation.

🧸

Cute Companion

An adorable friend to cherish, handcrafted with love to bring comfort and joy for years to come.

About This Nemo Starfish Amigurumi Pattern

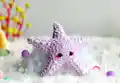
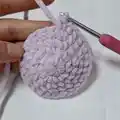
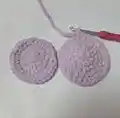
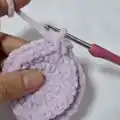
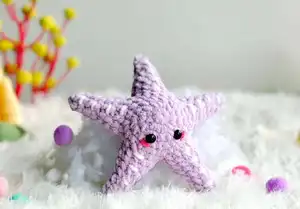
This wonderful pattern guides you through creating an adorable, chunky starfish amigurumi. Using super bulky yarn, you'll crochet a soft, plush sea creature complete with cute safety eyes and embroidered details. The construction method is clever, working the belly and back separately before joining them to form the five distinct arms!

Nemo Starfish Amigurumi Pattern crochet pattern - detailed view of completed project

With clear row-by-row instructions, you'll master basic shaping and joining techniques. It's a satisfying make that results in a perfectly huggable oceanic buddy.

Why You'll Love This Nemo Starfish Amigurumi Pattern

I absolutely love this pattern because it transforms simple stitches into such a recognizable and charming shape. Working with super bulky category 6 yarn means the project grows so fast, giving you instant gratification as the starfish comes to life. The clever technique of joining the belly and back pieces to create the arms is both fun to execute and creates a wonderfully neat finish. I also adore how customizable it is; while the original uses a beautiful purple, you can make an entire rainbow of starfish! Finally, those tiny embroidered spikes and sweet blush details give it so much personality, making it impossible not to smile when you finish.

Nemo Starfish Amigurumi Pattern step 1 - construction progress Nemo Starfish Amigurumi Pattern step 2 - assembly progress Nemo Starfish Amigurumi Pattern step 3 - details and accessories Nemo Starfish Amigurumi Pattern step 4 - final assembly and finishing

Switch Things Up

I love how versatile this starfish pattern is for customization! You can easily adjust the colors to create your own unique ocean creature - try pastel pinks and blues for a softer, magical look, or realistic sandy tones for a natural vibe.

Want to make it bigger or smaller? Simply change your yarn weight and hook size. Using a massive blanket yarn with a large hook will give you a giant, cuddly pillow version, while thin cotton yarn creates an adorable mini version perfect for keychains or baby mobiles.

I often add my own creative touches like a little crocheted sailor hat, a tiny bow, or even a pair of sunglasses to give my starfish a fun personality. These personal additions make each piece truly one-of-a-kind and special.

Don't be afraid to experiment with different facial expressions too! Adding a tiny embroidered smile or sleepy eyelids can completely change the personality of your creation. Try mapping it out with pins before securing them permanently.

For an extra special touch, consider adding a squeaker inside the stuffing for a pet or baby toy, or attach it to a beautiful crocheted coral reef base. The possibilities are endless, and that's what makes this sea-themed pattern so much fun!

Common Mistakes & How to Fix Them

βœ— Skipping stitch markers at color changes can lead to misaligned rounds; place a marker at the start of every round to stay on track. βœ— Not stuffing the arms evenly causes lumpy limbs; stuff gradually while shaping, pushing fiberfill all the way to the tips. βœ— Pulling yarn too tight when joining the belly and back creates stiff, inflexible pieces; maintain consistent, moderate tension throughout your work. βœ— Forgetting to count stitches results in uneven arms; count after every row, especially during the decrease sections of the starfish points.

Nemo Starfish Amigurumi Pattern

Dive into the enchanting world of ocean creatures with this delightful Nemo Starfish amigurumi pattern! Perfect for bringing a touch of the sea into your home, this chunky, super-soft starfish is incredibly fun to make. You'll love how quickly it works up using super bulky yarn, making it an ideal weekend project or a quick gift for sea-life lovers. Grab your purple yarn and let's create a cute new friend!

Beginner Friendly 2-4 Hours

Materials Needed for Nemo Starfish Amigurumi Pattern

β€” Main Fabric

  • 01
    Super Bulky / Category 6 Yarn in Purple color
  • 02
    Small amount of pink yarn or thread for blush/mouth embroidery
  • 03
    Small amount of orange yarn or thread for spike embroidery
  • 04
    Fiberfill for stuffing

β€” Tools Required

  • 01
    Crochet hook size 3.5mm (E)
  • 02
    Stitch maker
  • 03
    Sewing needle
  • 04
    Scissors
  • 05
    Plastic safety eyes (8mm)
  • 06
    Hot gun glue

Progress Tracker

0% Complete

β€” Starfish's Belly :

Info :

Begin with Purple yarn

Row 1 :

5 SC in an MR (5)

Row 2 :

5 INC (10)

Row 3 :

10 INC (20)

Row 4 :

(SC, INC) 10 times (30)

Info :

Cut the yarn.

β€” Starfish's Back :

Info :

Begin with Purple yarn

Row 1 :

6 SC in an MR (6)

Row 2 :

6 INC (12)

Row 3 :

(SC, INC) 6 times (18)

Row 4 :

(2 SC, INC) 6 times (24)

Row 5 :

(3 SC, INC) 6 times (30)

Info :

From this row, crochet together the abdominal part to create the arms of the starfish.

β€” Arms :

Row 6 :

6 SC (starfish's back), 6 SC (starfish's belly) (12)

Row 7 :

12 SC (12)

Row 8 :

(2 SC, DEC) 3 times (9)

Row 9 :

9 SC (9)

Row 10 :

2 SC, DEC, 3 SC, DEC (7)

Row 11 :

7 SC (7)

Row 12 :

DEC, SC, DEC, 2 SC (5)

Row 13 :

5 SC (5)

Info :

Cut the yarn.

Info :

*Stuffing*

Info :

Crochet the remaining 4 arms similarly as above

Info :

Fasten off and cut the yarn.

β€” Assembly :

Info :

Attach the eyes between rows 3 and 4, with 4 stitches between them.

Info :

Embroider pink and orange for the mouth and spikes. Complete the product.

Assembly Instructions

  • Work the first part of the pattern by crocheting the flat belly piece and setting it aside.
  • Crochet the back piece up to row 5, and then begin joining the back and belly stitches together in row 6 to form the 3D arms.
  • Stuff each arm firmly with fiberfill as you complete row 13 of the arm before cutting the yarn.
  • Attach the 8mm safety eyes securely between rows 3 and 4 of the back piece, making sure to leave 4 stitches between them.
  • Use a sewing needle and colored yarn or thread to embroider pink blush/mouth details and orange dashes for spikes to complete the look.

Important Notes

  • πŸ’‘Use a stitch marker to keep track of your rows, especially when working the separate arms after joining the belly and back.
  • πŸ’‘Stuff firmly but carefully as you go; waiting until the hole is too small makes it difficult to push the fiberfill into the arm tips.
  • πŸ’‘Make sure your safety eyes are secured tightly with their backings before you close up the final arm and finish stuffing the center.
  • πŸ’‘When joining the belly and back pieces, make sure you are picking up the correct stitches from each piece to avoid twisting the arms.
  • πŸ’‘Keep your tension consistent, especially when working with super bulky yarn, to prevent the stuffing from showing through.

This delightful Nemo Starfish pattern is guaranteed to make waves in your amigurumi collection! The clever construction and chunky yarn make it a fun, satisfying make that works up in no time. Whether you're gifting it to a sea-life enthusiast or keeping it for your own cozy decor, this little ocean buddy will bring endless smiles. 🌊 Happy crocheting! 🧢✨

You ask,

we answer.

FAQs

What size will the finished starfish be?

When using the recommended super bulky (category 6) yarn and a 3.5mm hook, the starfish will be a nice, chunky size, perfect for a small plush toy.

Can I use a different yarn weight for this pattern?

Yes! You can easily swap to worsted or plush velvet yarn. Just remember to use a hook size appropriate for your chosen yarn, which will change the final size of the starfish.

Is this pattern suitable for complete beginners?

Absolutely! The pattern uses basic stitches like single crochet, increases, and decreases. The most complex part is joining the two sides to make the arms, which is a great beginner-friendly technique.

How do I ensure the starfish arms look even?

Make sure to count your stitches carefully on each arm section, keeping consistent tension. Stuffing each arm with the same amount of fiberfill also helps maintain a uniform, balanced shape.