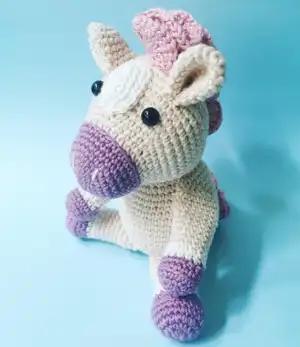
Make a sweet seated Neon the Horse amigurumi with soft pastel details and a ruffled mane. This pattern guides you through each piece — ears, head, body, legs, arms, mane, tail and patch — with clear step-by-step rounds. Customize colours to make Neon uniquely yours and enjoy a charming finished toy perfect for gifts or decor. Suitable for crocheters ready to expand their amigurumi skills.
Progress Tracker
0% Complete
— Ears :
Round 3 :
(sc, inc) x 6 [18]
Info :
Fasten off, fold ears in half and half again (you should have 4 edges together) and sew across the bottom. Leave a tail for sewing.
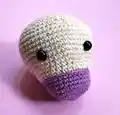
— Head :
Round 3 :
(sc, inc) x 6 [18]
Round 4 :
(sc x 2, inc) x 6 [24]
Round 5 :
(sc x 3, inc) x 6 [30]
Round 10 :
in BLO: sc x 30 [30]
Round 12 :
(sc x 4, inc) x 6 [36]
Round 13 :
(sc x 5, inc) x 6 [42]
Round 14 :
(sc x 6, inc) x 6 [48]
Round 15 :
(sc x 7, inc) x 6 [54]
Round 16-20 :
sc x 54 [54]
Round 21 :
(sc x 7, dec) x 6 [48]
Round 23 :
(sc x 6, dec) x 6 [42]
Round 24 :
(sc x 5, dec) x 6 [36]
Round 25 :
(sc x 4, dec) x 6 [30]
Info :
If using safety eyes, insert between rounds 15 and 16, 11 stitches apart.
Round 26 :
(sc x 3, dec) x 6 [24]
Info :
Stuff the head and continue stuffing until fastened off.
Round 27 :
(sc x 2, dec) x 6 [18]
Round 28 :
(sc, dec) x 6 [12]
Info :
Fasten off and weave tail through final round, pull to close.
— Arms :
Round 3 :
(sc, inc) x 6 [18]
Round 5 :
in BLO: sc x 18 [18]
Round 6 :
(sc x 7, dec) x 2 [16]
Round 7 :
(sc x 6, dec) x 2 [14]
Info :
Fasten off, stuff rounds 1-8 and sc across top. Leave a tail for sewing.
— Legs :
Round 3 :
(sc, inc) x 8 [24]
Round 6 :
in BLO: (sc x 6, dec) x 3 [21]
Round 7 :
(sc x 5, dec) x 3 [18]
Round 10-18 :
sc x 18 [18]
Info :
Fasten off, stuff and sc across the top to close. Leave a tail for sewing.
— Body :
Round 3 :
(sc, inc) x 6 [18]
Round 4 :
(sc x 2, inc) x 6 [24]
Round 5 :
(sc x 3, inc) x 6 [30]
Round 6 :
(sc x 4, inc) x 6 [36]
Round 7 :
(sc x 5, inc) x 6 [42]
Round 8-15 :
sc around [42]
Round 16 :
(sc x 5, dec) x 6 [36]
Round 17-20 :
sc x 36 [36]
Round 21 :
(sc x 4, dec) x 6 [30]
Round 23 :
(sc x 3, dec) x 6 [24]
Info :
Stuff and continue stuffing until fastened off.
Round 24 :
(sc x 2, dec) x 6 [18]
Round 25 :
(sc, dec) x 6 [12]
Info :
Fasten off, weave tail through final round and pull to close. Leave a tail for sewing.
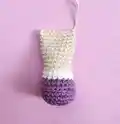
— Mane :
Info :
Leave a long tail at the beginning for sewing. You will work in rows and turn at the end of each row. Chains do not count as a stitch.
Row 1 :
ch16, sc in 2nd ch from hook, sc x 14 [15]
Row 2 :
ch2 and 3dc in same stitch, 3dc x 14 [45]
Row 3 :
ch2 and 3dc in same stitch, 3dc x 44 [135]
Info :
Fasten off and leave a tail for sewing.
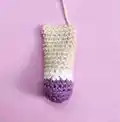
— Tail :
Info :
Leave a long tail at the beginning for sewing. You will work in rows and turn at the end of each row. Chains do not count as a stitch.
Row 1 :
ch9, sc in 2nd ch from hook, sc x 7 [8]
Row 2 :
ch2 and 3dc in same stitch, 3dc x 7 [24]
Row 3 :
ch2 and 3dc in same stitch, 3dc x 24 [72]
Info :
Fasten off and leave a tail for sewing.
— Patch :
Round 1 :
ch 6, sc in 2nd chain from hook, sc x 3, 3sc in the final chain, turn and work on the other side: sc x 3, inc [12]
Round 2 :
inc, sc x 3, inc, sc, inc, sc x 3, inc, sc [16]
Round 3 :
sc, inc, sc x 4, inc, sc, inc, sc x 5, inc, sc [20]
Info :
Fasten off and leave a tail for sewing.
— Assembly :
EYES :
Using APRICOT, sew over a stitch on the inner part of each eye (as shown) and pull a little to create an indent. Tie off yarn tails and hide inside the head.
PATCH :
Sew to the centre of the head over rounds 12-19.
HEAD :
Sew to the body. Go around twice to make secure.
EARS :
Sew to either side of the head over rounds 18-22. Approx. 3 stitches from the patch.
LEGS :
Sew to rounds 5-7 of the body pointing outwards, 3 stitches apart.
ARMS :
Sew to the body over rounds 17-22 on a diagonal so the arms point slightly forward and rest on the legs.
MANE :
Approx. 1 round after the patch, sew down the back of the head.
TAIL :
Sew to the back of the body over rounds 6-11.
NOSTRILS :
Using APRICOT, make 2 vertical lines over rounds 3-5, approx. 5 stitches apart.
Info :
That's it! Enjoy your Neon.
Make Neon the Horse to brighten any shelf or gift box with a handmade touch. 🧶
This pattern combines small shaping, colour changes and a playful ruffled mane for lots of charm. ✨
Share your finished Neon using #carascreationsaus or #neonthehorse and spread the handmade love! 😊