About This Niahs Balloon Dog Amigurumi Pattern
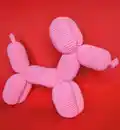
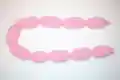
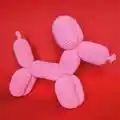
This pattern teaches you how to crochet Niahs Balloon Dog from tail to nose using cotton 8/4 yarn. The piece is made in spirals and shaped after crocheting by sewing specific joints together. The finished balloon dog measures about 20 cm tall and 23 cm from tail to nose.
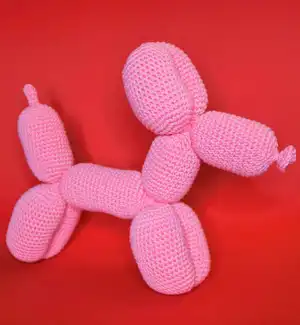
Includes complete round-by-round instructions and a step-by-step shaping guide with numbered joints for easy assembly. Suitable for crocheters comfortable with single crochet and basic increases/decreases.
Why You'll Love This Niahs Balloon Dog Amigurumi Pattern
I love how this pattern transforms simple single crochet rounds into a playful balloon animal. I enjoy the unique shaping process — sewing numbered joints to create the dog gives a satisfying, sculptural result. You’ll love the quirky finished toy and how customizable it is with color and yarn choices.
Switch Things Up
I like to experiment with different yarn colors to make a rainbow balloon dog — it makes the finished toy extra playful.
I often try a slightly smaller hook for a firmer fabric when giving the toy to children to maintain shape.
I recommend using a strong tapestry needle and short whipstitches for neat joins when sewing the joints together.
I sometimes add a small amount of polyester stuffing only in the center of each bump to keep the balloon look crisp.
I advise marking the rounds carefully; I always put a removable stitch marker at my start stitch to avoid miscounts.
I enjoy changing the tail finish — a small knotted loop can look like the knot in a real balloon.
I advise testing one leg assembly first so you can practice the tension before sewing all joints together.
I sometimes use stitch-holding pins to align segments before I sew to make sure everything sits correctly.
I like to block lightly by shaping with my hands after assembly to get rounded bumps and a polished finish.
I always weave in ends securely and hide them inside the nearest segment so the joins stay neat and durable.
Common Mistakes & How to Fix Them
✗ Skipping the magic loop start can make the tip of the tail messy; always begin with a neat ml to close tightly.
✗ Not checking your gauge will change the final size and yarn usage; make a 10 cm swatch and adjust hook size accordingly.
✗ Forgetting to add stuffing at the correct stage makes shaping difficult; add stuffing when the pattern instructs to achieve smooth bumps.
✗ Miscounting repeats in increase/decrease rounds will distort the balloon sections; mark the first stitch of each round and tick off repeats.
✗ Pulling yarn too tight when closing the nose hole can pucker the outer shape; secure gently or tie a knot on the outside instead.