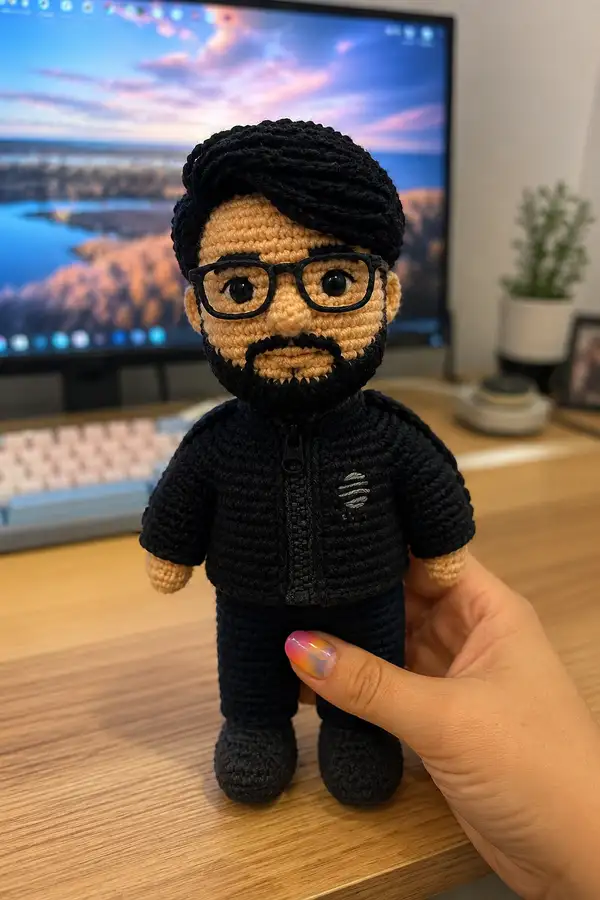
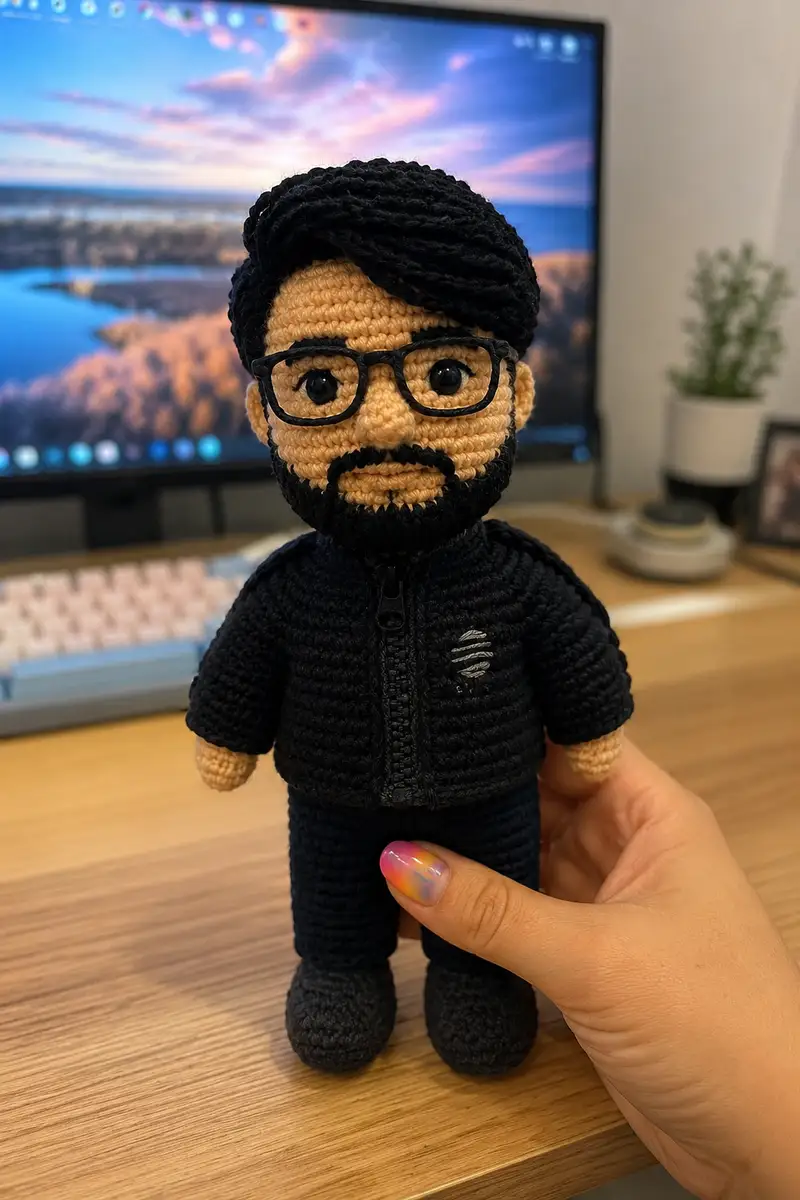
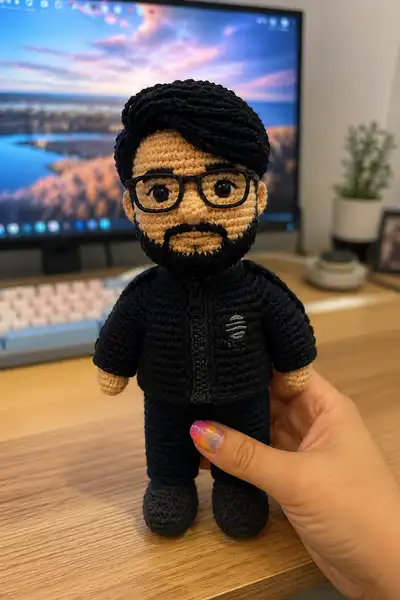
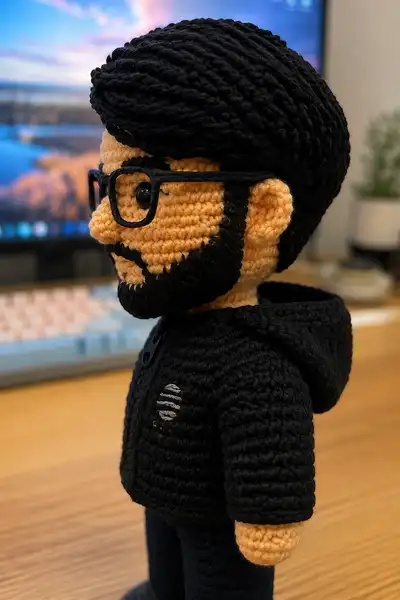
Create a personalized Nizar-inspired amigurumi with detailed, step-by-step instructions. This pattern recreates the little bearded character wearing a black hoodie, glasses, and twisted textured hair. The finished doll stands about 9-11 inches tall (depending on yarn and hook). Full instructions include head, facial features, beard, hair cap style, jacket with zipper detail, pants and shoes.
Progress Tracker
0% Complete
— Head :
Round 1 :
6 sc in magic ring (6)
Round 3 :
(1 sc, 1 inc) x 6 (18)
Round 4 :
(2 sc, 1 inc) x 6 (24)
Round 5 :
(3 sc, 1 inc) x 6 (30)
Round 6 :
(4 sc, 1 inc) x 6 (36)
Round 7 :
(5 sc, 1 inc) x 6 (42)
Round 8 :
(6 sc, 1 inc) x 6 (48)
Round 9 :
1 sc in each st (48)
Round 10 :
1 sc in each st (48)
Round 11 :
1 sc in each st (48)
Info :
Mark round start and work in continuous rounds. Keep tension slightly firm so stuffing does not show. Place safety eyes between rounds 13-14 spaced about 8-9 sts apart for an expressive look; use stitch counts below to visualize placement.
Round 12 :
1 sc in each st (48)
Round 13 :
1 sc in each st (48)
Round 14 :
1 sc in each st (48)
Info :
Position safety eyes so centers are approximately 8 stitches apart (count left-right). For this head size, attach eyes between rounds 13 and 14 with centers 8 sts apart if using 8mm eyes; adjust for larger eyes.
Round 15 :
1 sc in each st (48)
Round 16 :
1 sc in each st (48)
Round 17 :
1 sc in each st (48)
Round 18 :
1 sc in each st (48)
Info :
Begin small facial shaping by noting the front center between the eyes. If adding a small embroidered eyebrow or crease, do so now with a yarn needle and spare black yarn. Keep stitches tidy - facial embroidery should be minimal and anchored with several passes.
Round 19 :
(6 sc, 1 inc) x 6 (54) — slight head fullness for cheeks
Round 20 :
1 sc in each st (54)
Round 21 :
(6 sc, 1 dec) x 6 (48)
Round 22 :
(5 sc, 1 dec) x 6 (42)
Info :
Start stuffing head firmly now with small amounts of fiberfill. Stuff around the eye area first to give support for eye washers then continue stuffing evenly into crown and cheeks. Use a stuffing tool or blunt pencil for even distribution.
Round 23 :
(4 sc, 1 dec) x 6 (36)
Round 24 :
(3 sc, 1 dec) x 6 (30)
Round 25 :
(2 sc, 1 dec) x 6 (24)
Round 26 :
(1 sc, 1 dec) x 6 (18)
Info :
Fasten off leaving a 30 cm (12 in) tail for sewing to the neck later. Finish stuffing so head holds shape but is not rock-hard. Close the last stitches using a yarn needle, pulling tail through remaining 6 sts and weaving in securely.
Round 28 :
Join skin color back to base of head at front neck area and sc around to create a neck tube: 6 sc in BLO (6)
Round 29 :
1 sc in each st (6)
Round 30 :
1 sc in each st (6)
Round 31 :
Inc x6 (12) — widen for shoulder join
Round 32 :
1 sc in each st (12)
Info :
Leave long tail for sewing head to body. Neck tube built here will be sewn to the body opening (see Body section rounds). Double-check that head front is centered and eyes aligned; adjust with extra stuffing if necessary.
— Nose :
Round 1 :
6 sc in magic ring (6)
Round 3 :
(1 sc, 1 inc) x 6 (18)
Round 4 :
1 sc in each st (18)
Info :
Shape nose by pressing lightly and stitching base to face between the eyes about one round below eye level. Sew nose to head using mattress stitch around base; stuff very lightly so it protrudes but remains small.
Round 5 :
(2 sc, 1 dec) x 4, 2 sc (14)
Round 6 :
Sc around and fasten off leaving long tail. Attach nose centered between eyes about 2 stitches below eye row.
— Ears (Make 2) :
Round 1 :
6 sc in magic ring (6)
Round 3 :
(1 sc, 1 inc) x 6 (18)
Round 4 :
1 sc in each st (18)
Round 5 :
1 sc in each st (18)
Round 6 :
(2 sc, 1 dec) x 4, 2 sc (14)
Round 7 :
1 sc in each st (14)
Round 8 :
Fold ear slightly and sl st across 4 sts to create inner ear cup. Fasten off leaving long tail for sewing.
Info :
Sew ears to sides of head between rounds 11 and 16: place ear top slightly above eye line, tilt forward a little for a natural look. Use the long tail to secure through several rounds so ears do not flop.
— Beard / Moustache (Attachable Applique) :
Round 1 :
With black yarn: 8 sc in magic ring (8)
Round 2 :
(1 sc, inc) x 4 (12)
Round 3 :
1 sc in each st (12)
Round 4 :
(2 sc, inc) x 4 (16)
Round 5 :
1 sc in each st (16)
Round 6 :
(3 sc, inc) x 4 (20)
Round 7 :
Work shaped jawline by decreasing sides: (3 sc, dec) x 4 (16)
Round 8 :
Shape lower beard curve: (2 sc, dec) x 4 (12)
Round 9 :
Fasten off leaving long tail for sewing. Trim edge into slight crescent by flattening and sewing into place along jawline from ear-to-ear, leaving moustache center slightly above lip line.
Info :
Position beard by aligning its top edge at approximately the same round as the bottom of the ear. Sew through head rounds and beard rounds, anchoring heavily near chin so the beard sits flat and follows jaw curvature.
— Body / Jacket (Outer Jacket Worked in Black) :
Round 1 :
6 sc in magic ring (6)
Round 3 :
(1 sc, 1 inc) x 6 (18)
Round 4 :
(2 sc, 1 inc) x 6 (24)
Round 5 :
(3 sc, 1 inc) x 6 (30)
Round 6 :
(4 sc, 1 inc) x 6 (36) — widen to chest
Round 7 :
1 sc in each st (36)
Round 8 :
1 sc in each st (36)
Round 9 :
1 sc in each st BLO (36) — create ridge for jacket hem
Info :
Work the jacket as an outer layer; you will create an inner flesh-colored body tube that is slightly narrower for neck attachment. If you want the jacket to be removable, leave a longer opening at back and sew buttons or a small zip later.
Round 10 :
1 sc in each st (36)
Round 11 :
1 sc in each st (36)
Round 12 :
1 sc in each st (36)
Round 13 :
1 sc in each st (36)
Round 14 :
1 sc in each st (36)
Round 15 :
(4 sc, 1 dec) x 6 (30) — shape waist slightly
Round 16 :
1 sc in each st (30)
Round 17 :
1 sc in each st (30)
Round 18 :
(3 sc, 1 dec) x 6 (24)
Round 19 :
(2 sc, 1 dec) x 6 (18)
Info :
At this point the jacket outer shell is the main torso. Leave a long tail and do not fully close bottom if you prefer to slip the inner body inside. For a fixed jacket, finish stuffing as you close the bottom later. Add zipper detail later with surface crochet or a small plastic zipper sewn on.
Round 20 :
1 sc in each st (18)
Round 21 :
1 sc in each st (18)
Round 22 :
Fasten off leaving long tail for joining to lower body/pants. If making the jacket removable, stop here and prepare a back opening by leaving a length unworked and slip-stitch rows on each side to make a seam.
— Inner Body / Torso (Flesh-Colored Tube to Seat Under Jacket) :
Round 1 :
6 sc in magic ring (6)
Round 3 :
(1 sc, 1 inc) x 6 (18)
Round 4 :
1 sc in each st (18)
Round 5 :
1 sc in each st (18)
Round 6 :
1 sc in each st (18)
Round 7 :
1 sc in each st (18)
Info :
Stuff inner torso lightly so jacket will sit naturally. The inner body is slightly shorter than the jacket so the jacket hangs over the hips. Leave long tail to sew head to this tube (sew to neck tail from head). Attach head after stuffing both inner and outer parts to fine-tune posture.
Round 8 :
Begin stuffing inner torso moderately so it keeps shape but is soft enough for sewing (18)
Round 9 :
Work even for 6 rounds: 1 sc in each st (18)
Round 10 :
Work even for 4 rounds (18)
Round 11 :
(2 sc, 1 dec) x 4, 2 sc (14)
Round 12 :
(1 sc, 1 dec) x 4, 2 sc (10)
Round 13 :
Slowly finish stuffing and fasten off leaving a long tail for sewing to jacket bottom and head neck.
— Arms (Make 2 - Skin Hands then Sleeve) :
Round 1 :
6 sc in magic ring (6) — start with skin color for hand
Round 3 :
(1 sc, 1 inc) x 6 (18)
Round 4 :
1 sc in each st (18) — palm row
Info :
Stuff hand firmly at this stage so the fingers area remains compact. For simple mitten-style hands, do not separate fingers. If you want finger definition, sew small vertical seams dividing the palm into three fingers.
Round 5 :
Change to black (sleeve color) in last st: 1 sc in each st (18)
Round 6 :
1 sc in each st (18)
Round 7 :
1 sc in each st (18)
Round 8 :
1 sc in each st (18)
Round 9 :
1 sc in each st (18)
Info :
For a slightly tapered sleeve near shoulder, (4 sc, 1 dec) x 3 = 15. But for this design the sleeve remains straight to match the hoodie silhouette. If using wire for poseable arms, insert a thin wire or pipe cleaner now along arm center before stuffing completely, leaving ends wrapped and tucked inside.
Round 10 :
1 sc in each st (18)
Round 11 :
1 sc in each st (18)
Round 12 :
Stuff arm lightly and shape shoulder end: (3 sc, 1 dec) x 3 (15)
Round 13 :
(2 sc, 1 dec) x 3 (12)
Round 14 :
(1 sc, 1 dec) x 3 (9)
Round 15 :
1 sc in each st (9)
Round 16 :
Fasten off leaving long tail to sew to jacket at rounds 10-12 on body. Make second arm mirroring these steps.
— Legs / Pants (Make 2) :
Round 1 :
6 sc in magic ring (6) — start shoe base in dark gray
Round 3 :
(1 sc, 1 inc) x 6 (18)
Round 4 :
1 sc in each st (18) — shoe top
Round 5 :
Change to navy for pant leg: 1 sc in each st (18)
Round 6 :
1 sc in each st (18)
Round 7 :
1 sc in each st (18)
Round 8 :
1 sc in each st (18)
Round 9 :
1 sc in each st (18)
Info :
Work legs long enough to reach jacket bottom when attached. Keep legs firmly stuffed at the shoe area and looser up the leg. To make boots appear rounded, stuff shoes firmly and shape with your palm.
Round 10 :
Work even for 8 rounds (18)
Round 11 :
(2 sc, 1 dec) x 4, 2 sc (14) — decrease slightly near hip
Round 12 :
1 sc in each st (14)
Round 13 :
1 sc in each st (14)
Round 14 :
Fasten off leaving long tail for sewing to the bottom of the inner torso; make second leg mirror and attach legs side-by-side about 4-6 stitches apart at body base.
— Shoes (Decorative Top Stitching) :
Round 1 :
Working from shoe top, fasten in gray and sc around top edge for two rounds to create visible shoe top (18)
Round 2 :
Work a slip-stitch ridge around toe for realistic shoe seam, then fasten off and weave ends.
Info :
Emphasize the seam by working a contrasting color or using a surface slip stitch to mimic shoe stitching. Keep shoes well-stuffed for standing stability.
— Hood (Attached to Jacket) :
Round 1 :
Join black yarn to top center back of jacket neck and sc evenly around the neck edge for 1 round (count around neck edge to match jacket circumference — for this pattern 36 sts)
Round 2 :
1 sc in each st (36)
Round 3 :
1 sc in each st (36)
Round 4 :
1 sc in each st (36)
Round 5 :
(5 sc, 1 dec) x 6 (30)
Round 6 :
1 sc in each st (30)
Round 7 :
1 sc in each st (30)
Round 8 :
(4 sc, 1 dec) x 5 (25)
Round 9 :
1 sc in each st (25)
Round 10 :
Work even for 4 rounds (25)
Round 11 :
Fasten off and leave long tail for sewing. Fold hood double and sew center seam at back to shape realistic hood curve, leaving front facing open and slightly rolled. You can also crochet a small ribbed edge with BLO for a hood rim.
Info :
If you prefer a separate hood, crochet it independently and sew onto jacket neck edge. The hood here is slightly shallow so it sits behind the head and forms a collar when the head is attached.
— Hair Cap & Twisted Hair (Textured Top) :
Round 1 :
Join black yarn to top of head where hairline begins, sc evenly around head hairline to form a cap base (approx 48 sts)
Round 2 :
1 sc in each st (48)
Round 3 :
1 sc in each st (48)
Round 4 :
1 sc in each st (48)
Round 5 :
Work FLO rows (48) for subtle ridge (48)
Round 6 :
1 sc in each st (48)
Round 7 :
Fasten off and leave long tail. The cap creates a foundation to attach twisted yarn strands or rope-like chains for textured hair.
Info :
For the textured twisted hair seen on the doll, prepare multiple lengths of a doubled strand of black yarn approximately twice the head circumference (about 25-30 cm each). Twist each bundle tightly, then fold and lay them in rows across the cap, sewing at the fold so the twist runs outward. Work from the crown to the forehead to create directional hair flow.
Round 8 :
Attach twisted strands by folding each strand in half and using a latch-hook style knot or sewing at the fold edge along the cap in rows (about 10-14 rows depending on strand thickness)
Round 9 :
For the front swoop, use several longer twisted strands placed across the forehead and curl them inward slightly; anchor heavily near hairline and leave ends to drape over forehead.
Round 10 :
Trim and shape twisted hair with scissors; tuck and sew any loose ends. For a neater finish, lightly steam or block twisted yarn but do not over-heat synthetic yarns.
— Glasses Frame (Wire / Yarn Method) :
Step 1 :
Cut a single piece of thin craft wire long enough to go across both eyes and hook behind ears (approx 20-24 cm).
Step 2 :
Shape two rounded rectangles for lenses and a small bridge. Wrap wire frame thoroughly with black yarn using a whip-stitch or by winding yarn along the wire and securing ends with small stitches of glue.
Step 3 :
Sew or hook the frame gently into the head between rounds 13-16 so the lenses rest in front of the safety eyes. If preferred, make a yarn frame by crocheting two small flat rectangles (approx 10 sc x 8 rows), then sew them together across bridge and sew frame onto face.
Info :
If using plastic or rigid glasses, hot glue a small pad on the inner bridge to keep the frame from slipping; if using wire, bend short hooks at ear ends so they tuck into stitches around ear area for stability.
— Assembly & Final Details :
Info :
Sew head to inner torso by inserting neck tube into the top opening of the inner body. Use a whip stitch around the neck, distributing gathers evenly. Then fit the jacket outer shell over the inner body and seam closed or secure with a few stitches at the back.
Step :
Sew arms to jacket at rounds 9-12 on jacket body. Use mattress stitch for a neat, less visible seam. Ensure left and right arms are sewn at same vertical level and slightly forward for a natural arm placement.
Step :
Sew legs to bottom of inner body: align centers and pin first. Space them evenly (approx 4-6 stitches apart) and use the leg long tails to attach, reinforcing seams with several passes for stability.
Step :
Attach beard and moustache applique to face aligning top edge to just below the ear base; sew firmly across top and along jaw to create natural chin contour. Trim extra yarn and tuck ends under beard.
Info :
Add embroidered logo to left chest using light gray yarn: make 3-4 short horizontal satin stitches to create the stripes, and 2-3 tiny French knots under for accents. For zipper, use surface slip stitch down center front of jacket and sew a small plastic zipper or sculpt a zipper pull with black yarn.
Step :
Weave in all ends through several rounds, trim tails close. Add slight blush to cheeks with pastel chalk rubbed lightly and sealed, if desired. Secure glasses frame and any added accessories with glue or a few small stitches.
Info :
Inspect seams and reinforce any areas that will be handled frequently (arm joins, leg joins). If using limb wire, ensure wire ends are tucked and wrapped so they cannot poke through the yarn.
This project brings Nizar the Third to life with characterful detail — from the textured hair and full beard to the tidy little hoodie and glasses. Each stitch builds personality and charm, and the final assembly is deeply satisfying. You will end up with a warm, huggable mini-figure perfect for gifting or keeping on your desk. 🧶✨ Make it your own with color tweaks and accessories — have fun and enjoy every stitch! 🎁