Meet Noel, the adorable Christmas Mouse who is ready to add a festive touch to your holiday season! Dressed in his cozy green sweater and striped stocking cap, this charming little mouse is the perfect companion for your Christmas tree or a delightful stocking stuffer. With his sweet pink nose and oversized ears, he captures the heartwarming spirit of the holidays perfectly.
Progress Tracker
0% Complete
— Head :
Info :
Start in Colour 18 (Taupe). Stuff firmly as you go.
Round 1 :
Start 6 sc in a magic ring (6)
Round 2 :
(Sc in next st, inc in next st) x 3 (9)
Round 3 :
(Sc in each of next 2 st, inc in next st) x 3 (12)
Round 4 :
(Sc in each of next 3 st, inc in next st) x 3 (15)
Round 5 :
(Sc in each of next 4 st, inc in next st) x 3 (18)
Round 6 :
Sc in next st, inc in next st, sc in each of next 2 st, (inc in next st, sc in each of next 2 st) x 3, inc in next st, sc in each of next 2 st, inc in next st, sc in next st (24)
Info :
Mark the 8th/9th and 16th/17th stitches with a spare piece of yarn to indicate top center of head.
Round 7 :
Sc in all 24 st (24)
Round 8 :
Sc in each of next 2 st, (inc in next st, sc in each of next 3 st) x 2, inc in next st, sc in each of next 2 st, inc in next st, (sc in each of next 3 st, inc in next st) x 2, sc in each of next 2 st (30)
Round 9 :
Sc in all 30 st (30)
Round 10 :
Sc in each of next 2 st, inc in next st, (sc in each of next 4 st, inc in next st) x 5, sc in each of next 2 st (36)
Round 11 :
Sc in each of next 3 st, (inc in next st, sc in each of next 5 st) x 2, inc in next st, sc in each of next 4 st, inc in next st, (sc in each of next 5 st, inc in next st) x 2, sc in each of next 3 st (42)
Round 12 :
Sc in each of next 3 st, inc in next st, (sc in each of next 6 st, inc in next st) x 5, sc in each of next 3 st (48)
Round 13-18 :
Sc in all 48 st (48)
Info :
Insert 5 mm safety eyes between Rnd 9 and 10, 14 st apart. Use marked st from Rnd 6 to center eyes. Sew nose with pink thread over Rnd 1-3, 3 st wide at top.
Round 19 :
(Sc in each of next 6 st, dec) x 6 (42)
Round 20 :
(Sc in each of next 5 st, dec) x 6 (36)
Round 21 :
(Sc in each of next 4 st, dec) x 6 (30)
Round 22 :
(Sc in each of next 3 st, dec) x 6 (24)
Round 23 :
Sc in all 24 st (24)
Round 24 :
(Sc in each of next 2 st, dec) x 6 (18)
Round 25 :
(Sc in next st, dec) x 6 (12)
Info :
Sl st, fasten off. Weave yarn tail through front loops to close hole.
— Body :
Info :
Start in Colour 18 (Taupe). Stuff firmly.
Round 1 :
Start 6 sc in a magic ring (6)
Round 2 :
Inc in all 6 st (12)
Round 3 :
(Sc in next st, inc in next st) x 6 (18)
Round 4 :
(Sc in each of next 2 st, inc in next st) x 6 (24)
Round 5 :
(Sc in each of next 3 st, inc in next st) x 6 (30)
Round 6 :
(Sc in each of next 4 st, inc in next st) x 6 (36)
Round 7 :
(Sc in each of next 5 st, inc in next st) x 6 (42)
Round 8 :
(Sc in each of next 6 st, inc in next st) x 6 (48)
Round 9-11 :
Sc in all 48 st (48)
Info :
Change to Colour 42 (Green).
Round 12 :
(Sc in each of next 6 st, dec) x 6 (42)
Round 13 :
Sc in all 42 st (42)
Round 14 :
(Sc in each of next 5 st, dec) x 6 (36)
Round 15 :
Sc in all 36 st (36)
Info :
Change to Colour 02 (Off White).
Round 16 :
(Sc in each of next 10 st, dec) x 3 (33)
Info :
Change to Colour 42 (Green).
Round 17 :
Sc in all 33 st (33)
Info :
Optional: For Rnd 18, work every 5th stitch (starting from 3rd st of round - 3rd, 8th, 13th, etc.) in Colour 02 (Off White).
Round 18 :
Sc in each of next 3 st, dec, (sc in each of next 9 st, dec) x 2, sc in each of next 6 st (30)
Round 19 :
Sc in all 30 st (30)
Info :
Change to Colour 02 (Off White).
Round 20 :
Sc in each of next 5 st, dec, (sc in each of next 8 st, dec) x 2, sc in each of next 3 st (27)
Info :
Change to Colour 42 (Green).
Round 21 :
Sc in each of next 5 st, dec, (sc in each of next 7 st, dec) x 2, sc in each of next 2 st (24)
Round 22 :
(Sc in each of next 2 st, dec) x 6 (18)
Info :
Sl st, fasten off. Leave long tail for sewing.
— Arms (Make 2) :
Info :
Start in Colour 18 (Taupe). Stuff hand firmly, less further up.
Round 1 :
Start 6 sc in a magic ring (6)
Round 2 :
(Sc in next st, inc in next st) x 3 (9)
Round 3-4 :
Sc in all 9 st (9)
Round 5 :
(Sc in next st, dec) x 2, sc in each of next 3 st (7)
Info :
Change to Colour 42 (Green).
Round 6-11 :
Sc in all 7 st (7)
Round 12 :
Sc in each of next 3 st (3). Leave remaining stitches unworked.
Info :
Flatten top opening, sc in next 3 st through both layers. Fasten off with long tail.
— Legs (Make 2) :
Info :
Start in Colour 08 (Pink). Stuff firmly (Rnd 1-9), less further up.
Round 1 :
Start 6 sc in a magic ring (6)
Round 2 :
Inc in all 6 st (12)
Round 3 :
(Sc in next st, inc in next st) x 6 (18)
Info :
Change to Colour 18 (Taupe).
Round 4 :
(Sc in each of next 2 st, inc in next st) x 6 (24)
Round 5-6 :
Sc in all 24 st (24)
Round 7 :
Sc in each of next 3 st, (dec, sc in next st) x 5, dec, sc in each of next 4 st (18)
Round 8 :
Sc in each of next 3 st, dec x 6, sc in each of next 3 st (12)
Round 9 :
(Sc in each of next 2 st, dec) x 3 (9)
Round 10-14 :
Sc in all 9 st (9)
Round 15 (Left Leg) :
Sc in each of next 2 st (2). Leave remaining st unworked.
Round 15 (Right Leg) :
Sc in each of next 7 st (7). Leave remaining st unworked.
Info :
Flatten top opening, sc in next 4 st through both layers. Fasten off with long tail.
— Inner Ears (Make 2) :
Info :
In Colour 08 (Pink).
Round 1 :
Start 6 sc in a magic ring (6)
Round 2 :
Inc in all 6 st (12)
Round 3 :
(Sc in next st, inc in next st) x 6 (18)
Round 4 :
(Sc in each of next 2 st, inc in next st) x 6 (24)
Round 5 :
(Sc in each of next 3 st, inc in next st) x 6 (30)
Info :
Sl st in next st. Fasten off and weave in tails.
— Outer Ears (Make 2) :
Info :
In Colour 18 (Taupe).
Round 1 :
Start 6 sc in a magic ring (6)
Round 2 :
Inc in all 6 st (12)
Round 3 :
(Sc in next st, inc in next st) x 6 (18)
Round 4 :
(Sc in each of next 2 st, inc in next st) x 6 (24)
Round 5 :
(Sc in each of next 3 st, inc in next st) x 6 (30)
Info :
Do not fasten off. Place back of Inner and Outer ears together.
Round 6 :
Ch 1, sc in each of next 30 st through both inner and outer ear layers.
Info :
Fold joined ears in half, working through both layers: sc in each of next 2 st, sl st in next st. Fasten off with long tail.
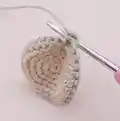
— Hat :
Info :
Start in Colour 42 (Green). Start with long yarn tail.
Round 1 :
Start 4 sc in a magic ring (4)
Round 2 :
(Sc in next st, inc in next st) x 2 (6)
Round 3 :
Sc in all 6 st (6)
Round 4 :
(Hdc in next st, hdc-inc in next st) x 3 (9)
Round 5 :
Hdc in all 9 st (9)
Round 6 :
(Hdc in each of next 2 st, hdc-inc in next st) x 3 (12)
Round 7 :
Hdc in all 12 st (12)
Info :
Change to Colour 02 (Off White).
Round 8 :
(Hdc in each of next 3 st, hdc-inc in next st) x 3 (15)
Round 9 :
Hdc in all 15 st (15)
Round 10 :
(Hdc in each of next 4 st, hdc-inc in next st) x 3 (18)
Round 11 :
Hdc in all 18 st (18)
Info :
Change to Colour 42 (Green).
Round 12 :
(Hdc in each of next 5 st, hdc-inc in next st) x 3 (21)
Round 13 :
Hdc in all 21 st (21)
Round 14 :
(Hdc in each of next 6 st, hdc-inc in next st) x 3 (24)
Round 15 :
Hdc in all 24 st (24)
Info :
Change to Colour 02 (Off White).
Round 16 :
(Hdc in each of next 3 st, hdc-inc in next st) x 6 (30)
Round 17 :
Hdc in all 30 st (30)
Round 18 :
(Hdc in each of next 4 st, hdc-inc in next st) x 6 (36)
Round 19 :
Hdc in all 36 st (36)
Info :
Change to Colour 42 (Green).
Round 20 :
(Hdc in each of next 5 st, hdc-inc in next st) x 6 (42)
Round 21 :
(Hdc in each of next 6 st, hdc-inc in next st) x 6 (48)
Round 22 :
Hdc in all 48 st (48)
Round 23 :
Sc in all 48 st (48)
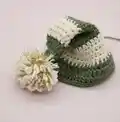
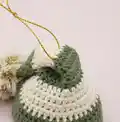
Info :
Sl st and fasten off with long tail. Pull start yarn tail out between Rnd 5 and 6.
Info :
Sew tip of hat down using start tail to between Rnd 20 and 21. Make and attach 35mm pom pom.
— Tail :
Info :
In Colour 18 (Taupe).
Round 1 :
Start 6 sc in a magic ring (6)
Round 2 :
Sc in each of next 5 st, inc in next st (7)
Round 3-17 :
Sc in all 7 st (7)
Info :
Do not stuff. Flatten opening, sc in next 3 st through both layers. Fasten off with long tail.
This darling Noel Mouse pattern brings the magic of a handmade Christmas right to your fingertips! With his striped hat and sweet face, he is sure to become a treasured part of your holiday traditions. Whether hanging on the tree or sitting on the mantel, he brings joy to all who see him. 🐭🎄✨