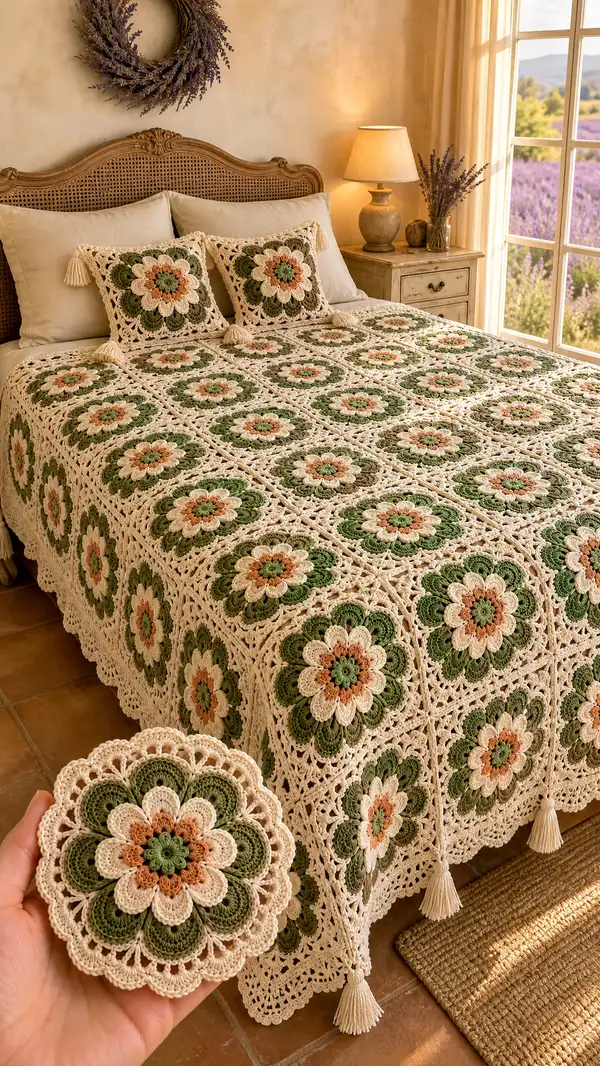
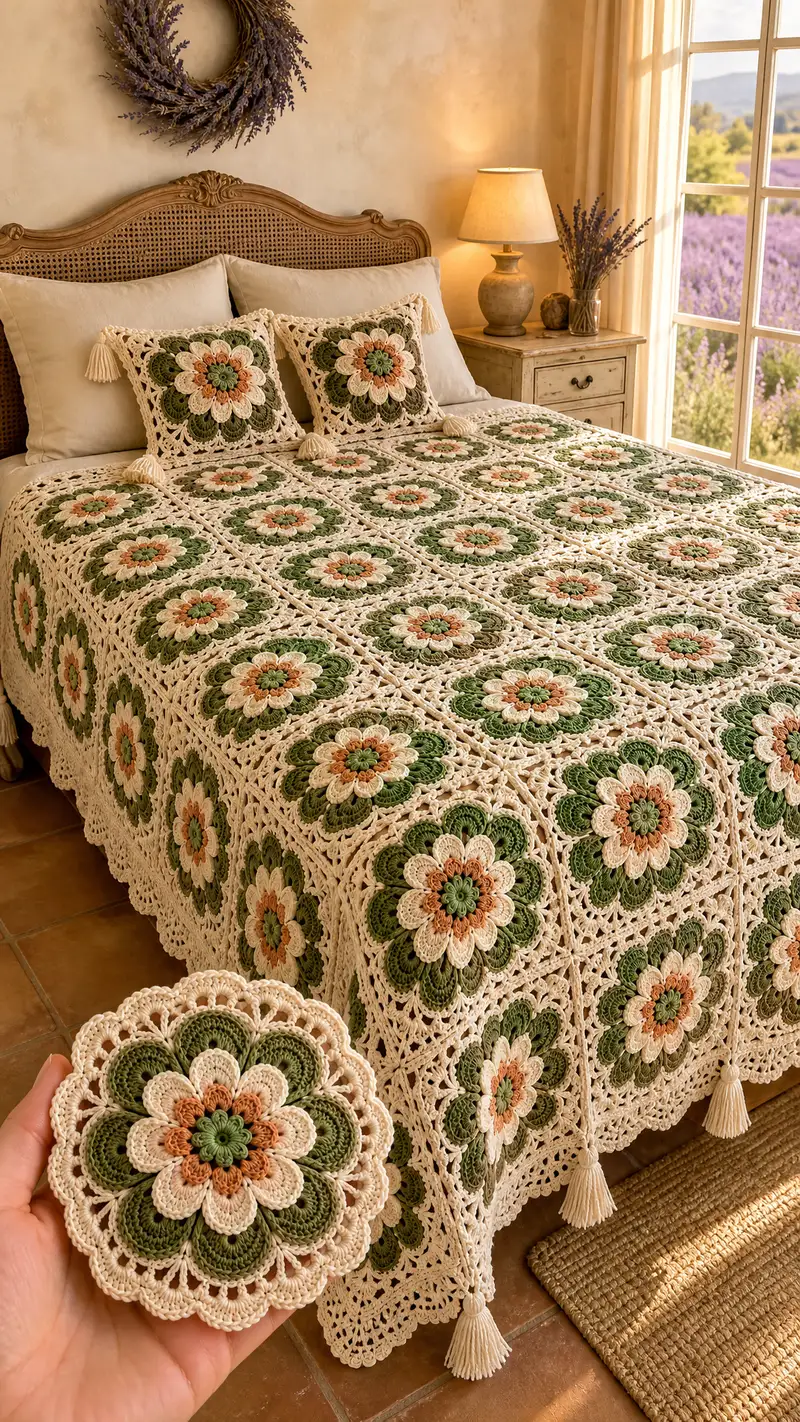
A vintage-inspired floral granny square bedspread worked in soft cream, olive and warm rust tones. This pattern uses layered puff and cluster petals to create raised 3D flowers set into lacy joining rounds and a scalloped border. Includes full square instructions, join method, decorative border, pillow cover directions and tassel finishing for a complete bedspread set. Perfect for an heirloom bed cover with a romantic cottage look.
Progress Tracker
0% Complete
— Materials & Gauge :
Info :
Use worsted weight (#4) cotton or cotton blend for a full drape and vintage look. Gauge is not critical for motif, but a 12 cm (4.75") motif size measured after blocking using specified yarn and a 4.0 mm hook will make a queen-size cover similar to photo when 5x6 squares are assembled. Always make a sample square and block before committing to full spread.
Info :
Terminology: 'petal' rounds use puff and cluster stitches to create raised layers. Puff: yarn over, insert hook, yarn over, pull up loop — repeat 3 times (4 loops on hook) then yarn over and draw through all loops, ch1 to close puff unless otherwise specified. Cluster: worked into same st as a multi-dc join — follow these instructions in rounds where cluster is named.
— Motif (Olive Blossom Granny Square) — Make 30–35 squares for queen (5x6 layout shown). Each square measures approx 12–13cm after blocking with 4.0 mm hook.
Round 1 :
With C1 (Sage) make a magic ring. Ch1, 6 sc in ring. Pull tight. (6)
Round 3 :
(1 sc, 1 inc) x 6 (18)
Round 4 :
(2 sc, 1 inc) x 6 (24)
Info :
Change to C2 (Rust) using finishing pull through technique so color change is neat. Keep tails to weave in later. These early rounds build a solid center for petal work.
Round 5 :
Change to C2. *Ch2, puff into next st, ch1, sc into next st* repeat around to create 12 small petal bumps. Work last sc into first stitch, sl st to join to first sc. (12 puff clusters + 12 sc positions — you will have 12 visible cluster petals)
Round 6 :
Switch to C3 (Cream). Ch2 (counts as hdc), hdc in same stitch, *hdc in next st, (hdc, ch1, hdc) in top of each puff cluster made in previous round* — work around to form small loop stitches behind clusters. Join with sl st. This round creates a base for the first cream petal layer. (24 hdc segments grouped into 12 sets)
Round 7 :
Change to C3. For each previous (hdc,ch1,hdc) space: work *(ch3, 3-tr cluster into same space, ch3, sl st into top of next small hdc) * to create 12 small rounded petals. Join with sl st. Count: 12 petal groups spaced evenly.
Info :
Keep tension relaxed for puff/cluster rounds so petals sit lofted. If puff is too tight, increase hook by 0.25–0.5mm for that round and return to main hook after finishing petal rounds.
Round 8 :
Change to C4 (Olive). Ch3 (counts as dc), 2 dc in same space (first petal base), *skip to next cream petal base, (3 dc, ch2, 3 dc) in space between petals forming a double petal shell* — continue to make 12 larger outer petal shells. Join with sl st. (12 shell groups — shell each contains 6 dc total when counted as sets)
Round 9 :
With C4, ch1, sc in each dc around to tidy the shells and create a stable round for next layer, working 2 sc in each ch2 space to keep count balanced. Result will be 48 sc around. (48)
Round 10 :
With C4, BLO: 1 sc in each st BLO (48). This creates a ridge behind petals and helps lift the next layer. Join with sl st.
Info :
Work BLO round to emphasize the outer petal depth — this helps the cream joining rounds sit neatly around the flower without flattening petals.
Round 11 :
Change to C3. Ch3 (counts as dc), *skip next st, puff into next st, ch1, sl st into base between shells* — create 24 puffed scallops around the outer shells floating in the BLO ridge. Join with sl st. (24 puff scallops)
Round 12 :
With C3, ch3, 2 dc into each puff scallop space, ch2 between groups to open out the lace. This will produce 24 small dc groups with ch2 spaces, preparing for square shaping. Join with sl st. (24 dc groups)
Round 13 :
With C3, *ch5, sl st in next dc group top to create loop arches* — repeat around to form 12 arches between petals. Join. (12 arches)
Info :
At this point you have the flower center and outer petal islands. Check that petals sit evenly; adjust with a light steam or block before continuing square shaping rounds.
Round 14 :
Change to C5 (Cream/Natural for join). Work into arches: *(sl st, ch3, 3 dc, ch3, sl st) into each arch to create a rounded square compression — these will be the cardinal points for shaping the motif into a square. (12 rounded groups)
Round 15 :
With C5, ch1, sc across the top of each arch group to connect them, placing *(sc, ch3, sc) into center of every other arch* to begin corner loops. You should end with 24 sc positions and 6 ch3 spaces around. (24)
Round 16 :
With C5, work in spaces between arch groups: *(3 dc, ch2, 3 dc) in each ch3 corner space to build prominent corner shells* and *(1 dc, ch1, 1 dc) in each mid-arch ch3* to start the square outline. Join with sl st. (6 corner shells + mid shells to total approx 30 shell groupings)
Round 17 :
With C5, ch1, sc across shells and dc groups to smooth edges and create consistent stitch height for next lacy square rounds. Work (sc, ch5, sc) in corner shell center to create corner ch5 spaces. In between, sc in dc tops. This gives you 4 corner ch5 spaces and approx 28 sc along edges. (approx 28 sc + 4 corner ch5)
Info :
These rounds convert the round floral motif into an even square lattice. Count your corner ch-spaces carefully: you should have 4 clear corner ch5 loops for the later join rounds.
Round 18 :
With C5, in each side between corners work: *[ch3, 2 dc, ch2, 2 dc, ch3] into the side spaces* to expand sides into a defined square. In corner ch5 work (2 dc, ch3, 2 dc). This expands edge count and creates 4 defined corner arches. Join. (Each side now has repeat pattern of shell groups; stitches per side approx 20-24 depending on tension.)
Round 19 :
With C5, ch1, sc in each st and in each ch-space along sides; in corner ch3 spaces work (sc, ch7, sc) to enlarge corner loops to ch7. This provides ample space for corner join rounds. Join. (sc count approx 96 total)
Round 20 :
With C5, *into each side repeat (ch3, skip 2, sc) across the shell groups to create airy mesh, working (sc, ch9, sc) in corners* — this opens up a lacy square grid, which gives the bedspread its openwork embrace. (mesh side repeats approx 12 per side)
Info :
At the end of Round 20 your motif should be square-shaped with a raised central flower. Measure across opposite edges; squares should be uniform. Light blocking now will stabilize shape and size so all squares match when you join.
Round 21 :
With C5, ch1, sc around working 3 sc in each corner ch9 (or ch7 depending on your count) to square off each corner; work sc in each ch-space and top of stitches to tidy edges. Aim for consistent stitch count each side around 24 sc (96 total). (96)
Round 22 :
With C5, FLO: 1 sc in each st FLO around to create a delicate ridge for the joining round. Join with sl st. (96)
Round 23 :
With C5, ch1. Begin decorative border for the square: *(ch3, skip 2 sts, sc in next st)* across each side to form small arches; in corners work a 5-arch shell pattern *(sc, ch5, sc) in corner* to reinforce corner shape. Join. (approx 96 sts preserved in mesh)
Round 24 :
With C5, in each small arch work *(sc, ch3, sc)* and in corner shells work *(sc, ch7, sc)* to slightly enlarge corner motifs and create uniform corner spaces for joining. Join with sl st. (square edges maintain ~96 stitches)
Info :
If you prefer join-as-you-go (JAYG) you can stop here and join squares into rows following the JAYG joining rounds. If sewing later, fasten off leaving a 25–30 cm tail for sewing. Block before joining.
Round 25 :
Optional edging for single square (if making pillows): With C5 ch1, make picot edging: *(sc in next 2 sts, ch3, sl st into first ch to form picot, sc in next 2 sts)* repeat for the perimeter for a delicate framed edge. Fasten off. (Picot adds approx 1–1.5 cm border.)
Info :
One finished motif should measure approx 12–13 cm after blocking and picot edging. Keep samples consistent and note your stitch counts per side so every square matches.
— Join-as-You-Go (JAYG) Method — Join squares into rows and then join rows to form full bedspread
Info :
This JAYG method connects motifs at Round 24/25 stage in C5. Work the final border rounds while joining to previously made squares so seams are seamless. You may also join later using whip stitch or mattress stitch — instructions for sewn join provided in Assembly section.
Join Round 1 :
Position two squares right sides up with one new square to be joined. With C5 and RS facing, attach yarn into a corner sc on new square, ch1, sc into same st, then sc across edge until reaching corner ch-space. At corner, align corner with adjacent already-made square and sl st into corresponding corner ch-space on adjoining square, ch1, then continue sc along edge of new square working sl st into adjacent square at each corner or join point (approximately every ch3-5 space) to secure. Continue across the side performing sl st joins at matching ch-spaces. Fasten off at corner. This joins one side. Repeat to join opposing side squares as you build each row.
Info :
When joining, maintain flat tension — do not pull tight. Allow a small ease so the seam sits flat and the motif maintains its lacy look. Use markers at corner joins to ensure perfect alignment.
Join Round 2 :
When making the second side join, work across the top edge of the new square similarly, but for interior joins you can alternate sl st and sc joins to create a little decorative ladder seam. Continue joining motifs until you have the full number of motifs in a row.
Join Round 3 :
Join rows to each other by aligning and joining squares at their side seams: attach yarn to corner ch-space of a square in the lower row, ch1, sc and sl st into corresponding top row ch-spaces across. Secure with Fasten off. Repeat across entire spread.
Info :
If you prefer invisible seams, use mattress stitch with tapestry needle: match corresponding edge stitches and sew through the inner loops for a flat, nearly invisible join. This takes longer, but yields a neat finish for heirloom pieces.
— Wide Outer Border (worked after all motifs are joined) — approx 20–26 rounds for the layered scalloped border
Border Round 1 :
With assembled bedspread RS up and C5, join yarn at any corner. Ch1, SC evenly around the entire perimeter working 3 sc in each corner to maintain square shape. Pause at corners to count stitches. (Total stitch count depends on assembled spread size — count per side and note for subsequent rounds.)
Border Round 2 :
With C5, ch3 (counts dc), dc in same st, *ch2, skip 1, dc in next st* repeat across sides; in corners work (2 dc, ch3, 2 dc). This begins a lacy border base. Maintain even tension. Join with sl st.
Border Round 3 :
With C5, *ch3, (3 dc, ch2, 3 dc) into every ch2 corner space and into side ch-spaces to create scalloped shells between motifs*. On edges, place shells in the center between motifs so shells sit between flower centres. Join with sl st.
Info :
Work spacing so scallops fall centered between motif centers. If your assembled size differs, adjust by adding or subtracting ch stitches in the initial lacy rows to center the scallops.
Border Round 4 :
With C5, ch1, sc across all shells and spaces to give an even baseline for additional rows; work (sc, ch5, sc) in large corner shells to keep corner arches open. Join. (Baseline smoothing round)
Border Round 5 :
With C5, Ch1. FLO: 1 sc in each st FLO around to create a rope-like ridge for the scalloped edging. Join. (st count held steady)
Border Round 6 :
With C5, *in each shell work (picot, sc) repeat across shell outer edge: (sc, ch3, sl st in first ch to form picot, sc) across each shell arch.* This adds vintage lace detail. Join.
Border Round 7 :
With C5, ch1, work a wider lacy mesh: *(ch5, sl st into the 3rd ch from previous shell, ch5, sl st)* between scallops to create a light openwork net. Join. (creates airy separation between scallops)
Info :
From rounds 8–18 repeat combinations of dc shells and ch-space mesh to build a wide border. Aim for a total border depth of approx 12–14 cm. Alternate sturdier rounds (dc shells) with airy rounds (ch mesh) to keep weight balanced while maintaining drape.
Border Round 8 :
With C5, work (3 dc, ch2, 3 dc) into each shell top and in between create (ch7, sl st) lattice points, continuing around. Join.
Border Round 9 :
With C5, ch1 sc around working 3 sc in corner points. Use this as a tidy baseline to count stitches for the repeating scallop final rounds. Join. (count stitches for consistency)
Border Round 10 :
With C5, final scallop repeat: *[sc, ch7, sc into same point], skip 3 sts, (7-dc shell) into next space* — repeat making large scallops across perimeter. Join.
Border Round 11 :
With C5, work picot trim across top of large scallops: into each scallop top work *(sc, ch3, sl st in first ch) repeat to form small picots*; finish with sl st and fasten off. Block entire bedspread to open lace and align scallops. (This finishes the wide border.)
Info :
For a deep scalloped border like the sample, you will repeat lacy rounds until the border reaches the desired depth. Blocking at the end will help the scallops open and the bedspread drape evenly.
— Pillow Cover (Square) — Make 2 matching pillow covers using the same motif, finished with tassels
Pillow Info :
Make 4 motifs and join to form one larger square for each pillow (2x2 layout). Follow motif rounds 1–24 and join as described in JAYG or sew together later. Add picot edging round (Round 25) and optional tasseled corners. Use an insert slightly larger than finished cover to get a plump pillow.
Pillow Round 1 :
Make 4 motifs and block. Join 2 motifs side by side using JAYG or mattress stitch; join the remaining two to form a 2x2 square. Once joined, work C5 ch1 sc evenly around the outside edge to tidy seam. (Edge sc around all four sides.)
Pillow Round 2 :
With C5, work decorative picot or small scallop edging: *(sc, ch3, sl st into first ch) across RS; at corners work (sc, ch7, sc) for rounded corners. Fasten off and weave in ends. Insert pillow and close with hidden slip stitch seam if making a closure flap.
Info :
Add a zipper or button flap to one side for a removable cover if desired. Sew zipper into inner seam before finishing with picot edge for a professional result.
— Tassels & Finishing Touches — Make 4 tassels for bed corners and optional tassels for pillows
Tassel Round 1 :
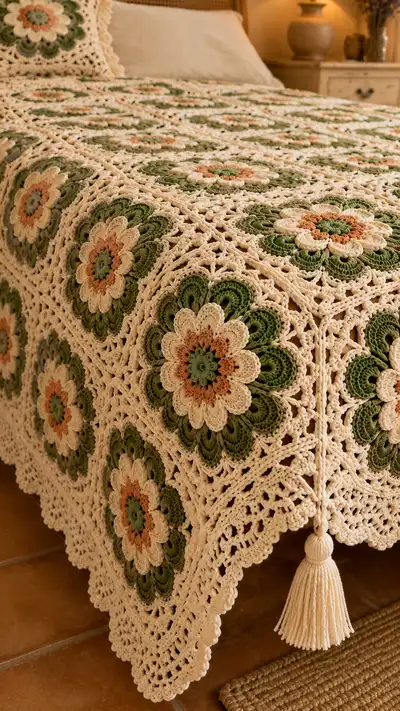
Using C5, wrap yarn around a 6 cm wide card or tassel maker approximately 30–45 times depending on desired tassel thickness. Tie top securely with a small piece of yarn, fold, and tie additional piece to form the tassel neck. Trim bottom even. Attach tassel to corners with a secure sewing knot using the top tail, weave end into border for stability.
Info :
For heavier drape use extra wraps (45–60) and a stronger cord inside the tassel head. Secure tassel with sewn stitches through the border and knot several times for durability.
— Blocking & Care :
Info :
Block individual squares after finishing motif rounds for best results; pin gently to measured squares and steam lightly or wet-block depending on yarn manufacturer instructions. For cotton, wet-block and pin into shape. After assembly, block the entire spread to open lace and set borders. For care, hand wash or machine wash gentle in cool water and lay flat to dry to avoid distorting delicate lace.
Finishing Round 1 :
Weave in all ends by threading into tapestry needle and running into the back of the stitches at least 5–8 cm. Trim close to work. For extra security, run a line of discreet slip stitches under the joins on RS if seams feel loose.
Finishing Round 2 :
Press or steam lightly after blocking for even finish. Add tassels to each corner by sewing through the top of the tassel core and knotting tails inside the underside of the border. Tie off and weave tails in securely.
Info :
Final dimensions: depends on number of squares—5x6 grid of 12–13 cm squares yields approx 60–78 cm x 72–91 cm before border; with border it becomes a generous throw/bedspread similar to photo. Adjust number of squares to fit your bed size.
Pattern Notes :
Many rounds use grouping and shell notation to create petals and lace. If you want a deeper flower effect, add an extra puff petal round in C4 before converting to square. When joining rows, use consistent tension and block squares for even seams.
Completing this Olive Blossom Granny Square Bedspread is such a satisfying, tactile journey — each floral square is a small moment of handmade joy that builds into an heirloom cover. Layered petals, warm olive tones and a lacy cream border make the finished piece cozy and elegant. Add tasseled corners for an extra charming flourish and gift it to someone special or keep it as your favorite bedroom accent. 🧶🌿✨