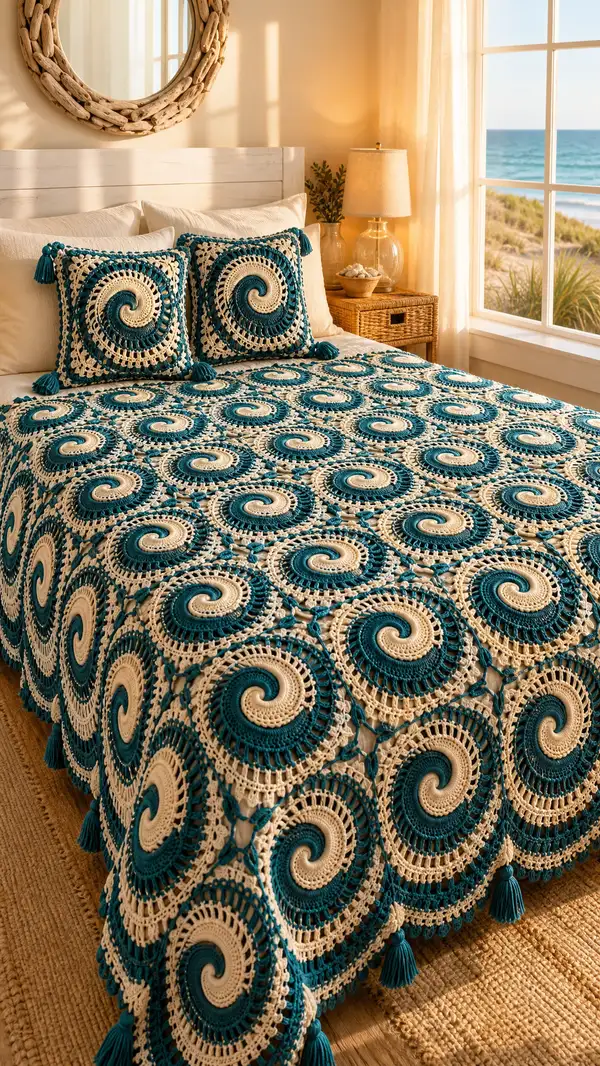
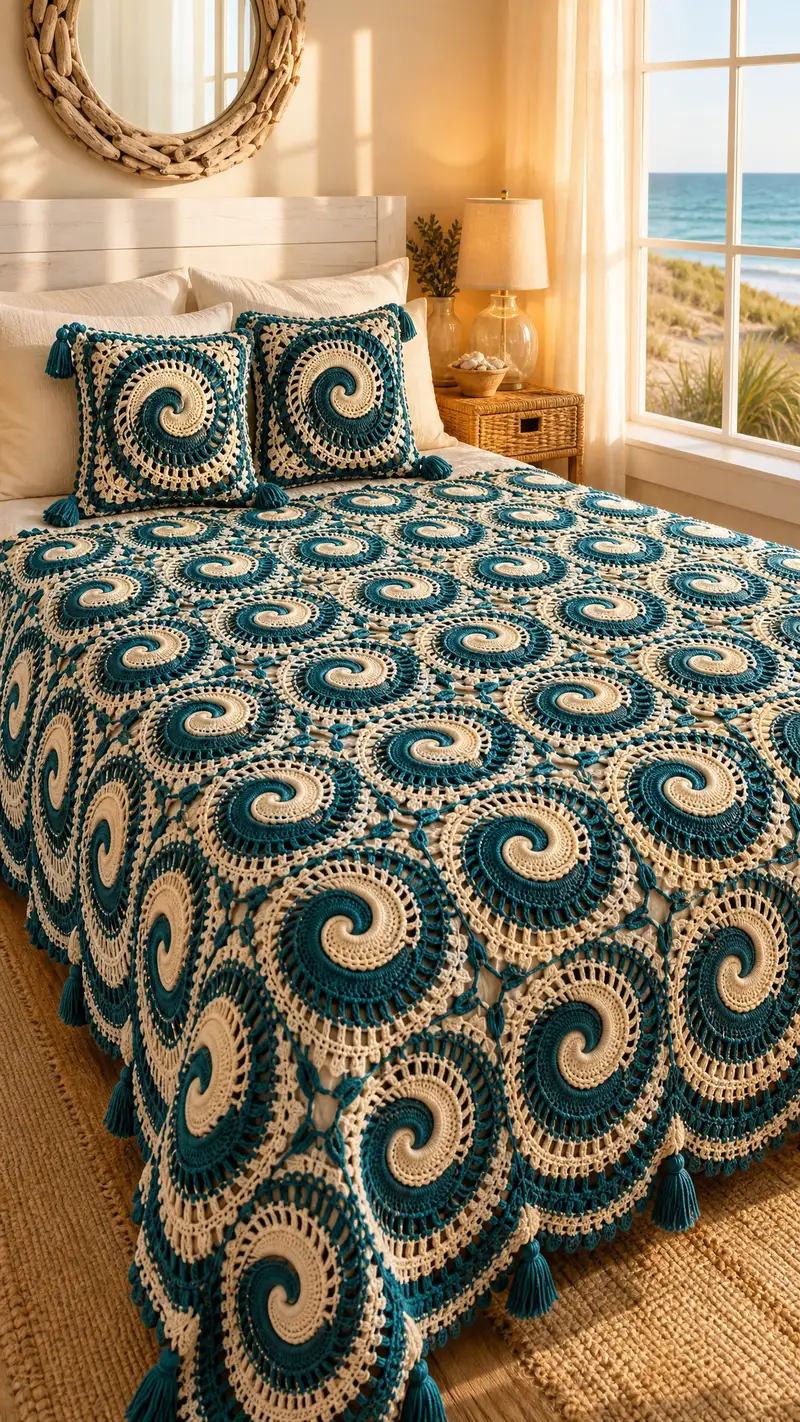
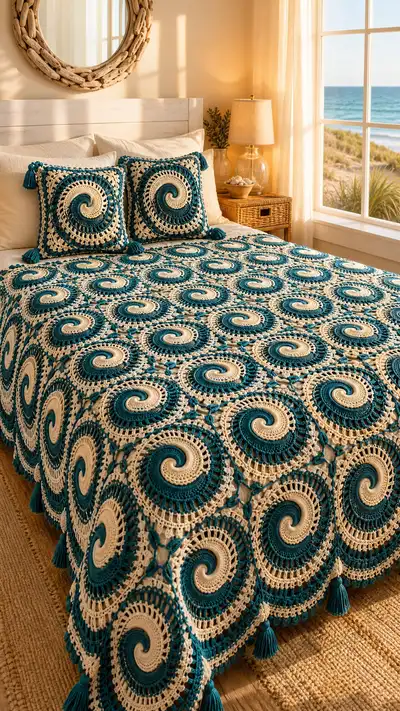
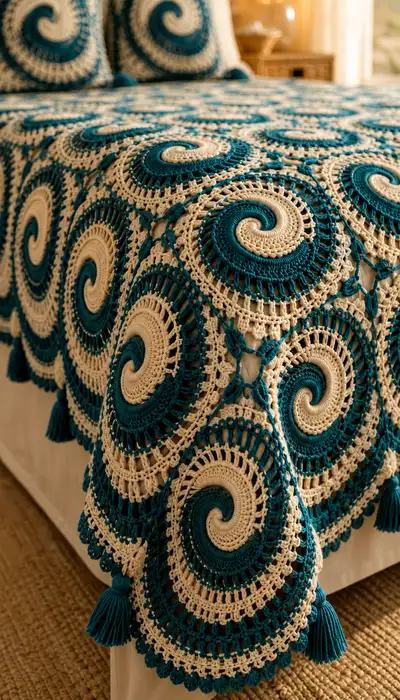
Bring coastal charm to your bedroom with this Teal Spiral Coastal Granny Bedspread. This stunning bedspread is built from spiral-centered round motifs in deep teal and warm cream, linked with lacy join rounds and finished with a scalloped border and tassels. The pattern includes full motif instructions, join-as-you-go options, border shaping, and matching pillow covers so you can recreate the serene, ocean-inspired look pictured.
Progress Tracker
0% Complete
— Overview :
Info :
This bedspread is made from repeating spiral-centered round motifs worked in two colors (Teal and Cream). Each motif is built as a round spiral center that transitions into lacy rounds which square up into a joinable motif. The pattern below provides full round-by-round instructions for one motif, instructions for join-as-you-go and whip-join methods, a decorative scalloped border, tassel finishing, and two matching pillow covers. Gauge and motif counts vary by bed size; instructions include notes for scaling and blocking tips.
Info :
Gauge note: The motif diameter after round 50 (before squaring rounds) should measure approximately 10.5" (26.5 cm) blocked when using worsted weight yarn and 4.5mm hook. Make a test motif and block to confirm your stitch tension before committing to the full spread.
— Spiral Motif (Make multiple) :
Materials :
Use Teal (Color A) and Cream (Color B). Start with Color B for the very center or Color A depending on your desired spiral direction. The instructions below show Color B center switching to Color A for the next round to create alternating spiral bands.
Round 3 :
(1 sc, inc) x6 (18)
Round 4 :
(2 sc, inc) x6 (24)
Info :
Change to Color A (Teal) at end of Round 4 if you want alternating color bands creating the spiral. The spiral effect will be enhanced by changing color every 1-2 rounds—carry unused yarn or fasten off and weave in ends.
Round 5 :
(3 sc, inc) x6 (30)
Round 6 :
(4 sc, inc) x6 (36)
Round 7 :
(5 sc, inc) x6 (42)
Round 8 :
(6 sc, inc) x6 (48)
Info :
For a pronounced raised spiral ridge, use Round 9 and Round 11 in BLO while working Round 10 in FLO, alternating to create subtle ridge height. Continue alternating colors every second or third round to create the two-color spiral visual.
Round 9 :
1 sc in each st BLO (48)
Round 10 :
1 sc in each st FLO (48)
Round 11 :
(7 sc, inc) x6 (54)
Round 12 :
1 sc in each st (54)
Info :
To strengthen the spiral ridge, on the first 10-12 rounds occasionally place a front post double crochet (fpdc) wrapping around the previous round's post every 6-8 stitches to guide a directional curve. This is optional and used if you prefer more sculpted spiral relief.
Round 13 :
(8 sc, inc) x6 (60)
Round 14 :
1 sc in each st (60)
Round 15 :
(9 sc, inc) x6 (66)
Round 16 :
1 sc in each st (66)
Info :
At this stage the motif is becoming wide enough to read as a spiral disk. Alternate color changes every 1-3 rounds depending on the width of the color band you prefer. Carry the unused color along the wrong side or fasten off and weave in tail neatly to avoid bulk.
Round 17 :
(10 sc, inc) x6 (72)
Round 18 :
1 sc in each st (72)
Round 19 :
(11 sc, inc) x6 (78)
Round 20 :
1 sc in each st (78)
Info :
To begin the transition into taller stitches that will add lace and open texture, change to double crochet (dc) on the next round. Use a ch-3 at round starts to count as first dc for evenness in stitch counts.
Round 21 :
Change to dc: ch3 (counts as dc), dc in same st, dc in each st around, join with sl st to top of ch3 (78)
Round 22 :
(5 dc, ch2, sk1) x13 (13 ch-2 spaces, 65 dc) — work pattern: [dc in next 5 sts, ch2, sk1] repeat to end, join with sl st to first dc
Round 23 :
In each ch-2 sp work: (sc, ch3, sc) to create mini-arches: [sc in first ch-2 sp, ch3, sc in same sp] x13. Dc in remaining dc stitches evenly between arch groups (78 total structural elements remain).
Info :
These arched rounds begin forming the open lacy rounds that will square up the motifs. Count your ch-2 spaces and stabilize with a stitch marker at the first arch to maintain placement during later square-up rounds.
Round 24 :
Work between arch groups: ch1, sc in arch top, ch5, sc in next arch top; repeat across to form long connecting chains, creating 13 long loops. Dc in leftover dc zones to balance stitch count.
Round 25 :
At each long ch-5 loop work: (sc, 3 dc, sc) into loop to anchor it and create a tall shell; between shells place 2 sc to stabilize. This yields a repeat: [sc, 3 dc, sc, 2 sc] x13 around. Approx stitch structure remains consistent to allow later corner shaping.
Round 26 :
Now begin squaring the motif: working into sections, ch2, (dc3, ch3, dc3) in every fourth shell to form corner clusters; on non-corner shells work (dc5) clusters to create straighter edges. You will form four larger cluster/corner positions spaced approximately every 13 repeats.
Info :
Divide the motif mentally into four quadrants using markers placed at cardinal points during Round 25; when you create corner cluster groups, ensure spacing is even — 13 repeat groups per full rotation means roughly 3-4 cluster groups per quadrant depending on counts; adjust counts by moving 1 sc between groups to keep corners square.
Round 27 :
Work a decorative picot-like round: into each dc surface stitch work (dc, ch2, sl st) to create small raised joins. For corner clusters work (dc3, ch3, dc3, ch2, sl st) to emphasize corners. This gives the motif a squared footprint with decorative lacy edges.
Round 28 :
Work 1 sc between each decorative picot. Into corner ch-3 spaces work (3 dc, ch3, 3 dc) to define a corner square; into side spaces work (dc5) for even edges. The motif now reads as a circle with an apparent squaring that helps motifs join neatly.
Round 29 :
Begin outer openwork row: *(ch4, sl st in next sp) repeat across side loops to create an airy mesh edging; at corners (ch6, sl st) to enlarge corner loops*. Repeat across entire motif, join to first sl st.
Info :
If you like a tighter motif, reduce ch4 mesh to ch3 and ch6 corner loops to ch5. Keep counts consistent across all motifs for even joining.
Round 30 :
In each ch4 mesh loop work (sc, hdc, dc, hdc, sc) to make elongated loops; in corner ch6 loops work (sc, 2 hdc, 3 dc, 2 hdc, sc) to maintain corner bulk. Finish round and weave in all tails or carry yarn neatly for the join-as-you-go method.
Round 31 :
Optional motif trim round: Switch to Color B (Cream) for a high-contrast outer collar. Work (picot, sc in next 2 sts) around: *sc, ch2, sl st into first ch of ch2 to form small picot; sc in next 2 sts* repeat to end to create a delicate looping edge. This creates the contrast outer ring visible in the photo.
Round 32 :
Work a final decorative shell row in Color B: *(sk 2 sts, 7 dc in next st, sk 2 sts, sl st in next st)* repeat 13-15 times evenly distributed—this creates the scalloped shell edge that will sit within the join lattice.
Round 33 :
Even working round: sc evenly in all available tops to create a tidy joinable edge (typical count will be between 96-120 stitches depending on earlier adjustments). This round is the final even perimeter you will use for join-as-you-go or whip join attachment.
Info :
Block and pin the motif to measured size, easing and stretching the corners gently to square. Allow to dry fully before joining motifs; consistent blockade is critical for a flat bedspread surface.
Round 34 :
Optional decorative outer scallop in Color A: *(ch3, sl st in third ch to form small loop) repeat along edge every 3rd stitch to create a beaded loop row which acts as a base for tassel attachment points later on.*
Round 35 :
Final finishing round: weave in any tails; if you used carried yarn, secure at intervals with mattress stitch to minimize show-through. Each motif is now ready to join.
Info :
Motif counts and rounds above produce a circular-squared motif with a final perimeter of roughly 96-120 workable loop spaces depending on exact increase pattern. If your motif perimeter differs, keep consistent across all motifs and adjust join spacing accordingly.
— Joining Motifs (Join-as-you-go and Alternate Methods) :
Info :
There are two recommended joining methods: Join-as-you-go (JAYG) or Block-and-Whip Join. JAYG yields a seamless look and is recommended for advanced pick-up. Whip join requires you to make all motifs first, block, then join with a yarn needle. The instructions below show JAYG steps; alternate notes for whip joining are provided.
Join Round 1 :
Start with base motif A fully completed and blocked. When working Round 33 on motif B, at every point where motif B's perimeter matches motif A's perimeter loop, do: sc in motif B loop, sl st into corresponding loop on motif A, continue. This creates small connecting bars. Continue around until you have joined motif B to motif A along a single side or corner as needed.
Info :
When joining at corners, connect two or three loops across both motifs to form a reinforced corner join. Use slip stitch ties rather than single crochet if you want flatter joins; slip stitches pull less and lay flatter.
Join Round 2 :
For full matrix joins (4-way grid), join each new motif to all adjacent motifs encountered during Round 33: when you reach a loop that touches two existing motifs, do: sc in motif B loop, sl st into motif A loop, ch1, sl st into motif C loop, sc in motif B loop. This will form a small X-join resembling the lattice in the photo.
Info :
Keep tension of connecting stitches relaxed; tight joining will pucker edges and tightens the bedspread. Use blocking pins between joined motifs if needed to preserve spacing and flatness during assembly.
Join Round 3 :
After joining the first row of motifs, join subsequent rows by aligning blocked motifs on a flat surface and using the same method. Work consistently at the same point of the perimeter (for example, always join at the picot location created in Round 31), so pattern placement remains uniform.
Alternate (Whip Join) :
Block all motifs. Place them right sides together as you prefer then whip stitch through corresponding sured loops with yarn needle and Color B. Use uniform stitch length and block again once joined for a smooth finish.
Info :
Whip joining allows easier correction and is more forgiving for beginners; the JAYG method is faster and gives a seamless look similar to the photos.
— Border Rounds (Edge Finishing) :
Border Round 1 :
Once all motifs are joined into the desired bedspread size and fully blocked, work a clean even sc round around the entire perimeter using Color B (Cream). Work 1 sc in each available join stitch; at corners work (sc, ch3, sc) to create corner loop anchors. This creates a tidy base for the scalloped edge.
Info :
Check that the bedspread perimeter is even—correct small puckers by adjusting sc counts before proceeding to scallop rounds.
Border Round 2 :
Work a tall lacy row: *ch4, sk2, sl st in next sc* across sides, and at corners work *ch7, sl st* to make large corner loops for dramatic tassels. This creates an airy border transition similar to the photographed bedspread.
Border Round 3 :
Into each ch4 loop work (sc, hdc, 3 dc, hdc, sc) to build a tall fan; into corner loops work (sc, 2 hdc, 5 dc, 2 hdc, sc). Join and continue evenly around.
Border Round 4 :
Work a smaller scallop row in Color A: *(sk 2 sts, 7 dc in next st, sk 2 sts, sl st in next st) repeat along the straight edges. At corners maintain 7-9 dc shells to keep corners rounded and full.
Border Round 5 :
Final picot trim in Color B: *(sc in next 2 sts, ch2, sl st in ch2 to form picot) repeat across entire edge to produce the beaded loop edge. Make small adjustments to ensure scallops are evenly spaced.
Border Round 6 :
Optional beaded bead row: Using a small contrasting yarn, weave a simple surface slip-stitch braid in one-repeat increments across each scallop peak for extra texture. This is optional but lends extra detail like the photo's layered texture.
Info :
Block the entire bedspread after the border is complete and let it set flat for at least 24 hours. The bedspread will relax and edges will fall naturally into their final shape during blocking.
— Tassels (Make as many as corner points require) :
Tassel 1 :
Wrap yarn (Color A or B) around a 3" wide cardboard template 60 times for a full tassel. Tie a small length of yarn around the top of the loops to secure, fold in half, and tie another yarn piece about 1/2" from the fold to form the tassel head. Cut loops at the bottom and trim evenly. Create 6-10 tassels for the full bedspread corners and perimeter if desired.
Info :
Use a small comb to flare tassel ends if you prefer a fuller finish; for a cleaner, neater look trim with sharp scissors and steam-block lightly.
Tassel Attachment :
Attach tassels at the corners created in the Border Round 2 (ch7 loops) by sewing the tassel head through the loop and knotting securely on the reverse side. Weave tails into the adjacent edging stitches to hide ends.
— Pillow Cover (Make 2 matching) :
Info :
Two motif-front pillow covers are created by making 4 motifs arranged 2x2 for a square pillow front. The pillow back can be a single solid panel or a second 2x2 motif set. The instructions below create motif fronts and a solid back closure with envelope overlap.
Motif for Pillow Round 1 :
Follow Spiral Motif rounds 1-35 exactly to create four matching motifs. Block them and join as described in the Joining section to create a 2x2 square approximately 20-22" across depending on gauge.
Pillow Joining Round :
Join two motifs at their internal seam with slip stitch joining along the same Round 33 points to create a flat square front. Join the other two motifs and then join the two halves together. Add one final sc round around the entire pillow front to tidy the edge and create the envelope fold base.
Pillow Back :
Using Color B, make a rectangular panel to match finished pillow size plus 1" seam allowance. Work in dc rows until the panel measures the pillow height. Create two back panels that overlap by 4" forming an envelope closure and sc around the edges to join to the motif front.
Info :
For a neat finish, sew the panel edges to the motif front from the wrong side using a mattress stitch in contrast Color B. Insert 18-20" square pillow form and close overlap.
— Assembly & Finishing :
Assembly Step 1 :
Lay the joined motif bedspread on a large flat surface and align perimeter edges. Pin across seams and corners to ensure even drape and symmetry. Block again if needed to correct any minor mismatches.
Assembly Step 2 :
Work the Border Rounds around the entire spread as described, using Color B for the base and Color A for select scallops to achieve the two-tone look shown in the photos. Attach tassels to corners and at evenly spaced points if desired.
Assembly Step 3 :
Weave in all ends with yarn needle, making small tidy knots at color change tails and burying tails through 3-4 stitches for security. Trim threads close to the fabric and steam-block lightly for a polished finished surface.
Info :
Consider creating a thin cotton or muslin backing if you want a less open weave for warmth. Sew the backing to the reverse of the border round using a ladder stitch so stitching won't show on the front.
Assembly Step 4 :
Final quality check: inspect join points for any gaps, reinforce with small sc or slip stitch ties if necessary. Steam or wet-block any uneven areas and let dry under weight for 24 hours.
Info :
Storage: Fold gently and avoid heavy stacking. For long-term storage, roll in breathable fabric and keep out of direct sunlight to prevent color fading.
Closing Notes :
This pattern intentionally builds many texture rounds and join rounds to mirror the photographed finish. Adjust motif counts and blocking tension for different bed sizes; see FAQ for yield estimates and advice on scaling up to queen/king sizes.
Completing this Teal Spiral Coastal Granny Bedspread is a rewarding slow-craft journey—each spiral motif stitches into the next like waves meeting the shore. The two-tone teal and cream palette brings a serene, beachy calm to any bedroom, while the lacy joins and tassel accents add handcrafted charm. Whether you make this as a special gift or a statement piece for your own bed, you'll enjoy the rhythm of repeated motifs and the satisfaction of a beautifully blocked finish. 🧶🌊 Please share a photo when you're done—I'd love to see how your spirals turned out! ✨