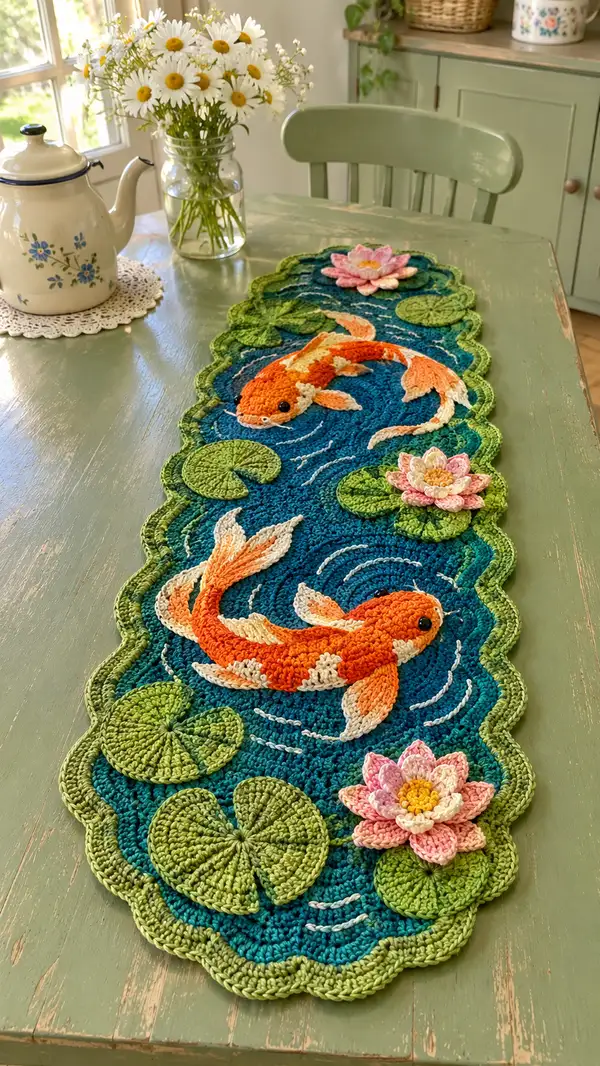
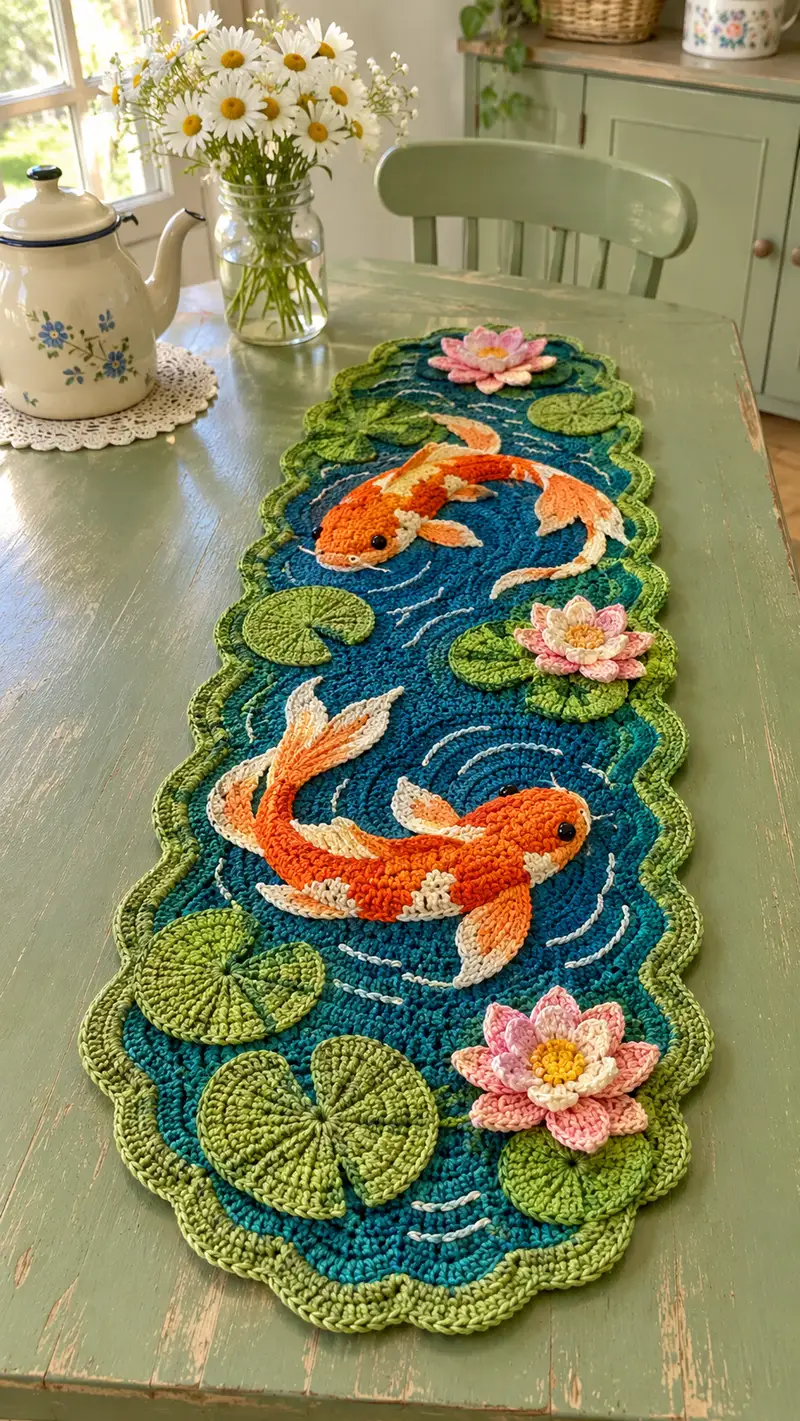
Create a stunning pond-themed table runner featuring two orange koi, layered water-lily blooms, and raised lily pads. This richly textured piece uses applique9 construction and surface embroidery to mimic ripples on deep teal water. The scalloped green border frames the scene beautifully, giving a handcrafted centerpiece that sits perfectly on a dining table or console.
Progress Tracker
0% Complete
— Materials & Preparation :
Info :
Work this runner using cotton or cotton-blend yarn for a crisp, durable finish. I recommend using one hook size for most pieces (3.5mm) and a slightly smaller 3.0mm for small motif detail if you need tighter fabric. Keep stitch markers and pins handy. Block each motif lightly before final assembly for best results.
— Base Panel (Pond) :
Info :
We build an elongated oval pond from a foundation chain of 48. Each round works evenly around the oval; counts remain consistent so you can place applique9s precisely. Use deep teal as the main pond color for all base rounds unless otherwise noted.
Round 1 :
ch 48, sc in 2nd ch from hook and in each ch across to last ch, 3 sc in last ch; now work along opposite side of foundation chain: sc in each ch across (47 sc), 3 sc in first ch to close; join with sl st to first sc. (100)
Round 2 :
Ch 1, sc in same st, 1 sc in each st around (100); join with sl st. (100)
Round 3-6 :
Ch 1, sc in each st around (100); join. (100)
Info :
Keep these first rounds fairly flat; if the fabric wants to ruffle, go down a hook size or work a round of BLO to encourage a flatter surface. Place removable stitch markers at quarter points of the oval to help mark where koi and pads will sit (approx at rounds 3-6 you can use temporary pins to map positions).
Round 7-12 :
Ch 1, sc in each st around (100); join each round. (100)
Info :
At this height the pond surface is deep enough to accept layered applique9s. Use pins to position your first koi motif approximately two-thirds down the oval (closer to one end), and the second koi toward the other end for a natural swim composition. Mark these spots with stitch markers that sit on top of the round.
Round 13-18 :
Ch 1, sc in each st around (100); join. (100)
Info :
If you want subtle color gradation in the water (darker center, lighter edges), now is the time to switch to a slightly different teal for 1-2 rounds. Change color at the end of a round using the final yarn-over to bring the new color through. Carry the unused yarn along the wrong side or weave in as you go.
Round 19-24 :
Ch 1, sc in each st around (100); join. (100)
Info :
These rounds form the main field of the pond. You will sew applique9 koi, pads, and flowers onto these rounds. Keep the surface fairly flat; if you have any ripple in the base it should be gentle so the applique9s sit smoothly.
Round 25 :
Ch 1, sc in each st BLO around to create a subtle ridge (100); join. (100)
Round 26 :
Ch 1, sc in each st BLO around (100); join. (100)
Info :
BLO rounds create a faint inner lip to help edges appear sunk a little like a pond bank. This is purely decorative but helps the applique9s feel attached.
Round 27 :
Change to variegated green (border color) or chosen green tone for edge shaping. Ch 1, sc in each st around in green (100); join. (100)
Round 28 :
Ch 2 (counts as hdc), hdc in each st around to begin smoothing the transition to the scalloped edge (100); join. (100)
Info :
Keep this round in hdc to provide a stable platform for shell scallops. If you're using a variegated green, let the color changes fall naturally; they will add a lovely organic look to the edge.
Round 29 :
Start scalloped border: *sk 3 sts, (5 dc) in next st, sk 3 sts, sl st in next st; rep from * around, aiming for 25 scallops (counts vary slightly depending on spacing—if needed adjust by skipping fewer or more sts to achieve an even number of shells). Join with sl st. (approx 25 shells)
Round 30 :
Switch to bright green for outer edge highlight. Ch 1, sc in each st and sl st across shell tops to tidy shell edges; join. (same number of shell tops as previous round)
Info :
Block the base lightly to set the oval shape and scalloped edge. Pin scallops evenly into shape and spray with water or use a damp cloth. Let dry thoroughly before attaching applique9s.
— Koi Fish Applique9 (Make 2: Koi A & Koi B) :
Info :
Each koi is built as a raised applique9 using an increasing flat oval for the body, built-up stitches for texture, and separate fins/tail sewn on. Work the main body from a magic ring in orange, adding cream highlights as color changes. Use black beads or embroidered stitches for eyes. We will give rounds for the main body (approx 30 rounds), plus separate fin and tail motifs.
Round 1 :
With orange, mr, 6 sc in ring. (6)
Round 3 :
(1 sc, inc) x 6 (18)
Round 4 :
(2 sc, inc) x 6 (24)
Round 5 :
(3 sc, inc) x 6 (30)
Round 6 :
(4 sc, inc) x 6 (36)
Info :
At this point the fish has a round disc. To shape it into an elongated fish body, we will now perform partial increases on two opposing arcs around the oval body. Think of the oval as head-to-tail. Keep a marker for the head center to ensure symmetry.
Round 7 :
1 sc in next 8 sts, inc in next st, 1 sc in next 10 sts, inc in next st, 1 sc in next 16 sts (count check -> 8+1+10+1+16 = 36 + previous increases accounted = 38? Adjust to equal new total) - to ensure an increase of 6 stitches total, perform pattern: (work 11 sc, inc) x 3? Instead, use precise method: (2 sc, inc, 8 sc, inc) sequences to add 6 stitches bringing count to 42. For clarity use the following exact increase pattern: 1 sc in next 5 sts, inc, 1 sc in next 8 sts, inc, 1 sc in next 5 sts, inc, then sc in remaining sts to total (42). (42)
Round 8 :
(4 sc, inc) x 6 (48)
Round 9 :
1 sc in each st around (48)
Round 10 :
Change to cream for small highlight patches: *Join cream with last yarn-over of previous round. Work 3 sc in cream across 6 spaced stitches to create highlight spots across the body center; then change back to orange and continue sc remainder of round.* (48)
Info :
Carry cream color minimally and weave tails in later. Alternatively, fasten off cream after each patch and rejoin to avoid floats. The goal is irregular white patches similar to koi markings.
Round 11-14 :
1 sc in each st around in orange (48)
Round 15 :
(6 sc, inc) x 6 (54)
Round 16-18 :
1 sc in each st around (54)
Info :
Now we will create textured ridges that mimic scales using alternating front loop ridges: work a round in BLO and one in FLO to pick up texture. You may also use crab stitch around selected areas for extra definition.
Round 19 :
1 sc in each st BLO around (54)
Round 20 :
1 sc in each st FLO around (54)
Round 21 :
Begin gentle decrease toward tail: (7 sc, dec) x 6 (48)
Round 22 :
(6 sc, dec) x 6 (42)
Info :
Stuff lightly under the head area if you want the head to curve slightly. Most of the koi applique9 is flat; only fins and a little padding beneath the head are lightly stuffed to lift them off the pond surface.
Round 23 :
(5 sc, dec) x 6 (36)
Round 24 :
Work 1 sc in next 12 sts, setup for head shaping: dec in next st, 1 sc in next 10 sts, dec in next st, 1 sc in remaining sts (34) - shape the head half by tightening stitches around the front center to make a rounded nose. (34)
Round 25 :
(4 sc, dec) x 6 (30)
Round 26 :
1 sc in each st around (30)
Round 27 :
Switch to cream to crochet a small oval cheek highlight: *Join cream and sc 6 sts across the head center to make an embroidered patch; do not increase overall count; then change back to orange and continue sc* (30)
Round 28 :
Fasten off orange leaving long tail for sewing. With cream, embroider a small crescent on the head for highlight if desired. Leave body flat; do not completely close the magic ring; instead fasten off when shape looks right. (30)
Info :
At this stage the body is a flattened, slightly three-dimensional shape. The tail and fins will be worked separately and sewn to the narrow end. Position the body on the base to determine exact placement before sewing.
— Koi Tail (Make 1 per Koi) :
Round 1 :
With cream (or cream blended with orange tips), mr, 6 sc in ring (6)
Round 3 :
(1 sc, inc) x 6 (18)
Round 4 :
(2 sc, inc) x 6 (24)
Round 5 :
Work in dc and tr shaping to create fan-like tail: ch 2, (2 dc, tr, 2 dc) in first half of oval edge, continue around curvature to create long fin tips; total stitches roughly 24 but vary by shaping
Round 6 :
Fasten off leaving long tail for sewing. Lightly block the tail into the flared shape and add a tiny bit of stuffing to the base if you want slight lift.
Info :
Sew the tail to the body narrow end using the long tail, positioning it so the tail curves naturally. Use small whip stitches and anchor the edges so it sits flush against the pond base at an angle that suggests motion.
— Koi Fins (Make 2 side fins and 1 top fin per fish) :
Round 1 :
With cream, mr, 6 sc in ring (6)
Round 3 :
(1 sc, inc) x 6 (18)
Round 4 :
Work 2 rounds of dc across one arc to create a flared fin: ch 2, dc in next 6 sts, sl st back to base. Fasten off leaving long tail for sewing. (18)
Info :
Shape the fins by pinching the base and sewing a small running stitch to hold the fin curve. Add a bit of fiberfill to the fin base if you want it to lift off the water slightly; keep it minimal to remain flat.
— Koi Eye :
Info :
Sew a 6mm black bead or embroider a small satin-stitched eye on the head roughly two stitches from the head center on either side. If using safety beads, attach before adding any stuffing or sewing the body down to the base.
— Lily Pad (Make 6-8 varied sizes) :
Round 1 :
With bright green, mr, 6 sc in ring (6)
Round 3 :
(1 sc, inc) x 6 (18)
Round 4 :
(2 sc, inc) x 6 (24)
Round 5 :
1 sc in each st around (24)
Round 6 :
Switch to darker green for shading: 1 sc in each st around (24)
Round 7 :
Create split and shaping: work sc to center front of pad, ch 1, fold front to back and join with sl st to make a small leaf notch; continue sc around to complete shaping. (24)
Round 8 :
Edging: *sc, hdc, sc* around outer edge to give a thick rim; fasten off. (24)
Info :
Make lily pads in 2 sizes by changing number of increasing rounds: for larger pads repeat Round 4 pattern once more to reach 30 sts and follow similar edge shaping. Pin each pad onto the base in clusters, slightly overlapping to create a natural spread.
— Water-lily Flower (Make 3 blooms) :
Center Round 1 :
With yellow, mr, 6 sc in ring (6)
Center Round 2 :
6 inc (12)
Center Round 3 :
1 sc in each st around (12)
Petal Round 1 :
Change to light pink. For each petal: *ch 6, sl st in 3rd ch from hook, hdc in next ch, dc in next ch, tr in next ch, sl st into center ring; rep for total of 8 petals.* Fasten off petal round leaving tail for sewing. (8 petals)
Petal Round 2 :
Make second layer of petals slightly smaller: join darker pink at base between first row petals and *ch 5, sl st in 3rd ch from hook, hdc, dc in next ch, sl st in center* repeat 8 times. Fasten off. (8 petals)
Info :
Sew the center and petals together, layering the second tier atop the first with a slight offset so petals are visible between the lower petals. Add a tiny bit of stuffing in center if you want the bloom to cup slightly. Sew the assembled flower onto a lily pad or directly to the pond base.
— Surface Ripples (Embroidered) :
Info :
Use a strand of pale blue or white yarn and a yarn needle to surface stitch semi-circular ripples around where the koi and lily pads sit. Use chain-stitched arcs or surface slip stitch in lines of short arcs to mimic water movement. Keep ripple arcs varied in length for natural effect.
— Assembly & Placement :
Info :
Arrange your koi and pad motifs on the blocked base with pins. Space koi approximately 18-24 sts apart along the long axis. Place lily pads and flowers in groups of two or three near koi to anchor the composition. Mark locations with stitch markers before sewing.
Round 1-Info :
Sew koi bodies to the base using mattress or whip stitch around the perimeter. Avoid sewing too tightly to allow the applique9 to lift slightly; this creates shadow and depth on the pond surface.
Round 2-Info :
Sew fins and tails to the fish body with small stitches; add a few anchoring stitches into the base to secure them. Use tiny invisible stitches along fin edges to hold slight flares in place.
Round 3-Info :
Sew lily pads flat onto the base but leave the edges free in places to create dimension. Sew water-lilies to pads with a few stitches through the center to hold them gently in place.
Round 4-Info :
After all pieces are sewn, weave in all ends thoroughly on the wrong side. Add embroidered ripples last so they cross over both base and applique9 naturally.
Final Round :
Block entire runner gently to set shape. Use rust-proof pins to hold scallops while damp. Let dry completely. Trim any remaining loose ends. The finished runner will be slightly flexible and should lay flat when blocked.
Info :
This pattern includes many join and shaping opportunities. If you want a sturdier runner for heavy use, consider backing with a lightweight fabric or felt and hand-stitching the crochet piece to the backing for extra durability. Be mindful of washing instructions for your chosen yarn; cotton can be machine washed gently but heat may alter blocked shape.
This pond runner is a joyful blend of texture and color, combining sculptural koi, layered lilies, and a scalloped leafy edge for a unique table centerpiece. Each stitch contributes to a miniature tranquil scene that's perfect for gifts or to brighten your own home. Take your time with the applique9s and embroidery — the little details make all the difference. 🧶🌸🐟 Enjoy the meditative process and proudly display your handmade pond!