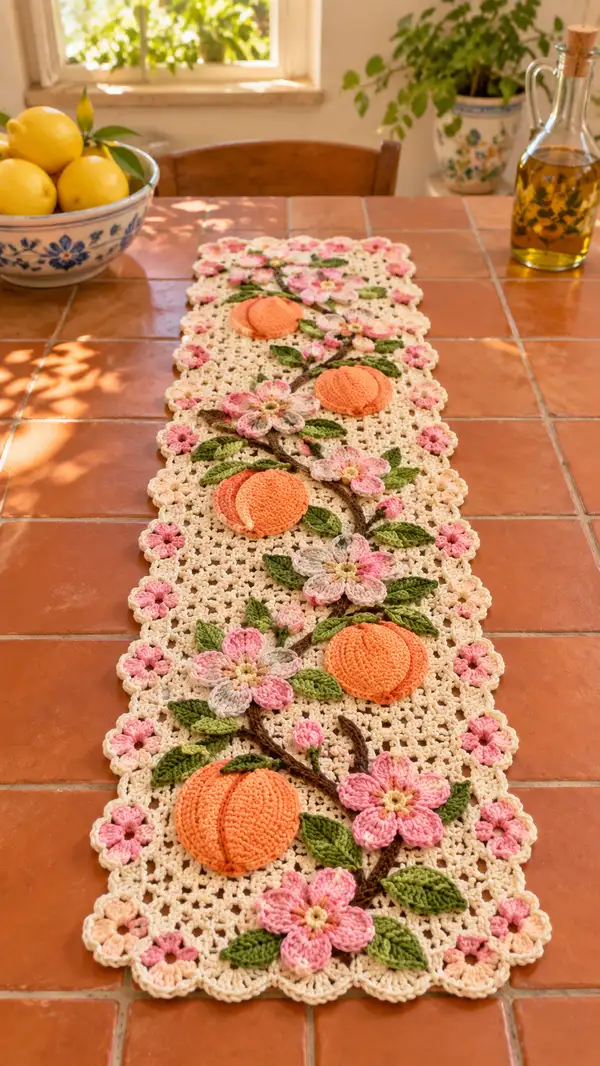
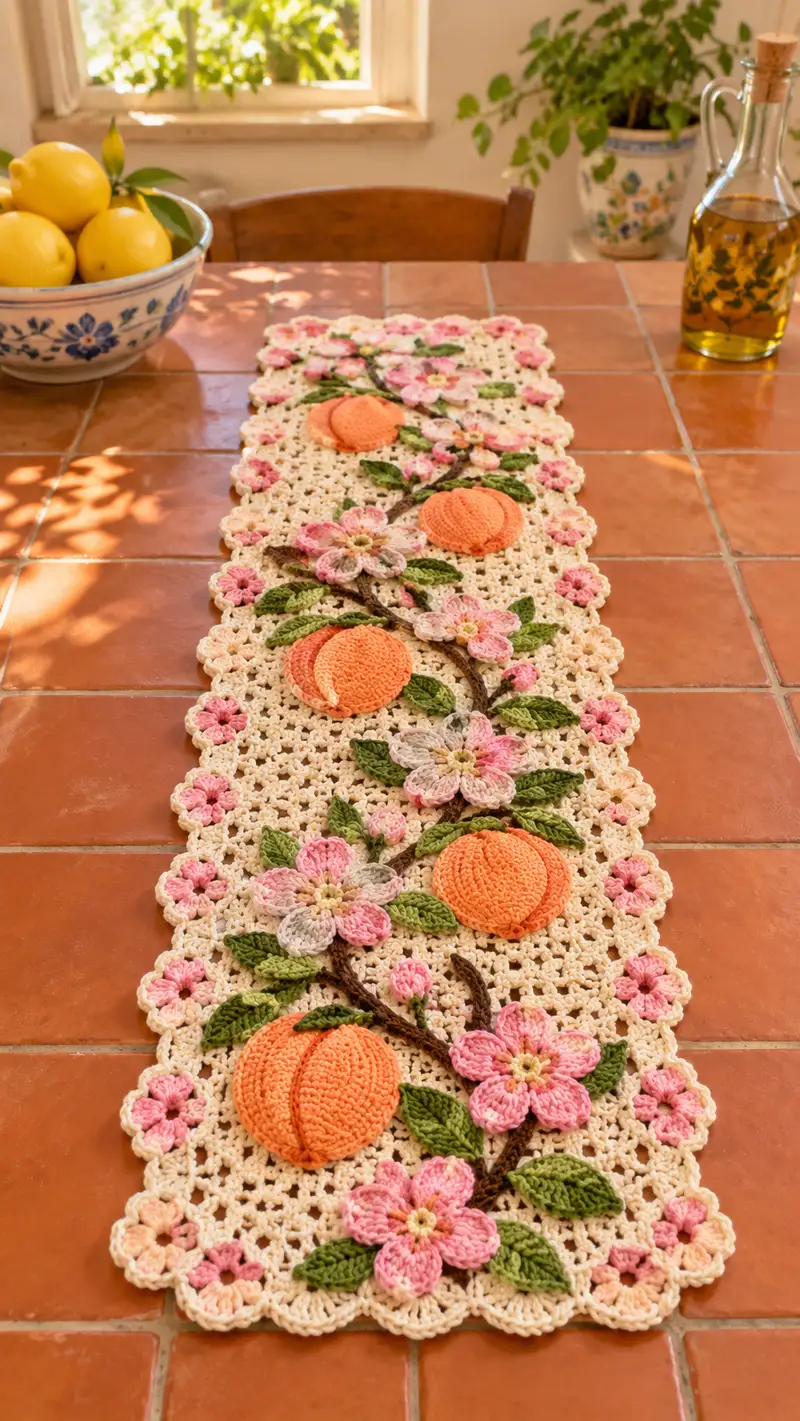
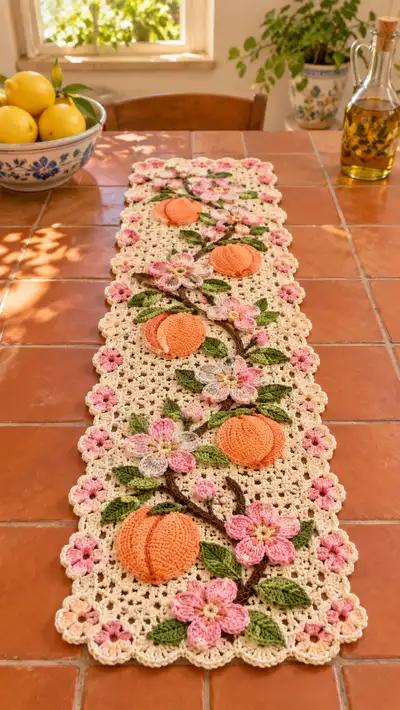
A charming lacy table runner that brings spring blossoms and ripe peaches to your table. This pattern features a cream openwork mesh base, three-dimensional peach appliques, layered pink blossom flowers, leafy vines and a scalloped floral border. Perfect for a sunny kitchen or seasonal centerpiece, the runner combines textured applique work with an elegant granny-style mesh for a hand-crafted vintage look.
Progress Tracker
0% Complete
— Main Panel Mesh Motif (make 12 squares to assemble into runner rows) :
Round 1 :
Form magic ring, ch1, 8 sc in ring, pull tight (8)
Round 2 :
Ch3 (counts as dc), dc in same st, ch1, *2 dc in next st, ch1; rep from * around, join with sl st to top of ch3 (16 dc, 8 ch-1 sps)
Round 3 :
Sl st into next ch-1 space, ch3, (2 dc, ch1, 3 dc) in same ch-1 sp to form corner, *sk next 2 dc, (3 dc, ch1, 3 dc) in next ch-1 sp; rep from * around to create 4 corners, join (4 corner clusters)
Round 4 :
Sl st into corner ch-1 sp, ch3, (3 dc, ch1, 3 dc) in corner, *ch2, (3 dc, ch1, 3 dc) in next corner ch-1 sp; rep from * 3 times, join (extended corners with chain-2 sides)
Round 5 :
Sl st to reach side ch-2 sp, ch1, sc in same sp, *ch3, sc in next side ch-2 sp across, when reaching corner work (sc, ch3, sc) into corner; rep around to make a lacy side chain space grid, join (square motif with 4 ch-3 sides)
Info :
Work all motifs in cream unless otherwise directed. Use stitch marker on first stitch of round 1 to track orientation. Make neat, even tension so all motifs match size for joining.
Round 6 :
Ch1, sc into same st, *ch5, sc into next ch-3 sp across sides and into corner ch-3 groups (sc, ch5, sc) at corners to form openwork loops; rep around, join (square with ch-5 loops forming mesh)
Round 7 :
Ch1, sc in each ch-5 loop (5 sc across each loop) to create a denser mesh row; at corners work (sc, ch3, sc) to keep square shape. Join (finalize motif square, approx 60-72 sc depending on tension)
Round 8 :
Ch1, sc in each st around working evenly to tidy edges, join. Fasten off and leave long tail for joining later. Block motif gently to a square, measuring approximately 6.5-7.5 cm depending on tension
Info :
Make a total of 12 motifs: 3 motifs across by 4 motifs down (or adjust to fit your table length). The runner in the photo is a long narrow arrangement—arrange motifs to form a rectangle of 3 columns x 4 rows before joining.
— Small Flower Motif (make 36 small blossoms for border accents) :
Round 1 :
Using soft pink, ch4, join to form ring, ch1, 10 sc into ring, join (10)
Round 2 :
Ch1, *sc in next st, ch3; rep from * around to create 10 ch-3 loops, join
Round 3 :
Switch to darker pink or variegated pink if desired. In each ch-3 loop work (sc, hdc, dc, hdc, sc) to form a rounded petal. Join. Fasten off leaving tail for sewing
Info :
Sew these small flowers into the scalloped border gaps later. Make 36 to space evenly around the runner edge and between larger appliques.
— Large Layered Blossom (make 6 large blossoms) :
Round 1 :
With variegated pink, ch4, join to make ring, ch1, 12 sc into ring, join (12)
Round 2 :
Ch1, *sc in next st, ch4; rep around to create 12 ch-4 loops, join
Round 3 :
In each ch-4 loop work (sc, hdc, dc, tr, dc, hdc, sc) to make elongated petals, join (12 petals)
Round 4 :
Switch to pale yellow for blossom center: attach yarn to center, ch1, 6 sc into center ring, join (6)
Info :
Make a second petal layer to add depth: position a smaller petal round on top of first by repeating Rounds 1-3 using a lighter pink and fewer petals (8 petals) then sew centered so petals stagger. This creates the layered blossom seen in the photo.
Round 5 :
Fasten off both layers leaving long tails for sewing. Lightly shape petals using damp blocking if necessary to create a cupped petal look
— Peach Applique (3D) (make 4 peaches) :
Round 1 :
Using peach/orange yarn, ch2, 6 sc in second ch from hook (6)
Round 2 :
6 inc around (12)
Round 3 :
(1 sc, 1 inc) x6 (18)
Round 4 :
(2 sc, 1 inc) x6 (24)
Round 5 :
(3 sc, 1 inc) x6 (30)
Round 6 :
1 sc in each st around (30) — work 2 rounds even to build body
Round 7 :
1 sc in each st around (30)
Info :
Begin stuffing lightly at the end of Round 7. Use small handfuls and shape as you go. The peach should be slightly flattened, not a perfect sphere.
Round 8 :
(3 sc, 1 dec) x6 (24)
Round 9 :
(2 sc, 1 dec) x6 (18)
Round 10 :
(1 sc, 1 dec) x6 (12)
Round 11 :
6 dec (6) — leave a long tail, close with yarn needle, fasten off
Info :
For the sculpted peach look, make two halves (follow Rounds 1-11 twice) and join the two halves together along their edges using slip stitch or whip stitch around mouth-facing edges to create a slightly flattened disc with a seam. Stuff fully before closing the final seam.
Alternate Peach Shaping :
To create the vertical seam detail seen in the photo, after joining two halves sew a slightly raised ridge by stitching a line of sc along the seam, then using a yarn needle with matching yarn weave a strand of yarn around the peach circumference to make subtle segment lines. Secure and hide ends.
— Peach Detailing Ridges :
Round 1 :
With same peach yarn, insert needle at top center, run yarn in curved arcs across the peach to create three segments; secure ends inside peach. Repeat for each peach to create the carved look
Info :
Use the tapestry needle and a tighter, smaller hook if you prefer a neater seam while joining halves. Slightly dampen the finished peach and press into shape before final ridge stitching for a polished finish.
— Leaf (make 18 leaves small and 12 leaves large) :
Round 1 :
With green, ch7, sc in 2nd ch from hook, hdc in next, dc in next, tr in next (center st), dc in next, hdc in next, sc in last (leaf shape formed, 7 sts)
Round 2 :
Turn leaf, sl st back along opposite edge to create a pointed mirror edge; total should be a symmetrical leaf with a center ridge. Fasten off leaving long tail for sewing
Info :
For larger leaves work ch9 and add one more dc/tr in the center to extend size. Add BLO hdc row inside for a ribbed texture if desired: work 1 sc BLO across center then continue outer edge shaping.
— Bud (make 8 buds) :
Round 1 :
With darker pink, ch2, 6 sc in ring (6)
Round 2 :
Inc all around (12)
Round 3 :
1 sc around (12), fasten off leaving tail for sewing. Slightly shape with small push of stuffing if you want rounded buds
Info :
Buds are small accents clustered around branches and large blossoms to capture the visual rhythm in the photo.
— Branch and Stem (make vine pieces to attach across runner) :
Round 1 :
Using brown, ch50 (adjust length depending on runner layout), sl st in 2nd ch from hook and each ch back to create a tight cord (49 sl st cord)
Round 2 :
Work surface crochet chain along cord to create a thicker rope: attach yarn, ch1, sc along cord to cover (49 sc) — fasten off leaving long tail
Info :
Make multiple branch lengths: two long branches (approx ch80 cords), two medium (ch60), and short connectors (ch30). These will be arranged diagonally across the runner. Use a hook one size smaller to keep cord firm.
Round 3 :
To create forked branch tips, leave a small loop at one end and work 10-14 ch branches attached to branch mainline using sl st; fasten off and tidy ends
— Border Scallop with Floral Motifs :
Round 1 :
With cream, join yarn to a side edge of joined panel, ch1, sc evenly along side to build a base row; count stitches to divide edges into equal scallops
Round 2 :
Mark scallop divisions: for each scallop work (5 dc, ch1, 5 dc) into marked point to create rounded shell. Work (sc, ch3, sc) at corners to keep shape. Repeat around entire perimeter
Round 3 :
Ch1, sc in each dc and sc around, slip stitch to join, fasten off. At each scallop center attach small pink flower motif using tapestry needle and secure with a few stitches.
Info :
Make scallops slightly larger than the small flower known as filler to allow the little five-petal flowers to nest neatly inside each scallop, as pictured.
Round 4 :
Additional decorative round: join lighter cream or blush color, work picot edging: *sc in next st, ch3, sl st in 3rd ch to make small picot; rep around scallop edges for delicate detail; fasten off and weave ends
— Assembling Motifs into Runner Panel :
Info :
Lay out your 12 square motifs in a 3x4 grid. Arrange large blossoms, peaches, leaves and small flowers before sewing. The photograph shows peaches offset on alternating motifs with branches weaving diagonally across the panel.
Round 1 :
Join motifs using whip stitch or slip-stitch join through back loops for a joined seam: align two motifs and use long cream tail to stitch through adjacent sts; join motifs into rows first (3 per row), then join rows together to form rectangular runner
Round 2 :
Block the assembled panel flat to remove distortions and check motif alignment. Pin seams gently and recheck spacing of appliques while damp — adjust if needed.
Info :
When sewing seams, keep tension even to avoid puckering. If seams gap, add a few mattress stitch passes across the join to flatten. Hide tails between motifs.
— Attaching Branches, Leaves, Blossoms and Peaches :
Round 1 :
Arrange longer branches in a staggered diagonal, pin in place. Use a length of brown yarn and a tapestry needle to sew branches to the mesh by stitching through the mesh holes and the branch cord every 6-8 sts to secure
Round 2 :
Position peaches where branches have natural fruit nodes, typically near motif centers. Sew each peach to mesh by using the long tail and stitching through the bottom of the peach into multiple mesh loops—secure with at least 12 stitches spaced evenly for stability
Info :
Sew through the stuffed core sparingly to avoid loosening stuffing. Anchor the peach with a small felt disc inside (optional) for extra stability, then stitch around the base through both felt and mesh.
Round 3 :
Pin large layered blossoms near peaches and sew with long tails from blossom center; sew through the central small yellow disc first then through petal bases to secure. Add small buds clustered near blossom bases for realistic growth pattern
Round 4 :
Arrange leaves around peaches and blossoms; sew using hidden whip stitch along the leaf base. Use two shades of green overlapped to create layered veined look seen in photo
Info :
To get the raised vine look, place branches under some leaves and over others, tucking leaf bases under petals where they intersect for natural overlap. Pin and photograph layout before final sewing to ensure balance.
— Decorative Surface Embroidery and Veining :
Round 1 :
Use contrasting darker green and brown to embroider leaf veins and branch texture. With tapestry needle, couch small lengths of yarn along branch cords to simulate bark; secure every 6 sts to prevent slipping
Round 2 :
Embroider petal veins with pale pink using backstitch or straight stitch into petals. For peach segments, add a few vertical running stitches to emphasize fruit segments
Info :
Keep embroidery subtle and proportional. Use fewer stitches for a delicate, natural look rather than heavy graphic lines.
— Final Border & Edging Rounds :
Round 1 :
With cream, join yarn at a side seam, ch1, sc evenly around entire runner leaving 2-3 sts for corner shaping; work slowly to keep edges straight, join
Round 2 :
Work shell scallops on these sc foundation: *skip 2 sc, in next sc work (5 dc), skip 2 sc, sl st into next sc; rep around; at corners add (sc, ch3, sc) to turn neatly. Join and fasten off
Round 3 :
Attach small flower motifs at scallop centers using matching tails; sew three large blossoms and three peaches staggered down runner as pictured
Info :
After final assembly, wet-block entire runner carefully, pinming to shape and smooth appliques. Allow to dry fully for a crisp, even finish. This will make scallops and mesh uniform.
— Finishing Touches and Care :
Round 1 :
Weave in all ends securely by threading tails through multiple stitches and trimming close. For extra durability dab a tiny amount of fabric glue on knots then weave in to hide
Round 2 :
Light steam iron on low through a pressing cloth if desired to flatten appliques and smooth mesh. Do not press directly on raised peaches. Spot clean as needed and hand wash gently when necessary
Info :
Store flat or rolled with tissue to preserve shape. Avoid heavy items placed on entire runner length to prevent crushing the 3D appliques.
Completing this Peach Blossom and Fruit table runner feels like capturing a warm spring afternoon in yarn form. The layered blossoms, sculpted peaches and lacy mesh come together to create a timeless table accent that delights every time you set the table. The process of assembling the vines and carefully placing each petal is calming and deeply satisfying. 🧶🍑 Let this runner grace your home or become a thoughtful handmade gift—each stitch tells a story. 🌸