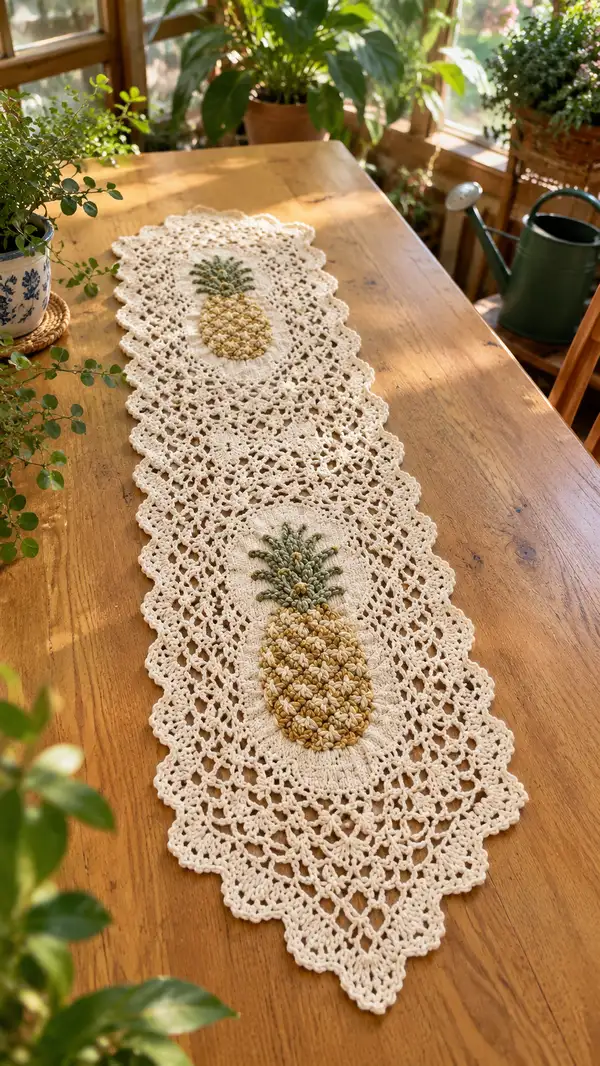
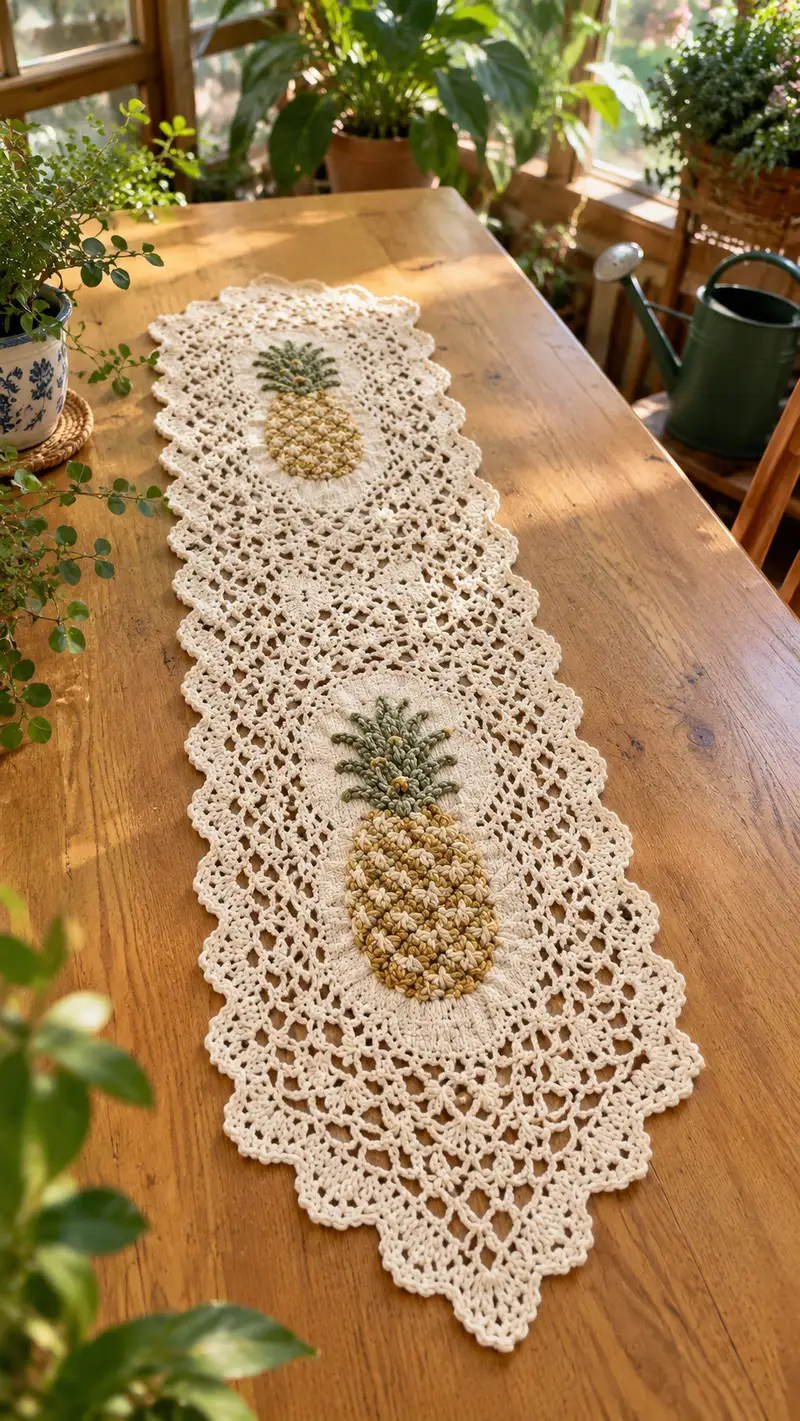
A vintage-inspired pineapple lace table runner worked in soft cream cotton with textured pineapple motifs in muted gold and sage green. This elegant runner features two raised pineapple medallions nestled in a wide lacy filet panel and finished with a scalloped picot edge. The pattern uses simple crochet stitches plus puff clusters for the textured fruit and is written for intermediate crocheters who love vintage-style home decor.
Progress Tracker
0% Complete
— Notes and Special Techniques :
Info :
This pattern is written in US terms. Work tightly enough to produce defined stitches but not so tight that puff clusters cannot be formed. Puff clusters are made by drawing multiple loops through the same stitch and finishing with a ch-1 and a sc into the same stitch to secure (detailed puff instruction included). Work motifs flat. For best results, block motifs and panels before final joining.
— Pineapple Oval Base (Make 2 identical) :
Round 1 :
With cream yarn, ch 28. Working into back bumps or work flat around chain to form oval: sc in 2nd ch from hook and across to last ch (26), 3 sc in last ch; continue working along opposite side of foundation chain, sc in next 26 ch, 3 sc in first ch to join (62)
Info :
Do not join with sl st; place a marker in the first sc to mark round start. This foundation oval gives an initial 62-st circumference which will be the base for shaping the pineapple area.
Round 2 :
1 sc in each st around (62)
Round 3 :
(6 sc, inc) x 8 = (6 sc, 2 sc in next st) repeated 8 times to add 8 increases (70)
Round 4 :
1 sc in each st around (70)
Round 5 :
(7 sc, inc) x 8 (78)
Round 6 :
1 sc in each st around (78)
Round 7 :
(8 sc, inc) x 8 (86)
Round 8 :
1 sc in each st around (86)
Info :
These even rounds build the oval base. Because we want a slightly elongated oval, the increase points were placed at the two short ends; the repeat of 8 increases distributes along the curve. Use markers to note the center front and center back of the oval for later pineapple placement.
Round 9 :
1 sc in each st BLO around to create a shallow ridge for pineapple placement (86)
Round 10 :
1 sc in each st around (86)
Round 11 :
(9 sc, inc) x 8 (94)
Round 12 :
1 sc in each st around (94)
Round 13 :
(10 sc, inc) x 8 (102)
Round 14 :
1 sc in each st around (102)
Info :
At the end of Round 14 you will have a stable oval base roughly the size seen in the photo. The counts given maintain symmetry; the increase locations remain at the oval ends. Mark the central top and bottom middle stitches to align the pineapple texture pattern.
Round 15 :
Change to accent golden yellow yarn. 1 sc in each st around (102)
Round 16 :
1 sc in each st BLO around (102)
Round 17 :
To create a solid inner oval ring before texture work: (4 sc, dec) x 17 then 1 sc to finish round = (4 sc, sc2tog) x 17 +1 (85)
Info :
Begin transitioning to textured pineapple body. Work Round 17 slightly snug to create a defined oval frame that keeps puff clusters contained. Keep stitch counts accurate; if your initial chain was slightly different, adjust decreases evenly.
— Pineapple Textured Body (Puff Clusters) :
Special Puff Instruction :
Puff stitch used here: Yarn over, insert hook into designated stitch, draw up loop; yarn over, insert into same stitch, draw up loop (repeat until you have 5 loops on hook for a 5-loop puff). Yarn over and pull through all loops, ch 1 to secure the puff. The ch-1 acts as the space between puffs. Alternate a single sc between puff clusters in staggered rows to form a pineapple lattice.
Round 18 :
Working from the marked top center and moving outward, make pattern row in golden yellow: *sc in next 2 sts, puff in next st (5-loop puff closed with ch-1)*; repeat around aligning puffs in the central oval area until you have placed 28 puffs and sc to close (85 total stitches, counted as sc/puff places)
Round 19 :
Ch 1, sc in same st, *sc in next st, puff in next st* repeat but offset each puff between the two previous puffs to create a staggered lattice. Work total placements to align 28 puffs in staggered rows, finishing with sc (85)
Round 20 :
Repeat Round 19 but move puffs slightly toward the oval center by making puff into the FLO of the underlying sc to add depth (85)
Info :
Keep puff loops consistent. Practice a sample puff row first to get tension right. If puffs are too large, reduce to 4-loop puffs and adjust counts visually; aim for dense, textured 'pineapple eyes'.
Round 21 :
Sc in each st around and place sc between puffs rather than into puff stitches (85)
Round 22 :
Staggered puff round: *ch 1, puff in next st, sc in next st* repeat around to create 28 puffs slightly closer together (85)
Round 23 :
Sc around in BLO to create a ridge separating pineapple body from leaf base (85)
Round 24 :
Work a decorative row: *hdc in next 3 sts, ch 2, sk 2* repeat around to begin forming lace transition (this row will use ch spaces but counts remain approximately as visual; aim for 42 ch-2 spaces evenly spaced)
Info :
Puff rows are dense; if you find the central area puckering, ease tension or use a slightly larger hook for these rounds only to allow puffs to blossom. You can also block puffs gently by pinning to shape while damp.
Round 25 :
Switch to cream yarn. Sc around, placing sc into hdc and ch-2 spaces to stabilize (approximately 85)
Round 26 :
Sc in each st BLO to emphasize a ridge and flatten puff base (85)
Round 27 :
(3 sc, 1 inc) x 21 + 2 sc = (3 sc, 2 sc in next) x 21 then sc to finish (approx 106)
Info :
This increase round rounds out the pineapple oval so the lace pattern can attach smoothly. Your exact count may vary slightly; keep the increases evenly spaced around the oval ends to maintain an elongated shape.
— Pineapple Leaves (Make 2 sets per motif) :
Info :
Leaves are worked at the top of the pineapple using sage green. Work short tapered leaves by creating a small fan of stitches anchored in a line of stitches forming the top of the oval. We will create 7 leaves per pineapple arranged in a crown.
Leaf 1 :
Join sage at top center with sl st. Ch 2, (3 dc, ch 1, 3 dc) all into same st to form a wide leaf. Working back along the anchor, sl st into next st to secure. (Finish leaf width ~6-7 dcs)
Leaf 2 :
Move 2 sts to right, sl st, ch 2, (2 dc, ch 1, 2 dc) in the anchoring st, sl st back to secure. Continue for leaves 3-7 gradually decreasing the center cluster size to create variety: leaves near center larger (3 dc clusters) and outermost leaves smaller (1 dc clusters). Finish by weaving ends inside.
Info :
For extra texture, embroider short detached chain stitches (surface slip or raised chain) in sage from leaf base upward to mimic midrib veins. Secure all leaf anchors with small hidden stitches into the cream base so leaves sit upright after blocking.
— Surrounding Lace Panel (Frame for Motif) :
Round 28 :
With cream, ch 3 (counts as dc), dc in next 2, *ch 2, sk 2, dc in next 3* repeat all way around anchoring into the expanded oval (approx 106)
Round 29 :
Ch 4 (counts as tr), sk 1, 2 tr in next st, *ch 3, sk 2, 3 tr in next 3 trs* continue creating little arches; finish with sl st to top of ch-4 (this builds airy arches to start the lace field)
Info :
This transition rounds convert the dense oval to an open lace field. Keep stitch placement symmetrical around oval ends. Use markers at the four cardinal points to check alignment when attaching the runner panel later.
Round 30 :
Ch 1, sc in each tr and in ch spaces across to form small picot-like joins; where ch-3 spaces exist, work (sc, ch 3, sc) to keep openings uniform (approx 106)
Round 31 :
Work a filet-lace repeat: *ch 5, sk 3, sc in next sp, ch 5, sc in next sp* creating diamond-shaped openwork around the pineapple. Keep repeats even so outer scalloped edge will align in later rounds (approx 106)
Info :
Count the large ch-5 spaces; aim for an even number so later joining rows between two motifs match up. Place temporary markers in every 8th ch-space to help with counting when making the runner center panel.
Round 32 :
In each ch-5 space: sl st, ch 3, 2 dc, ch 3, sl st into same space to form small arches; sc into sc spaces to tie arch rows together across the oval (approx 106)
Round 33 :
Work lattice panel: *ch 6, sc in 3rd stitch from previous arch, ch 6, sk over arch* repeat to form elongated diamond motifs (count ~53 diamonds)
Round 34 :
Join rows: sc across all anchors to stabilize lattice, placing sc into each sl st and into peak stitches of diamonds (approx 106)
Info :
These rounds are the core lace field that visually surrounds each pineapple. Keep tension consistent to avoid puckering; blocking later opens the lace evenly. If you prefer a denser runner, substitute some ch-spaces with dc clusters per your preference.
Round 35 :
Repeat a decorative cluster round: *sc, ch 3, sk 2, (sc, ch 3, sc) in next sp* around to create a trellis-like motif (approx 106)
Round 36 :
Work (2 dc, ch 2, 2 dc) shells into every 4th sc to begin shaping the scalloped outer border – place shells evenly (approx 26 shells)
Info :
At this point you have completed a framed pineapple medallion that measures roughly 12-14 inches long by 6-7 inches wide depending on yarn and tension. The counts are intentionally approximate for the lace rounds because stitch choices can vary; maintain symmetry and even spacing so multiple motifs join cleanly later.
— Connecting Panels (Make 1 for long runner between two motifs) :
Info :
The runner in the photo is two pineapple medallions connected by an elongated lace segment. Work a rectangular lace panel matching the height of the framed medallions (measured at the widest point). This pattern uses a repeating lattice that mirrors the medallion lace.
Row 1 :
With cream, ch 60 (or to match measured number of diamond repeats), turn. Row 1: sc in 2nd ch from hook and across (59)
Row 2 :
Ch 4, skip 1, tr in next, *ch 3, sk 3, tr in next* across to create row of arches; turn (approx 15 arches)
Row 3 :
Ch 1, sc in tr and into arch spaces creating anchors across (59)
Row 4-25 :
Repeat Rows 2-3 alternating to build panel length. Keep panel length same as space between medallions; for a runner similar to the photo, create 10-12 repeats (approx 20-24 rows). The final stitch count of each row should be consistent at 59.
Info :
To make the runner longer or shorter, add or remove repeats of the two-row lace motif. Keep edges straight by ending each row with the same number of scs or ch spaces as the first row. Block this panel to the same width as the medallion frames before joining.
— Joining Motifs and Panel :
Info :
Join by crocheting motifs together with a join-as-you-go (JAYG) slip-stitch seam or by mattress stitch sewing with cream yarn. Align medallion framed edges with panel edges so large ch-spaces fit into one another. Place pins at 1-inch intervals and check symmetry from each side.
Join Step 1 :
With right sides facing and edges aligned, insert hook into the outermost sc or ch space of the medallion and the corresponding space on the panel, sl st through both to join. Repeat across entire overlapping edge. Repeat for both sides of each medallion so that two medallions are joined by a central panel forming a long runner.
Info :
If you prefer an invisible join, use a whip stitch with cream yarn and a tapestry needle sewing through the backs of stitches only. JAYG is faster but makes a visible seam; choose based on desired finish.
— Outer Scalloped Border & Picot Edge :
Round 37 :
After junctions are complete, work a stabilization round in cream: sc evenly around entire outer perimeter, placing 2 sc in shell peaks and 1 sc along straight edges to keep counts even. Aim for an even total count (example: 420 sc around runner).
Round 38 :
Ch 3 (counts as dc), *sk 1, (5 dc shell) in next sc, sk 1, dc in following 3 sc* repeat around to create scallops. Make sure shell centers are evenly spaced (approx 26 shells along long edges and extra shells on rounded ends).
Round 39 :
Working into each shell: sl st into shell center, ch 3, 2 dc, ch 1, 3 dc to form an amplified scallop. Between scallops work sc in the dc groups to support curve (total scallops equal number of shells from Round 38).
Info :
Scallop rounds define the runner outline. Adjust shell sizes so border lies flat. If shell bulges, reduce dc per shell or add an extra sc between shells to ease tension.
Round 40 :
Picot finishing round: sc in each st; in each scallop peak work (sc, ch 3, sl st into top of sc) to create small picots. This gives a delicate finished look similar to the photo.
Info :
Weave in ends as you go into the back of each scallop so finishing is tidy. After this round, the runner is functionally complete but blocking is essential to open the lace and flatten scallops.
— Optional Decorative Embroidery and Highlights :
Info :
To add subtle depth to the pineapples, use pale beige to embroider small straight stitches at the base of some puffs, giving a honeyed highlight. Use sage to add tiny French knots at the leaf bases if desired.
Embroider :
With tapestry needle and beige, stitch small vertical bars into random puff clusters (about 12 per pineapple) to give the look of natural pineapple eyes. With sage, place 6-10 French knots at the leaf base to mimic bud textures (optional).
— Blocking and Finishing :
Info :
Wet block or steam block the runner. Gently pin to a flat blocking board matching desired final dimensions, pulling scallops and arches into smooth curves. Allow to dry fully. Final pressing (careful steam) will set scallops and shape leaves upward.
Final Touch :
Once dry, trim any stray fibers and secure all ends by weaving at least 2 inches into the body of work. If desired, lightly starch scallops for added crispness for display use.
— Stitch Count and Round Summary (Reference) :
Info :
Motif oval base final pre-lace count: approx 102 sts. After puff texture and increase rounds the outer stabilized count is approx 106 sts. Lace frames and connecting panel counts are based on repeat multiples; the recommended connecting panel width is 59 sts to match medallion sides. Outer scallop shell counts depend on your blocking and spacing but plan for ~26 shells per long side for a two-medallion runner. Keep a notebook of exact counts for your piece as you go so joins match perfectly.
Info :
Estimated total rounds per motif (including textured rows and frame) ~40 rounds; connecting panel rows ~24 rows; border rounds ~4 rounds. Overall the runner uses more than 80 rounds of detailed work when all pieces and joins are included.
Completing this pineapple lace table runner is a wonderfully rewarding project that combines texture and vintage lacework in one piece. Each puff stitch adds tactile charm while the scalloped border gives a finished, heirloom look. Pin and block with care, then enjoy the warm glow it brings to your table. 🧶🌿 Your handmade runner will become a conversation starter and a cozy, decorative centerpiece. Happy crocheting! ✨