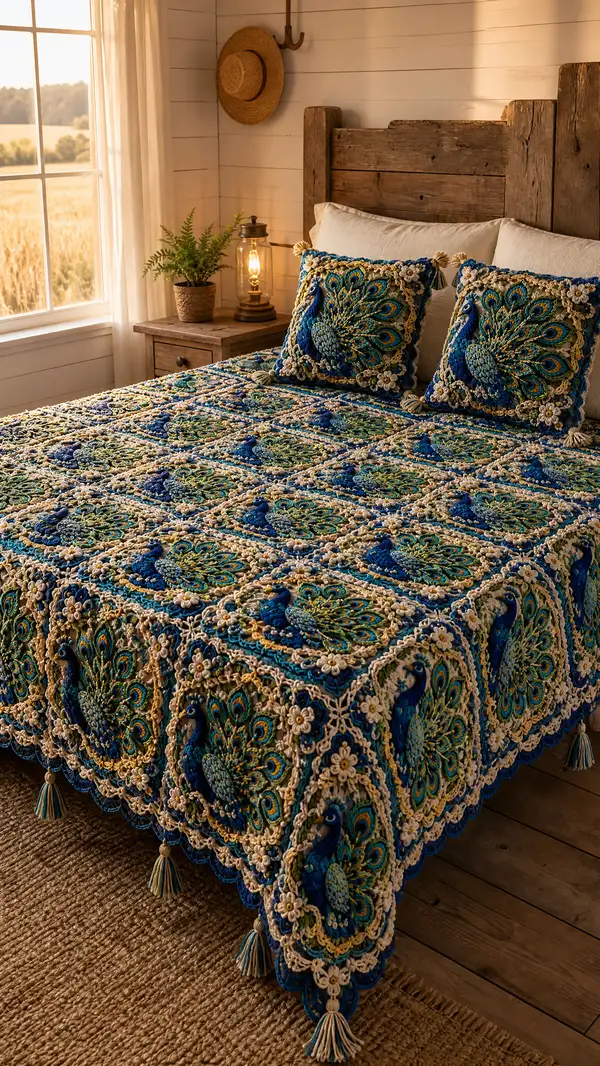
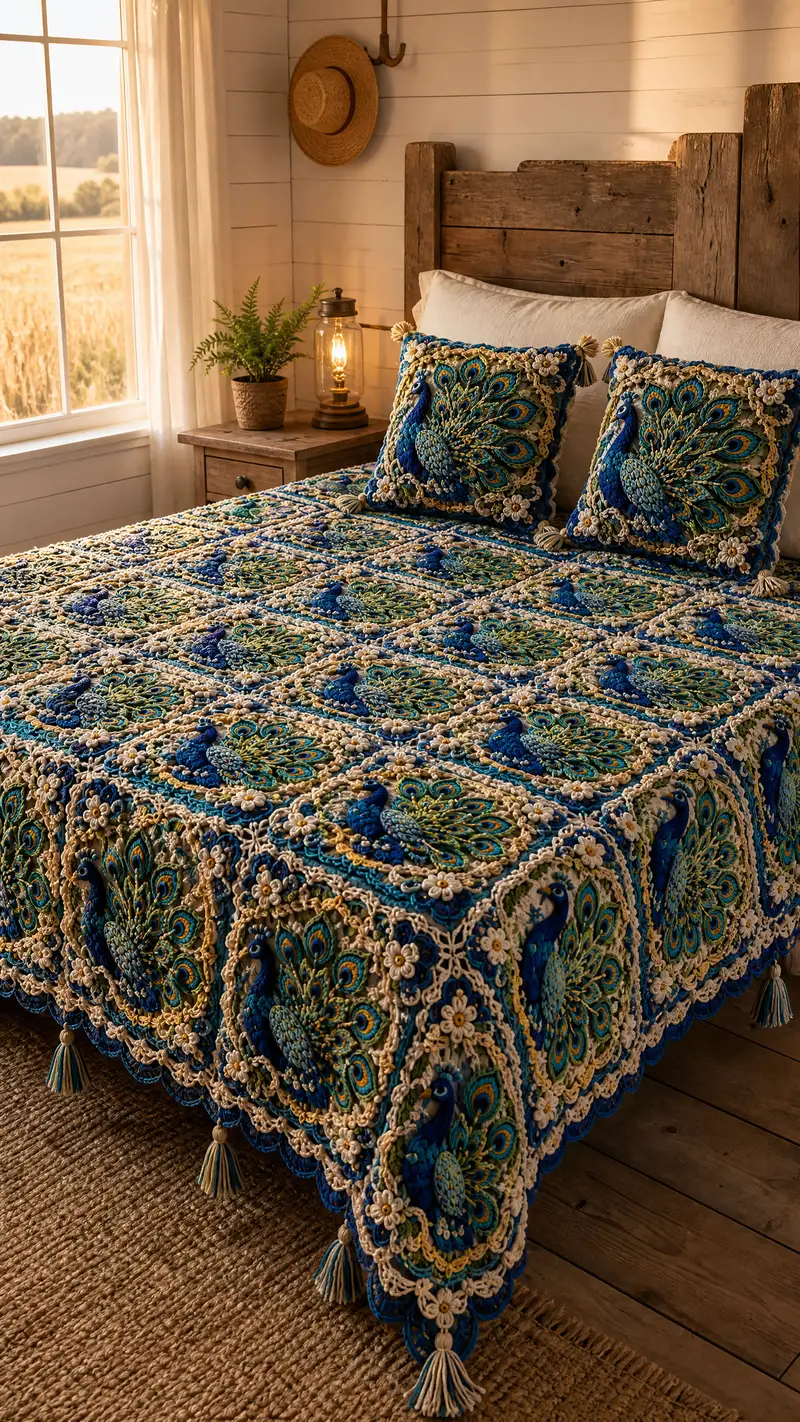
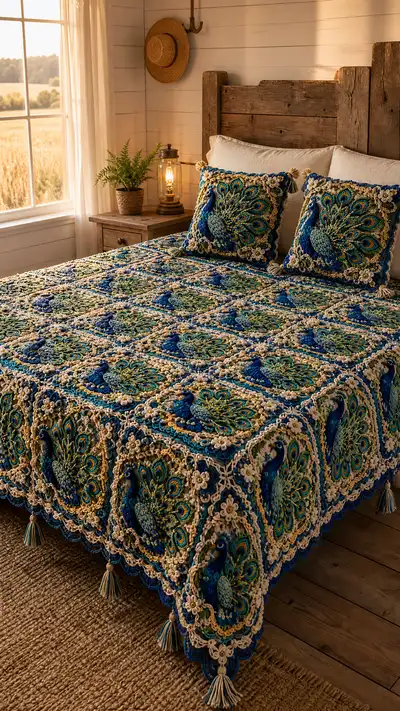
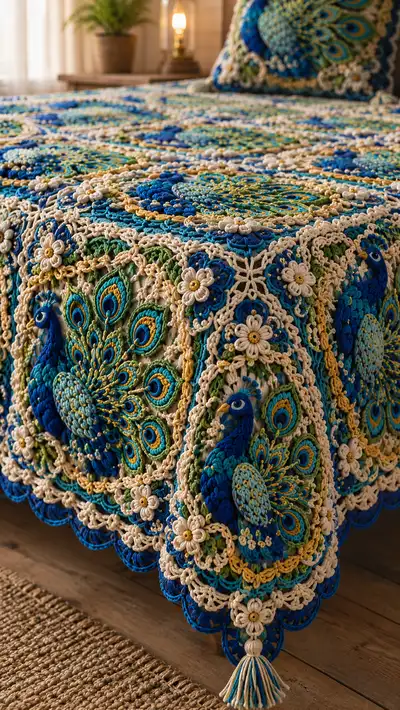
An opulent, highly textured bedspread made from repeated peacock-granny square motifs. Each square features a raised 3D peacock with layered feathers, floral corners and a scalloped border—finished with tassels for an heirloom look. Rich jewel tones of deep blue, teal, green, gold and cream give this spread luxurious depth and contrast. This pattern breaks the complex design into clear motifs, appliques and finishing steps so a determined crocheter can recreate the effect.
Progress Tracker
0% Complete
— Peacock Square Motif :
Round 1 :
Start in deep navy yarn. Make a mr, ch1, 6 sc into magic ring (6)
Round 2 :
Inc in each st around (6 inc) (12)
Round 3 :
(1 sc, inc) x6 (18)
Round 4 :
(2 sc, inc) x6 (24)
Round 5 :
(3 sc, inc) x6 (30)
Info :
This small center disk becomes the peacock's eye cluster. Keep tension firm so subsequent puff stitches sit proud. Weave in the short tail only after next round if you need stability.
Round 6 :
Change to teal. (4 sc, inc) x6 (36)
Round 7 :
1 sc in each st around (36)
Round 8 :
Change to bright turquoise. Work 1 sc BLO in each st (36) to produce a subtle ridge for feather attachment
Info :
At the end of Round 8, mark 8 evenly placed positions for the main feather teardrops—every 4.5 stitches approximately. Use pins or small contrasting scrap threads to mark starting points.
Round 9 :
(5 sc, inc) x6 (42)
Round 10 :
1 sc in each st (42)
Round 11 :
Change to leaf green. (6 sc, inc) x6 (48)
Round 12 :
1 sc in each st (48)
Info :
Rounds 9–12 form the foundation disc for the peacock body and base for the feather anchors. Maintain consistent tension and check round counts often.
Round 13 :
Switch to golden yellow. *Ch5, sk3 sts, sl st into next st; rep from * around total 12 loops (12 picot arches)
Round 14 :
Into each ch5 arch: (sc, hdc, 3 dc, hdc, sc) forming 12 petal shells (each shell uses 7 sts approx). Work sl st to join (count depends on arch spacing)
Info :
These petals will be the inner 'eyes' of the feathers; keep each shell even. If you find gaps, tighten your joining slip stitch slightly or move shell placement by 1 stitch outward.
Round 15 :
Change to deep navy. Work 1 sc in each st around through both loops and shells to create a continuous base (approx 84 sts depending on shell overlaps)
Round 16 :
Switch to turquoise; prepare to work first layer of teardrop foundations. *Ch6, sk 4 sts, sl st into next* around at 12 positions. Join (12 arches)
Info :
At this point check the motif center diameter: this motif square should measure approximately 8–9cm across (blocked). Adjust hook size if your counts make it considerably different.
Round 17 :
Work into each ch6 arch: (sc, 2 hdc, 5 dc, 2 hdc, sc) to make elongated teardrop shells; leave a long tail for securing each teardrop if you wish to embroider later (12 teardrops)
Round 18 :
Change to gradient teal; around teardrop base, work 1 sc in each st around to tidy edges and prepare for layered teardrop insertions (count variable ~120)
Round 19 :
Switch to leaf green. Between each teardrop attach a small 5-sc bobble: *sc in next st, make 5-dc pop in next, sl st into next st* rep across all 12 spaces. These small pops will add texture between feathers
Info :
Use the bobble/popcorn technique with the 3.0mm hook for tighter, more pronounced bumps. Keep the loops even and quick-chain each pop stitch carefully to avoid mis-sized bumps.
Round 20 :
Switch to bright blue. Prepare for the large outer feather layer: ch8 arches built over the teardrop tops; *(ch8, sl st into top of next teardrop) x12*
Round 21 :
Into each ch8 arch: (sc, hdc, 7 dc, hdc, sc) creating a pronounced outer petal (12 large feathers)
Round 22 :
Switch to gold accent: Work 1 sc around each large feather to reinforce edges. Add small picots at feather tips: (sc, ch3, sl st in last sc) at tip of each feather (12 picot tips).
Info :
These three concentric feather layers—inner petal, teardrop, outer feather—are the heart of the peacock motif. Trim any long tails but leave a few for later decorative embroidery if desired.
Round 23 :
Change to cream. Work 1 sc evenly around entire motif joining spaces and stabilizing shell overlaps (approx 180 sc). This creates the inner disc that will later be squared up to a stylized granny shape.
Round 24 :
Switch to navy. Mark 4 evenly spaced points at 90 degrees to be the square corners. At each point work: *(ch4, sl st) across 3 spaces to make corner chains*. Between corners keep a row of sc to even out sides.
Round 25 :
Change to cream. Work shelled edges between corners to begin square shaping: *in side space work (sc, ch2, 3 dc, ch2, sc)* repeat to form 4 large corner shells (4 corners plus even sides)
Info :
From Round 24 onward you will be converting the circular motif into a square: work shells spaced to pull out four corners. Use blocking pins to hold shape before the next round—this ensures symmetry and easier joining later.
Round 26 :
In cream: 1 sc along sides and (3 dc, ch3, 3 dc) into each corner shell to square off (approx 200–220 sts variable by tension)
Round 27 :
Switch to navy. Around the square edge work a textured row of bp and fp relief: *1 sc, fpdc around next dc, 1 sc, bpdc around next dc* repeat to develop raised lines that frame the motif (maintain stitch count)
Round 28 :
Change to cream. Add the 3D peacock body applique base where the center left quadrant was previously. Mark placement with stitch markers approximately 10 sts in from top-left corner and 8 rows down. We'll crochet the body separately then sew—so leave a working tail for applique placement.
Info :
Blocking tip: after Round 26–27, lightly wet-block each square to the exact dimensions you want for the overall spread. This makes joining far easier later. Use matching pins and ensure corners are right-angled.
— Peacock Body Applique (Make 1 per square) :
Round 1 :
With deep navy, mr, ch1, 6 sc (6)
Round 2 :
Inc in each st (12)
Round 3 :
(1 sc, inc) x6 (18)
Round 4 :
Switch to bright blue. (2 sc, inc) x6 (24)
Round 5 :
1 sc around (24)
Round 6 :
Change to teal. Work two rows of puff stitches to create the textured body: *puff (yarn over, insert hook, pull loop) x4 then yarn over and pull through all loops, ch1 to close puff*; work 12 puff stitches evenly around the body (12 puffs)
Info :
Use the 3.0mm hook for puffs to keep them dense. Pull loops to a similar height and close with a ch1 to stabilize. These puffs represent the body scales.
Round 7 :
Switch to navy: sc in between each puff to create separation (24 sc)
Round 8 :
Begin shaping the neck: (sc6, dec) x3 (21)
Round 9 :
(sc5, dec) x3 (18)
Round 10 :
(sc4, dec) x3 (15)
Round 11 :
Switch to navy. Work ch10 to form a stiff neck arch; sc back along the chain to base and anchor with sl st. Repeat for a double-neck effect if you want more height.
Info :
Sew the body applique centered within the square using the long tail. Secure with hidden whip stitch; tie off and weave ends into the backside of the square. Do not overstuff—these are flat appliques.
— Feather Teardrop Appliques (Make 12 per square) :
Round 1 :
With deep navy, ch4, join to form ring, ch1, 6 sc into ring (6)
Round 2 :
Change to turquoise. (1 sc, inc) x3 (9)
Round 3 :
Switch to teal. (2 sc, inc) x3 (12)
Round 4 :
Change to gold: sc around to enlarge and then shape tip: ch3, 3 dc in next st, ch3, sl st to create pointed eye (approx 18 sts)
Round 5 :
Work BLO sc around to create a thin ridge that can be sewn onto the teardrop base on the main motif (18)
Info :
Sew the teardrops onto the marked teardrop foundations of the main motif. Place the gold point outward to mimic the peacock eye. Use tiny whip-stitches in matching thread to anchor the teardrop so it lies slightly elevated.
— Flower Corner Clusters (Make 4 per square) :
Round 1 :
With cream, mr, ch1, 6 sc (6)
Round 2 :
Change to gold, (inc) x6 (12)
Round 3 :
Switch to cream, into chain spaces make petals: *(ch4, sl st into base) x5* to create 5-loop petals; secure and sl st into center
Round 4 :
Sew a small bead or French knot of yarn into each flower center for a jewel look. Make 4 and attach one at each corner using the long tail. Add 6 small sc between flowers to create the lattice join points for motifs.
Info :
These corner flowers act as the connecting points when you join squares. Use them to hide join seams and to anchor the cream lattice that links squares.
— Square Framing and Lattice Join Preparation :
Round 1 :
With cream, join at any side st and ch6, *skip 3, sc, ch6* repeat to create six chains per side; make sure chains align with neighbor squares when placing on bed (creates open lattice)
Round 2 :
Work 1 sc in each chain space and 1 sc around flower centers forming a reinforced lattice edge (maintain symmetry)
Info :
Before joining, lay out all your blocked squares on the floor or bed in final arrangement. Check pattern flows—feather orientations should point consistently for a unified look.
Round 3 :
Join squares using a visible cream join: With right sides facing, slip-stitch through both loops of adjacent squares aligning flower corners; sew across the lattice chains and secure ends (this join is decorative and structural)
Info :
There are many joining methods. This pattern uses a slip-stitch join for a raised chain look. Alternatively, use a whip stitch for invisible joins or join-as-you-go technique when making the last round of each square.
— Bedspread Center & Repeat Grid :
Info :
A typical queen bed in these photos is approximated by a grid of 6 squares across by 6 squares down (36 squares). Each finished square blocked should be approximately 35–40cm (14–15.5 inches) to reach this coverage. Adjust number of squares for smaller or larger beds.
Round 1 :
Make 36 peacock motifs following motif, feather and corner instructions. Block and lay flat in a 6x6 grid, reversing orientation of alternate rows for a balanced look (mirror every other row).
Round 2 :
Join row by row using the lattice slip-stitch method described. After joining all horizontal seams, join vertical seams carefully so the flowers meet neatly at four-way intersections.
Info :
Pin a four-way intersection, then stitch a small central star using a few tight stitches to ensure the corner flower centers meet squarely and do not pull apart. Hide tails in the lattice backing.
— Outer Border & Scalloped Edge :
Round 1 :
With navy, work 1 sc evenly around the entire joined spread, placing 3 sc into each corner shell to prevent curling (approx stitch count dependent on total size)
Round 2 :
Change to cream. *Ch5, skip 2, sc into next* repeat to create a chained scalloped guide around the full edge
Round 3 :
In each ch5 arch work (sc, hdc, 7 dc, hdc, sc) to form large scallops. Place 3 dc clusters at corners for decorative tassel attachment points.
Info :
Make sure scallops line up with the square seams below. If a scallop falls awkwardly over a motif, adjust repeat spacing by one stitch to center scallops between motifs.
Round 4 :
Switch to bright blue. Work a decorative picot ridge: *sc, ch3, sl st in next sc* repeat across scallop ridge to add fine beading detail
Round 5 :
Switch to gold and work a final row of 1 sc into the outermost ridge to finish off. Block again to even out scallops and let dry fully before tassel attachment.
— Tassels & Corner Finishing (Make 4 large tassels + small domes per corner) :
Round 1 :
Cut 60 strands of yarn about 18cm long mixing navy, teal and cream. Fold into half to form loop and anchor loop under corner 3-dc cluster using a lark's head knot. Trim and comb ends for a tidy tassel.
Round 2 :
Wrap a coordinating yarn band around the top of tassel and secure with tight knot. Optionally add a wooden bead or metal cap for a decorative finish; secure with fabric glue and extra stitches.
Info :
Tassels can weigh the corners slightly—ensure your corner shells are strongly sewn to the underlying squares. Reinforce with a few extra whip stitches through the corner shells and the join layers.
— Cushion Covers & Matching Pillows :
Round 1 :
To make matching cushions, prepare a single square as the front and a plain cream crocheted back of the same dimensions. Crochet a 3-row navy sc border around the back and join with hidden mattress stitch or a decorative single crochet seam to enclose a pillow form (approx 16–18 inches square depending on blocking).
Round 2 :
Add tassels to each cushion corner using the same method as bedspread. Stuff cushions with a medium-loft insert for a plump look; close seam securely and weave in ends.
Info :
Pillow making tip: place a lining fabric behind the front square and hand-stitch it in place before adding the stuffing and back panel. This hides all applique tails and protects detailed pieces from wear.
— Final Assembly & Finishing Touches :
Round 1 :
Weave in all ends using a yarn needle. For any beads or buttons used in flower centers, secure with multiple passes and finish with a small dab of fabric glue, then cover glue with a few neat stitches to hide.
Round 2 :
Steam block the full spread on blocking mats for final shaping. Use rustproof pins and ensure all corners and scallops are neat and even. Allow to dry completely before using.
Info :
Care instructions: Hand wash cold or machine wash on gentle in a mesh bag, lay flat to dry. Avoid tumbling and direct sunlight for long-term color preservation.
This Peacock Jewel Granny Square Bedspread is a show-stopping heirloom full of texture, color and craftsmanship. Each square reads like a little tapestry, and the full spread makes a dramatic focal point for a bedroom. The tactile puff stitching, layered feathers and floral lattice invite touch and admiration. Take your time, enjoy making each motif, and celebrate the moment you lay the finished bedspread on the bed — it is truly a labor of joy. 🧶✨