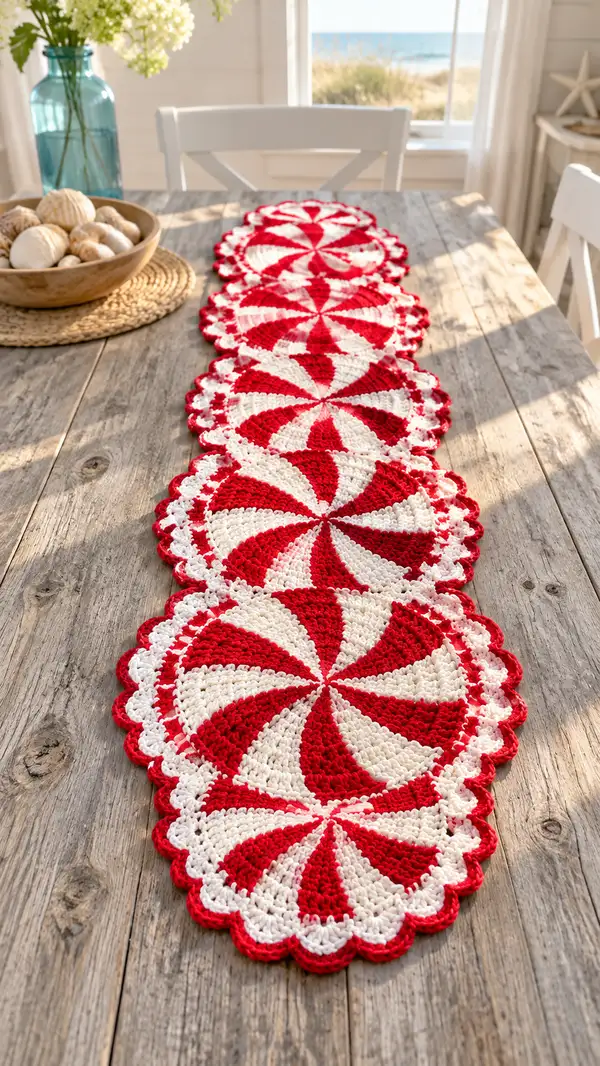
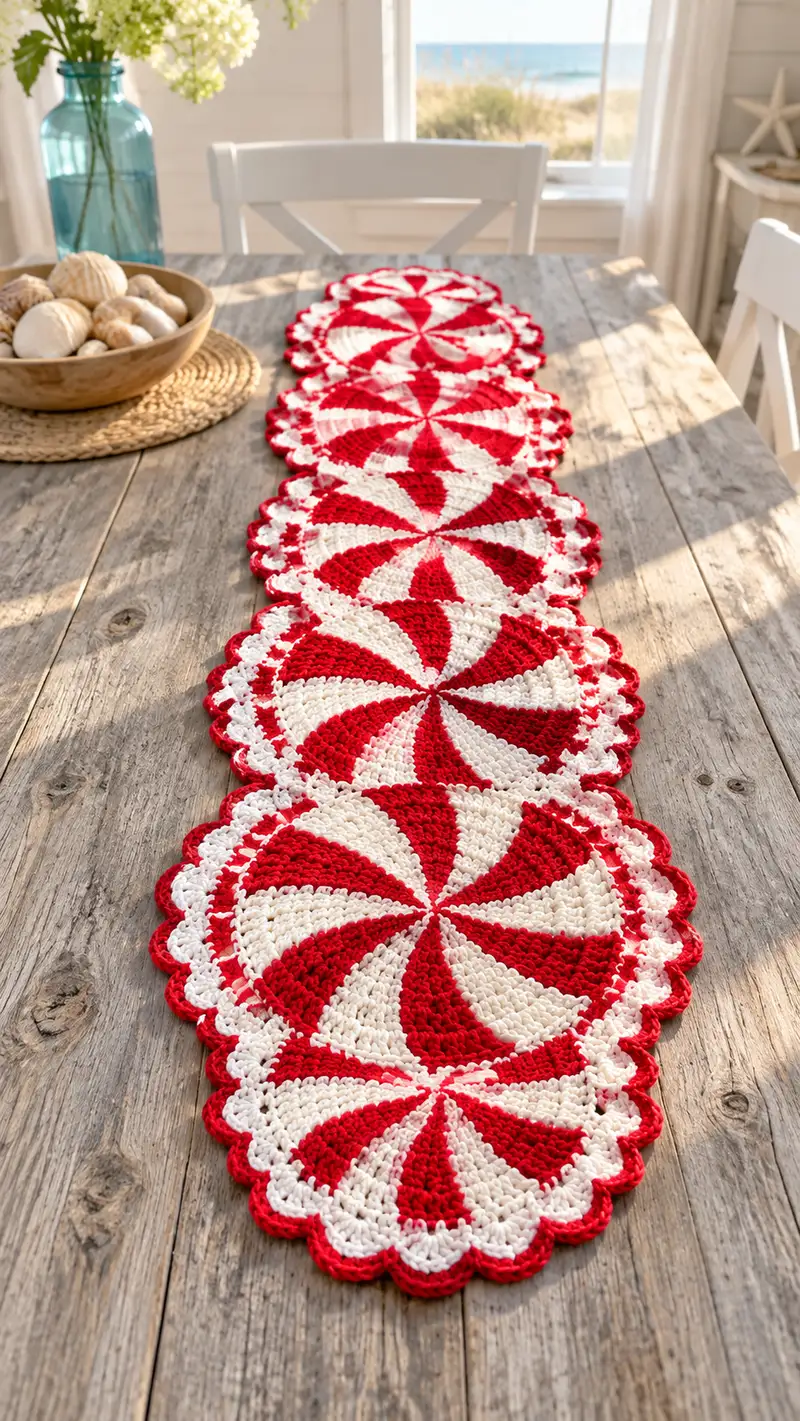
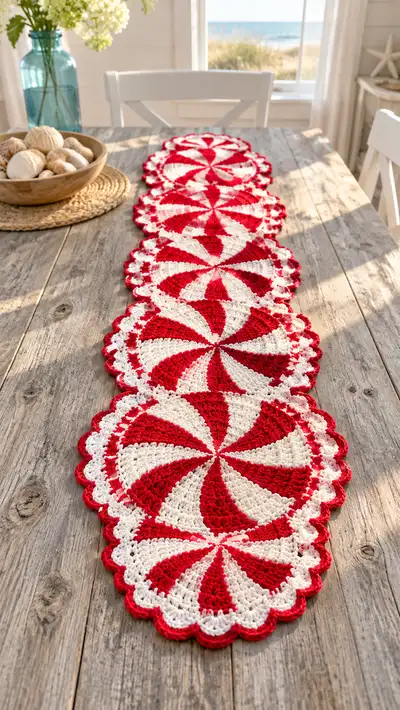
Bright, festive peppermint-swirl wheels linked into a scalloped-edge table runner. Each round motif alternates red and white wedges to create a classic candy-cane pinwheel effect, finished with a lacy scallop border and join-as-you-go assembly for a clean, continuous runner.
Progress Tracker
0% Complete
— Overview :
Info :
Make 5 Peppermint Swirl Wheel motifs and join-as-you-go on the final scallop round to create a continuous table runner. Each motif uses two alternating colors (Candy Red and Cream/White) to form 8 distinct wedges. Work joined rounds with slip stitch joins and change colors at wedge boundaries for crisp sectors. Final edging forms a lacy scallop that is used to join adjoining motifs.
— Materials & Gauge :
Info :
Gauge is not critical for function but affects size: one completed motif (after blocking) should measure approximately 9-10 inches (23-25 cm) in diameter using 4.0mm hook and worsted cotton. Adjust hook size to achieve flat, non-cupping circles.
— Peppermint Swirl Wheel Motif (Make 5) :
Notes :
Each motif is worked in joined rounds starting from a magic ring. There are 8 wedges per motif. For a clear candy-swirl look, use two contrasting colors and change colors at wedge boundaries. The rounds below show exact stitch counts and color-change points. All increases are distributed evenly (one increase per wedge per increase round) which adds exactly 8 stitches each increase round, keeping math consistent.
Round 1 :
Make a magic ring. Work 8 sc into the ring, do not join yet if you prefer continuous spiral; for easier color changes, join with sl st into first sc and ch1. (8)
Round 2 :
Change to Candy Red. Inc in each stitch around (2 sc in each st) — 8 increases total. If joined rounds: *2 sc in next st* repeat 8 times, join with sl st to first sc. (16)
Info :
Place a stitch marker at the first stitch of Round 2 to mark the start of the wedge sequence. We will treat every 2 stitches as the initial wedge base for Round 2 but from Round 3 onward wedges grow evenly.
Round 3 :
Change to Cream. Work (1 sc, inc) in sequence around: *(1 sc in next st, 2 sc in next st) repeat* 8 times. Join. (24)
Round 4 :
Change to Candy Red. Work (2 sc, inc) x 8 — that is, 2 sc in first 2 sts, then inc in next; or follow pattern *(2 sc, 2 sc in next st)* repeated 8 times. Join. (32)
Round 5 :
Change to Cream. Work (3 sc, inc) x 8. Join. (40)
Info :
Color changes: change color at the last yarn-over of the final stitch before the wedge boundary so the new color is pulled through and the edge stays crisp. Carry the unused color behind the work for up to 2-3 rounds if you prefer, or fasten off and weave in ends for the cleanest look.
Round 6 :
Change to Candy Red. Work (4 sc, inc) x 8. Join. (48)
Round 7 :
Change to Cream. Work (5 sc, inc) x 8. Join. (56)
Round 8 :
Change to Candy Red. Work (6 sc, inc) x 8. Join. (64)
Info :
At this stage every wedge consists of the same number of stitches. Keep your tension even. If the center is tightening, slightly loosen the last rounds so the motif lies flat. If cupping occurs, add an extra increase evenly across round.
Round 9 :
Change to Cream. Work (7 sc, inc) x 8. Join. (72)
Round 10 :
Change to Candy Red. Work (8 sc, inc) x 8. Join. (80)
Round 11 :
Change to Cream. Work (9 sc, inc) x 8. Join. (88)
Round 12 :
Change to Candy Red. Work (10 sc, inc) x 8. Join. (96)
Info :
Round 12 yields 96 stitches total, which divides evenly into 16 scallops or 8 larger wedges. We will use 16 scallop anchor points for a regular scalloped border; this makes joining motifs simple because 96/16 = 6 stitches per scallop unit.
Round 13 :
Change to Cream. 1 sc in each st around. Join. (96)
Round 14 :
Change to Candy Red. 1 sc in each st BLO (back loops only) around to create a slight ridge defining the border. Join. (96)
Info :
Working in BLO on this round creates a neat ridge that visually separates the wheel center from the scalloped border. This is also ideal for anchoring scallops so the border stands away from the wheel slightly.
Round 15 :
Scallop preparation — mark every 6th stitch around. To mark, use stitch markers or safety pins: *Place marker in 1st stitch, then count 6 sts and place next marker* until you have 16 marked anchor points (96/6 = 16). These marks will be the shell anchor stitches.
Round 16 :
Shell round — keep Candy Red. *Sc in next 5 sts, 5 dc in next marked stitch (shell). Repeat from * until you have worked 16 shells. Join with sl st to first sc. The working stitch count remains conceptually 96; shells are worked into one anchor stitch each. (Shells x 16)
Info :
Each shell is worked into a single anchor stitch (every 6th stitch) so shell spacing is even. If your motifs have slightly different stitch totals, adjust the spacing by dividing your stitch count by 16 to get the correct interval for shells.
Round 17 :
Scallop finishing — switch to Cream. Into each shell: sl st into center dc of shell, ch3 (counts as first dc), 2 dc in same center space, ch2, 3 dc in same center space, sl st to next shell center space. This creates a lacy picot-like scallop between shells. Work all 16 scallops, join. (16 scallops)
Round 18 :
Edge clean-up — remain Cream. 1 sc in each dc and ch space around to tidy shells and fill gaps; when you reach chain-2 spaces created in Round 17, work 2 sc into each chain-2 space to maintain edge tension. Join. (approx 96 sc equivalent)
Info :
At this point your motif measures about 9-10 inches across depending on yarn and tension. Block each motif gently: dampen, pin to a circular template, and allow to dry. Blocking ensures shells sit flat and edges align for joining.
Round 19 :
Final picot accent — change to Candy Red. Along the outermost edge: *(sc in next 3 sts, ch3, sl st into the first of the 3 sc just made to form a small picot-style bump) repeat around* to create a bright red scalloped rim. Join and fasten off leaving a 12-18 inch tail for weaving when joining to next motif. (approx 16-18 picots)
Info :
If you prefer a single-color rim, work the picot accent in whichever color you prefer; red offers striking contrast while cream softens the look. Fasten off securely and weave ends in across the back of the motif.
Repeat :
Make 5 motifs in total following Rounds 1-19 above. For motifs 2-5: you will join-as-you-go on Round 16 (shell round) or Round 19 (final picot accent) — instructions below show the recommended join-as-you-go method using the scallop/shell anchor points.
— Join-as-you-go Method (Joining Motifs in a Row) :
Info :
We recommend joining each new motif to the previous motif as you work the final scalloped round (Round 16 or Round 19) using slip stitches or single crochet into corresponding shells. This avoids visible seams and yields a continuous runner.
J1 — Positioning :
Lay Motif 1 flat, shell-side up. Lay Motif 2 on top with shells aligned so that shells from Motif 2 will meet shells of Motif 1 at designated anchor points along one side. You will join 8 shells across the contact edge for motifs that touch on a semicircle. For a linear runner, join motifs along one edge: you will align 8 shells from each motif so they overlap neatly.
J2 — Begin Joining (during Round 16) :
When you reach a shell that should join to the previous motif, instead of completing the shell in isolation, work the shell as: 5 dc in anchor stitch of current motif, then sl st into the center of the corresponding shell on the adjacent completed motif to join. Continue for each join shell. This makes a linked chain of shells between motif edges. Work non-join shells as normal on the free edge.
J3 — Alternate joining on Round 19 (if using picot accent) :
If you prefer to add the bright red picot rim last, work motifs up to Round 18, then when working Round 19 on Motif 2, at each picot position that aligns with Motif 1, sl st into the picot bump (or shell center) of Motif 1 before forming the new picot on Motif 2. This gives a decorative linked picot seam.
Info :
Make sure the motifs are blocked and shells are evenly spaced before joining. Using a tapestry needle to pin and align shell centers helps keep alignment exact. When joining, keep tension consistent so the join is flat and secure but not pulled tight.
— Runner Assembly Notes :
Info :
For a 5-motif runner, join motifs in a straight line with the same seam orientation for all joins. If you prefer a staggered look, offset every other motif by half a shell for a scalloped offset; this requires slightly different shell alignment and additional slip stitch joins.
Edge Finish (After Joining All Motifs) :
Once motifs are joined, work a unifying border along the long edges to neaten the seam and create a continuous look. With Cream on the runner laid flat, pick up stitches along the entire outer edge and work: Round A: 1 sc in each st around edges including join seams to fill any gaps. Round B: *sc in next 4 sts, 5 dc in next st* repeat along each side to create small scallops; repeat on both long edges. Finish with a picot or crab stitch (reverse sc) in Candy Red for a crisp outer rim.
Info :
The unify-border rounds will have counts dependent on join shaping; work to visually balanced spacing rather than exact stitch numbers if your joins altered counts slightly. Use markers every 10 inches for reference and adjust shell placement to maintain symmetry.
— Alternate Lengths and Adjustments :
Info :
To lengthen the runner, simply make additional motifs and join them in the same way. To shorten, omit motifs and finish with the same edge treatment. If you want a wider runner, create a second parallel row and join rows with connecting shells or decorative chain bridges between motifs; this requires planning the join so shells on both rows align every other motif.
— Detailed Troubleshooting & Tips :
Info :
1) If your motif cups (edges curl upward), add one additional increase round evenly distributed and re-block. 2) If motif ruffles (wavy edge), you added too many increases—remove the last increase round by unpicking and reworking evenly. 3) When carrying yarn between color changes, catch floats every 3-4 sts to keep floats tidy behind fabric. 4) Keep your last stitch before a color change worked to the final yarn over in old color and complete final pull-through in new color for a neater join.
Info :
Weave in ends as you go to keep the back tidy: using the long tails left after each motif, weave them through several rounds on the wrong side before trimming. This secures the color changes and creates a neat finished back when the runner is in use.
— Finishing :
Info :
Once all motifs are joined and the outer border is complete, give the runner a final block: dampen lightly, pin to desired measurements ensuring motif centers are aligned, and allow to dry fully. Trim any stray fibers and give a gentle steam press if desired to flatten shells.
Final Care :
Hand wash or use gentle machine cycle for cotton yarns. Lay flat to dry to keep shells and scallops in shape. Avoid tumble drying to prevent distortion of scalloped edges.
Info :
Pattern Variations: To create a subtler swirl, substitute soft gray or sand for the cream. For smaller motifs, use sport-weight yarn and a 3.5mm hook — remember motifs will be smaller and joining counts differ proportionately. For a festive table, add metallic gold thread plied together at the shell round for a hint of sparkle.
This peppermint swirl runner brings instant festive cheer and vintage charm to any table. Working each swirl motif is meditative, and the join-as-you-go scalloped edge makes assembly satisfying and neat. The bold red and cream contrast gives a crisp, classic look, while the lacy edges add handmade elegance. Whether for holiday gatherings or daily display, this runner is a bright, durable accent you'll be proud to place on your table. 🧶❤️✨