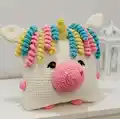
About This Pillow-unicorn Amigurumi Pattern
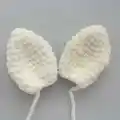
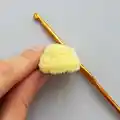
This pattern makes a soft square unicorn pillow with a chunky plush texture and cute facial features. You will crochet the pillow base, then create and attach ears, horn, mane, nose, nostrils, legs and arms. The design is playful and customizable, perfect as a gift or nursery decor.
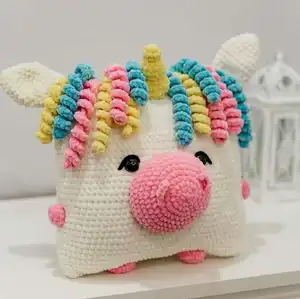
Worked in plush yarn (Himalaya Dolphin Baby recommended) with a medium hook, the pillow finishes approximately 31x31 cm including the horn. Colorful mane pieces add whimsical texture and charm.
Why You'll Love This Pillow-unicorn Amigurumi Pattern
I absolutely love this pattern because it transforms simple crochet squares into a joyful, character-filled pillow that kids adore. I enjoy the mix of basic rounds for the pillow and small amigurumi pieces that bring the face and mane to life. The mane technique lets me play with color combinations and texture, and sewing everything together is a satisfying finishing step. It is a wonderfully giftable project that feels special and handmade every time.
Switch Things Up
I love customizing the mane colors to make each unicorn unique; try pastel shades for a softer look or bright brights for a playful version.
I often change yarn weight and hook size to create different finished sizes — bulky yarn with a larger hook gives a chunky pillow, while thin yarn makes a smaller, denser pillow.
I sometimes embroider different eye shapes or add safety eyes for a different expression; play with eye placement to change personality.
You can vary the nose size and shape by increasing or decreasing rounds to make a round snout or a smaller button-like nose.
Try adding tiny crocheted accessories like a bow, little crown, or a scarf to personalize the pillow for gifts.
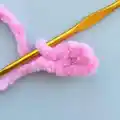
I recommend experimenting with mane length by making longer chains and more rows for a fuller look or shorter curls for a tidy style.
For a more durable toy, sew in an inner lining or use tighter tension and extra stuffing to help the pillow keep its shape.
I sometimes replace the bead eyes with embroidered eyelids for a softer child-safe finish and to add character with eyelashes or brows.
To make a themed set, create multiple pillows in coordinating colors and varying horn styles for a delightful collection.
I also enjoy adding tiny details like blush with yarn or fabric paint, or crocheted hearts sewn on as little accents to make each pillow special.
Common Mistakes & How to Fix Them
✗ Not securing the beginning of each round can cause circles to become uneven and open; always fix the beginning of each new circle with a pin or a thread to maintain an even edge.
✗ Understuffing or overstuffing the pillow leads to misshapen corners and an unstable shape; stuff tightly and evenly while shaping the angles for a neat square finish.
✗ Forgetting to leave long sewing tails on small parts prevents easy attachment later; leave a long thread at the end of each detail for sewing and hiding inside the pillow.
✗ Skipping stitch counts on ears, nose, or horn creates mismatched pieces; count every round carefully, especially where increases and decreases are used.
✗ Placing facial features without pinning first can result in asymmetric placement; pin eyes, nose, and mane in position before permanently stitching them down.