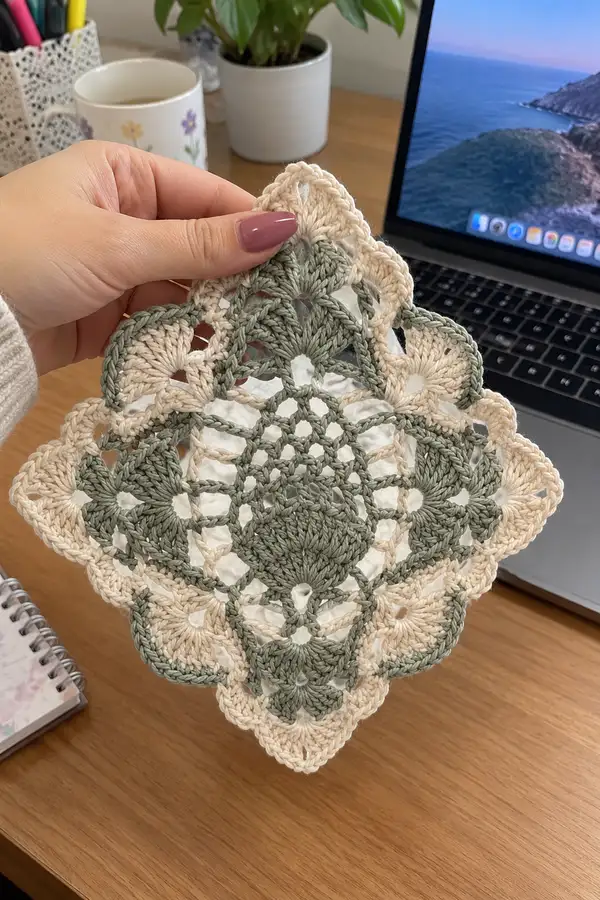
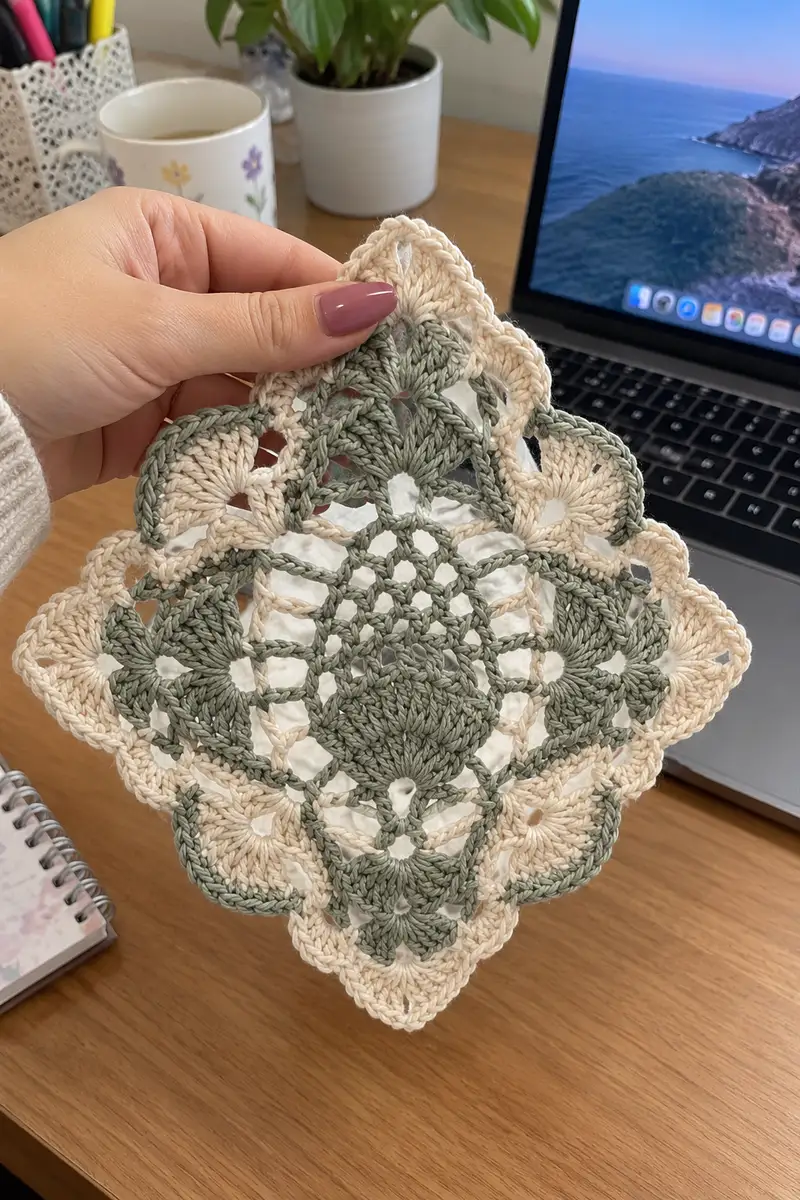
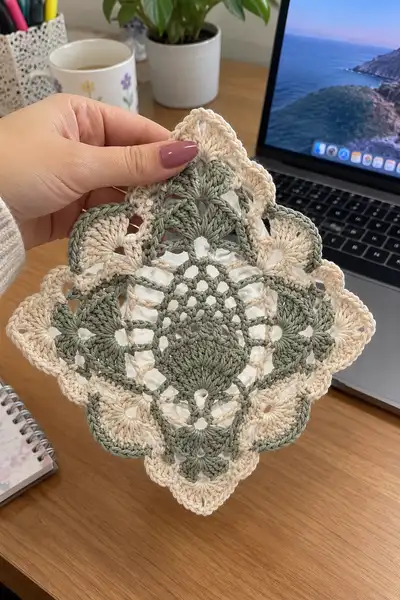
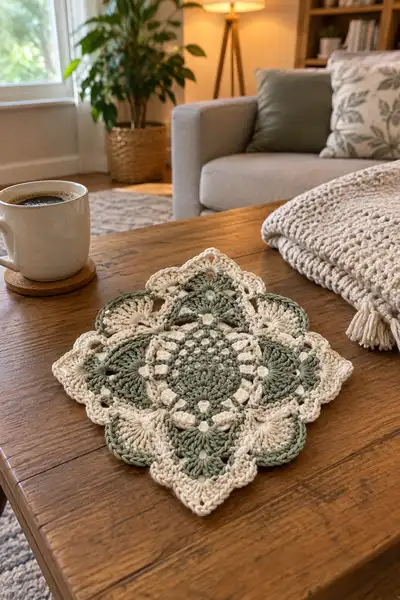
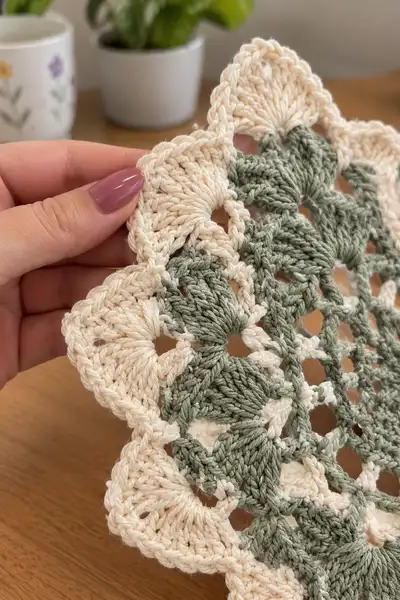
This delicate pineapple lace granny square is a lacy, square motif inspired by classic pineapple crochet motifs. Shown in a soft sage green and warm cream, the motif features a textured central medallion, openwork mesh, layered pineapple shells and a scalloped edge — perfect for a bedspread, throw or set of placemats. The pattern includes step-by-step round instructions, color change notes, blocking and joining guidance to recreate the elegant bedspread shown in the photos.
Progress Tracker
0% Complete
— Center Medallion :
Round 1 :
Make a magic ring, ch 3 (counts as dc). Work 7 dc into ring. Join with sl st to top of ch-3. (8)
Round 2 :
Ch 3, dc in same st, *1 dc in next st; rep from * around. Join. (8 dc groups, 8 total increase points = 12)
Round 3 :
Ch 3, (dc, dc) in next st, *2 dc in next st; rep around. Join. (16)
Round 4 :
Ch 3, dc in next 2 sts, *2 dc in next st, dc in next 2 sts; rep around. Join. (20)
Round 5 :
Ch 3, dc in next 3 sts, *2 dc in next st, dc in next 3 sts; rep around. Join. (24)
Info :
Keep tension even. This small medallion forms the solid centre of the pineapple square. Place a stitch marker at the start of each round if you prefer to track more easily.
Round 6 :
Ch 3, dc in next 4 sts, *2 dc in next st, dc in next 4 sts; rep around. Join. (28)
Round 7 :
Ch 3, dc in next 5 sts, *2 dc in next st, dc in next 5 sts; rep around. Join. (32)
Info :
At this stage the medallion is still mostly solid; the next rounds create the first subtle lace spokes which lead into the pineapple repeats. Ensure the magic ring center is closed tightly so no hole shows through.
Round 8 :
Ch 3, dc in next 6 sts, *2 dc in next st, dc in next 6 sts; rep around. Join. (36)
Round 9 :
Ch 3, dc in next 7 sts, *2 dc in next st, dc in next 7 sts; rep around. Join. (40)
Round 10 :
Ch 3, dc in next 8 sts, *2 dc in next st, dc in next 8 sts; rep around. Join. (44)
Round 11 :
Ch 1, sc in same st, *ch 3, skip 2 sts, sc in next st; rep around. Join with sl st to first sc. (44 sc base, 22 chain-3 spaces)
Info :
Switch to Sage Green for the next set of rounds to form the inner pineapple lobes. Join the new color in any sc of your choice — weave in the tail later or carry the color along the back if making multiple squares.
Round 12 :
With Sage, ch 4 (counts as tr), tr in same st, *ch 3, (tr, tr) in each sc around into the sc spaces, ending with ch 3. Join with sl st to top of ch-4. (Pairs of tr made into each sc, ch-3 spaces retained)
Round 13 :
Ch 3, dc in same st, *dc in next st, ch 3, dc in next st; rep around linking corners visually. Join. (This round creates short spokes; stitch count remains similar to previous round)
Round 14 :
Ch 1, sc in same st, *ch 5, sc in center of next small pair of dc groups; rep around to create larger chain spaces for the pineapple arches. Join. (Evenly spaced chain-5 loops)
Info :
These chain spaces form the channels where the first pineapple shells will rest. Keep them open by not pulling the chains too tight; the shells rely on these spaces to anchor properly.
Round 15 :
Ch 3, in same loop work 7 dc shell (7 dc cluster), *skip ch-5, sl st in sc between shells, sk next chain, in next ch-5 work 7 dc shell; rep around. Join. (You will have shells placed into the larger chain loops; count: shells = number of chain-5 spaces)
Round 16 :
Ch 1, sc in top of first shell, ch 4, sc between shells (in the sl st join), *ch 4, sc on shell top; rep around to create tall picot-like arches. Join. (shell-to-shell connectors formed)
Round 17 :
Ch 3, dc in same st, dc across top of shell and into chain-4 spaces to build a mesh ladder: (dc, ch2, dc) across each arch, connecting shells with small dc pairs. Join. (Count variable; maintain 44-48 approximated dc placements)
Info :
At the end of Round 17 the motif begins to take on a lacy, open character. If your shells look narrow, block them before continuing to encourage even expansion.
Round 18 :
Ch 1, sc in same st, *ch 3, sc between the next pair of dc groups; rep around. Join. (sc base with chain arches)
Round 19 :
Ch 3, in next ch-3 space work (2 dc, ch 2, 2 dc) as a small cluster shell. In each chain-3 space work cluster; sl st between clusters as needed. Join. (Creates diamondlike secondary shells around the center)
Round 20 :
Ch 3, dc in each st and dc-space across, making sure to place 3 dc in center-top of earlier shells to give rise to pineapple lobes. Join. (Stitch count increases slightly where clusters receive extra dc: typical increase +4 across the round)
Info :
Begin visualizing the four pointed diamond shape: you will be building longer groups on the four cardinal points to form the large pineapple lobes seen in the images. Use stitch markers in the 4 quadrant midpoints to keep symmetry correct.
— Pineapple Lobes (first expansion) :
Round 21 :
Ch 3, dc in next 4 sts, *(ch 2, skip 1), in next stitch work 5 dc cluster (shell), ch 2; continue dc in next 8 sts to emphasize the quadrant lobe. Join. (Counts vary per quadrant; overall stitch total increases by 4)
Round 22 :
Ch 1, sc in same st, *ch 5, sc at each shell apex; rep around to form long chain arches that outline each pineapple lobe. Join. (You will have 4 long chain-5 arches per motif per side)
Info :
This is where the motif starts showing the characteristic elongated pineapple shape at each point. Each lobe is constructed over several rounds by stacking shells and elongated chain spaces.
Round 23 :
Change to Cream. Join cream with a sl st into any chain-5 space at a quadrant. Ch 3, (dc, dc, dc) in same ch-5 to start scalloped foundation, *ch 2, sl st to the outside of the next shell to anchor; rep around in the long chain arches. Join. (Creates alternating dc fans and sl st anchors)
Round 24 :
Ch 1, sc in same st, *ch 3, skip 2, sc in next dc fan apex; rep around to define scallop locations. Join. (Defines sites for later outer shell placement)
Round 25 :
Ch 3, in next sc-space work shell: (dc x7) into space to form a large outer petal; sl st to next anchoring point; rep around. Join. (Shells now begin to appear along the outer edges; shell count will be equal to the number of earlier chain-5 spaces)
Info :
Change of color emphasizes the layered appearance. When you change to Cream be sure to carry the Sage color behind if you prefer to avoid many tails when making many motifs — otherwise fasten off neatly and weave ends later.
Round 26 :
Ch 3, dc in each st along shell tops, placing 3 dc in the shell center for stability. Where space exists, work (dc, ch2, dc) to open a small eyelet. Join. (A few increases across round possible where shells receive center clusters)
Round 27 :
Ch 1, sc in same st, *ch 4, sc at shell joins to prepare for next Sage round; rep around. Join. (Chain arches alternate between cream shells)
Round 28 :
Change back to Sage. Join with sl st to any ch-4 space. Ch 3, in same space work (dc, dc, dc, dc) as a compact 4-dc cluster; *ch 2, sl st in top of next shell; rep around building a second tier of sage lobes inside the cream scallops. Join. (This starts the layered pineapples visible in the sample)
Round 29 :
Ch 1, sc in same st, *ch 3, sc between clusters; rep around. Join. (Creates vertical channels between scallops and inner lobes)
Info :
Use this round to ensure your quadrant markers are still aligned. Adjust tension slightly in the chain loops so that when you build the next shell tier the corners remain pointed and not rounded.
Round 30 :
Ch 3, dc in each stitch across the round, placing 3 dc in the center top of each inner cluster to reinforce the oval shaping of each pineapple lobe. Join. (Expect stitch count to have increased by roughly 4–8 from Round 26, depending on how many 3-dc centers you placed)
Round 31 :
Ch 1, sc in same st, *ch 5, sc in center of next double cluster; rep around. Join. (Chain-5 spaces again to accept larger outer shells)
Round 32 :
Ch 3, in each ch-5 space work a 9-dc shell (9 dc). Sl st to sc between shells. Rep around to make full scallop row in Sage. Join. (Large shells create dramatic textured lobes)
Info :
At this point you should see four large lobes placed on the four cardinal points and smaller scallops filling between. The motif is now clearly diamond-on-point shaped. If any lobe looks off, unravel only the last shell and rework with slightly looser or tighter tension.
— Lacy Fill and Mesh Rows :
Round 33 :
Ch 1, sc in same st, *ch 6, sc into next shell apex; rep to create tall mesh arches around the outer shells. Join. (Ch-6 loops form mesh)
Round 34 :
Ch 3, in each ch-6 space work (dc, ch2, dc) to create a laddered connection between outer shells. Sl st to next sc and continue. Join. (Mesh ladder forms; stitch count increases by +4 per ch-6 anchoring where 2 dcs are placed)
Round 35 :
Ch 1, sc in same st, *ch 4, sc on top of each dc-pair; rep around. Join. (Prepares for an extra sage shell tier)
Round 36 :
Change to Cream. Join cream in a ch-4 space. Ch 3, make 7 dc shell in ch-4; sl st to next anchoring sc. Rep around to add cream fan details between sage lobes. Join. (Alternating cream shells create contrast)
Round 37 :
Ch 1, sc across, placing sc in top of each 7-dc shell and chain spaces to neat the round. Join. (Even balancing round with minimal change)
Round 38 :
Ch 3, dc in each st around reserving to place (2 dc, ch1, 2 dc) in each quadrant apex to strengthen the points. Join. (Stitch count will increase by +4 for the 4 apex clusters)
Info :
From here on you will alternate sage and cream to build the scalloped, nested pineapple shells. Work slowly and count carefully — each shell adds extra stitches at its apex which must be balanced in the following rounds.
Round 39 :
Ch 1, sc in same st, *ch 3, sc between groupings; rep. Join. (Lays foundation for the next shell tier)
Round 40 :
Change to Sage. In each ch-3 space work (dc x5) to create compact sage shells; sl st between shells into the sc. Join. (Shells = number of ch-3 spaces; overall stitch count increases by shells x 2–4)
Round 41 :
Ch 1, sc in same st, *ch 4, sc between shells; rep around. Join. (Defines next outer shell anchors)
Round 42 :
Change to Cream. In each ch-4 space work (dc x9) to create larger outer scallops. Sl st to sc. Join. (Significant increase around these larger shells; add 4 stitches per shell where necessary)
Round 43 :
Ch 1, sc in same st, *ch 2, sc in middle st of each 9-dc shell; rep around. Join.
Info :
At this scale the motif is reaching finished size for a single square. For a bedspread you may prefer to stop here and join multiple squares; for a larger single square continue with additional decorative rounds below.
Round 44 :
Ch 3, dc in each st around, placing 3 dc in center-top of each 9-dc shell to keep shells flat. Join. (Adds reinforcing dc row; slight increase where shells were centered)
Round 45 :
Ch 1, sc in same st, *ch 5, sc between dc pairs; rep around. Join. (Long chains prepare for final scallop shaping)
Round 46 :
Change to Sage. Join in ch-5 space, ch 3, work 11 dc into ch-5 space to make an extended scallop shell. Sl st in joining sc. Rep around. Join. (Bold outer scallops formed; count per shell matches ch-5 spaces)
Round 47 :
Ch 1, sc in each dc across shells to tidy and even out the scallop bases. Join. (Even stabilizing round; stitch count roughly equals previous round dc shells count)
Round 48 :
Ch 3, work (dc, ch2, dc) into spaces between scallops to give a subtle ridge for outer points. Join. (Small increases at ridge points reflect placement of two dc clusters)
Info :
Pin the motif to your blocking mat now to coax the outer scallops and lacy mesh open. If making multiple squares, block each before joining for an even finish.
— Detailed Outer Scallop & Point Refinement :
Round 49 :
Ch 1, sc in same st, *ch 6, sc at valley between scallops; rep around. Join. (Large loops for a dramatic final shell)
Round 50 :
Change to Cream. In each ch-6 space work 13 dc shell to create full, plump scallops at the outermost edge. Sl st in next sc. Rep around. Join. (Very large scallops — stitch count increases across each shell)
Round 51 :
Ch 1, sc through each dc across shells, placing 2 sc in tip of each shell to mark the points. Join. (Creates pronounced points around motif)
Round 52 :
Ch 3, dc in next 4 sts, *in tip of cream shell work (dc, ch2, dc) to form a point; dc in next 4 sts; rep around. Join. (Apex points are reinforced with small dc clusters)
Info :
Now is a good time to decide whether to continue adding a decorative loop or to move into joining multiple squares. The motif pictured has an extra neat crocheted rope around the edge which uses a thin slip-stitch row for definition.
Round 53 :
Ch 1, sc in same st, *ch 2, skip 1, sc in next st for small picot valleys; rep around. Join. (Neater valley shaping created)
Round 54 :
Change to Sage. Work 1 sc in each st around in BLO for a subtle raised ridge on the inside of the scallops. Join. (No stitch count change; ridge forms by using BLO)
Round 55 :
Ch 3, dc in each st around, placing 3 dc in shell center where extra weight is desired. Join. (Adds a final reinforcing dc round)
Round 56 :
Ch 1, sc, *ch 3, sc in each shell valley. Join. (Prepares for final decorative picot row)
Round 57 :
Change to Cream. In each ch-3 space work: (sc, ch3, sc) to form small picot petals all around. Join. (Delicate picot edging formed)
Info :
If you want a heavier border (like on a bedspread), repeat Round 56–57 one or two times to thicken the edge. For a lighter look, stop here and weave in tails before blocking.
Round 58 :
Ch 1, sc in each st around to tidy the edge and close any picot gaps. Join. (Final round for single motif edge; stitch count roughly equals previous round)
Round 59 :
Finishing row option: *sl st around in back loop only for a neat rope finish. Fasten off and weave ends. (No stitch count change)
Info :
Fasten off leaving long tail if you intend to join motifs with whip stitch. For slip-join or flat join, leave a 20–30 cm tail to seam through the back loops or foundation chains later.
— Alternate Extended Rounds for Larger Square (optional) :
Round 60 :
If you wish to enlarge the motif, continue: Ch 3, dc 1 in each st around while placing (2 dc, ch2, 2 dc) in each cardinal apex to maintain diamond points. Join. (Stitch count increases +4 per apex)
Round 61 :
Ch 1, sc in same st, *ch 5, sc between large shells; rep around. Join. (Provides more room for an additional shell tier)
Round 62 :
Change to Sage. In each ch-5 space work 11 dc to create an added decorative scallop round. Join. (Large scallops add a significant stitch count)
Info :
Each additional shell tier adds complexity and yarn usage. For bedspread applications you may choose 1–3 extra shell tiers for a fuller motif before final edging and joining.
Round 63 :
Ch 1, sc evenly across shells, placing 3 sc in each shell apex to stabilize outer edges. Join. (Stitch count equalizes)
Round 64 :
Ch 3, dc in each st around, marking corner apexes with (dc, ch2, dc). Join. (Keeps diamond points pronounced)
Round 65 :
Ch 1, sc in same st, *ch 4, sc between clusters; rep around. Join. (Sets up for final scalloped trim)
Round 66 :
Change to Cream. In each ch-4 space work (dc x9) to produce a final decorative scallop band. Join. (Round adds a thick scalloped border)
Round 67 :
Ch 1, sc through each dc around to tidy shell bases. Join. (Stitch count stabilizes)
Info :
To keep symmetry when adding many rounds, place stitch markers at the four cardinal apexes and at the midpoints of each side; this simplifies counting and the placement of extra shells.
Round 68 :
Optional rope finish: Join Sage and sl st around in BLO; fasten off and weave ends. This creates the defined sage rope edge visible in the sample photos. (No stitch count change)
Round 69 :
Final blocking: wet block motif, pin to diamond shape with cardinal apexes elongated slightly, and leave to dry. (No stitch count)
Info :
Blocking opens the pineapple shells and evens the scallops. Use rust-proof T-pins and a foam mat. Gently stretch the motif to desired dimensions and allow to dry completely before joining motifs together.
— Joining Multiple Motifs (if making bedspread) :
Round 70 :
Make as many motifs as required. For joining, align two finished motifs on wrong sides together and pin so that the scallop points meet. Whip stitch through corresponding back loops or use slip-stitch join through the FRONT loops for a decorative raised seam. (No stitch count)
Round 71 :
Join motifs by whip-stitching from the center of each scallop valley to valley, leaving the shell points free for the scalloped seam look. Repeat for entire bedspread, pinning three to four motifs and checking alignment as you go. (Assembly technique)
Round 72 :
For flat join: With cream, join with sc across the adjoining loops through both motifs to create a flat seam. Use 2 sc in valleys where the overlap is larger. Continue until all motifs are joined in your chosen layout. (No stitch count)
Info :
When joining, work gently and keep your tension of the joining stitches slightly looser than the motif fabric so the join lies flat without pulling the scallops inward. Press seams with a warm iron (if cotton) under a damp cloth after joining for a polished finish.
Round 73 :
Edge finishing after joining: With cream, sc evenly around the perimeter of the assembled bedspread, placing 3 sc in each scallop point to emphasize the border. Join with sl st and fasten off. (Final edging step)
Round 74 :
Optional tassel or fringe: Cut groups of yarn to desired length, fold in half and use a crochet hook to pull through the scallop valleys, knotting to secure. Trim evenly. (Decide spacing evenly; e.g., every 3–5 scallops)
Round 75 :
Final care: wash gently by hand or machine on a delicate cycle, reshape and re-block if needed. (Care instructions)
Info :
Although this pattern has many rounds and optional extensions, you can adapt halting at any earlier round for smaller projects like coasters, doilies or placemats. The rounds above provide a full set of options to enlarge, join and finish motifs to recreate the bedspread shown in the photos.
Completing this pineapple lace granny square brings such satisfying results — the layered shells and scalloped edges create a vintage-luxe look that elevates any room! Each motif snaps into place once blocked and joined, forming an elegant bedspread or a set of gorgeous placemats. Take your time with the color changes and blocking; those small finishing steps make all the difference. 🧶💚 I hope you enjoy making these as much as I enjoyed writing the pattern — every scallop is a lovely reward. 🌿