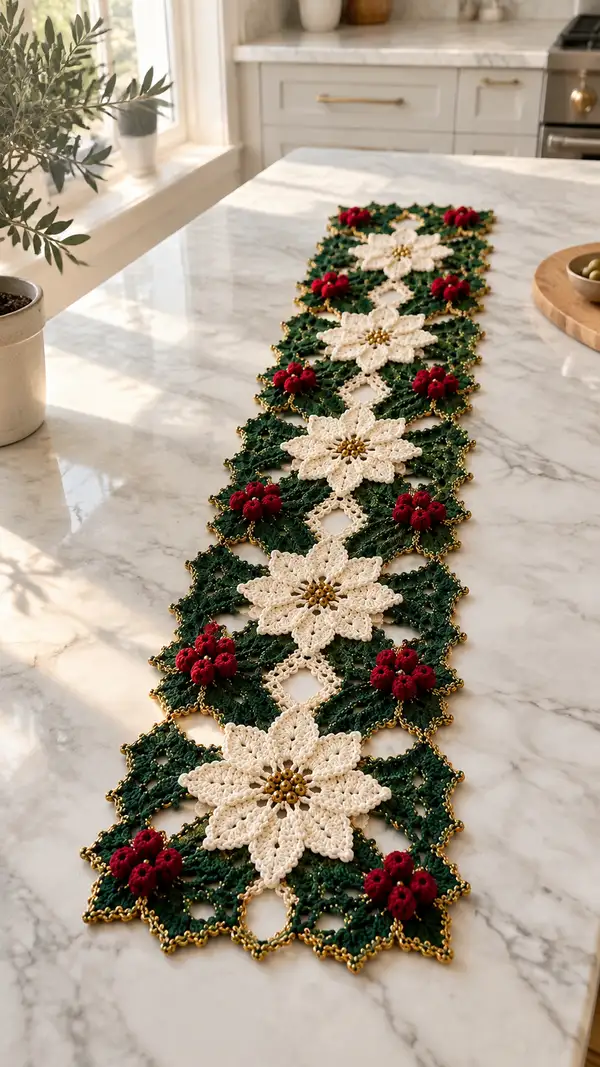
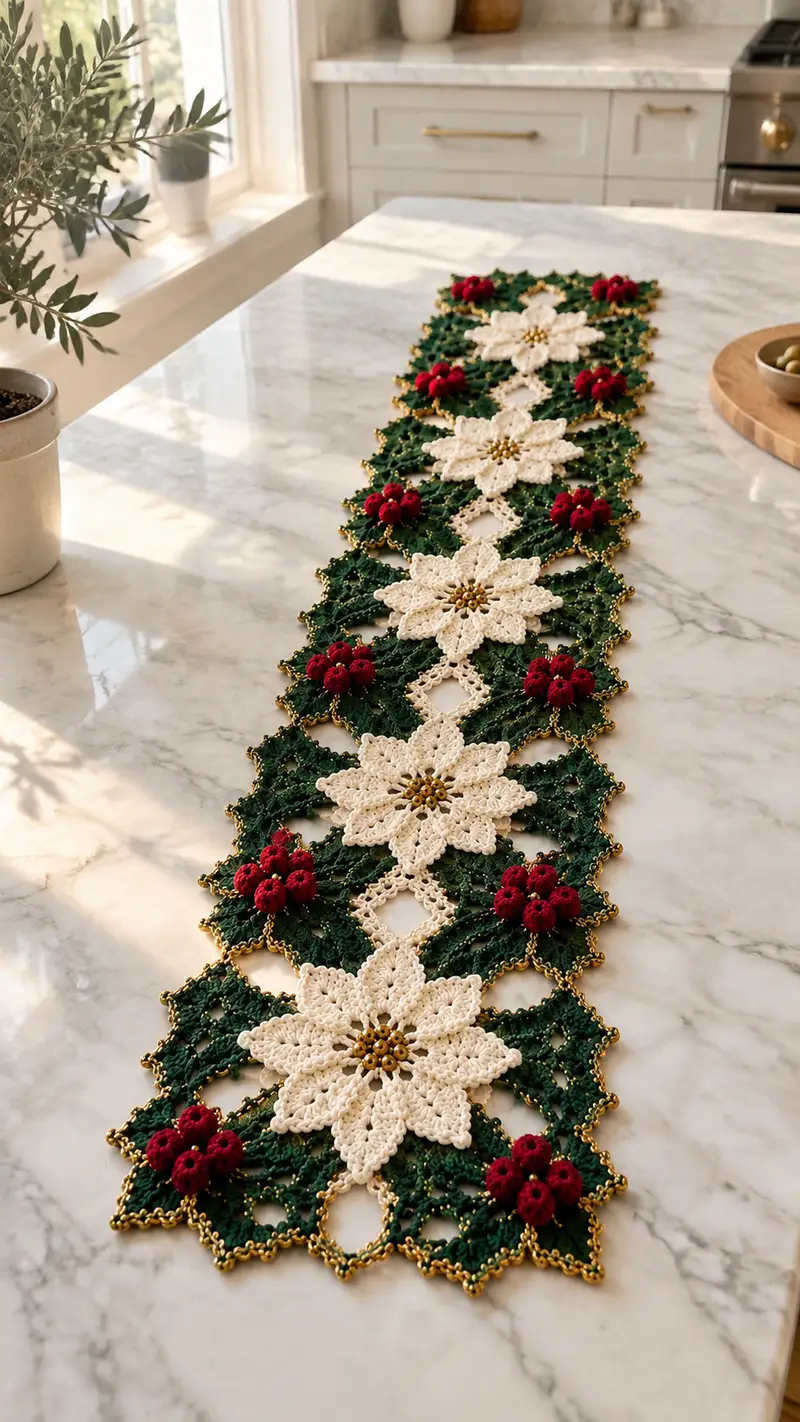
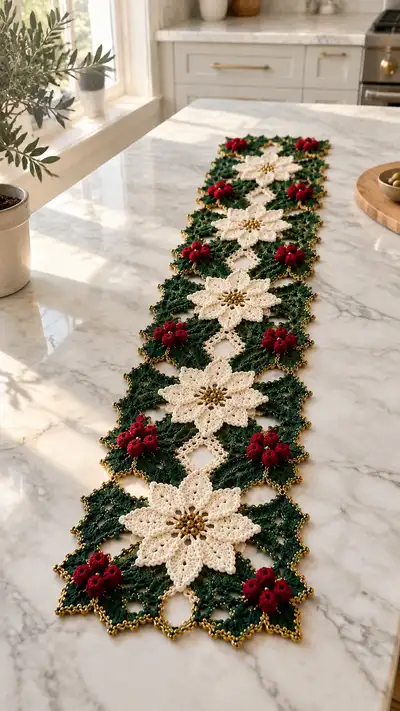
Create an elegant holiday table runner featuring cream poinsettias, deep green lacy foliage, burgundy berry clusters and a sparkling gold bead edge. This modular motif-based pattern is designed to be assembled into a long runner like the photo. Detailed stitch-by-stitch instructions, bead placement, and finishing tips help you recreate this festive centerpiece.
Progress Tracker
0% Complete
— Notes & Gauge :
Info :
This pattern is modular: it uses three main pieces — the Poinsettia Motif, the Diamond Leaf Connector, and the Berry Cluster. Each completed set (poinsettia + two half-diamonds + berries) equals one repeat of the runner as shown. Work motifs in DK cotton with 3.5mm hook for crisp stitch definition. Adjust hook size to match feel and drape. Block each motif flat before joining. Pre-string gold seed beads onto metallic thread or thin yarn before using them in the center and edging rounds.
— Poinsettia Motif (Make 5 or as many repeats as runner length desired) :
Round 1 :
6 sc in magic ring (6)
Round 3 :
(1 sc, inc) x 6 (18)
Round 4 :
(2 sc, inc) x 6 (24)
Info :
This base rounds form a small disk to anchor the layered petals; keep tension loose enough to avoid curling.
Round 5 :
(3 sc, inc) x 6 (30)
Round 6 :
1 sc in each st (30)
Info :
We will create a beaded center. If using beads, slide 8-12 beads to yarn now (approx 8 beads for discreet centers) and incorporate them when noted in Round 9.
Round 7 :
(4 sc, inc) x 6 (36)
Round 8 :
1 sc in each st (36)
Round 9 :
*ch 4, sl st into next sc (creates 12 ch-4 loops around)* Repeat around to end (12 loops). Join with sl st to first loop (36 base sts not counted in loop chain)
Info :
Place beads: after forming ch-4 loops slide one seed bead to the yarn and work a sc into next base st to trap beads; or if using metallic thread, sew beads into center after motif is blocked.
Round 10 :
Working into each ch-4 loop: (sc, ch2, 5 dc cluster in same loop, ch2, sc) in each ch-4 loop (12 petals formed)
Round 11 :
1 sc in each st around petals (count varies; aim for even join around petals; typical count ~72)
Round 12 :
(sc in next 3 sts, sl st into top of next petal dc cluster) x 12 (approx 12 sl st joins, 48 sc between joins)
Info :
These rounds lock petal bases into a round; count carefully. If you end with a different count, adjust by adding single crochet evenly to maintain symmetry for the next decorative petal layer.
Round 13 :
Petal Layer 2 — start embellishing petals: into each petal top (the central dc of the 5-dc cluster) work (ch3, 3 dc, ch3, sl st back into same top) to create raised scalloped petal tips. Do this in each of 12 petals (12 scallops).
Round 14 :
Working around outer edge of petals: *(sc, ch2, 3 dc, ch2, sc) in next petal scallop* x 12 (forms fuller petal edges)
Round 15 :
Even round around petal edges: 1 sc in each st (count will be roughly 120 depending on additions)
Info :
Assess petal fullness. If petals look narrow, add an extra round of (sc, ch2, 2 dc, ch2, sc) between petals to widen them before moving to layering rounds.
Round 16 :
Layer join for second tier petals: Identify every second petal base and work a second-tier petal on top as follows: into base st: (ch4, tr, 3 dc, tr, ch4, sl st into same base). Do this on every other petal base to create layered look (6 second-tier petals)
Round 17 :
1 sc around to tidy joins and secure layered petals. Add extra sc where needed to maintain symmetry (expected count ~140)
Round 18 :
Picot edging: *(sc 3, picot) repeat across each petal edge* around to form delicate points. This will give the poinsettia a lacy finished edge.
Info :
Finish by securing yarn, leave a long tail (approx 20-25cm) for joining to neighboring diamond motifs. Block each poinsettia to flatten and shape petals. Add gold seed beads to center by sewing through the central disk; stitch through central rounds and knot securely behind the disk.
— Diamond Leaf Connector Motif (Make double motifs to fit between poinsettias) :
Round 1 :
6 sc in magic ring (6)
Round 3 :
(1 sc, inc) x 6 (18)
Round 4 :
(2 sc, inc) x 6 (24)
Round 5 :
(3 sc, inc) x 6 (30)
Info :
This starts a small circular base which will be transformed into a diamond by strategic increases and chain loops. Work in deep green for foliage effect. Keep tension consistent for matching sizes.
Round 6 :
1 sc in each st (30)
Round 7 :
To form diamond lobes: *(sc in next 4 sts, ch5, sk 5 sts, sc in next st) x 6 around creating 6 chain spaces for shaping (counts remain based on base sts)
Round 8 :
Work into ch-5 loops to create leaf points: in each ch-5 loop work (sc, hdc, 5 dc, hdc, sc) to form elongated leaf points (6 leaf points)
Round 9 :
Between leaf points work 1 sc in the base to join points, creating a scalloped diamond outline. Expected st count ~90 depending on exact stitches
Info :
At this stage the motif is a six-pointed star; to create the diamond lattice shape, we will work elongated connecting chains and central openwork.
Round 10 :
Working on RS: *ch6, sl st into the base st located two petals over (skipping intermediate petal), ch6, sl st back into next base* - these long chains create the open diamond centers; complete across motif creating alternating diamond windows (6 windows)
Round 11 :
Into each ch-6 window: (sc, ch3, 3 dc, ch3, sc) to create lacy diamond frames (6 lacy diamonds)
Round 12 :
1 sc around motif to tidy joins and stabilize windows. Add extra sc at window corners to maintain straight diamond edges.
Info :
These diamond connectors are worked in deep green and will be joined at their corner points to adjacent motifs and to the poinsettia centers. Leave a 20-25cm tail for joining if you plan to sew; otherwise plan to join motifs as-you-go in joining rounds later.
Round 13 :
Leaf texture round: Working in BLO: 1 sc in each st BLO around to create subtle raised veins (this adds texture to foliage) (count stable)
Round 14 :
Decorative chain edge: *(sc, ch3, sc) around each leaf tip and diamond corner to create picot-like points* continue around motif to produce a consistent edge
Round 15 :
Even round of sc to tidy: 1 sc in each st (expected final count ~110)
Info :
Fasten off leaving long tail for joining. Block motif to exact diamond shape so window openings align precisely when joining multiple connectors to form the runner lattice.
— Berry Cluster Motif (Make many; groups of 3 form berries) :
Round 1 :
6 sc in magic ring (6)
Round 3 :
1 sc in each st (12)
Round 4 :
Working popcorn-style clusters: *into next st work (5 dc in same st), remove hook, insert hook into top of first dc, pull loop through to close popcorn, secure with sl st in next st* repeat to make 3 small popcorns around motif (3 textured berries). Finish with 1 sc around to tidy (approx 18 sts)
Info :
Alternatively use puff stitch: yarn over, insert, pull to height 3 times then gather to close puff. Make 3 puffs close together to create berry trio. Work in burgundy for deep berry color. Leave long tail for sewing.
Round 5 :
1 sc around base to secure berry shape; add extra sc behind each popcorn to anchor (final count variable ~18-20)
Round 6 :
Optional small leaf: With green yarn, attach at base and ch5, work (sc, hdc, sc) into chain to make tiny leaf; sl st back to berry base. This gives natural anchor when attaching to diamond motifs.
Info :
Make clusters of three berries and stitch them at diamond motif corners in sets as pictured. Sew berry clusters in groups and add a small gold bead at the junction for extra sparkle if desired.
— Joining & As-You-Go Connection Rounds :
Info :
Decide the layout: sample photo uses sequence: half-diamond leaves -> poinsettia center -> half-diamond leaves -> poinsettia center, repeated. Join motifs by sewing tails or join as-you-go using slip-stitch connections at pointed corners for a flat seam.
Round 1 (Join Start) :
With poinsettia RS up, position a diamond connector on each side aligning diamond window corners with poinsettia outer points. Using long tail from poinsettia, whip stitch through corresponding sc loops around the poinsettia edge and diamond corner; aim for invisible mattress or ladder stitches. Sew 12-16 evenly spaced stitches around each contact area for a secure join.
Round 2 :
Continue joining subsequent diamonds to the next poinsettia, maintaining consistent tension. If joining as-you-go: with WS facing, join with sl st into both motif loops at corner points and ch1 between joins to secure flat connection.
Info :
Use pins to hold motifs in exact position before sewing. Keep joins loose enough to allow lace to lay flat but firm enough to avoid gaps. Aim for identical spacing on both sides so the runner lies straight.
Round 3 :
Attach berry clusters: Position berry clusters at every alternate diamond corner (as shown). Sew berry base through both diamond and poinsettia seam if applicable. Use 6-8 stitches per berry cluster to anchor securely.
Round 4 :
Once full length is joined, check entire runner on flat surface and adjust any tucks by adding a few anchoring stitches along long seams to prevent shifting.
Info :
For a stronger seam for table use, add a few hidden stitches through adjacent motif layers behind the runner (toward underside) to stabilize joints without affecting top-side aesthetics.
— Decorative Gold Beaded Edging (worked last) :
Info :
Pre-string gold seed beads onto metallic thread or thin yarn long enough to run the full perimeter with a few extra for safety. The edge will be crocheted in a single continuous round around the entire runner to give unified sparkle.
Round 1 :
Attach gold thread at a corner point. Working along motif edge with 3.0-3.5mm hook: *(sc 2, ch3, sc into next picot or space) with bead: before completing last sc of a 2-sc group slide one bead up and work sc to trap bead* Continue along all outer edges placing one bead every 6-10 stitches for consistent shimmer.
Round 2 :
Edge scallop: *into each ch-3 loop work (sc, ch3, sc) and add bead in center sc as you go on alternate scallops* This produces pointed gold-tipped scallops around each leaf and petal point.
Round 3 :
Final tidy round: 1 sc in each st to secure beads and prevent shifting. At corners, work extra sc to maintain flat perimeter. Fasten off and weave ends into back of runner, securing bead strands by knotting and sealing behind motifs with a tiny dab of fabric glue if needed.
Info :
Be mindful of bead tension: do not pull beads tightly; keep a relaxed loop so edge remains flexible. If beads bunch, undo and rework that section with looser tension.
— Blocking & Finishing :
Info :
Wet block entire runner: pin flat to desired measurements, shaping petals and diamonds to match each other. Use rust-proof pins and steam or dampen lightly. Allow to dry completely. Trim any stray fibers, then weave ends securely on WS. Finally, press lightly from RS with cloth over runner to fuse flat shape if your yarn allows.
Info :
For long-term preservation, avoid storing folded on itself; roll with tissue paper or store flat. Remove beads before laundering if using metallic thread that may tarnish, or hand wash gently with cool water and lay flat to dry.
This poinsettia lace table runner brings classic holiday charm to your tabletop with hand-crocheted petals, leafy openwork, and sparkling gold accents. Each motif joins into a luxurious lacy ensemble perfect for festive dinners and seasonal decor. Enjoy the rhythmic stitching and the satisfying glow of gold beads catching the light. 🧶✨ Bring this timeless centerpiece to your home or gift it to someone special — every stitch tells a story. Happy hooking and joyful holidays! 🎄