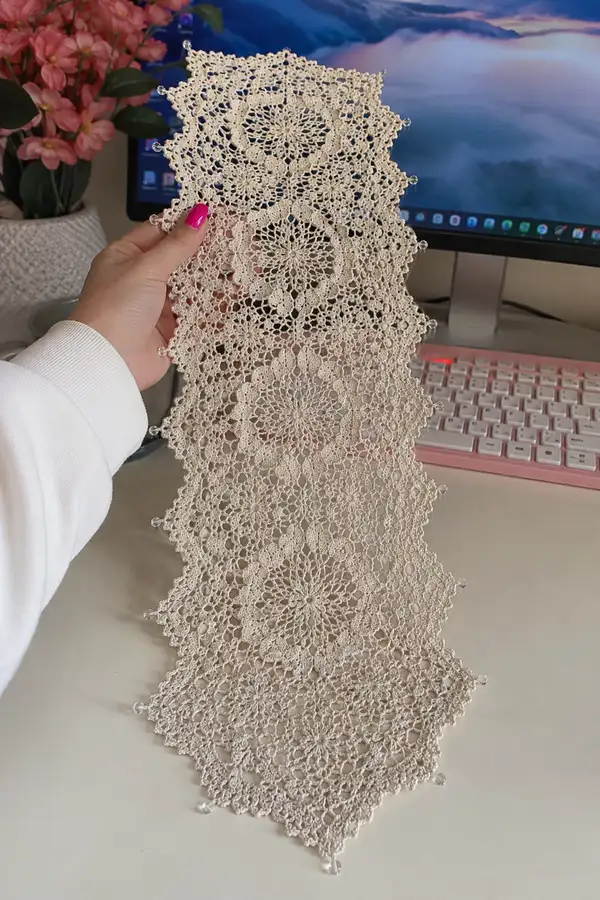
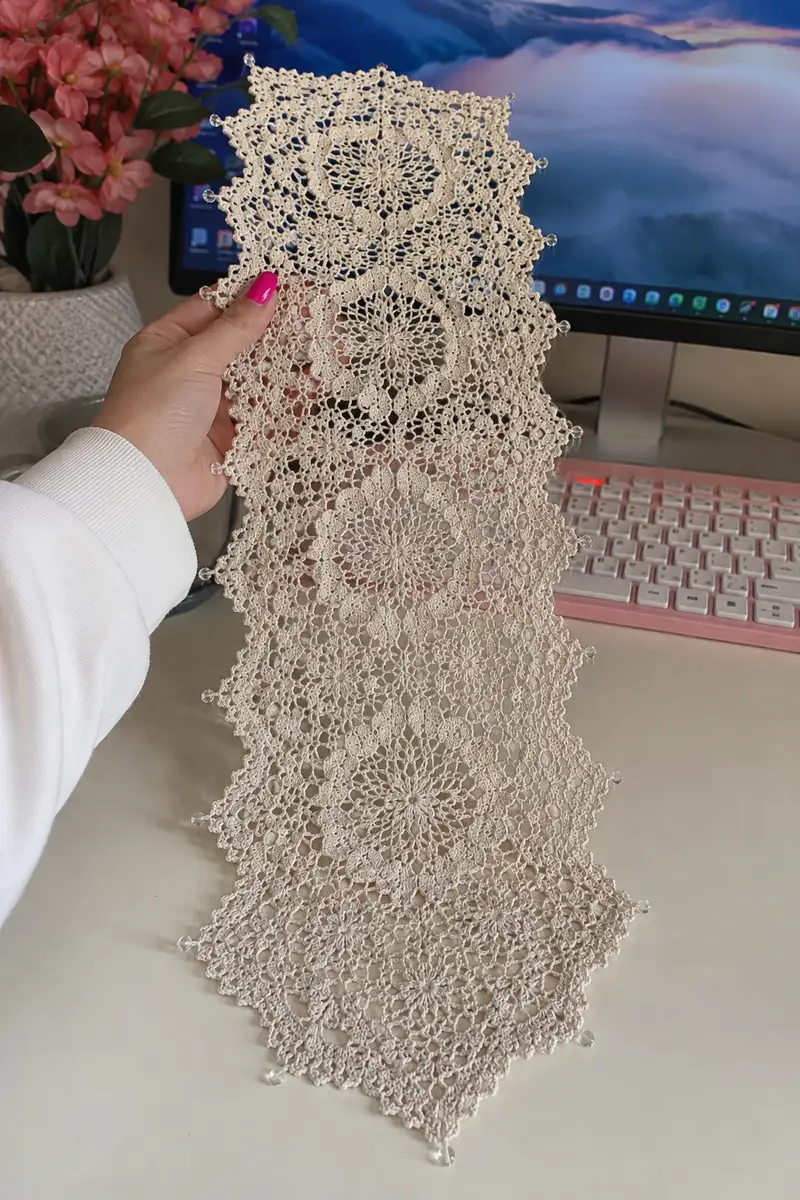
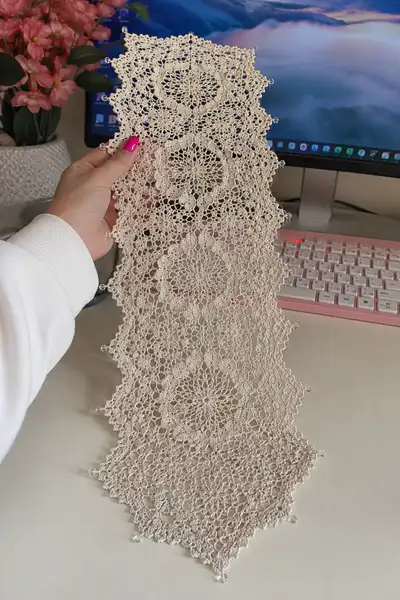
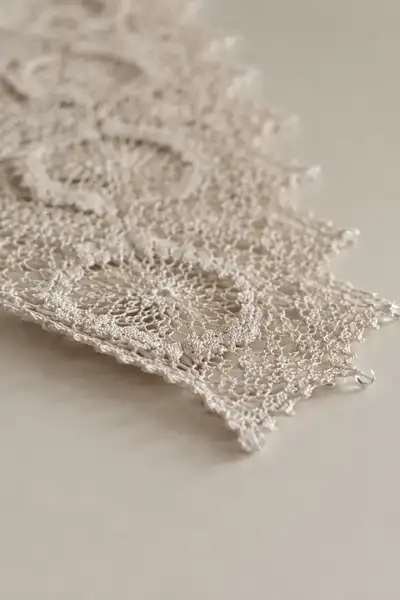
This elegant beaded crystal lace wedding table runner is handcrafted in fine ecru cotton thread and finished with clear crystal bead points. The design features repeating circular medallions joined by delicate lace mesh, scalloped edges and tiny picot bead drops for a romantic, vintage look. Perfect for a bridal table, altar runner or an heirloom centerpiece, this pattern includes detailed motif instructions, joining techniques, beading and blocking guidance to recreate the exact airy lace effect shown.
Progress Tracker
0% Complete
— Materials & Gauge :
Info :
Use size 10 crochet cotton thread and a 1.25mm or 1.5mm hook. Gauge is not critical for lace runners but approximate gauge is 18 motif rounds = 3.5 in (9 cm) across a single medallion when blocked. This runner is worked flat in separate motifs then joined and blocked.
— Notes & Techniques :
Info :
Read through all sections before starting. Each major medallion motif (Large Medallion A) uses 12 repeats around a central ring. Work tightly on center rounds to compact the medallion and more open on later rounds to create lace. Pre-string crystal beads onto a short length of beading thread or onto the working thread prior to the bead rounds (see Beading Info later).
— Abbreviations Summary :
Info :
Refer to the abbreviations list at top. When the pattern says (rep x12) it means repeat the bracketed sequence twelve times for the twelve points of the medallion.
— Large Medallion Motif A (Make 6-8 depending on runner length) :
Round 1 :
Form a small loop with a slip knot and work ch8, sl st to first ch to form ring. (1 ring)
Round 2 :
Ch3 (counts as first dc), work 11 dc into ring, sl st to top of beg ch3. (12 dc)
Round 3 :
Ch5, *sk next dc, dc in next dc, ch3* rep around to create 12 ch-5 loops and 12 dc anchors, sl st to 2nd ch of start ch5 to join. (12 loops)
Info :
Round 3 creates the first set of chain loops that will be the base for shell petals. Keep loops even by counting stitches and using stitch marker at start.
Round 4 :
Sl st into first ch-5 loop, ch3 (counts as dc), work (2 dc, ch2, 3 dc) in same loop (shell), *sl st to next ch-5 loop, (3 dc, ch2, 3 dc) in loop; rep around, sl st to top of beg ch3. (12 shells)
Round 5 :
Ch1, *sc in next 3 dc of shell, ch5, sc in ch2 sp of same shell, sc in last 3 dc, ch3, sl st into ch3 sp from previous shell; rep around to create connecting picot arches. Fasten off and weave tail. (12 arches)
Info :
If you want more open lace here, change to a slightly larger hook for rounds 5-8. Otherwise continue with same hook for consistent fabric.
Round 6 :
Join with thread in any ch5 arch, ch4 (counts as tr), work (tr, ch2, tr) in same arch, *sk to next arch, (tr, ch2, tr) in each arch; rep around, sl st to top of beg ch4. (12 V-trs)
Round 7 :
Ch1, sc in each tr and ch2 sp around (working 3 sc in each V where appropriate) to create a compact ring of sc around outer petals. (72 sc)
Info :
Round 7 evens the work and readies the motif for a more open external lace. Keep stitches even to avoid distortion when joining later.
Round 8 :
Ch5, *sk 3 sc, dc in next sc, ch3, dc in next sc, sk 3 sc, ch5; rep around creating 12 outer picot loops for later shell attachment. Sl st to join. (12 ch-5 loops)
Round 9 :
Sl st into first ch-5 loop, ch3, work (2 dc, ch2, 2 dc, ch2, 3 dc) into same loop to form elongated pointed petal, *sl st to next ch-5 loop, repeat petal; rep around, sl st to top of beg ch3. (12 petals)
Round 10 :
Ch1, sc around each petal following counts: (3 sc across top of first 3-dc group, ch3, sc into ch2 sp, ch3, 3 sc across final 3-dc group). Rep around to create an airy ring. (approx. 144 sc/picot units when counted across petals)
Info :
Use a stitch marker at the start of Round 10 to count petals; maintain symmetry. You may adjust ch3 picots to ch2 for tighter look.
Round 11 :
Ch7, *sk to center of next petal and sl st into ch3 sp, ch7; rep around making 12 ch-7 arches. Sl st to join. (12 ch-7 arches)
Round 12 :
In each ch-7 arch work (sc, ch5, 5 dc, ch5, sc) to create fan units. Rep around and sl st to join. (12 fans)
Round 13 :
Ch1, sc across fans: sc in fan sc, (ch3, sc in center of fan) repeat across each fan to build mesh anchors. Rep around. (12 mesh anchors)
Info :
At this stage the medallion begins to flatten; if your center is cupping, block the center slightly or work next round with a couple extra chs to ease tension.
Round 14 :
Ch3, *dc in sc of fan, ch2, dc in next sc, ch4; rep around forming long looped arches between fans (12 loops). Sl st to join. (12 long loops)
Round 15 :
Work (3 dc, ch2, 3 dc) into each long loop to form outer shells; rep around. (12 outer shells)
Round 16 :
Ch1, sc across shell clusters working 6 sc across each shell and placing ch3 picots between shells (3 sc, ch3, 3 sc). Rep around. (approx 96 sc and 12 picots)
Info :
Round 16 readies the medallion for a delicate edging; count shells to ensure there are exactly 12 shell positions. If you see extra or missing shells, adjust by adding or skipping a small cluster before proceeding.
Round 17 :
Ch4, *tr in next sc, ch2, tr in next sc, ch5; rep around forming raised points. Join. (12 raised points)
Round 18 :
In each ch5 sp work (sc, ch3, 5 dc, ch3, sc) to create scalloped petals. Rep around. (12 scalloped petals)
Round 19 :
Ch1, sc evenly across petals placing (3 sc, ch2, 3 sc) across each petal for a stable fabric. (approx 144 sc)
Info :
This completes the main medallion body. The following rounds add outer lace points and bead picots. If you do not wish to add beads, finish with Round 22 and block.
Round 20 :
Ch6, *sk 6 sc, sl st into next ch2 sp of petal, ch6; rep around to make 12 ch6 connecting loops. Join. (12 ch6 loops)
Round 21 :
Into each ch6 loop: sl st, ch3, (2 dc, ch2, 2 dc), ch3, sl st to make elongated outer points. Rep around. (12 outer points)
Round 22 :
Ch1, sc around each outer point working 6 sc across each tip and placing a small picot (ch3, sl st to base) at the tip of every point. Rep around. (approx 96 sc and 12 picots)
Info :
To add beads: pre-string your 4-6mm crystal beads onto a short length of matching thread or slide them onto the working thread before crocheting Round 24. If pre-stringing on thread, keep bead placements roughly 1 bead per outer point.
Round 24 :
Bead round: With bead on thread or pre-strung on working yarn, sl st to base of an outer picot, ch2, insert bead onto loop then ch1 to secure bead (or slide bead into place then ch1), sl st to center of picot base. Repeat for each outer picot around to place 12 beads. Fasten off and weave in ends. (12 beads)
Info :
Fasten off leaving a 12-15 cm tail for blocking and joining. Pressing and blocking after motifs are completed yields crisp petals and defined picot edges.
— Motif Variation B (Lace Connector, Make matching number minus 1 to join medallions) :
Round 1 :
Ch8, sl st to form ring. (1 ring)
Round 2 :
Ch3, 11 dc in ring, sl st to top of ch3. (12 dc)
Round 3 :
Ch5, *sk next dc, dc in next dc, ch3; rep around to make 12 loops. Join. (12 loops)
Round 4 :
In each loop work (sc, ch3, 3 dc, ch3, sc) to create small fans. Rep around and join. (12 fans)
Round 5 :
Ch1, join fans with sc and ch4 arches: sc in fan sc, ch4, sc in next fan center; rep around forming mesh connectors. (12 ch4 arches)
Info :
These connectors are worked narrower to keep the runner lightweight. You will place these between main medallions to form a continuous runner.
Round 6 :
Ch6, *sl st into ch4 arch, ch6; rep around for long mesh loops. Join. (12 ch6 loops)
Round 7 :
In each ch6 loop work (sc, ch3, 5 dc, ch3, sc). Rep around and join. (12 mini fans)
Round 8 :
Ch1, sc evenly around mini fans adding ch2 spaces between each fan to create flexible mesh. (approx 72 sc and 12 ch2 sps)
Info :
Make connector motifs equal in number to spaces between medallions (e.g., if runner has 4 medallions, make 3 connectors). Place beads on connector outer points if desired using same method as medallion bead round.
Round 9 :
Ch4, *tr in next sc, ch2, tr in next sc; rep around to create subtle raised points. Join. (approx 24 tr points)
Round 10 :
Ch1, sc across with small picots at points: sc across tr, (ch3, sl st to base) in each point; rep around. Fasten off leaving tail for joining to medallions. (approx 72 sc and 12 picots)
— Small End Medallion C (Make 2 for each runner end) :
Round 1 :
Ch6, sl st to form ring. (1 ring)
Round 2 :
Ch3, 11 dc in ring, join. (12 dc)
Round 3 :
Ch5, *dc in next dc, ch3; rep to form 12 ch5 loops. Join. (12 loops)
Round 4 :
In each loop work (2 dc, ch2, 2 dc) to form small petals. Join. (12 petals)
Round 5 :
Ch1, sc around petals with ch3 picots between petals. Fasten off leaving tail for attachment. (approx 72 sc and 12 picots)
Info :
These small end medallions cap runner ends and should mirror the outermost medallion pattern for visual continuity. Add bead to each picot if desired.
— Edging & Scallop Repeat (Edge rounds to create uninterrupted scalloped border) :
Round 1 :
With motif joined or worked separately, join thread at outermost sc of medallion and ch1, work sc around outer edge of the entire runner to tidy joins and pick up connecting points. Work 1 sc per visible sc around edge, placing extra sc where motif edges meet to maintain stability. (Count varies by runner width; work evenly)
Round 2 :
Ch5, *skip 3 sc, sl st in next sc, ch5; rep around creating small arch loops along outer edge. Join. (approx 24-36 loops depending on runner length)
Info :
Edge loops allow for a decorative scallop to be worked on top. During this round, plan bead placement on each scallop point: pre-string beads or have them ready on a short needle.
Round 3 :
Into each ch5 loop work (sc, ch3, 5 dc, ch3, sc) to form the scallop shells. Rep across entire perimeter. (Scallop count equals number of ch5 loops)
Round 4 :
Ch1, sc around scallops placing a picot (ch3, sl st to base) at the tip of each scallop. Rep around. (picot count = scallop count)
Info :
For beaded scallop points: pre-thread bead onto working thread or onto a needle. In the next round we will secure one bead per scallop tip as a final decorative touch.
Round 6 :
Beaded edge round: For each scallop tip, sl st to base of picot, ch2, slide a bead into place then ch1 and sl st to base to lock bead. Repeat for all scallops around outer edge. Fasten off and weave ends. (bead count equals scallop count)
— Joining Motifs into Runner (Detailed join method) :
Info :
Lay medallions and connectors on a flat surface in final runner layout and pin lightly. Choose either slip-stitch joining (crochet-as-you-go) or whip stitch joining with a fine tapestry needle. The instructions below describe a seam-join using a combination of slip stitch and single crochet for a strong, neat join.
Round 1 :
With motifs positioned RS up, join thread at ch2 space where two motifs will meet. Ch1, sl st through both motif ch2 spaces joining them; repeat sl st across one repeat unit until motif edge is secured. Continue around all meeting points. (Join units per meeting point)
Round 2 :
Once initial sl st joins are complete, work a neat sc seam: join yarn at top of seam, sc through the same joining spaces on both motifs working through both loops (like mattress stitch but with sc) to create an even raised seam. Rep at all seams. (Seam length varies)
Info :
Keep joining tension very relaxed so the seam lays flat. Pin motifs and baste with thread if necessary before working sc seams. If you prefer hidden joins, use ladder stitch with a yarn needle and the long tails left from finishing each motif.
Round 3 :
After joining, inspect the runner for any lopsided sections. Adjust by removing a few seam stitches and re-pinning motifs until edges align. Finalize by weaving in all tails and snipping close to the fabric. (Finish work)
— Beading Method & Notes :
Info :
Pre-stringing: Slide all required beads onto a length of flexible monofilament or onto the working thread before the bead rounds. Alternatively, use a beading needle and a short tail of matching thread to sew beads to finished picots. When threading beads on working yarn, slide beads into position then secure with ch1 or a small sl st to lock bead in place.
Info :
Placement: Place one bead at each outer scallop/picot point. On medallions there are typically 12 beads; connectors have fewer (6-8) depending on design. Space beads evenly and secure with a double pass: slide bead, ch1, sl st to base then pass needle back through bead and stitch again if using sewing thread for added security.
— Blocking & Finishing :
Info :
Blocking is essential. Use a big foam blocking board and rust-proof pins. Pin each medallion into a flat circle, stretching petals and scallops outward to create crisp points. Pin bead picots so beads hang just off the edge. Mist lightly with water or steam through a cloth; do not iron directly on beads. Allow to dry fully (12-24 hours).
Round 1 :
After blocking and drying, re-check bead security. If any beads feel loose, secure from the WS with matching thread and small backstitches to lock bead in place. Trim and weave all ends to the WS.
Info :
Storage: Store flat if possible in a breathable fabric bag. Avoid folding across bead points which might stress bead threads.
— Full Example Layout & Counts for Shown Runner :
Info :
The photographed runner shows three large medallions (A) joined lengthwise with two connector motifs (B) between them and small end medallions (C). For that layout: make 3 x A, 2 x B, 2 x C, plus edge scallops worked around entire assembly. Bead count in pictured runner is ~36 crystal beads (12 per major motif tip and a few on connectors and end medallions).
Round 1 :
Layout assembly: Place motifs as A - B - A - B - A with C medallions on each extreme end. Pin heavily. Join motifs using the Joining method described above. Block the entire assembly flat once joined. (Layout complete)
Info :
If you wish a longer runner, add additional A motifs and B connectors repeating the pattern. Adjust bead quantities proportionally. For table width adjustments, add more connectors laterally if changing format from linear to wider runner.
— Troubleshooting Tips & Alternate Approaches :
Info :
If motifs cup or pucker in the center, ensure your central rounds were worked slightly tighter and that outer rounds were not too tight; unpick a round and re-work with a slightly larger ch in arches. For a firmer runner use size 10 thread with 1.25mm hook and use slightly smaller bead sizes to prevent pulling on edges.
Info :
Alternate join: For a more seamless join, consider the join-as-you-go (JAYG) method: complete last round of a motif, and on the last motif slip stitch at seam points into adjacent motif spaces to create direct joins. This requires planning but yields fewer woven ends.
— Final Checklist Before Presentation :
Info :
Check beads for security, ensure no loose ends, ensure blocking pins removed and fabric fully dry. Give a final gentle steam if needed, and arrange runner on table smoothing any residual waves. Enjoy your beaded crystal lace wedding table runner!
Completing this beaded crystal lace runner is a truly rewarding experience—each delicate medallion comes together to form a romantic heirloom piece. The sparkle of the tiny crystal drops transforms the crochet lace into a shimmering centerpiece perfect for weddings and special occasions. Pin and block carefully, and the finished runner will drape beautifully and last for years. 🧶✨ Display with pride or gift it as a memorable, handcrafted keepsake. Enjoy every stitch—and congratulations on finishing a beautiful vintage-style lace runner! 🎀