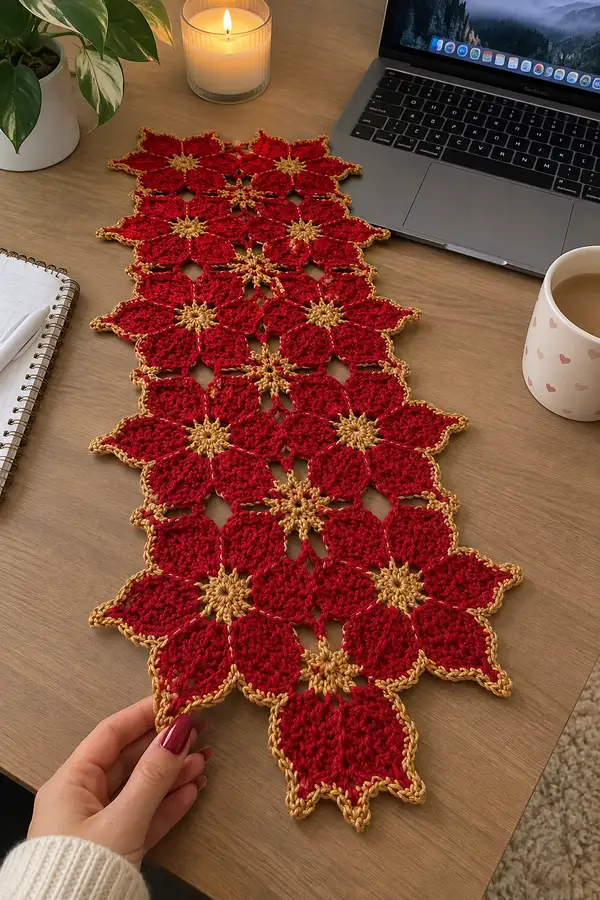
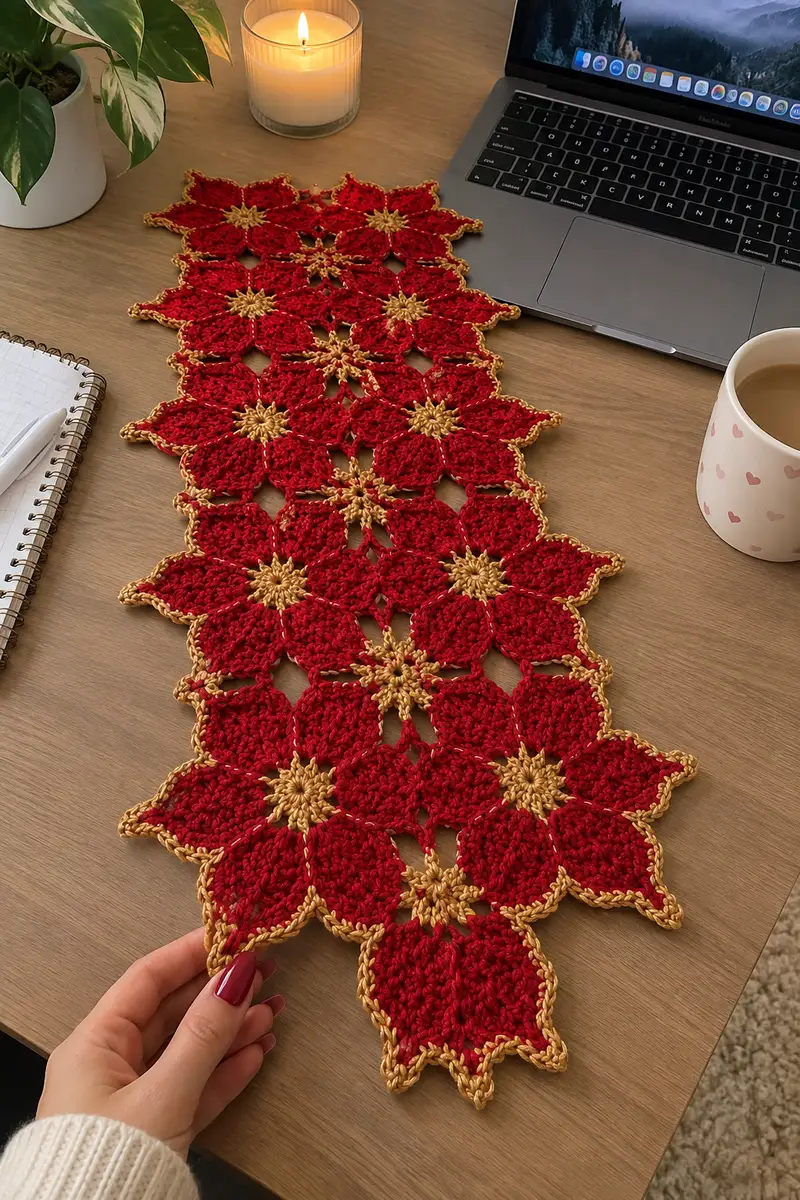
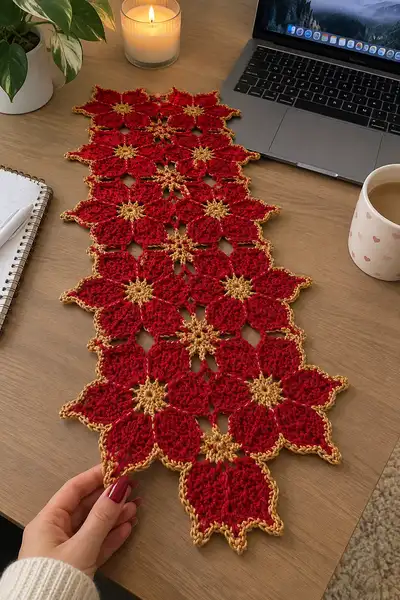
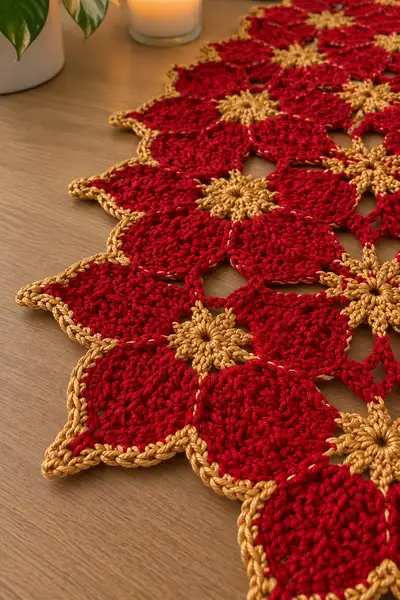
Celebrate the season with this elegant poinsettia table runner made from joined floral motifs. Rich red petals and glowing gold centers create a festive, textured layout with scalloped gold edging. Each motif is worked in two colors and joined-as-you-go for a seamless, lacy runner that lies beautifully flat. The pattern includes step-by-step rounds, joining instructions and a decorative gold border to finish the piece like the photos.
Progress Tracker
0% Complete
— Notes and Gauge :
Info :
This pattern describes a single 8-petal poinsettia motif worked in two colors (gold center, red petals) and joined-as-you-go to assemble a long table runner. Motif sizing may vary with tension; using the recommended yarn and hook, each completed motif measures approximately 4.25" (11 cm) across at the widest points. The sample runner is approximately 11.5" x 36" (29 x 91 cm) composed of 15 full motifs placed lengthwise with trimmed edge motifs at both ends. Gauge is not critical but consistent tension will make joining and edging easier.
Info :
Throughout the rounds I use a consistent scheme based on eight repeats (one per petal) so stitch counts expand and contract in predictable multiples of 8. Place a stitch marker at the first stitch of each round and move it after each round to keep track. When switching colors, finish the last pull-through of the previous color with the new color to avoid additional knots at joins.
— Poinsettia Motif (Make as many as needed) :
Round 1 :
Using gold yarn: 6 sc in magic ring (6)
Round 3 :
(1 sc, 1 inc) x 6 (18)
Round 4 :
(2 sc, 1 inc) x 6 (24)
Info :
At this point you have a small, tight gold disc. We will build a textured gold star center and then switch to red for petals. Fasten off the gold tail if you will be switching from a different gold ball for the center, otherwise carry a short tail for weaving in.
Round 5 :
In gold, (ch2, 2 dc, ch2) into each of the next 6 stitches to form 6 little raised spokes, then into the remaining 6 stitches work sl st into center of each spoke to create an 8-spoked visual—work evenly so you have 8 small clusters around the center (you will end this round with 24 worked stitches and 8 small ch2 spaces for the petal anchors)
Info :
The central gold star is intentionally a compact textured disc; do not overwork this section. We will cut the gold and switch to red on the next round for the petals. Leave a 6" tail to weave into the back.
Round 6 :
Change to red yarn. Join with a sl st to a ch2 space from Round 5, ch1 (does not count), sc into same ch2 space, *ch3, sc into next ch2 space; rep from * around to create 8 ch3 loops between center anchors (work total: 8 sc and 8 ch3 spaces; visual reference only)
Round 7 :
Petal foundation. Work petals into each ch3 space: sl st into ch3 sp, ch1, (sc, hdc, 3 dc, hdc, sc) into same ch3 sp, sl st to anchor; rep for 8 petals. Each petal = 7 stitches (per-petal count). Total petal stitches this round = 7 x 8 = 56 (excluding sl sts and ch1). There are now 56 visible petal stitches forming 8 petals.
Info :
Petals are worked individually into the ch3 anchors. Keep tension slightly firmer here so petals have good definition. Do not join petals to each other yet; treat each as a petal cup.
Round 8 :
Expand petals: In each petal work into the cluster: ch1, sc in next stitch, 2 hdc in next 2 sts, 5 dc across the center region of the petal, 2 hdc in next 2 sts, sc in next stitch, ch1 and sl st to the base; rep x8. Per-petal new stitches = 1 sc + 2 hdc + 5 dc + 2 hdc + 1 sc = 11 stitches; Total stitch count across petals this round = 11 x 8 = 88 (not counting ch/sp or sl sts).
Round 9 :
Work 1 sc in each stitch around across petals, picking up every dc/hdc/sc from previous round so that the stitch count becomes 88 sc (88). This round evens out the petal edges.
Info :
If a small hole remains between petals, we'll close it in the next-building rounds. Keep your hook size consistent to avoid stretch differences across the runner.
Round 10 :
1 sc in each st (88)
Round 11 :
1 sc in each st (88)
Info :
Rounds 9-11 build the body of each petal and equalize the fabric. If you want deeper petals (taller, cupped), you may add an extra even round before moving to shaping.
Round 12 :
(10 sc, 1 inc) x 8 (88 + 8 = 96)
Round 13 :
1 sc in each st (96)
Info :
Round 12 increases the circumference slightly to allow nice petal points. Count in multiples of 8 — each (10 sc, inc) uses 11 sts per repeat but yields net +1 per repeat so math is consistent (96).
Round 14 :
(11 sc, 1 inc) x 8 (96 + 8 = 104)
Round 15 :
1 sc in each st (104)
Info :
At this stage petals are broad; the next rounds will sculpt petal tips and create small chain loops that become motif join points. Make sure petals are oriented with center star visible and petals pointing outward.
Round 16 :
(7 sc, ch4, skip 1) x 8 around (work evenly into the previous round). This creates 8 ch4 loops spaced around the motif for decorative joins and helps form the lacy negative spaces between adjoining motifs. Total sc stitches worked this round = 7 x 8 = 56; plus 8 ch4 loops.
Round 17 :
Work across petals to sculpt points: in each petal section between ch4 loops work: sc in next 7 sts, (3 tr, sl st to tip to form pointed picot), sc back down three sts to anchor — repeat for each petal. Each petal receives approximately 14 sculpting stitches including tr clusters; estimate per-petal added texture 14 x 8 = 112 worked stitches (these are worked into existing spaces; stitch-by-stitch placement is more important than a total absolute count here).
Info :
Petal point shaping uses taller stitches (tr clusters) to give the petals a defined tip. If you prefer a softer point, replace last 3 tr with 3 dc. Keep counted repeats symmetrical across the motif.
Round 18 :
1 sc in each st around the outer perimeter to bind sculpted areas (for counting purposes this will be approximately 104-112 sc depending on small variations created in Round 17; for clarity, aim for 112 sc if you worked full sculpting in each petal) (approx 112)
Round 19 :
1 sc in each st (112)
Info :
Now that the full motif has formed its petals, we will prepare join points that align to the gold centers of adjacent motifs. The next round builds small chain arches at points between petals — these will be where motifs connect when joined-as-you-go.
Round 20 :
(5 sc, ch6, 5 sc) into each petal valley (work into small spaces between petals so you have 8 ch6 arches). Count: 10 sc per repeat x 8 = 80 sc plus 8 ch6 loops; the overall fabric relaxes to a slightly open lacy motif.
Info :
These ch6 arches are the intended join anchors for the classic star-style join-as-you-go used later. Mark them with small safety pins or removable stitch markers if helpful so joining is consistent motif-to-motif.
Round 21 :
1 sc around all petals and arches to tidy join anchors — approximately 80-112 sc depending on your placement (aim for a tidy even round). This is the last red round on the individual motif before final refinement; fasten off leaving a long tail for weaving or for sewing if not joining immediately.
Info :
Fasten off red if making multiple motifs from separate balls; if you plan to work motifs in a chain, you can join-as-you-go during Round 21 on subsequent motifs (instructions follow). Weave in the gold center tail if desired or leave long for final securing between motifs.
— Join-as-you-go Method (Assemble motifs into runner) :
Info :
The sample runner is made of 15 full motifs arranged as a single column with trimmed edge points. Motifs are joined by connecting the ch6 arches of a new motif to adjacent completed motifs at specific stitch points. Join motifs one motif at a time using Round 21 as the joining round: attach the new motif with slip stitches into the partner motif's ch6 arches at 4-6 points per side depending on overlap.
Round J1 :
To attach the second motif to the first: start motif as usual through Round 20. On Round 21 (1 sc around), when you reach the first ch6 arch on the new motif that corresponds to an arch on the assembled motif, replace the sc into that arch with a sl st into the partner motif's ch6 loop (sl st through new motif’s loop and existing motif’s loop together). Continue around, joining at each aligned arch — this will connect motifs invisibly. Continue making motifs and joining them at matching ch6 arches to create the column. Each join consumes one sc from the new motif and 1 sl st into the existing motif; final stitch count on joined round reduces by the number of joins (for a motif joined on both sides, net sc of that round will be approx 80 minus number of joins). For clarity, a solo motif pre-join round had ~80 sc — after three joins you might have ~77 stitches present.
Info :
Work slowly to align petals so centers remain aligned and petals sit flush; pin motifs in place with small tapestry needles or blocking pins before final sl st joins to check alignment. If joining in a staggered layout (offset rows), you will join different arches to neighboring motifs; follow the same sl st-in-loop approach.
Round J2 :
After creating a column of motifs, reinforce joins on the reverse side with small whip stitches through the adjacent outermost scs to stabilize the runner. This is optional but helps keep motifs from shifting. Use a matching red yarn for near-invisible reinforcement.
Info :
For the pictured runner the motifs are joined directly edge-to-edge in a single staggered column. If you want a wider runner, create multiple parallel columns and join columns together using the same arch-to-arch method at the edges.
— Edge and Scalloped Gold Border :
Info :
Once motifs are all joined and the runner shape is formed, work the gold scalloped border last. This unifies the runner visually and provides a crisp, finished silhouette. The border is worked in several rounds: first round of gold sc to provide attachment points, then sculpted scallops and a final picot/chain accent.
Round E1 :
Join gold yarn at a corner petal point with a sl st. Work 1 sc in each available outermost st around the entire runner perimeter, working evenly to follow the petal points and valleys. Count will vary by runner length; sample runner perimeter round count was ~420 sc (this includes the edges of all motifs). Stay even and keep the sc round flat; if it pulls in large sections, add occasional increases of (sc, inc) to relax the fabric.
Round E2 :
Work into the sc round to create scallops: *(sc, hdc, 3 dc, hdc, sc) all worked into the top of a petal point to make one scallop, then skip 2 sc along the straight edge, sl st into the next st between petals; rep from * around. Each scallop uses 7 stitches; scallops will align with petal points. Count of scallops = number of petal points around the runner; in the sample runner there are 120 scallops total around full perimeter (distributed across both long edges and both ends).
Info :
If a scallop falls across a join point, work the scallop centered on the petal point, even if this means the sl st between scallops anchors into a join sl st. Keep symmetry along both long edges by counting scallops and ensuring the two long edges have identical scallop counts.
Round E3 :
Work a neat picot accent into each scallop tip: join to the top dc of each scallop, *(ch3, sl st into base of last dc) to create a small picot, sl st down to the base and continue to the next scallop; rep from * around. This gives a subtle pointed finish to the scallops and echoes petal tips. Final stitch nuance only, no large changes to perimeter count.
Round E4 :
Finishing round: 1 sl st into each st around the perimeter to neaten and hide tail ends; fasten off and weave in all ends securely with a yarn needle.
Info :
For an extra luxe look, work the final round with the smaller 3.0mm hook to make the edge slightly tighter and crisper. Block gently after finishing to flatten scallops evenly.
— Short Rows and Partial Motifs for Runner Ends :
Info :
The pictured runner has shaped ends where full motifs are trimmed to create a pointed finish. You can either cut and sew partial motifs from leftover motif pieces or work partial motifs by making rounds 1-12 and then stopping, joining these partials into the last row and edging them to mirror the pictured scalloped end. If you prefer a straight end, simply stop at the last full motif and work the border immediately.
Round P1 :
Partial motifs: create motif through Round 12 only (stop before full petal sculpting). Join these partial motifs to the last full motif row by slip stitching into available ch4/ch6 arches and then finish with border rounds E1–E4 as above. The partial motif footprint will tuck beneath the final scallops and create the pointed runner tip pictured.
Info :
When joining partial motifs, pin them in place first and use temporary stitch markers to ensure symmetry before completing slip-stitch joins. A symmetric layout makes the finished scallop perimeter look professionally balanced.
— Blocking and Finishing :
Info :
Gently wash the runner by hand in cool water with a little mild soap if desired, reshape and pin to a blocking board flat to the dimensions you want. Pin each scallop and petal tip to open the lace and create crisp petal points. Allow to dry completely — overnight is best. A light spray of fabric starch will make the runner stand up slightly and show off the scallops, but this is optional.
Info :
Weave in all tails with a yarn needle and trim close to the work. If you carried yarn between motifs, carefully tuck those floats inside nearest joins so they are not visible from the right side.
— Alternative Finishes, Variations and Tips :
Info :
You can use a subtle variegated red or change the gold to cream for a softer look. For a smaller runner use sport-weight yarn and a 3.25mm hook and scale the number of motifs down. To make a placemat instead of a long runner, join motifs into a compact rectangular grid and work a slightly wider border to create a mat perimeter.
Info :
If you prefer no metallic sheen, use a matte gold-ochre yarn for a classic look. For a shiny holiday effect, a metallic or mercerized cotton in gold works beautifully but can be a little slippery; use a slightly smaller hook to compensate for the smoother yarn.
Info :
Care instructions: hand wash cool and dry flat to preserve the metallic yarns; metallic yarns may be less forgiving in machine wash cycles.
This poinsettia table runner is a holiday show-stopper — each jewel-like red motif with a glowing gold center joins to create a festive fabric that feels handmade and luxurious. The scalloped gold edge gives a picture-perfect silhouette and the join-as-you-go construction makes assembly feel seamless. Whether displayed on a dining table, console or dresser, it brings warmth and seasonal sparkle to your home. Happy stitching and enjoy the cozy glow this runner will bring to your holidays! 🎄✨