🧢 Beautiful ✨ Detailed πŸ’ Adorable

Pokeball Amigurumi Pattern

Pokeball Amigurumi Pattern
4.8β˜… Rating
2-3 Hours Time Needed
1.6K Made This
βœ‚οΈ

Intermediate Level

Ideal for those with basic crochet experience, featuring slightly more advanced stitches and techniques to expand your skills.

⏱️

Bite-Sized Project

Finishes in 2-4 hoursβ€”perfect for an afternoon of creative relaxation.

🎁

Tiny Treasure

Small, sweet, and gift-worthy creations that fit perfectly in the palm of your hand with detailed charm.

About This Pokeball Amigurumi Pattern

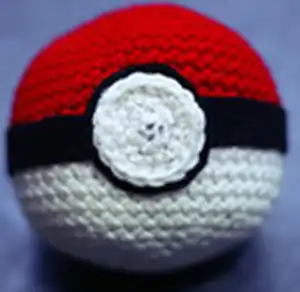
This pattern creates a classic Pokeball amigurumi using worsted weight yarn and a small felt detail for the center band. The design is worked in continuous rounds with clear increase and decrease steps, producing a neat spherical shape. Youll make the red top, white bottom, and a layered button to finish the look.

Pokeball Amigurumi Pattern crochet pattern - detailed view of completed project

Includes full round-by-round instructions for the head/body and the button, plus materials and finishing tips. A quick, satisfying project that is perfect for gifting or keeping in your crochet collection.

Why You'll Love This Pokeball Amigurumi Pattern

I absolutely love this pattern because it turns simple stitches into a recognizable, playful Pokeball with minimal effort. I enjoy how quickly the ball takes shape as you work the increases and decreases, which makes the project rewarding in a short time. The felt band and layered button are small finishing touches that make a big visual impact, and I like that theyre easy to attach. Making these as gifts is so fun because theyre small, customizable, and always get a smile.

Pokeball Amigurumi Pattern step 1 - construction progress Pokeball Amigurumi Pattern step 2 - assembly progress Pokeball Amigurumi Pattern step 3 - details and accessories Pokeball Amigurumi Pattern step 4 - final assembly and finishing

Switch Things Up

I love experimenting with colors, so try swapping the cranberry top for any bright color to create your own themed ball.

You can make this larger or smaller by changing yarn weight and hook size; bulky yarn with a larger hook creates a chunky version while fingering weight makes a delicate mini.

I often add a keyring attachment by stitching a small loop into the top before closing, turning the Pokeball into a fun keychain accessory.

Try embroidering tiny details on the white button center for a custom look or use metallic thread for a special finish.

Instead of felt, you can crochet a black band and sew it in place for a fully crocheted version that is machine washable.

I sometimes add a small toy or surprise inside before closing the ball to make it a secret gift for kids and friends.

For a posable display, consider adding a felt stand or small base to prop the ball in a collection shelf.

If youre gifting many, make matching sets in different colors or assemble a themed display with several balls of varying sizes.

I recommend testing a small sample swatch to check your tension and final size before committing to your main yarn.

Dont be afraid to mix yarn texturesβ€”cotton gives a firm, defined stitch while acrylic is soft and forgiving, each creating a slightly different finished look.

Common Mistakes & How to Fix Them

βœ— Skipping tight tension when using worsted yarn can let stuffing show through; keep your stitches small and consistent to hide the stuffing. βœ— Not changing colors securely or hiding ends can create messy color transitions; weave in ends neatly and secure color changes behind the felt band. βœ— Forgetting to stuff gradually causes lumps or uneven shaping; add fiberfill in small amounts and shape as you go for a smooth sphere. βœ— Attaching the button without leaving enough tail yarn will make sewing difficult; leave a long tail after finishing so you can sew it neatly into the last stitches. βœ— Using an overly large hook creates loose stitches and visible stuffing; use the recommended 3.25 mm hook or tighten your tension to maintain a firm fabric.

Pokeball Amigurumi Pattern

Create a charming Pokeball amigurumi to display or give as a playful handmade gift. This pattern guides you through the full round-by-round construction of the ball and the decorative button, with clear materials and finishing notes. Perfect for crocheters who enjoy small, satisfying projects with quick results. Follow along to make a bright, collectible Pokeball that is fun to customize.

Intermediate 2-3 Hours

Materials Needed for Pokeball Amigurumi Pattern

β€” Main Fabric

  • 01
    Worsted Weight Yarn (Vanna's Choice) in 'Cranberry' (top color)
  • 02
    Worsted Weight Yarn (Vanna's Choice) in 'White' (bottom color)
  • 03
    Worsted Weight Yarn (Vanna's Choice) in 'Black' (band detail)
  • 04
    Black felt sheet (small strip and small circle for backing the button)
  • 05
    Polyester fiberfill for stuffing

β€” Tools Required

  • 01
    Crochet hook size D/3.25 mm
  • 02
    Polyester Fiberfill
  • 03
    Black Felt Sheet (small pieces)
  • 04
    Darning Needle
  • 05
    Scissors

Progress Tracker

0% Complete

β€” Base :

Infos :

O = CHAIN (CH). X = SINGLE CROCHET (SC). V = INCREASE 2 IN 1 STITCH.

β€” Head :

Info :

Create a "magic ring" using "cranberry" yarn

Round 1 :

[SC] x6 inside ring and tighte loop (6)

Round 2 :

[INC] x6 (12)

Round 3 :

[SC, INC] x6 (18)

Round 4 :

[SC2, INC] x6 (24)

Round 5 :

[SC3, INC] x6 (30)

Round 6 :

[SC4, INC] x6 (36)

Round 7 :

[SC5, INC] x6 (42)

Round 8 :

[SC6, INC] x6 (48)

Round 9 :

[SC7, INC] x6 (54)

Round 10-14 :

[SC] around (54)

Info :

* I cut a long inch wide band of black felt and cover where these two colors meet. I then also cut a small felt circle for behind the button and I use hot glue to attach both of these to the amigurumi.

Round 15-19 :

With white yarn, [SC] around (54)

Round 20 :

[SC7, DEC] x6 (48)

Round 21 :

[SC6, DEC] x6 (42)

Round 22 :

[SC5, DEC] x6 (36)

Round 23 :

[SC4, DEC] x6 (30)

Round 24 :

[SC3, DEC] x6 (24)

Round 25 :

[SC2, DEC] x6 (18)

Round 26 :

[SC1, DEC] x6 (12)

Round 27 :

[DEC] x6 (6)

Info :

Slip stitch off, and make sure you leave enough yarn to sew into last 6 stitches. Weave in tails

β€” Button :

Info :

Create a "magic ring" using White yarn

Round 1 :

[SC] x6 inside ring and tighten loop. (6)

Round 2 :

[INC] x6 (12)

Round 3 :

[SC1, INC] x6 (18)

Round 4 :

[SC2, INC] x6 (24)

Round 5 :

[SC3, INC] x6 (30)

Info :

Sl st. and attach to front of ball.

Assembly Instructions

  • Cut a long inch-wide strip of black felt and wrap it around the ball where the red and white colors meet; glue it in place with hot glue for a clean seam.
  • Cut a small circle from black felt to place behind the button, then glue the layered white button on top of it to create the center detail.
  • After finishing round 27, slip stitch off leaving enough yarn to sew into the last 6 stitches; use this tail to sew the button securely to the front of the ball.
  • Stuff the ball firmly with polyester fiberfill while working decreases, adding small amounts as you go to maintain a smooth, even sphere.
  • Weave in remaining yarn tails securely on the inside of the ball and trim excess felt or threads for a neat finish.

Important Notes

  • πŸ’‘Note: Hook size is not as important as much as having your stitches tight so as to not show the stuffing inside.
  • πŸ’‘You don't want your stuffing to escape once you filled your amigurumi; maintain tight, consistent tension.
  • πŸ’‘Make sure you leave enough yarn after finishing to sew the button into the last six stitches before fastening off.
  • πŸ’‘Use hot glue for attaching felt pieces for a secure, flat finish and press firmly while drying to ensure adhesion.

This Pokeball Amigurumi pattern is a fun, compact project that yields a playful collectible you can gift or display. The layered button and felt band add crisp, professional-looking details to a simple spherical design. Grab your worsted yarn and a small hook and make a whole batch of these for friends, gifts, or decor. 🧢🎁

You ask,

we answer.

FAQs

What size will the finished piece be?

The finished amigurumi measures approximately the size of a small palm (around 8-10 cm diameter) when using worsted weight yarn and a 3.25 mm hook.

Can I use different yarn weights for this pattern?

Yes, you can use different yarn weights, but the final size will change; adjust your hook size accordingly and be mindful of how stuffing shows through with larger hooks.

Do I need prior crochet experience for this pattern?

This pattern is rated intermediate, so basic knowledge of single crochet, increases, decreases, and working in the round is recommended for best results.

How long does this project typically take to complete?

Most crocheters complete this Pokeball amigurumi in 2-3 hours, though time may vary depending on experience level and how much detailing or finishing you add.